Introduction
Picture this: the sweet scent of vanilla and butter swirling through your kitchen, a little cloud of powdered sugar drifting through the sunbeam as you frost each cupcake. The first time I made Bunny Butt Cupcakes for an Easter brunch, I couldn’t help but laugh—those fluffy little bunny bottoms peeking out from a bed of green coconut “grass” are almost too cute to eat (but trust me, everyone does!). I was instantly hooked. It was one of those moments where you stop, look at your creation, and let out a sigh of satisfaction. You just know you’ve whipped up something that’s going to cause a stir at your next spring party.
You know, when I was just knee-high to a grasshopper, Easter meant pastel baskets, egg hunts, and way too many marshmallow chicks. But we never had anything quite like these cupcakes on our dessert table. I first stumbled on the idea at a friend’s potluck. The platter emptied out in minutes—kids and adults alike grabbing for their favorite bunny butt. I found myself wishing I’d had this recipe in my back pocket years ago.
Now, my kids can’t resist sneaking a bunny butt off the tray (sometimes before the frosting even sets). My husband, who claims he’s “not into cute desserts,” manages to polish off two before the coffee is poured. These Bunny Butt Cupcakes bring giggles, wide eyes, and pure, nostalgic comfort to any gathering. They’re dangerously easy and honestly, they brighten up any dessert table—Pinterest boards included. Whether you’re planning an Easter egg hunt, a spring birthday, or just want to add a whimsical touch to Sunday dinner, these cupcakes are your answer. I’ve tested (and retested, in the name of research, of course), and they’ve become a staple for gifting, school parties, and family get-togethers. If you’re after a treat that feels like a warm hug and always gets a reaction, you’re going to want to bookmark this one.
Why You’ll Love This Bunny Butt Cupcakes Recipe
Let me tell you, after years of baking for holidays, school events, and every spring shindig imaginable, these Bunny Butt Cupcakes have earned their place as a family classic. I’ve tweaked, tested, and taste-tested (someone had to do it). Here’s why you’re about to fall in love with this Easter treat:
- Quick & Easy: The cupcakes come together in about 45 minutes, so they’re perfect for last-minute gatherings or when the kids spring a party on you with little warning.
- Simple Ingredients: No specialty baking supply store trips needed. Everything is pantry-friendly, and you probably have most of it on hand.
- Perfect for Parties: These are the showstopper at Easter brunches, classroom celebrations, or spring birthdays. I’ve seen them double as table décor and dessert in one go.
- Crowd-Pleaser: They’re fun, adorable, and always disappear fast—there’s something irresistible about a bunny butt, let’s face it.
- Unbelievably Delicious: Moist vanilla cupcakes, creamy frosting, sweet coconut, and the cutest marshmallow details. It’s the best combo of flavor and whimsy.
What really sets my Bunny Butt Cupcakes apart is the easy assembly—no fancy piping skills needed. I use a simple “pull-apart” technique for the bunny feet and tail, so anyone (yes, even the kids) can help decorate. The green coconut grass is my secret for hiding imperfections, and the pastel paw pads make everyone smile.
It’s not just about the look, either. The cupcake base is soft and fluffy, never dry. I use a trusted vanilla cupcake recipe with just a hint of almond extract for depth. The frosting is smooth and pipeable, holding up even when the kitchen heats up with all those oven bakes.
If you’re after a recipe that delivers on taste, fun, and that “wow, you made these?” factor—this is your best bet. These cupcakes are more than just a treat; they’re a little slice of happiness, ready to bring laughter and delight to your next spring gathering.
What Ingredients You Will Need
This Bunny Butt Cupcakes recipe keeps things simple, using everyday ingredients for maximum cuteness and flavor. Here’s what you’ll need (broken down for easy shopping and prep):
- For the Cupcakes:
- 1 2/3 cups (210g) all-purpose flour
- 1 cup (200g) granulated sugar
- 1/2 cup (115g) unsalted butter, softened (adds richness)
- 2 large eggs, room temperature
- 1/2 cup (120ml) milk (any kind; whole milk gives the best crumb)
- 2 teaspoons vanilla extract (I like Nielsen-Massey for a pure vanilla punch)
- 1/2 teaspoon almond extract (optional, but adds lovely depth)
- 1 1/2 teaspoons baking powder
- 1/4 teaspoon salt
- For the Frosting:
- 1 cup (225g) unsalted butter, softened
- 3 cups (360g) powdered sugar (sifted for smoothness)
- 2-3 tablespoons (30-45ml) milk or cream
- 1 teaspoon vanilla extract
- Pinch of salt
- For Decorating:
- Sweetened shredded coconut (about 1 cup/80g, for “grass”)
- Green food coloring (gel works best)
- Large marshmallows (6, for bunny feet)
- Mini marshmallows (6, for bunny tails)
- Pink icing or pink candy melts (for paw pads)
- Optional: Chocolate chips (for added bunny detail or eyes)
Ingredient Tips: If you need a gluten-free version, swap in a 1:1 gluten-free baking flour. For dairy-free, use vegan butter and almond or oat milk—I’ve done both with success when making these for friends with allergies. When coconut isn’t an option, try green sanding sugar for grass. In a pinch, you can use store-bought cupcakes as your base, though homemade always wins for flavor and texture.
For the bunny feet, I’ve tried both cutting marshmallows in half and using oval-shaped candies; both work, but marshmallows are fluffier—just like a real bunny bottom! For the grass, toss the coconut with a few drops of food coloring in a zip-top bag; it’s less messy, and the kids love shaking it up.
Equipment Needed
- 12-cup muffin tin (standard size)
- Paper cupcake liners (pastel colors look extra festive, but plain white does the trick)
- Hand mixer or stand mixer (you can mix by hand, but it really saves time and muscles!)
- Mixing bowls: one large for the batter, one medium for frosting
- Measuring cups and spoons
- Rubber spatula (for scraping every last bit of batter)
- Small offset spatula or butter knife (for frosting spreading)
- Piping bag with large round tip (optional—for neater frosting, but a plastic storage bag with the corner snipped off works too)
- Small scissors or kitchen shears (for cutting marshmallows)
- Zip-top bag (for shaking and coloring the coconut)
If you don’t have a piping bag, don’t worry—frosting with a spoon and smoothing with a butter knife works just fine. I’ve even used a sandwich bag in a pinch; just snip the corner and squeeze! If your muffin tin is looking a little worse for wear, line it well and grease the top edges to help your cupcakes release easily. Cleanup tip: soak everything in warm, soapy water right after decorating—dried frosting is a bear to scrub off.
I picked up my favorite Wilton cupcake tin at a yard sale years ago, and it’s still going strong. Don’t spend a fortune—any standard muffin tin will do. For kids’ parties or bake sales, disposable cupcake carriers from the dollar store make transport a breeze.
Preparation Method
-
Preheat and Prep:
Preheat your oven to 350°F (175°C). Line a 12-cup muffin tin with paper liners. If you want extra insurance against sticking, give the top of the pan a quick spritz with nonstick spray. -
Mix Dry Ingredients:
In a medium bowl, whisk together 1 2/3 cups (210g) flour, 1 1/2 teaspoons baking powder, and 1/4 teaspoon salt. Set aside. -
Cream Butter and Sugar:
In a large mixing bowl, beat 1/2 cup (115g) softened butter and 1 cup (200g) sugar with an electric mixer on medium speed until light and fluffy, about 2-3 minutes. The mixture should look pale and creamy.
Tip: Scrape down the sides with a spatula to make sure everything’s evenly mixed. -
Add Eggs and Extracts:
Beat in 2 large eggs, one at a time, mixing well after each. Add 2 teaspoons vanilla extract and 1/2 teaspoon almond extract, if using. -
Combine Wet and Dry:
With the mixer on low, add half the dry mixture to the wet. Pour in 1/2 cup (120ml) milk, then add the remaining dry mixture. Mix just until combined—don’t overmix or your cupcakes may turn out dense. -
Fill and Bake:
Divide the batter evenly among the 12 cupcake liners (about 2/3 full). Bake for 16-18 minutes, or until a toothpick inserted in the center comes out clean. The cupcakes should spring back lightly when touched and have a pale golden top.
Note: Oven times can vary—start checking at 15 minutes if your oven runs hot! -
Cool Completely:
Let cupcakes cool in the pan for 5 minutes, then transfer to a wire rack to cool completely before decorating. Warm cupcakes will melt your frosting—patience pays off here. -
Make Frosting:
In a clean bowl, beat 1 cup (225g) softened butter until smooth. Add 3 cups (360g) powdered sugar, 1 teaspoon vanilla, a pinch of salt, and 2 tablespoons (30ml) milk or cream. Beat on low until combined, then on high for 2-3 minutes until light and fluffy. Add more milk if needed for a spreadable consistency. -
Tint Coconut Grass:
Place 1 cup (80g) shredded coconut in a zip-top bag. Add a few drops of green food coloring, seal, and shake until evenly colored. Pour onto a plate for easy dipping. -
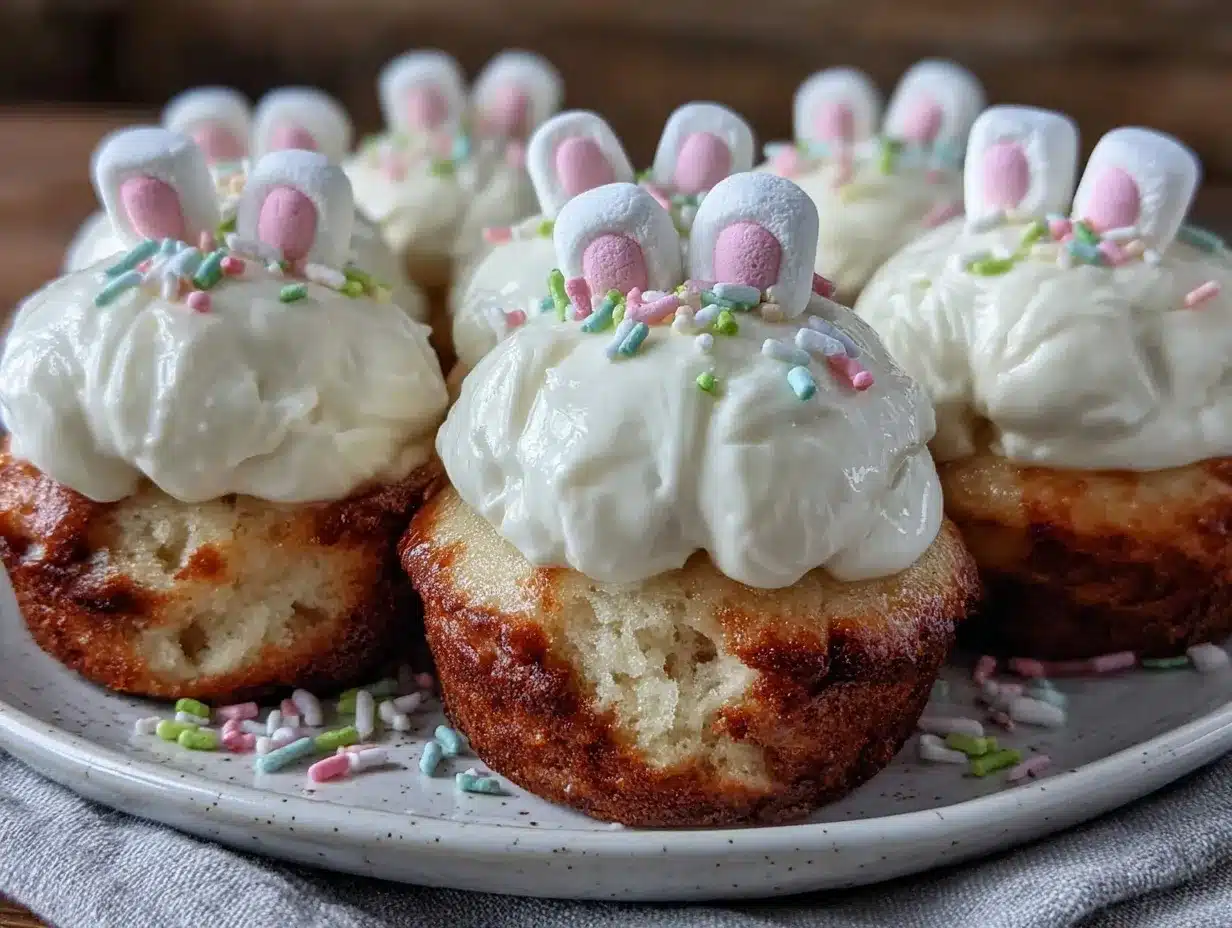
Frost and Decorate:
Frost each cooled cupcake with a generous swirl of buttercream. Immediately dip the top into the colored coconut, pressing gently to cover. -
Assemble Bunny Butts:
Cut large marshmallows in half crosswise; place one half, cut side down, on each cupcake for the bunny “butt.” Attach a mini marshmallow with a dab of frosting for the tail. Use pink icing to pipe three small ovals and a circle on each large marshmallow for the paw pads.
Tip: If the marshmallow won’t stick, use a toothpick or a dot of frosting as glue! -
Finishing Touches:
Optional: Add chocolate chip “dirt” or pastel sprinkles for extra fun. Let cupcakes set for 10 minutes before serving so the decorations hold.
Extra tip: If you run out of patience, let the kids do the paw pads with pink candy melts—they don’t need to be perfect to be adorable. Store in a cool place until ready to serve.
Cooking Tips & Techniques
- Keep Cupcakes Moist: Don’t overbake! The second a toothpick comes out clean, pull them from the oven. Even one or two extra minutes can dry them out. I learned this the hard way during a distracted “multitask” moment.
- Smooth Frosting: Always sift your powdered sugar before making frosting. No one wants lumpy clouds on their bunny cupcakes.
- Coconut Grass: Use gel food coloring for vibrant, non-watery color. If you only have liquid dye, add it slowly and mix well. Too much liquid can make the coconut soggy.
- Marshmallow Assembly: Fresh marshmallows stick best. If yours are a little stale, microwave for 5 seconds to soften before cutting.
- Piping Paw Pads: Practice once or twice on parchment before decorating the real thing. If you “mess up,” just eat the evidence—no one has to know!
- Efficiency Tip: Make the coconut grass and marshmallow feet ahead of time and store in airtight containers. This turns decorating into a quick, assembly-line process.
- Batch Baking: Double the recipe if you’re feeding a crowd, but bake in two batches so the batter doesn’t over-sit. I’ve tried baking all at once (overfilling, oops)—the cupcakes overflowed and lost their perfect shape.
Remember, these are meant to be fun. If your bunny butts end up a little wonky or the paw pads aren’t exactly symmetrical, they still taste just as good. The giggles and smiles are the real goal. And hey, even professional bakers have a few “unique” bunnies—embrace the imperfections!
Variations & Adaptations
Want to make these Bunny Butt Cupcakes fit your party, diet, or taste buds? Here are some of my favorite twists and swaps:
- Gluten-Free: Use your favorite 1:1 gluten-free flour blend in place of the all-purpose flour. I’ve tried King Arthur’s Measure for Measure with great results—no one noticed the difference.
- Vegan/Dairy-Free: Swap unsalted butter for vegan butter and use almond or oat milk. For the frosting, stick with plant-based options. Vegan marshmallows are available at most health food stores for the decorations.
- Chocolate Lovers: Substitute 1/3 cup (35g) of the flour with unsweetened cocoa powder for chocolate cupcakes. Top with a dusting of crushed Oreos for “dirt”—the bunnies look like they’re burrowing!
- Flavored Grass: Mix a drop of mint or coconut extract into the green coconut for a subtle flavor twist.
- Seasonal Touches: For spring birthdays, use pastel-colored coconut or edible glitter. For garden parties, add candy flowers or butterflies around the bunny butts.
- Nut-Free: Omit almond extract if allergies are a concern, and be sure to check ingredient labels for cross-contamination if serving to a group.
- Personal Favorite: I sometimes add a spoonful of lemon zest to the batter and a little lemon juice to the frosting for a bright, springy twist. It’s a hit with adults who want something a little less sweet.
Don’t be afraid to play! The beauty of this recipe is how easily it adapts to what you have on hand or what your guests need. If you try a new flavor or design, I’d love to hear about it.
Serving & Storage Suggestions
Serve Bunny Butt Cupcakes at room temperature for the best taste and texture. Arrange them on a pastel platter or a bed of artificial Easter grass for extra visual appeal (Pinterest-worthy, for sure!). I like adding a few candy eggs or edible flowers for flair.
Pair with fruity drinks (like sparkling lemonade) or a light tea for a kid-friendly party, or go for coffee and mimosas for the grown-ups. These cupcakes also look adorable next to a carrot cake or lemon bars on a spring dessert table.
To store, keep cupcakes in an airtight container at room temperature for up to 2 days. Longer than that? Pop them in the fridge for up to 4 days, but bring them back to room temp before serving for the softest crumb. You can freeze undecorated cupcakes (well-wrapped) for up to 2 months. Thaw, frost, and decorate the day of your event.
Frosted and decorated cupcakes can be refrigerated, but note that condensation may soften the coconut. For best results, assemble them the day you plan to serve. The flavors actually get even better after a few hours as the cupcake and frosting meld—if you can resist eating them right away!
Nutritional Information & Benefits
Each Bunny Butt Cupcake (decorated as described) has approximately 320 calories, with 14g fat, 45g carbs, and 3g protein. They’re a treat, not an everyday snack, but they’re worth every bite around the holidays.
These cupcakes are nut-free if you skip the almond extract and check your other ingredient labels. They can be made gluten-free or dairy-free with swaps noted above, so everyone can join the fun. Coconut provides a little fiber, and you’re in control of the food coloring and add-ins.
Allergens present: wheat, dairy, eggs, coconut (for most). For a lower-sugar option, cut the frosting in half or use a sugar-free sweetener, though honestly, they’re meant to be a festive indulgence. The real benefit? Pure joy, laughter, and that happy spark when kids and adults alike spot a tray of Bunny Butt Cupcakes.
Conclusion
I can’t recommend these Bunny Butt Cupcakes enough—they’re fun, approachable, and guaranteed to make your Easter or spring party special. The combination of fluffy homemade cupcakes, creamy frosting, and whimsical bunny decorations delivers both on taste and smiles. They’re easy enough for beginners but cute enough to impress even the pickiest Pinterest scroller.
Don’t hesitate to tweak the recipe to suit your family’s tastes or dietary needs. Make them chocolatey, citrusy, or gluten-free—whatever makes you happy. My family comes back for seconds (and thirds), and I bet yours will too.
If you try these, I’d love to hear how they turned out! Share your own twists, leave a comment below, or tag me on social media with your creations. Wishing you a season filled with sweet treats, happy memories, and a few giggles over the best bunny butts around. Happy baking!
Frequently Asked Questions About Bunny Butt Cupcakes
How far in advance can I make Bunny Butt Cupcakes?
You can bake the cupcakes up to 2 days ahead and store them, unfrosted, in an airtight container. Frost and decorate the day you plan to serve for best results.
Can I use a cake mix instead of homemade cupcakes?
Absolutely! A boxed vanilla or chocolate cake mix works in a pinch. Just follow package directions for cupcakes, then decorate as described.
What if I don’t like coconut for the grass?
No problem. Swap the coconut for green sanding sugar or tinted buttercream. Both work well and keep the look festive.
Are these safe for nut allergies?
Yes, as long as you skip the almond extract and check all ingredient labels to confirm they’re nut-free. Use allergy-friendly candies for decorating if needed.
Can I freeze decorated Bunny Butt Cupcakes?
It’s best to freeze the baked cupcakes before decorating. Frosting and marshmallows can get sticky in the freezer. Decorate after thawing for the cutest results!
Pin This Recipe!
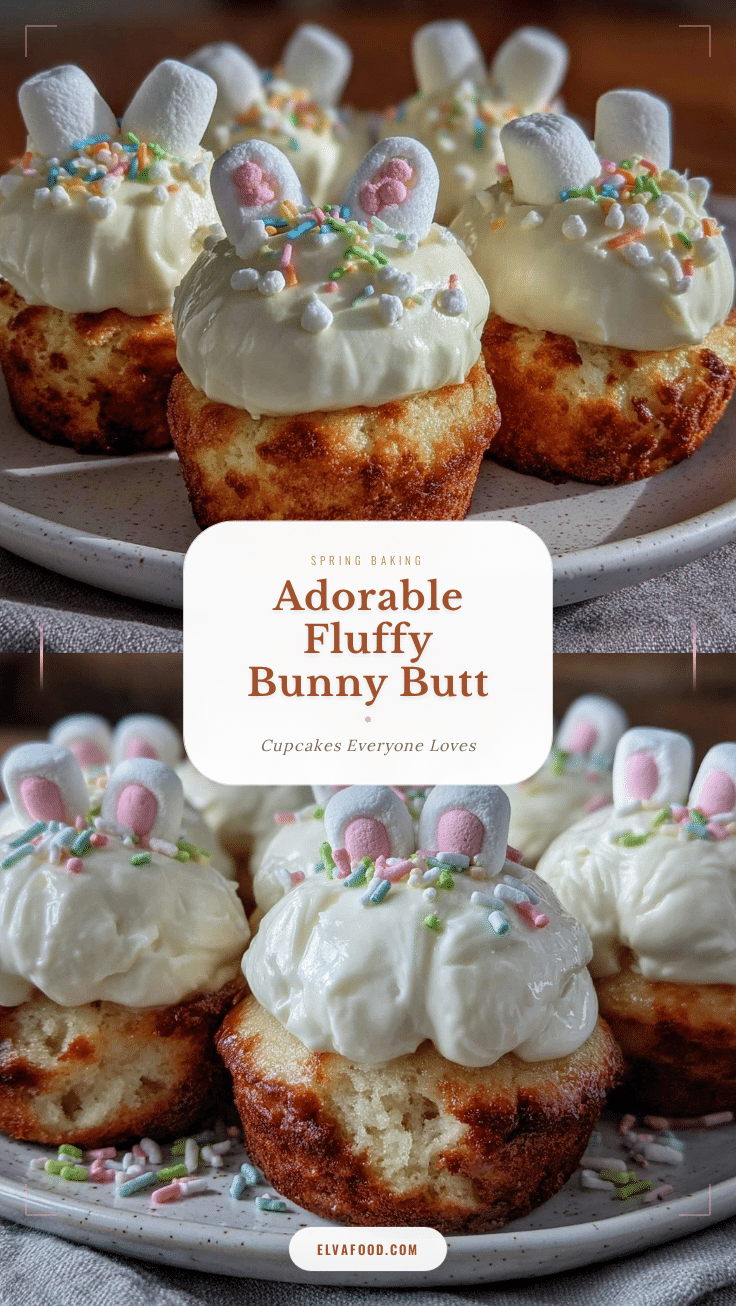
Bunny Butt Cupcakes Recipe Easy Easter Treat for Spring Parties
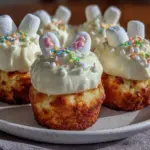
These adorable Bunny Butt Cupcakes feature moist vanilla cake, creamy buttercream frosting, and whimsical bunny decorations made from marshmallows and coconut ‘grass.’ Perfect for Easter, spring parties, or any festive gathering, they’re easy to make and guaranteed to bring smiles.
- Prep Time: 20 minutes
- Cook Time: 18 minutes
- Total Time: 45 minutes
- Yield: 12 cupcakes 1x
- Category: Dessert
- Cuisine: American
Ingredients
- 1 2/3 cups all-purpose flour
- 1 cup granulated sugar
- 1/2 cup unsalted butter, softened
- 2 large eggs, room temperature
- 1/2 cup milk (whole milk preferred)
- 2 teaspoons vanilla extract
- 1/2 teaspoon almond extract (optional)
- 1 1/2 teaspoons baking powder
- 1/4 teaspoon salt
- 1 cup unsalted butter, softened (for frosting)
- 3 cups powdered sugar, sifted (for frosting)
- 2–3 tablespoons milk or cream (for frosting)
- 1 teaspoon vanilla extract (for frosting)
- Pinch of salt (for frosting)
- 1 cup sweetened shredded coconut (for decorating)
- Green food coloring (gel preferred, for coconut grass)
- 6 large marshmallows (for bunny feet)
- 6 mini marshmallows (for bunny tails)
- Pink icing or pink candy melts (for paw pads)
- Optional: Chocolate chips (for bunny detail or eyes)
Instructions
- Preheat oven to 350°F (175°C). Line a 12-cup muffin tin with paper liners and lightly spray the top of the pan with nonstick spray.
- In a medium bowl, whisk together flour, baking powder, and salt. Set aside.
- In a large mixing bowl, beat softened butter and sugar with an electric mixer on medium speed until light and fluffy, about 2-3 minutes.
- Beat in eggs one at a time, mixing well after each. Add vanilla extract and almond extract (if using).
- With mixer on low, add half the dry mixture to the wet ingredients. Pour in milk, then add remaining dry mixture. Mix just until combined.
- Divide batter evenly among cupcake liners (about 2/3 full). Bake for 16-18 minutes, or until a toothpick inserted in the center comes out clean.
- Let cupcakes cool in the pan for 5 minutes, then transfer to a wire rack to cool completely.
- For frosting: In a clean bowl, beat softened butter until smooth. Add powdered sugar, vanilla, pinch of salt, and 2 tablespoons milk or cream. Beat on low until combined, then on high for 2-3 minutes until light and fluffy. Add more milk if needed for spreadable consistency.
- To make coconut grass: Place shredded coconut in a zip-top bag. Add a few drops of green food coloring, seal, and shake until evenly colored. Pour onto a plate.
- Frost each cooled cupcake with a generous swirl of buttercream. Immediately dip the top into colored coconut, pressing gently to cover.
- Cut large marshmallows in half crosswise; place one half, cut side down, on each cupcake for the bunny ‘butt.’ Attach a mini marshmallow with a dab of frosting for the tail.
- Use pink icing to pipe three small ovals and a circle on each large marshmallow for the paw pads.
- Optional: Add chocolate chip ‘dirt’ or pastel sprinkles for extra fun. Let cupcakes set for 10 minutes before serving.
Notes
For gluten-free, use a 1:1 gluten-free flour blend. For dairy-free, substitute vegan butter and plant-based milk. If coconut isn’t preferred, use green sanding sugar for grass. Make coconut grass and marshmallow feet ahead for easy assembly. Don’t overbake cupcakes for best texture. Store decorated cupcakes in an airtight container at room temperature for up to 2 days, or refrigerate for up to 4 days.
Nutrition
- Serving Size: 1 cupcake
- Calories: 320
- Sugar: 32
- Sodium: 160
- Fat: 14
- Saturated Fat: 9
- Carbohydrates: 45
- Fiber: 1
- Protein: 3
Keywords: Easter cupcakes, bunny butt cupcakes, spring dessert, kid-friendly, party treat, vanilla cupcakes, marshmallow decoration, coconut grass, easy baking, festive cupcakes