There’s something about the bright pop of a Lemon Curd Tart with Juicy Berries that just sings “spring” to me, even in the dead of winter. Picture this: the tangy scent of fresh lemons, their zest perfuming your kitchen, while golden, creamy curd bubbles gently on your stove. The first time I slid a tart pan filled with homemade lemon curd into the fridge, I stood there watching the surface set, practically counting the seconds until I could top it with a tumble of berries. It’s the kind of moment where you pause, take a deep breath, and just smile because you know you’re onto something truly special.
Years ago, when I was knee-high to a grasshopper, my grandma would save her lemon peels and whisper about “tart magic” as she whisked eggs and sugar together. I’d lick the spoon and get that zingy hit of lemon—bright, sharp, and just sweet enough. Fast-forward to now, and this Lemon Curd Tart recipe is my happy place. I stumbled on the idea after a rainy Sunday spent trying to recreate a dessert from a tiny Parisian café (you know, the kind where the window fogs up and you just want to sit there forever). Honestly, I wish I’d known how dangerously easy lemon curd could be years ago.
My family can’t help themselves—just yesterday, my partner stole a berry off the top while the tart was cooling. The kids circled the table, waiting for that first slice. And when I brought it to a potluck, the platter came home empty (not even a crumb for midnight snacking). There’s pure, nostalgic comfort in every bite, but the bright, fresh flavors make it feel modern and light. Whether you’re looking for something showstopping for your next brunch, a sweet treat for your kids, or just want to brighten up your Pinterest dessert board, this Lemon Curd Tart with Juicy Berries is the answer.
I’ve tested this recipe more times than I can count—in the name of research, of course! At this point, it’s a staple for family gatherings and gifting. It feels like a warm hug and a burst of sunshine at the same time. Trust me, you’re going to want to bookmark this one.
Why You’ll Love This Lemon Curd Tart Recipe
When it comes to lemon desserts, I’ve baked my fair share (tarts, bars, even the occasional soufflé gone wrong). After lots of kitchen experiments, I can honestly say this Lemon Curd Tart recipe is a keeper—and not just because it’s pretty enough for Pinterest. Here’s why:
- Quick & Easy: You can whip up the crust and curd in about an hour, then let the fridge do the rest. It’s perfect for busy weeknights or last-minute dessert cravings.
- Simple Ingredients: No fancy trips to the store. You probably have everything—lemons, eggs, butter, sugar, flour—right in your kitchen.
- Perfect for Every Occasion: This tart shines at brunch, adds elegance to dinner parties, and is just right for holiday mornings or birthday celebrations.
- Crowd-Pleaser: Kids love the sweet berries, adults rave about the tangy curd. It disappears fast at every gathering (don’t count on leftovers!).
- Unbelievably Delicious: The crisp, buttery crust, silky lemon curd, and juicy berries create a flavor and texture combo that’s pure comfort food—bright, creamy, and just sweet enough.
What really sets this Lemon Curd Tart apart? I blend a bit of lemon zest right into the curd for extra zing, and the berry topping adds fresh, juicy contrast. The tart shell uses a simple press-in dough—no rolling pins, no fuss. It’s approachable even if you’re not a “baker” (trust me, I’ve had my fair share of lopsided pies in the past!).
This isn’t just another lemon tart. It’s the kind that makes you close your eyes, savor the balance of tart and sweet, and maybe do a happy little dance in your kitchen. It’s comfort food that feels light, fresh, and fancy—without any of the stress. Whether you want to impress guests or just treat yourself, this tart makes any meal feel special (with no pastry degree required).
What Ingredients You Will Need
This Lemon Curd Tart with Juicy Berries relies on simple, wholesome ingredients to deliver intense lemon flavor, creamy texture, and a pop of fresh fruit. You don’t need anything complicated—just a few pantry staples and some fresh produce. Most of these are probably already in your fridge or cupboard, and I’ll include a few of my personal tips for choosing the best.
- For the crust:
- All-purpose flour (120 g / 1 cup)—for structure
- Powdered sugar (30 g / 1/4 cup)—for tenderness and a hint of sweetness
- Unsalted butter, melted (85 g / 6 tbsp)—adds rich flavor and crisp texture
- Pinch of salt—just enough to balance the sweetness
- Optional: 1/2 tsp vanilla extract—adds subtle warmth
- For the lemon curd:
- Large eggs (3)—room temperature works best for smooth curd
- Granulated sugar (150 g / 3/4 cup)—for sweetness and structure
- Fresh lemon juice (120 ml / 1/2 cup)—about 2-3 lemons, freshly squeezed (bottled just isn’t the same!)
- Lemon zest (2 tsp, from 2 lemons)—intensifies the tart flavor
- Unsalted butter (85 g / 6 tbsp), cut into pieces—makes the curd silky smooth
- Pinch of salt—rounds out the flavors
- For the topping:
- Mixed fresh berries (about 1 cup / 150 g)—strawberries, blueberries, raspberries, blackberries (use whatever is prettiest at the market!)
- Optional: Powdered sugar, for dusting
- Optional: Mint leaves, for garnish
Ingredient Tips: For the best lemon curd, use organic lemons if possible—they’re less bitter and the zest really shines. I love using Kerrygold butter for that extra-rich flavor, but any good unsalted butter works. If you need a gluten-free crust, swap the all-purpose flour for a 1:1 gluten-free blend (I’ve had good results with King Arthur). Dairy-free folks can use vegan butter, though the flavor will be a bit different—still tasty!
For the berries, go seasonal for the juiciest flavor: strawberries in spring, blueberries and raspberries in summer, or swap in thinly sliced kiwi or mango for a twist. If you’re low on fresh fruit, a handful of frozen berries (thawed and patted dry) works in a pinch—just keep the tart from getting soggy by adding them right before serving.
Equipment Needed
This Lemon Curd Tart recipe doesn’t need much in the way of fancy gadgets, which is part of the charm. Here’s what you’ll want to have ready:
- 9-inch tart pan with removable bottom (or a regular pie dish in a pinch—just grease it well!)
- Mixing bowls (medium and large)
- Whisk (a balloon whisk makes silky curd, but a fork will do in a pinch)
- Microplane or fine grater (for zesting lemons—my favorite kitchen tool!)
- Small saucepan (for the lemon curd)
- Measuring cups and spoons (accuracy matters for the curd)
- Rubber spatula (for stirring and scraping every last bit of curd)
- Cooling rack (helps the crust or tart cool evenly)
If you don’t have a tart pan, a springform pan or even a square baking dish works. Just line the bottom with parchment for easy removal. My first tart was made in a thrift-store pie dish, and it tasted just as good! If you’re investing in one tool, a Microplane zester is worth it—just rinse it right away so zest doesn’t get stuck (been there, done that). For budget-friendly options, most big box stores carry sturdy tart pans under $15, and you can always use what you have on hand.
Preparation Method
- Make the crust:
- Preheat your oven to 350°F (175°C). Lightly grease a 9-inch tart pan with removable bottom.
- In a medium bowl, whisk together 1 cup (120 g) all-purpose flour, 1/4 cup (30 g) powdered sugar, and a pinch of salt. Stir in 6 tbsp (85 g) melted butter (and vanilla, if using) until mixture forms soft, sandy crumbs.
- Pour dough into the tart pan and press firmly into the bottom and up the sides with your fingers or the back of a measuring cup. Try to keep the thickness even, but don’t stress if it’s not perfect—rustic is beautiful.
- Prick the base all over with a fork (this prevents bubbles). Bake for 17-20 minutes until lightly golden. If it puffs up, just press it down gently with a spoon while still warm.
- Cool completely on a rack before filling (about 20 minutes).
- Make the lemon curd:
- In a small saucepan, whisk together 3 eggs, 3/4 cup (150 g) sugar, 1/2 cup (120 ml) fresh lemon juice, 2 tsp zest, and a pinch of salt.
- Cook over medium-low heat, whisking constantly (don’t walk away—curd can scramble fast!), until mixture thickens and coats the back of a spoon—about 6-8 minutes. It should reach 170°F (77°C) if using a thermometer.
- Immediately remove from heat and stir in 6 tbsp (85 g) butter, a few pieces at a time, until completely melted and glossy.
- For extra-smooth curd, strain through a fine mesh sieve into a bowl (I always do—those little bits of zest can sometimes clump). Let cool slightly for 10 minutes.
- Assemble the tart:
- Pour slightly cooled lemon curd into the baked crust and smooth the top with a spatula. Refrigerate until set, at least 2 hours (overnight is even better for flavor!).
- Just before serving, top with 1 cup (150 g) mixed fresh berries and a dusting of powdered sugar. Add mint leaves if you’re feeling fancy.
Troubleshooting: If the curd looks lumpy, don’t panic—strain it, and it’ll be silky. If the crust cracks, patch with leftover crumbs (no one will know). Not sure if the curd is set? It should jiggle slightly but not run when you tilt the pan. I sometimes make the crust and curd a day ahead to split up the work—super helpful for busy weekends!
Cooking Tips & Techniques
I’ve had a few lemon curd mishaps in my day (scrambled eggs, runny filling—you name it), so here are my hard-won secrets for a perfect Lemon Curd Tart every time:
- Keep the heat low and whisk constantly: Lemon curd thickens quickly. If you see lumps, pull it off the heat right away and strain. Don’t let it boil, or you’ll get lemony scrambled eggs (yup, done that myself!).
- Use fresh lemons for the brightest flavor: Bottled juice just won’t give you the same zing. Roll lemons on the counter before juicing to get the most out.
- Room temperature eggs mix more smoothly: If you forgot to take them out, just put eggs in a bowl of warm water for 5 minutes.
- Let the tart fully chill before slicing—this gives the curd time to set up perfectly. If you’re in a rush, pop it in the freezer for 20 minutes (just don’t forget it’s in there!).
- Don’t stress about the crust: If your tart shell isn’t picture-perfect, the berries will cover any cracks or uneven edges. Trust me, rustic looks homemade and inviting.
- For extra shine on berries: Warm a spoonful of apricot jam and brush it over the fruit for a pretty bakery look.
I always set my tart pan on a baking sheet to catch drips and make it easier to move in and out of the fridge. If you want the curd even more tart, add extra zest! For a sweeter curd, sprinkle a little extra sugar on top before serving. Multitasking tip: make the crust while the lemons are coming to room temp and zesting—it saves time and keeps things moving.
Variations & Adaptations
I love how flexible this Lemon Curd Tart recipe is. Here are a few of my favorite twists, plus some swaps for different needs or cravings:
- Gluten-Free Version: Substitute the all-purpose flour with a 1:1 gluten-free blend. I’ve used King Arthur and Bob’s Red Mill with great results—the crust stays crisp and buttery.
- Dairy-Free Adaptation: Use vegan butter for both the crust and curd. The flavor changes just a bit, but it’s still rich and satisfying. Coconut oil works in a pinch for the crust, but stick with a neutral-tasting vegan butter for the curd.
- Seasonal Fruit Topping: In fall or winter, try thinly sliced pears or pomegranate arils instead of (or alongside) berries. In summer, stone fruits like peaches or nectarines are incredible. You can even use thinly sliced kiwi for a tropical twist.
- Mini Tarts: Divide the dough and curd among mini tart pans (about 4-inch size). Bake the crusts a little less—about 12-14 minutes. These are adorable for parties or gifting.
- Herb-Infused Lemon Curd: Add a few sprigs of fresh thyme or basil to the curd as it cooks, then remove before straining. It adds a subtle, grown-up flavor that’s unexpected and lovely.
- Extra Tangy: Double the lemon zest for a super-bright, tart-forward filling.
If you need an egg-free version, you can use a cornstarch-thickened lemon filling instead of traditional curd (not quite the same, but still tasty). I once made a “mash-up” tart with half lemon curd, half raspberry jam—so good if you’re feeling adventurous!
Serving & Storage Suggestions
This Lemon Curd Tart is best served chilled, straight from the fridge. I like to slice it with a hot knife (just run under hot water and wipe dry) for those clean, bakery-style edges. Arrange berries and mint leaves on top just before serving for the prettiest effect—perfect for Instagram or your next Pinterest post.
Pair slices with a dollop of whipped cream or a scoop of vanilla ice cream for a dreamy dessert. For brunch, serve alongside hot coffee or a glass of bubbly. If you’re feeling extra, drizzle with a little berry coulis or lemon syrup.
To store, cover the tart loosely with foil or plastic wrap and keep in the fridge for up to 3 days. The crust stays crisp, and the curd gets even more flavorful as it sits. If you want to freeze, wrap the ungarnished tart well in two layers of plastic—thaw overnight in the fridge and top with fresh berries before serving. I find the tart is best eaten within 24 hours for the juiciest fruit, but leftovers are never a problem in my house!
Reheat individual slices for just 10 seconds in the microwave if you want a slightly softer texture, but honestly, it’s delicious cold.
Nutritional Information & Benefits
This Lemon Curd Tart with Juicy Berries is lighter than you might guess, thanks to the fresh fruit and zesty lemon. Here’s an estimate per slice (based on 8 servings):
- Calories: ~250
- Protein: 4g
- Fat: 13g
- Carbs: 29g
- Fiber: 2g
Lemons are loaded with vitamin C, which supports your immune system and gives you a little energy boost. The berries add antioxidants and more fiber. This tart is naturally nut-free, and you can make it gluten-free or dairy-free with simple swaps. Just a heads-up: it does contain eggs and dairy, so those with allergies should use the adaptations above.
I love that you get a sweet, satisfying treat that feels indulgent without being heavy. It’s a dessert that fits into a balanced diet—and makes you happy, too!
Conclusion
So there you have it—the Lemon Curd Tart with Juicy Berries, a dessert that’s as beautiful as it is delicious. It’s proof that fresh, simple ingredients can come together to make something truly special, no pastry chef required. Whether you stick to the classic or play with flavors and toppings, you’ll end up with a showstopper that brings a little sunshine to any table.
I love this recipe because it’s forgiving, fun, and always gets smiles from my family and friends. Don’t be afraid to put your own spin on it—change up the fruit, try a new crust, or pile it high with whatever’s in season. That’s what makes home baking so joyful.
If you try this Lemon Curd Tart recipe, let me know in the comments how it turned out, or tag me on social media with your creations. I’d love to see your twists and get ideas for my next baking adventure. Happy baking, and here’s to moments of pure, lemony joy!
Frequently Asked Questions
Can I make the lemon curd tart ahead of time?
Absolutely! You can prepare the tart (without berries) up to 2 days in advance. Just add the berries right before serving so they stay fresh and juicy.
What if I don’t have a tart pan?
No worries—use a pie dish or a springform pan instead. Just grease it well and line the bottom with parchment for easy removal.
Can I use bottled lemon juice?
Fresh lemon juice is best for vibrant, tangy flavor. Bottled juice can taste flat, but in a pinch, it works—maybe add extra zest to boost the citrus punch.
How do I prevent the crust from getting soggy?
Let the crust cool completely before adding the curd, and only top with berries right before serving. If you’re worried, you can brush the baked crust with melted white chocolate to create a barrier.
Is this recipe suitable for gluten-free or dairy-free diets?
Yes! Use a gluten-free flour blend for the crust and dairy-free butter for both the crust and curd. The result is still delicious and perfect for sharing with everyone.
Pin This Recipe!
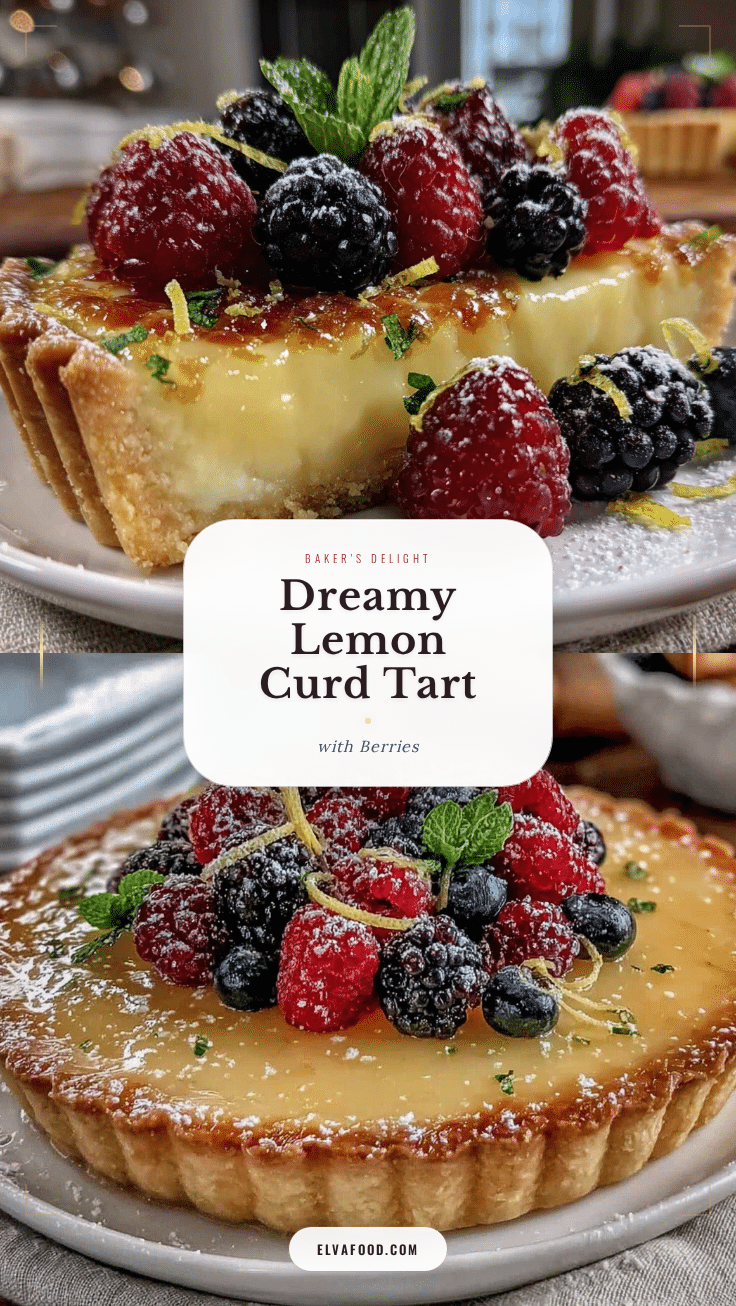
Lemon Curd Tart with Juicy Berries
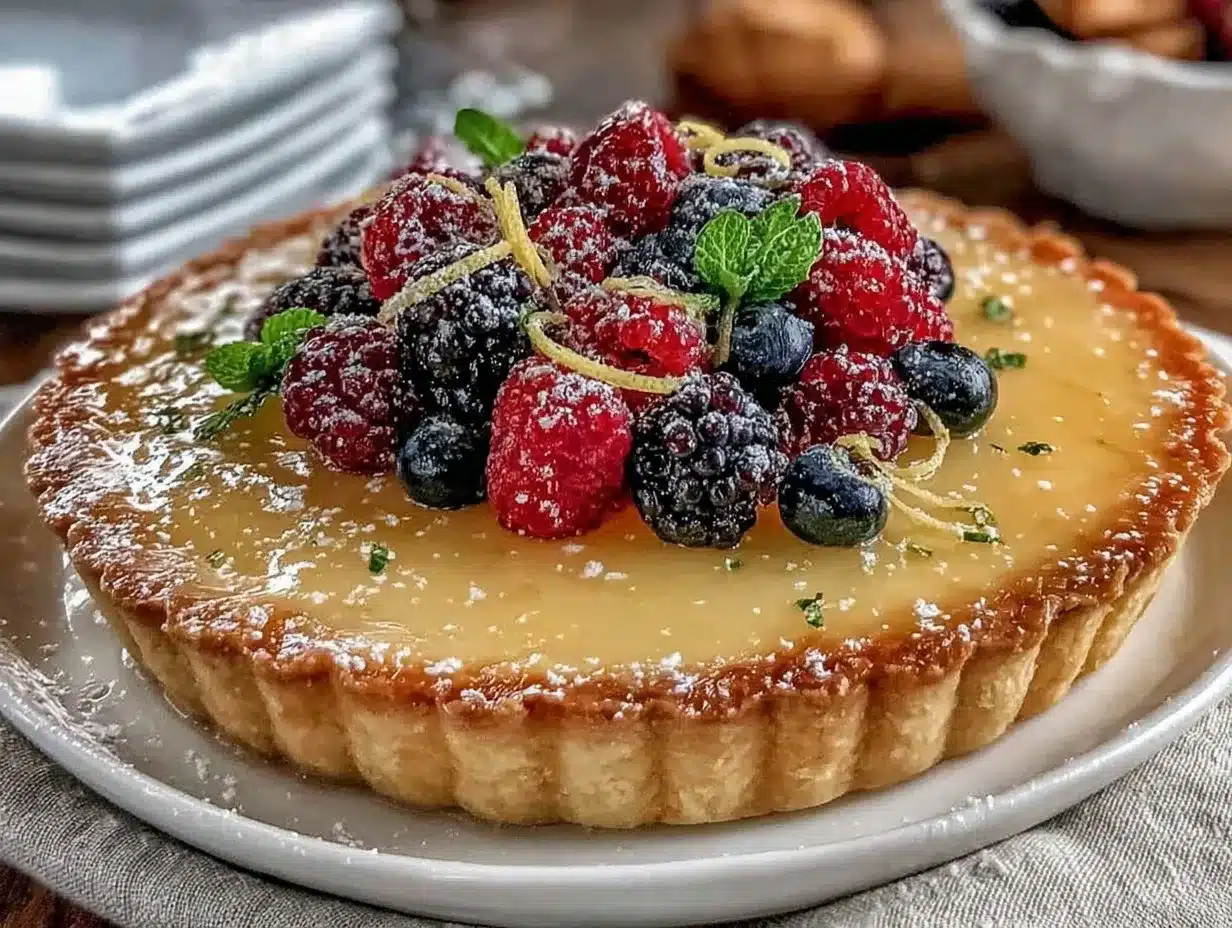
This easy Lemon Curd Tart features a crisp, buttery crust filled with silky homemade lemon curd and topped with fresh, juicy berries. It’s a showstopping dessert that’s bright, creamy, and perfect for spring or any special occasion.
- Prep Time: 20 minutes
- Cook Time: 25 minutes
- Total Time: 2 hours 45 minutes
- Yield: 8 servings 1x
- Category: Dessert
- Cuisine: French
Ingredients
- 1 cup all-purpose flour (120 g)
- 1/4 cup powdered sugar (30 g)
- 6 tbsp unsalted butter, melted (85 g)
- Pinch of salt
- 1/2 tsp vanilla extract (optional)
- 3 large eggs, room temperature
- 3/4 cup granulated sugar (150 g)
- 1/2 cup fresh lemon juice (120 ml, about 2–3 lemons)
- 2 tsp lemon zest (from 2 lemons)
- 6 tbsp unsalted butter, cut into pieces (85 g)
- Pinch of salt
- 1 cup mixed fresh berries (150 g, such as strawberries, blueberries, raspberries, blackberries)
- Powdered sugar, for dusting (optional)
- Mint leaves, for garnish (optional)
Instructions
- Preheat oven to 350°F (175°C). Lightly grease a 9-inch tart pan with removable bottom.
- In a medium bowl, whisk together flour, powdered sugar, and salt. Stir in melted butter (and vanilla, if using) until mixture forms soft, sandy crumbs.
- Press dough firmly into the bottom and up the sides of the tart pan. Prick the base all over with a fork.
- Bake crust for 17-20 minutes until lightly golden. If it puffs up, gently press down with a spoon while still warm. Cool completely on a rack (about 20 minutes).
- In a small saucepan, whisk together eggs, sugar, lemon juice, zest, and salt.
- Cook over medium-low heat, whisking constantly, until mixture thickens and coats the back of a spoon (about 6-8 minutes, or until 170°F).
- Remove from heat and stir in butter, a few pieces at a time, until melted and glossy.
- Strain curd through a fine mesh sieve into a bowl for extra smoothness. Let cool slightly for 10 minutes.
- Pour slightly cooled lemon curd into the baked crust and smooth the top. Refrigerate until set, at least 2 hours (overnight is best).
- Just before serving, top with mixed fresh berries and a dusting of powdered sugar. Garnish with mint leaves if desired.
Notes
For gluten-free, use a 1:1 gluten-free flour blend. For dairy-free, substitute vegan butter. Use fresh lemons for best flavor. Chill tart fully before slicing for clean edges. Top with berries just before serving to prevent sogginess. For extra shine, brush berries with warmed apricot jam.
Nutrition
- Serving Size: 1 slice (1/8 of tart
- Calories: 250
- Sugar: 18
- Sodium: 90
- Fat: 13
- Saturated Fat: 8
- Carbohydrates: 29
- Fiber: 2
- Protein: 4
Keywords: lemon curd tart, lemon dessert, spring dessert, berries, easy tart, brunch, potluck, homemade, fresh fruit, creamy, buttery crust