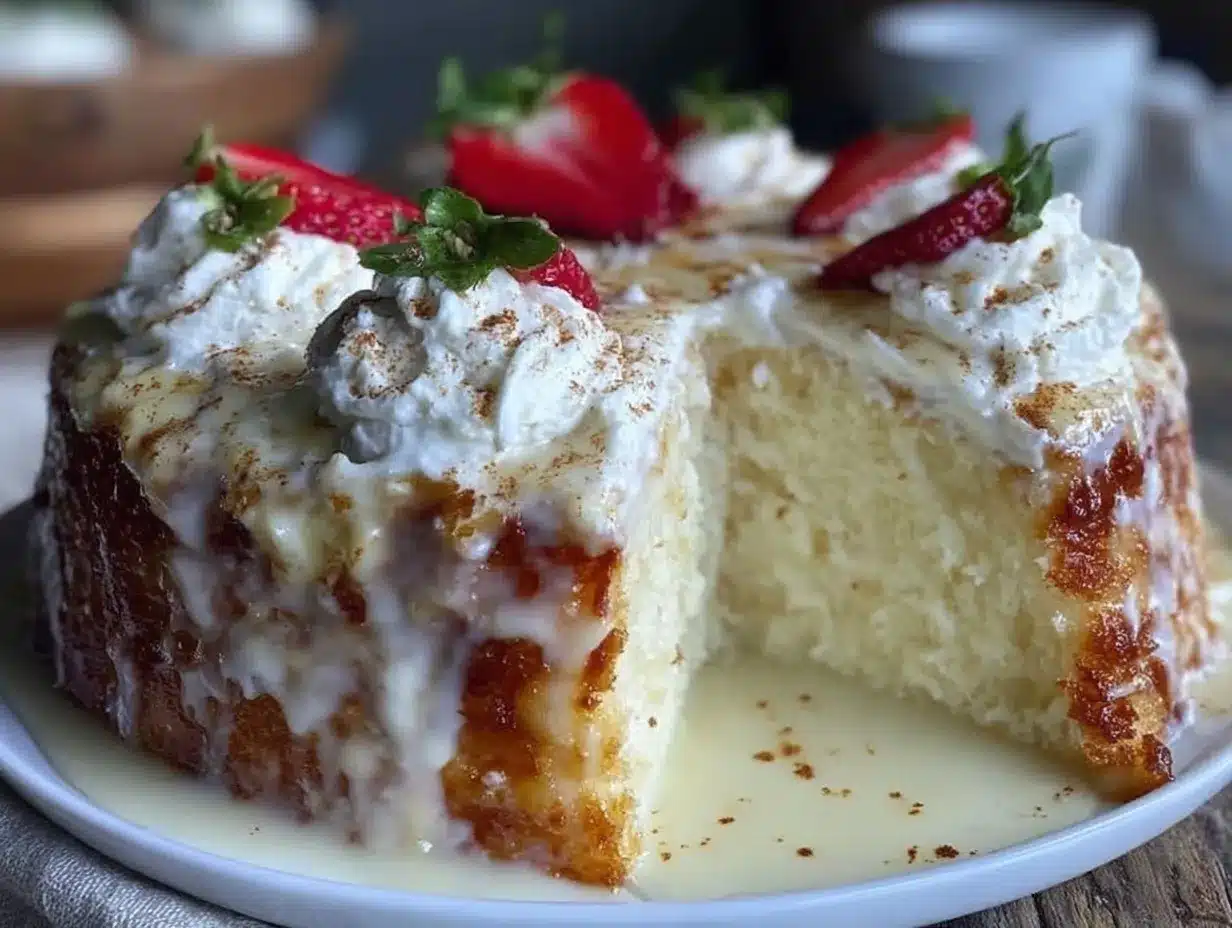
Picture this: the sweet, creamy aroma of vanilla and fresh dairy swirling through your kitchen, a golden sponge cake gently rising in the oven, and the anticipation building as you imagine that first chilled, fork-tender bite. There’s something undeniably magical about a homemade Moist Tres Leches Cake recipe from scratch—the way the milky syrup seeps into every crumb, and how the pillowy whipped cream topping practically begs for a sprinkle of cinnamon. The moment that cake emerges, cool and soaked, it’s pure bliss (honestly, it’s hard to resist just digging in with a spoon right then and there).
The first time I made this Tres Leches Cake, I was a college kid missing my abuela’s kitchen. She would whip up a version so soft and lush, you barely needed teeth to eat it. I remember pausing, fork in hand, grinning from ear to ear after my first homemade attempt—this was the kind of moment you just know you’ve hit on something special. My little brother wandered in, eyes wide, and before I knew it, half the cake was gone (can you blame him?).
Now, this easy homemade dessert has become a staple for every family birthday, potluck, and random Tuesday that needs a bit of celebrating. It’s the one cake everyone requests—kids, grandparents, friends who “don’t usually like dessert.” I wish I’d started making this years ago, honestly. It’s dangerously easy, almost no-fuss, and the reward is a slice of pure, nostalgic comfort that tastes like a hug. Perfect for brightening up your Pinterest board, impressing your crew, or just treating yourself after a long week. After testing this recipe more times than I can count (all in the name of research, of course), I can tell you: you’re going to want to bookmark this one.
Why You’ll Love This Moist Tres Leches Cake Recipe from Scratch
When it comes to cake, there are plenty of recipes out there, but this one’s got a few secret weapons that make it stand out. Years of family birthdays, countless bake sales, and, yes, a few “kitchen disaster” moments have made me a Tres Leches Cake devotee. I’ve tested, tweaked, and perfected this recipe so you can enjoy flawless results—every single time. Here’s why this easy homemade dessert is about to become your new favorite:
- Quick & Easy: This cake comes together in just over an hour (plus chilling time), so you get that impressive bakery taste without an all-day project. Perfect for those “I forgot I need to bring dessert” moments.
- Simple Ingredients: No fancy baking aisles or specialty stores needed—just pantry staples like flour, eggs, milk, and sugar. If you bake even once a year, you probably have what you need.
- Perfect for Every Occasion: Whether it’s a backyard BBQ, a birthday bash, or a “just because” Tuesday, this cake fits right in. It’s a showstopper on your holiday table and casual enough for a weeknight treat.
- Crowd-Pleaser: I’ve never met a soul who didn’t go back for seconds. Kids love the sweet, soft texture, and adults appreciate the not-too-sweet, creamy bite.
- Unbelievably Delicious: The milky soak transforms the cake into something truly special—moist but never soggy, delicately sweet, and topped with clouds of homemade whipped cream.
So what makes this Tres Leches Cake recipe different? For one, it’s all about the balance. The sponge is airy enough to soak up the three-milk mixture without falling apart, and the topping is lightly sweetened—no canned stuff here! I use a trick my abuela taught me: separating the eggs and whipping the whites for extra lift. And unlike some store-bought cakes, this one is never dry or bland. It’s comfort food, but lighter, and honestly, it’s as easy as a boxed mix (but tastes a million times better).
This cake is more than just dessert—it’s a memory-maker. It’s the kind of thing that turns a regular meal into a celebration. It’s the cake you’ll crave on rainy days, share with your favorite people, and maybe even sneak a midnight slice (no judgment). If you’ve been searching for the ultimate Moist Tres Leches Cake recipe from scratch, this is it—trust me, you’ll want to make it again and again.
What Ingredients You Will Need
This Moist Tres Leches Cake recipe from scratch keeps things simple but delivers big flavor. We’re talking basic ingredients that yield a classic, tender cake and a lush, creamy milk soak. You probably have most of these in your kitchen already, and if not, they’re easy to find. Here’s what you’ll need for the cake, milk mixture, and whipped cream topping:
For the Cake
- 1 cup (125g) all-purpose flour (don’t pack it—spoon and level for best texture)
- 1 1/2 teaspoons baking powder
- 1/4 teaspoon salt
- 5 large eggs, separated (at room temperature for best volume)
- 1 cup (200g) granulated sugar, divided
- 1/3 cup (80ml) whole milk (or 2% if that’s what you have)
- 1 teaspoon pure vanilla extract (I like Nielsen-Massey or McCormick for good flavor)
For the Tres Leches Milk Mixture
- 1 can (12 oz/354ml) evaporated milk
- 1 can (14 oz/396g) sweetened condensed milk
- 1/3 cup (80ml) heavy cream (or half-and-half for a lighter version)
- Optional: 1 teaspoon vanilla extract or 1 tablespoon dark rum for a grown-up twist
For the Whipped Cream Topping
- 1 1/2 cups (360ml) heavy whipping cream (cold, for best whip)
- 3 tablespoons (25g) powdered sugar (for subtle sweetness)
- 1 teaspoon vanilla extract
Optional Garnishes
- Ground cinnamon or cocoa powder (for dusting)
- Fresh berries or sliced strawberries (for color and tartness)
- Toasted coconut flakes (if you’re feeling fancy)
Ingredient Notes: I always use large eggs (room temp helps them whip up fluffier), but medium works in a pinch. Evaporated milk and sweetened condensed milk are pantry MVPs—don’t skip them. For a dairy-free twist, you can use coconut milk (full fat) instead of heavy cream, and coconut whipped topping, but the flavor will shift a bit. If you need gluten-free, swap the all-purpose flour for a 1:1 gluten-free blend like King Arthur or Bob’s Red Mill. In the summer, I love adding a handful of fresh, ripe berries on top—it’s a crowd-pleaser at picnics. And honestly, don’t stress if you don’t have everything exactly; this cake is forgiving and delicious either way.
Equipment Needed
- 9×13-inch baking pan (glass or ceramic preferred for even soaking—metal works too, just watch the bake time)
- Mixing bowls (one large for cake batter, one medium for whipping the cream, and one for the milk mixture)
- Electric mixer (hand mixer or stand mixer for best whipped egg whites and cream—you can do it by hand, but your arm might not forgive you!)
- Measuring cups and spoons (accuracy matters for that perfect texture)
- Rubber spatula (for gentle folding)
- Whisk (for dry ingredients and whipped cream, if mixing by hand)
- Toothpick or cake tester (for checking doneness)
- Offset spatula or butter knife (to spread the whipped cream topping evenly—totally optional but makes things pretty)
If you don’t have a 9×13 pan, you can use two 8-inch square pans or a deep round cake pan (just adjust your baking time and check with a toothpick). I’ve made this cake in everything from glass Pyrex to a battered old metal pan, and it turns out great. For the whipped cream, a chilled metal bowl helps the cream whip up faster. And here’s my favorite budget trick: if you don’t have a mixer, a big jar with a tight lid can whip cream in a pinch (just shake like crazy—fun for kids, too!). Clean your beaters and bowls well—any grease will stop your eggs or cream from whipping up.
Preparation Method
- Preheat & Prep: Set your oven to 350°F (175°C). Grease a 9×13-inch baking pan with butter or nonstick spray. Line the bottom with parchment for easier removal (not a must, but super helpful).
- Mix Dry Ingredients: In a medium bowl, whisk together 1 cup (125g) all-purpose flour, 1 1/2 teaspoons baking powder, and 1/4 teaspoon salt. Set aside.
- Separate Eggs: Crack 5 large eggs, placing the whites in one bowl and yolks in another. This helps the cake rise tall and stay airy—don’t skip this part.
- Beat Yolks: With a mixer, beat the yolks with 3/4 cup (150g) of the granulated sugar on high speed until pale and thick (about 2 minutes). Mix in 1/3 cup (80ml) whole milk and 1 teaspoon vanilla extract.
- Combine Wet & Dry: Gently stir the yolk mixture into the dry ingredients. Don’t overmix—just until combined.
- Whip Egg Whites: Clean your beaters (any grease ruins this step!). Beat the egg whites on high until soft peaks form, then gradually add the remaining 1/4 cup (50g) sugar. Continue whipping until stiff peaks form (about 2-3 minutes). The meringue should be glossy and hold its shape.
- Fold In Whites: Using a rubber spatula, gently fold the whipped whites into the batter in 2 batches. Fold just until no streaks remain—this keeps your cake light and fluffy.
- Bake: Pour the batter into your prepared pan. Smooth the top. Bake for 25-30 minutes, until golden and a toothpick inserted in the center comes out clean or with a few moist crumbs.
- Cool: Let the cake cool completely in the pan (about 1 hour). Don’t rush this—the cake needs to be cool before soaking.
- Poke & Soak: Use a fork or skewer to poke holes all over the cooled cake (about 50 pokes—get to the edges!). In a bowl, whisk together 1 can evaporated milk, 1 can sweetened condensed milk, 1/3 cup heavy cream, and optional vanilla or rum. Slowly pour the milk mixture over the entire cake, letting it soak in. It might look like a lot, but the cake will drink it all up!
- Chill: Cover and refrigerate for at least 4 hours (overnight is best!). This gives the cake time to soak up all that milky goodness.
- Make Whipped Cream: In a cold bowl, whip 1 1/2 cups heavy cream with 3 tablespoons powdered sugar and 1 teaspoon vanilla until soft peaks form. Don’t overwhip—you want it billowy, not grainy.
- Top & Serve: Spread whipped cream over the chilled cake. Dust with cinnamon, add berries, or sprinkle toasted coconut if you like. Slice and serve cold for pure heaven!
Preparation notes: If your cake looks a bit soggy at first, don’t panic—it will firm up as it chills. If your whipped cream is runny, chill your bowl and beaters next time. And if you overbake the cake, poke extra holes and let it soak a bit longer. After a few tries, you’ll get a feel for the perfect soak and texture—trust your instincts!
Cooking Tips & Techniques
- Don’t Overmix the Batter: Once you add the flour, mix just until combined. Too much mixing means a tough cake—been there, regretted that!
- Egg Whites Are Key: Clean, grease-free bowls and beaters are a must. Even a little yolk will keep your whites from whipping to stiff peaks (I learned this the hard way during a midnight baking session). If your whites don’t look glossy and fluffy, start over.
- Soak Evenly: Poke all the way to the bottom and make plenty of holes. Pour the milk mixture slowly and evenly—don’t just dump it in one spot or your cake will be dry in places and soggy in others.
- Chill for Best Texture: I know it’s tempting, but chilling for at least 4 hours (or overnight) really is worth it. The cake becomes perfectly moist, not mushy.
- Whipped Cream Perfection: Cold cream, cold bowl, and don’t walk away! Overwhipped cream turns grainy—if you go too far, add a splash of cream and gently fold to rescue it.
- Presentation Matters: For clean slices, use a sharp knife dipped in hot water and wiped dry. Wipe the knife between cuts for those picture-perfect squares you see on Pinterest.
- Multitasking: While the cake cools, prep your milk mixture and clean up—makes final assembly a breeze.
- Consistency Tip: Every oven’s a bit different—start checking your cake at 23 minutes. Golden on top, springy to the touch, and a toothpick with a few crumbs is the sweet spot.
Honestly, the first time I made Tres Leches Cake, I thought I’d ruined it by over-soaking—but after a chill in the fridge, it was perfect. If your cake feels a bit soft at first, trust the process. This cake rewards patience and a gentle hand. Once you’ve made it a couple of times, you’ll have the timing and texture down pat, and you’ll never go back to store-bought again!
Variations & Adaptations
- Gluten-Free Tres Leches Cake: Swap the all-purpose flour for a 1:1 gluten-free baking blend (I like King Arthur or Bob’s Red Mill). The cake will be just as moist and fluffy, and guests with gluten sensitivity can enjoy every bite.
- Dairy-Free or Vegan Version: Replace the evaporated milk, condensed milk, and heavy cream with coconut milk, coconut condensed milk, and a non-dairy whipped topping. The flavor will have a subtle coconut note—honestly, it’s delicious and a fun twist!
- Chocolate Tres Leches Cake: Add 1/4 cup (25g) unsweetened cocoa powder to the dry ingredients for a chocolatey sponge. Swap regular condensed milk for chocolate condensed milk if you can find it, and top with chocolate shavings.
- Fruit-Forward: Add a layer of sliced strawberries or peaches between the cake and whipped cream for a summery vibe. Blueberries and raspberries are also fantastic.
- Coffee Infusion: Stir 2 tablespoons of cooled brewed espresso into your milk mixture for a “Tiramisu meets Tres Leches” spin. Top with a dusting of cocoa.
- Nut Free: This recipe is naturally nut-free, but always check your ingredient labels if baking for allergies.
Personally, I love adding fresh berries and a hint of cinnamon in summer, and a splash of dark rum for grown-up celebrations. If you like things extra sweet, add a thin layer of dulce de leche between the cake and cream. The possibilities are endless—make this Moist Tres Leches Cake recipe from scratch your own!
Serving & Storage Suggestions
This Moist Tres Leches Cake is best served chilled—straight from the fridge is where it shines. For a pretty presentation, dust with cinnamon, add fresh berries, or sprinkle toasted coconut on top of the whipped cream. A dollop of extra cream or a drizzle of caramel sauce never hurts either.
Pair your cake with hot coffee, Mexican hot chocolate, or even a tangy lime agua fresca. For special occasions, a glass of bubbly or a light dessert wine makes it feel extra fancy. If you’re serving a crowd, slice the cake into squares and use a small spatula for clean plating.
To store, cover the cake tightly with plastic wrap or foil and refrigerate. It keeps well for 3-4 days (if it lasts that long!). The flavors deepen as it sits, so it’s even better on day two. For longer storage, you can freeze individual slices (wrapped well) for up to a month—just thaw in the fridge overnight. Re-whip a bit of cream for freshness if needed. If you’re prepping ahead, wait to add the whipped topping until serving for the fluffiest texture.
Nutritional Information & Benefits
Here’s an estimate for one generous slice (1/12th of the cake):
- Calories: ~320
- Total Fat: 16g
- Carbs: 38g
- Protein: 7g
- Sugar: 28g
Key ingredient benefits: eggs and milk provide a good dose of protein and calcium, while homemade whipped cream is lower in additives than store-bought toppings. If you opt for gluten-free or dairy-free versions, the cake still delivers comfort and satisfaction. Just a heads-up, it does contain dairy and eggs, so not suitable for those with allergies to either.
In our house, this cake is a once-in-a-while treat that nourishes more than just the body—it’s about sharing joy, celebrating milestones, and making memories. As with any sweet, moderation is key, but sometimes, a slice of comfort is exactly what you need.
Conclusion
If you’re searching for a homemade dessert that’s simple, satisfying, and guaranteed to make you the hero of every potluck, this Moist Tres Leches Cake recipe from scratch is your answer. It’s a cake that delivers on every front—soft, creamy, and delicately sweet, with a topping you’ll want to eat straight from the bowl.
Don’t be afraid to make it your own—add berries, try a gluten-free flour, or sneak in a splash of rum. I love this cake for its nostalgia, its versatility, and, honestly, the way it brings people together. Every bite is a little celebration. So go ahead, whip it up, and let me know how yours turns out—leave a comment, share your tweaks, or tag your beautiful creation online. You’ll be glad you did (and so will everyone lucky enough to snag a slice)!
Frequently Asked Questions
How long does Tres Leches Cake need to chill?
Ideally, chill the cake for at least 4 hours, but overnight is even better. This gives the sponge plenty of time to soak up the milky syrup and develop that perfectly moist texture.
Can I make this cake ahead of time?
Absolutely! You can bake the cake and soak it up to 2 days ahead. Just wait to add the whipped cream topping until right before serving for the freshest results.
What can I use instead of evaporated milk?
If you’re out of evaporated milk, substitute with an equal amount of half-and-half or whole milk. The texture will be slightly lighter, but still delicious.
How do I know when the cake is baked perfectly?
The cake is done when it’s golden on top, springs back when gently pressed, and a toothpick inserted in the center comes out clean or with a few moist crumbs. Don’t overbake—it should be tender!
Can I freeze Tres Leches Cake?
Yes! Slice the cake, wrap each piece tightly, and freeze for up to a month. Thaw in the fridge overnight, and add a fresh dollop of whipped cream before serving if you like.
Pin This Recipe!
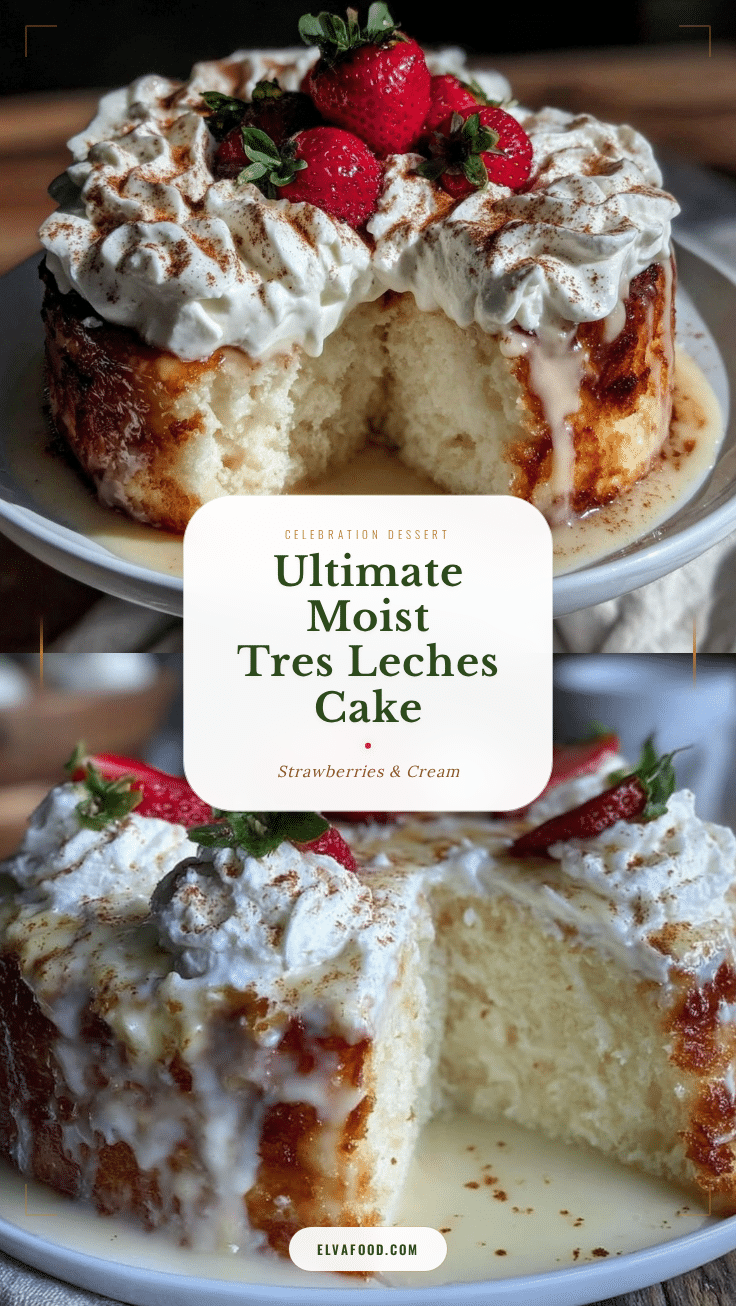
Moist Tres Leches Cake Recipe from Scratch

This easy homemade Tres Leches Cake features a light, airy sponge soaked in a creamy three-milk mixture and topped with billowy whipped cream. It’s a nostalgic, crowd-pleasing dessert perfect for birthdays, potlucks, or any celebration.
- Prep Time: 20 minutes
- Cook Time: 30 minutes
- Total Time: 5 hours (including chilling)
- Yield: 12 servings 1x
- Category: Dessert
- Cuisine: Mexican
Ingredients
- 1 cup all-purpose flour
- 1 1/2 teaspoons baking powder
- 1/4 teaspoon salt
- 5 large eggs, separated
- 1 cup granulated sugar, divided
- 1/3 cup whole milk
- 1 teaspoon pure vanilla extract
- 1 can (12 oz) evaporated milk
- 1 can (14 oz) sweetened condensed milk
- 1/3 cup heavy cream (or half-and-half)
- Optional: 1 teaspoon vanilla extract or 1 tablespoon dark rum
- 1 1/2 cups heavy whipping cream (cold)
- 3 tablespoons powdered sugar
- 1 teaspoon vanilla extract
- Optional garnishes: ground cinnamon, cocoa powder, fresh berries, sliced strawberries, toasted coconut flakes
Instructions
- Preheat oven to 350°F (175°C). Grease a 9×13-inch baking pan and line with parchment paper if desired.
- In a medium bowl, whisk together flour, baking powder, and salt.
- Separate eggs, placing whites in one bowl and yolks in another.
- With a mixer, beat yolks with 3/4 cup sugar on high speed until pale and thick (about 2 minutes). Mix in milk and vanilla extract.
- Gently stir yolk mixture into dry ingredients just until combined.
- Clean beaters. Beat egg whites on high until soft peaks form, then gradually add remaining 1/4 cup sugar. Continue whipping until stiff peaks form (2-3 minutes).
- Gently fold whipped whites into batter in 2 batches until no streaks remain.
- Pour batter into prepared pan, smooth top, and bake for 25-30 minutes until golden and a toothpick comes out clean or with a few moist crumbs.
- Let cake cool completely in pan (about 1 hour).
- Poke holes all over cooled cake with a fork or skewer.
- In a bowl, whisk together evaporated milk, sweetened condensed milk, heavy cream, and optional vanilla or rum. Slowly pour milk mixture over cake, letting it soak in.
- Cover and refrigerate for at least 4 hours (overnight is best).
- In a cold bowl, whip heavy cream with powdered sugar and vanilla until soft peaks form.
- Spread whipped cream over chilled cake. Garnish with cinnamon, berries, or coconut if desired. Slice and serve cold.
Notes
For best texture, chill the cake at least 4 hours before serving. Use room temperature eggs for fluffier sponge. Clean beaters and bowls thoroughly before whipping egg whites and cream. The cake can be made gluten-free with a 1:1 gluten-free flour blend. For dairy-free, substitute coconut milk and non-dairy whipped topping. Add berries, cinnamon, or rum for variations. Store covered in the fridge for up to 4 days or freeze slices for up to a month.
Nutrition
- Serving Size: 1 slice (1/12th of c
- Calories: 320
- Sugar: 28
- Sodium: 180
- Fat: 16
- Saturated Fat: 10
- Carbohydrates: 38
- Protein: 7
Keywords: Tres Leches Cake, Mexican dessert, sponge cake, easy cake recipe, homemade, birthday cake, potluck dessert, whipped cream, three milk cake, moist cake