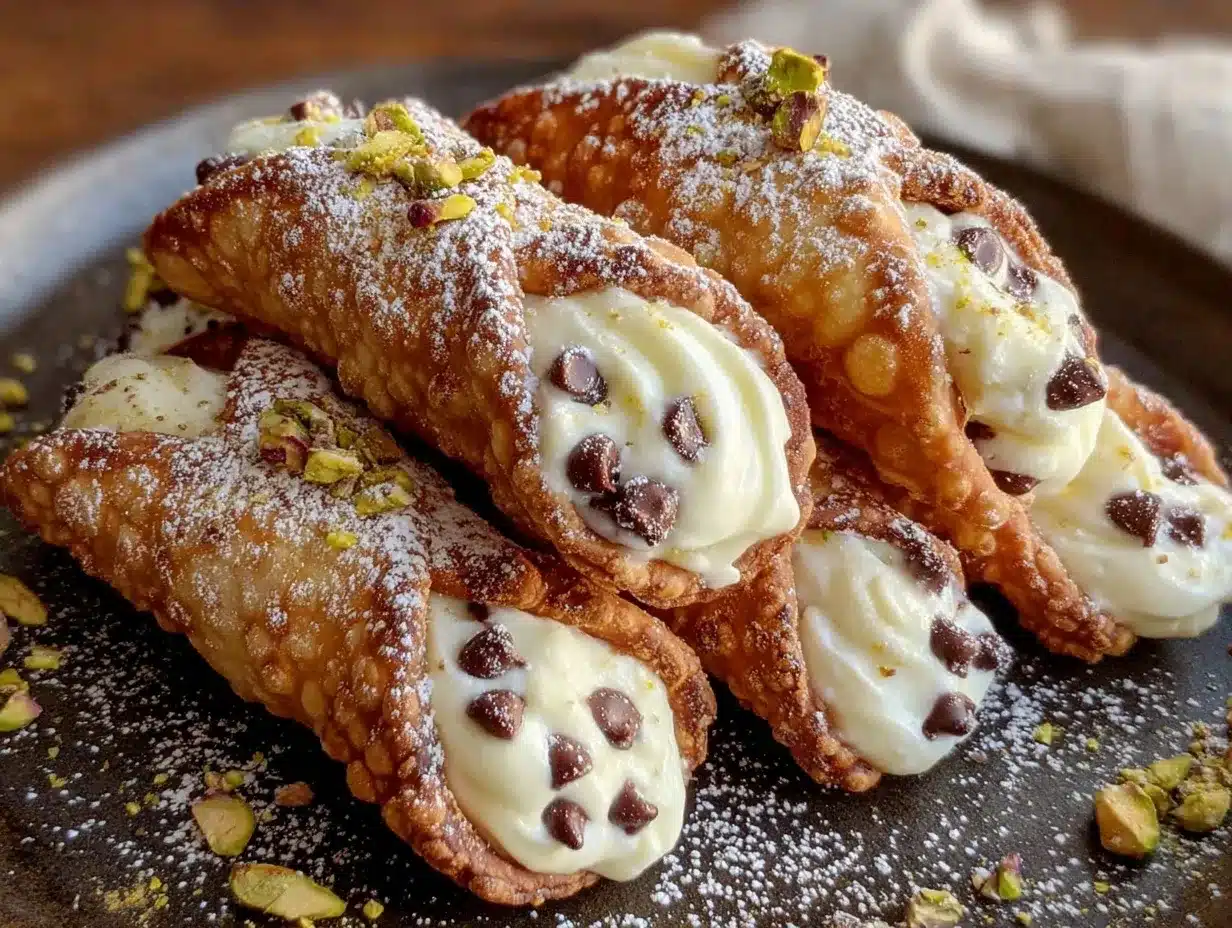
Imagine the sound of a perfect, golden shell snapping between your teeth, revealing a cloud-like, sweet ricotta filling flecked with chocolate and citrus. That’s the first thing I remember when I made my first batch of homemade cannoli. The kitchen was filled with the scent of fried dough and orange zest, reminding me of bustling Italian bakeries and Sunday afternoons at my grandmother’s house, where cannoli always made an appearance (especially if someone had good news to share!).
The first time I tried making these, I was honestly a little intimidated. Cannoli seemed like something only Nonna could pull off, but curiosity (and a sweet tooth) got the better of me. I’ll never forget that first bite—crisp, delicate, with a filling so silky I closed my eyes right there at the kitchen counter. It was one of those moments you just want to bottle up. You know what I’m talking about—the kind of treat that makes everyone go quiet for a second, just savoring the flavor.
My family couldn’t resist sneaking shells straight off the rack, dusted with powdered sugar and still a tad warm. I caught my kids piping the filling themselves (with plenty of giggles and a little ricotta on the floor). That’s when I knew this recipe was a keeper! Honestly, once you try these, store-bought will never cut it again. They’re perfect for holiday dessert spreads, birthdays, or adding something truly special to your Pinterest board. And the best part? They’re way easier than you think. After testing batch after batch (in the name of research, of course), homemade cannoli have become a staple for family gatherings, gifting, and, well, whenever I need a taste of pure, nostalgic comfort. Trust me—you’re going to want to bookmark this one.
Why You’ll Love This Homemade Cannoli Recipe
Let’s face it—cannoli have a reputation for being tricky, but after years of trial and error (and a few burnt shells along the way), I can say with confidence that this recipe delivers every single time. Here’s why you’ll want to roll up your sleeves and try these:
- Quick & Easy: Despite their fancy reputation, you can whip up these cannoli in about an hour and a half (shells and filling included). Perfect for when you want to impress without spending all day in the kitchen.
- Simple Ingredients: You probably have most of what you need in your pantry—no specialty shopping trips required.
- Perfect for Celebrations: These cannoli always steal the show at potlucks, birthdays, or Sunday dinner. They’re the kind of dessert that gets people talking.
- Crowd-Pleaser: Both kids and adults line up for these. They’re just sweet enough, with a filling so creamy it’s honestly hard to stop at one.
- Unbelievably Delicious: The contrast of the crispy shell and rich filling is, well, what Italian dessert dreams are made of.
What sets this homemade cannoli recipe apart? It’s all about the details: draining the ricotta overnight for a lush, not-watery filling; kneading the dough until it’s silky; and frying the shells just right for that signature crunch. I’ve tested everything—using a touch of marsala wine in the dough for flavor, adding orange zest to the filling, and even piping in mini chocolate chips for added texture. These little touches make each bite a revelation.
For me, cannoli are more than just dessert—they’re a memory, a tradition, and a way to bring people together. When you take that first bite, you’ll know exactly what I’m talking about. This recipe isn’t just good—it’s the kind that makes you pause, close your eyes, and let out a happy sigh. Whether you’re new to cannoli or a lifelong fan, these are the best I’ve ever made (and eaten). Don’t be surprised if you find yourself making them for every special occasion—or just because.
What Ingredients You Will Need
This homemade cannoli recipe relies on classic, wholesome ingredients that create the perfect balance of crispy shell and creamy filling. Most of these are pantry staples, though a few make all the difference in the final flavor and texture. Here’s what you’ll need:
For the Cannoli Shells:
- 2 cups (250 g) all-purpose flour (plus more for dusting)
- 2 tablespoons (25 g) granulated sugar
- 1/2 teaspoon (2 g) kosher salt
- 2 tablespoons (30 g) unsalted butter, cold and cut into cubes (adds richness)
- 1 large egg, beaten
- 1/2 cup (120 ml) dry marsala wine (or white wine; for flavor and crispness)
- 1 tablespoon (15 ml) white vinegar
- Vegetable oil, for frying (canola or sunflower work too)
For the Creamy Ricotta Filling:
- 2 cups (500 g) whole milk ricotta cheese, drained overnight (see note)
- 1 cup (125 g) powdered sugar, sifted (add more for sweeter filling)
- 1/2 teaspoon (2 g) ground cinnamon
- Zest of 1 orange (about 1 tablespoon; adds fragrance)
- 1/2 teaspoon (2 ml) pure vanilla extract
- 1/2 cup (100 g) mini chocolate chips (I love Ghirardelli minis for this)
For Garnishing:
- Chopped pistachios (about 1/2 cup or 70 g; optional, for rims)
- Extra powdered sugar for dusting
- Candied orange peel (optional, for that bakery touch)
Ingredient Notes & Tips:
- Ricotta Cheese: Drain well by setting in a cheesecloth-lined sieve overnight. This is the secret to a thick, non-runny filling!
- Flour: All-purpose works best, but you can swap for 1:1 gluten-free flour if needed.
- Wine: Marsala is classic, but dry white wine or even sherry works in a pinch.
- Chocolate Chips: Swap for chopped dark chocolate or leave out for a nutty filling.
- Allergy-Friendly: Use dairy-free ricotta and skip chocolate chips for dairy-free cannoli.
Honestly, you don’t need anything fancy here. Just quality ingredients, a little patience, and a sense of adventure. If you want to channel your inner Italian baker, this is the place to start!
Equipment Needed
- Cannoli forms/tubes: Essential for shaping the shells. If you don’t have these, you can use cleaned metal dowels or even shape aluminum foil into thick tubes (it works in a pinch!).
- Rolling pin: For rolling the dough nice and thin.
- Large mixing bowl: You’ll need this for combining your dough ingredients.
- Frying thermometer: Helps keep your oil at the perfect temperature (but if you’re brave, a wooden spoon and careful watching work too).
- Slotted spoon or tongs: For safely flipping and removing shells from hot oil.
- Paper towels: For draining excess oil after frying.
- Cheesecloth: For draining ricotta (a must for creamy, thick filling!).
- Piping bag and star tip: Makes filling the cannoli easier and prettier, but a zip-top bag with the corner snipped will also do the trick.
- Baking sheet: Great for cooling and storing shells before filling.
- Small bowl and pastry brush: For sealing the dough edges with egg wash.
Honestly, I’ve used everything from a wine bottle as a rolling pin to chopsticks as makeshift cannoli forms when I was starting out. Just be sure anything you fry is oven-safe and heatproof. For cleaning, a quick soak and scrub of the metal forms gets any stubborn dough off. If you’re on a budget, most kitchen supply shops sell cannoli tubes for a few dollars. Don’t overthink it—resourcefulness is part of the fun!
How to Make Homemade Cannoli (Step-by-Step)
-
Drain the Ricotta (8-24 hours ahead):
Spoon ricotta into a cheesecloth-lined sieve, set over a bowl. Cover and chill at least 8 hours (preferably overnight). This keeps your filling thick and lush—not soupy.
-
Make the Dough (15 minutes):
In a large mixing bowl, whisk together 2 cups (250 g) flour, 2 tablespoons (25 g) sugar, and 1/2 teaspoon (2 g) salt. Add the cold butter and rub in with your fingertips until mixture looks like coarse crumbs.
Make a well in the center. Add 1 large beaten egg, 1/2 cup (120 ml) marsala wine, and 1 tablespoon (15 ml) vinegar. Mix with a fork, then knead by hand until a smooth dough forms (about 5 minutes). If sticky, dust with more flour as needed.
-
Rest the Dough (30 minutes):
Wrap dough in plastic wrap and rest at content temperature for at least 30 minutes. This helps relax the gluten for an easier roll-out.
-
Roll Out & Cut (15 minutes):
On a lightly floured surface, roll dough as thin as you can—about 1/16-inch (1.5 mm) thick. (Thinner dough = crispier shells!)
Use a 4-inch (10 cm) round cutter to stamp out circles. Reroll scraps as needed. Cover circles with a towel to keep from drying out.
-
Shape on Cannoli Forms:
Wrap each dough circle loosely around a cannoli tube. Brush one edge with a bit of beaten egg, pressing to seal the seam (don’t overlap too much or they won’t crisp up well).
-
Heat Oil & Fry Shells (15 minutes):
Pour oil into a deep pot to 2 inches (5 cm) and heat to 350°F (175°C). Fry shells, 2-3 at a time, for 1-2 minutes or until golden brown and bubbly. They should float and spin with a gentle nudge. If they brown too fast, lower the heat.
Use tongs to remove shells to a paper towel-lined tray. While still warm, carefully slide out the metal tubes (use a clean towel if hot). Cool completely before filling.
-
Make the Filling (10 minutes):
In a bowl, blend drained ricotta, 1 cup (125 g) powdered sugar, 1/2 teaspoon (2 g) cinnamon, orange zest, and vanilla until smooth. Fold in mini chocolate chips. Chill until ready to use.
-
Fill & Decorate Cannoli (10 minutes):
Just before serving, spoon filling into a piping bag and pipe into both ends of each shell. (Don’t fill ahead or shells will soften!)
Dip the ends in chopped pistachios, garnish with candied orange peel, and dust generously with powdered sugar.
Prep Notes: If your dough tears, sprinkle with a little water and patch gently. Shells too pale? Oil temp may be too low. Too dark? Lower the heat. If shells stick to the forms, let them sit a minute after frying—it loosens as they cool. And don’t stress about perfect shapes; slightly wonky cannoli are, honestly, the best kind.
Cooking Tips & Techniques
- Thin Dough = Crispy Shells: Roll the dough thinner than you think—almost see-through. Thicker dough makes chewy, not snappy, shells. If rolling by hand is tough, take breaks to let the dough relax.
- Oil Temperature: Keep oil between 350-360°F (175-182°C) for even browning. Too cool and shells absorb oil; too hot and they burn. A thermometer saves a lot of guesswork (learned that the hard way after a few overly “bronzed” shells!).
- Don’t Overcrowd the Pot: Frying too many at once drops the oil temp and leads to greasy shells. Two or three at a time is perfect.
- Proper Draining: Ricotta must be drained well, or your filling will run. I once skipped this and ended up with cannoli “soup”—not my proudest moment.
- Fill at the Last Minute: Shells stay crisp if you fill them right before serving. If you have leftovers, keep shells and filling separate until ready to serve.
- Piping Perfection: Use a large star tip for that bakery swirl, or just snip the tip of a bag for a rustic look. Kids love helping with this part!
- Practice Makes Perfect: My first cannoli were, well, “rustic” looking. Don’t worry about perfection—flavor always wins.
Consistency is all about patience and attention to detail. After making these a few times, you’ll develop a feel for how the dough should look and how the shells should sound when you tap them. That’s when you know you’ve nailed it!
Variations & Adaptations
- Chocolate-Dipped Cannoli: Dip cooled shells in melted dark or white chocolate, then let set before filling. Adds a bakery-worthy twist (and, let’s be honest, who doesn’t love more chocolate?).
- Gluten-Free Cannoli: Swap all-purpose flour for your favorite 1:1 gluten-free blend. The result is just as crispy and delicious—my sister-in-law requests this version every holiday.
- Lemon-Ricotta Filling: Replace orange zest with lemon zest, add a splash of limoncello to the filling, and top with candied lemon peel for a fresh, zesty flavor.
- Baked Cannoli Shells: Don’t want to fry? Brush dough circles with butter, wrap around greased metal tubes, and bake at 400°F (200°C) for 12-15 minutes until golden. Not as shatteringly crisp as fried, but much less mess.
- Nuts or Fruit: Fold in chopped pistachios, hazelnuts, or dried cherries to the filling for added crunch and flavor.
- Dairy-Free: Use a quality dairy-free ricotta (like Kite Hill) and a plant-based chocolate chip for completely dairy-free cannoli. A little coconut cream in the filling helps with texture.
I’ve played around with everything from espresso powder in the filling to adding a pinch of nutmeg. Honestly, once you’ve got the basics down, you can riff on these any way you like. Let your taste buds lead the way!
Serving & Storage Suggestions
- Serving Temp: Serve cannoli chilled or at cool room temperature for the best contrast between crisp shell and creamy filling.
- Presentation: Arrange on a platter with a dusting of powdered sugar and a scatter of chopped pistachios. Add a few curls of candied orange peel for a pop of color (it makes your dessert table Pinterest-ready!).
- Pairings: Cannoli pair perfectly with espresso, cappuccino, or sweet dessert wine like Vin Santo. For a fun twist, serve alongside fresh berries or a scoop of pistachio gelato.
- Storage: Unfilled shells can be stored in an airtight container at room temperature for up to 1 week. Filled cannoli should be eaten the same day (shells soften quickly) but keep well in the fridge for 1 day.
- Freezing: Shells freeze beautifully! Wrap tightly and freeze for up to 2 months. Thaw at room temp before filling.
- Reheating: If shells lose crispness, pop them in a low oven (300°F/150°C) for 5 minutes to refresh.
- Flavor Development: The filling gets even better after a few hours in the fridge (before piping into shells). The flavors meld and deepen—just don’t fill too early or you’ll lose that crunch.
These cannoli are the ultimate make-ahead dessert—just fill and garnish right before serving and watch them disappear!
Nutritional Information & Benefits
Here’s a rough estimate for one medium cannoli:
- Calories: 210
- Fat: 10g
- Carbohydrates: 26g
- Protein: 5g
- Sugar: 14g
Ricotta cheese brings calcium and protein to the party, while using whole milk ricotta means a creamier texture with fewer additives. If you go with gluten-free or dairy-free adaptations, these cannoli can fit a variety of dietary needs. Just watch out for nut or dairy allergies (especially with pistachio or chocolate additions).
Personally, I love the balance of indulgence and homemade goodness here. You know exactly what’s in your dessert—no preservatives or mystery ingredients. As always, enjoy in moderation and savor every bite!
Conclusion
Homemade cannoli truly are the stuff of sweet dreams—crisp, golden shells and creamy ricotta filling that tastes like an Italian vacation in every bite. There’s something magical about making these from scratch, whether you’re carrying on a family tradition or starting your own. I love this recipe because it delivers that bakery-shop flavor with ingredients you can trust and steps you’ll quickly master.
Don’t be afraid to make it your own—try new flavors, play with fillings, and invite your family to help (the best memories are made with a little flour on your shirt). If you try this homemade cannoli recipe, let me know how it goes! Leave a comment, share your photos, or tell me about your favorite twist. Here’s to more sweet moments, new traditions, and desserts that bring everyone to the table. Happy baking!
FAQs About Homemade Cannoli
Can I make cannoli shells in advance?
Absolutely! Fry the shells up to a week ahead and store them in an airtight container. Fill just before serving for ultimate crunch.
What can I use instead of marsala wine in the shell dough?
Dry white wine or even sherry works well. In a pinch, you can use apple juice, but the flavor will be milder.
How do I keep my cannoli shells from getting soggy?
Always fill the shells right before serving. If you want extra protection, brush the inside of cooled shells with melted chocolate and let set before filling.
Can I make the filling without ricotta?
Mascapone cheese can be used for a richer filling, but traditional cannoli are always made with ricotta. Dairy-free ricotta also works for a vegan version.
What if I don’t have cannoli tubes?
You can shape thick aluminum foil into tubes or use metal chopsticks wrapped in parchment paper. Just make sure they’re oven-safe for frying or baking.
Pin This Recipe!
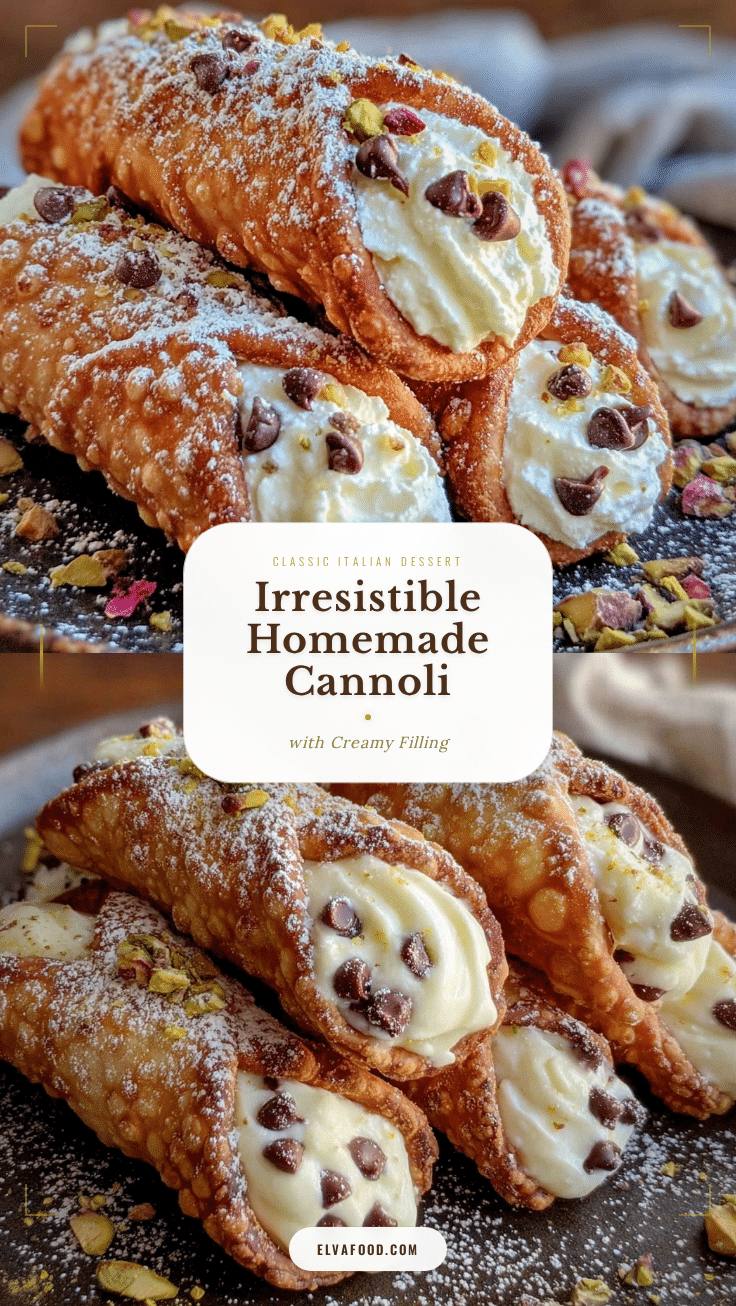
Homemade Cannoli Recipe: Easy Crispy Shells & Creamy Ricotta Filling

This homemade cannoli recipe features crisp, golden shells and a creamy ricotta filling flecked with chocolate and citrus. Perfect for celebrations, these bakery-worthy treats are easier to make than you think and deliver authentic Italian flavor in every bite.
- Prep Time: 30 minutes
- Cook Time: 45 minutes
- Total Time: 1 hour 15 minutes (plus 8 hours draining ricotta)
- Yield: 16 cannoli 1x
- Category: Dessert
- Cuisine: Italian
Ingredients
- 2 cups all-purpose flour (plus more for dusting)
- 2 tablespoons granulated sugar
- 1/2 teaspoon kosher salt
- 2 tablespoons unsalted butter, cold and cut into cubes
- 1 large egg, beaten
- 1/2 cup dry marsala wine (or white wine)
- 1 tablespoon white vinegar
- Vegetable oil, for frying (canola or sunflower)
- 2 cups whole milk ricotta cheese, drained overnight
- 1 cup powdered sugar, sifted
- 1/2 teaspoon ground cinnamon
- Zest of 1 orange (about 1 tablespoon)
- 1/2 teaspoon pure vanilla extract
- 1/2 cup mini chocolate chips
- Chopped pistachios (about 1/2 cup; optional, for rims)
- Extra powdered sugar for dusting
- Candied orange peel (optional, for garnish)
Instructions
- Spoon ricotta into a cheesecloth-lined sieve set over a bowl. Cover and chill at least 8 hours or overnight to drain.
- In a large mixing bowl, whisk together flour, sugar, and salt. Add cold butter and rub in with fingertips until mixture resembles coarse crumbs.
- Make a well in the center. Add beaten egg, marsala wine, and vinegar. Mix with a fork, then knead by hand until a smooth dough forms (about 5 minutes). If sticky, dust with more flour.
- Wrap dough in plastic wrap and rest at room temperature for at least 30 minutes.
- On a lightly floured surface, roll dough as thin as possible (about 1/16-inch thick). Use a 4-inch round cutter to stamp out circles. Reroll scraps as needed.
- Wrap each dough circle loosely around a cannoli tube. Brush one edge with beaten egg and press to seal the seam.
- Pour oil into a deep pot to 2 inches and heat to 350°F. Fry shells, 2-3 at a time, for 1-2 minutes until golden brown and bubbly. Remove with tongs to a paper towel-lined tray. Carefully slide out metal tubes while still warm. Cool shells completely.
- In a bowl, blend drained ricotta, powdered sugar, cinnamon, orange zest, and vanilla until smooth. Fold in mini chocolate chips. Chill until ready to use.
- Just before serving, spoon filling into a piping bag and pipe into both ends of each shell. Dip ends in chopped pistachios, garnish with candied orange peel, and dust with powdered sugar.
Notes
Drain ricotta overnight for a thick, non-runny filling. Roll dough very thin for crisp shells. Fill shells just before serving to keep them crunchy. Shells can be made ahead and stored unfilled for up to a week. For gluten-free cannoli, use a 1:1 gluten-free flour blend. Dairy-free ricotta and chocolate chips can be substituted for a vegan version.
Nutrition
- Serving Size: 1 cannoli
- Calories: 210
- Sugar: 14
- Sodium: 90
- Fat: 10
- Saturated Fat: 6
- Carbohydrates: 26
- Fiber: 1
- Protein: 5
Keywords: cannoli, Italian dessert, ricotta filling, crispy shells, homemade cannoli, easy cannoli recipe, holiday dessert, bakery-style cannoli