“Hey, did you make the mini cheesecakes for the party?” my sister texted me the morning of my nephew’s graduation. Honestly, I was scrambling, juggling a million things, and cheesecake wasn’t even on my radar. But those tiny desserts, topped with little graduation caps, ended up being the hit of the celebration. It wasn’t some fancy bakery order—just a last-minute effort born from a half-forgotten recipe and a bit of kitchen improvisation.
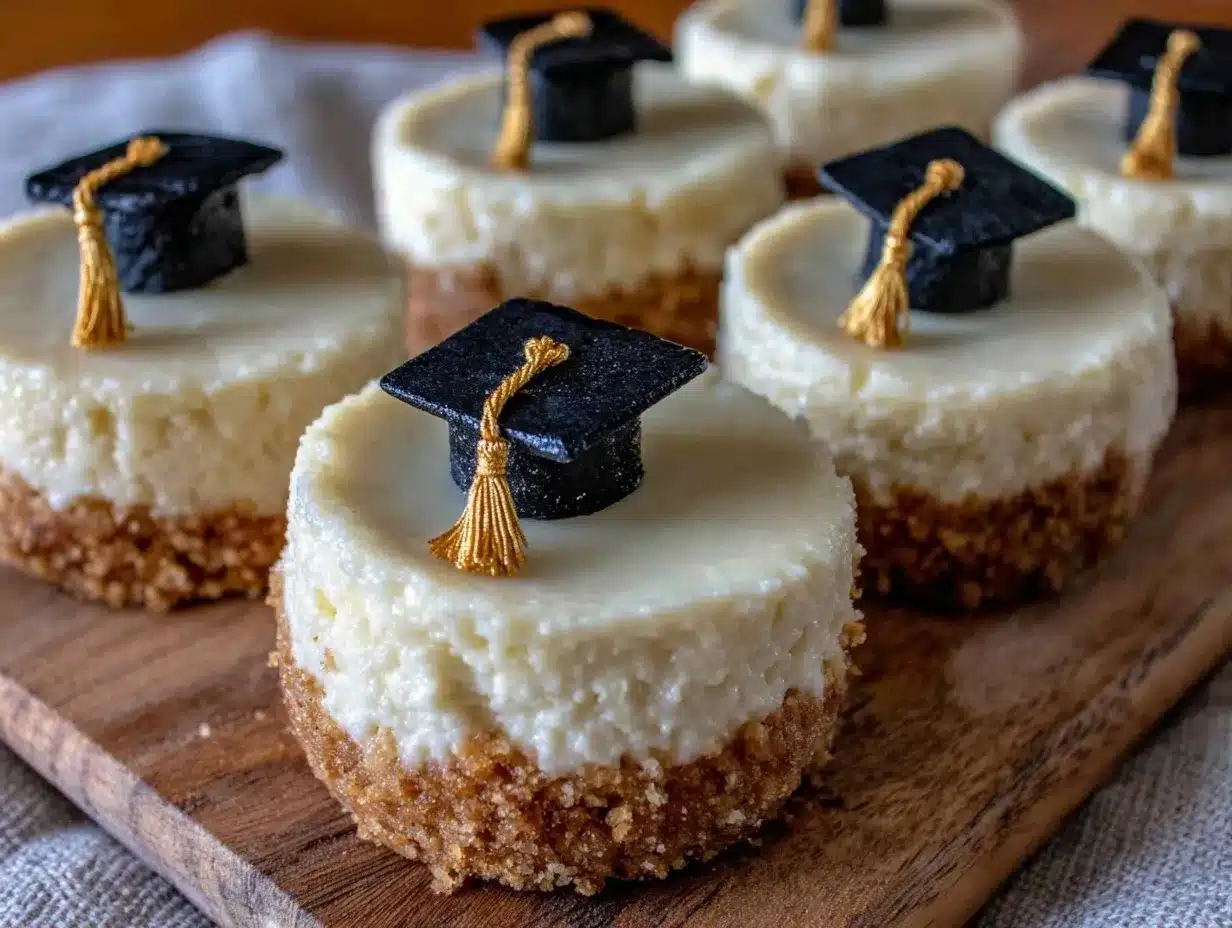
I remember standing in my kitchen, surrounded by empty cupcake liners and a few ingredients, wondering if those mini cheesecakes would hold up. The smell of cream cheese and vanilla wafted through the air while the oven did its thing, and I found myself smiling despite the chaos. Those little graduation cap toppers—crafted from simple black cardstock and toothpicks—added a playful touch that made the whole thing feel personal and festive.
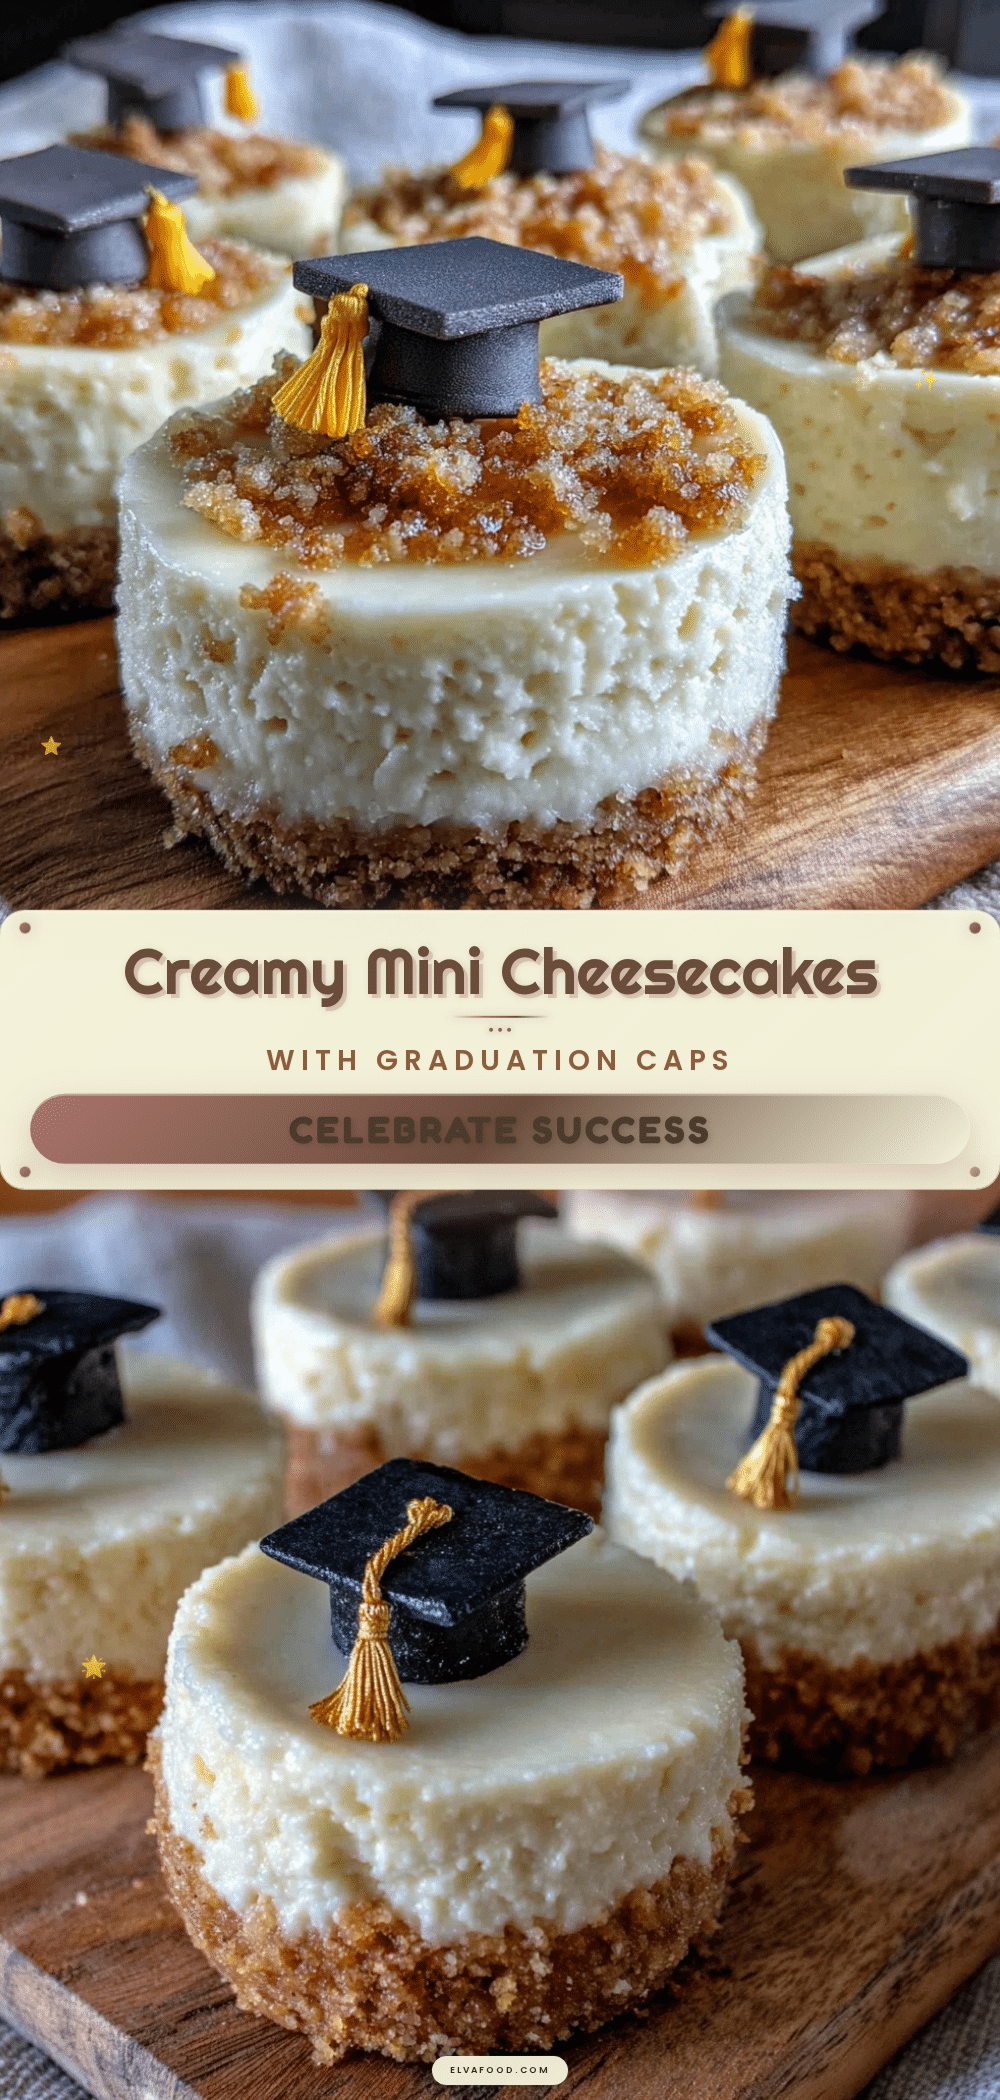
Since then, I’ve made these perfect mini cheesecakes with graduation cap toppers for several family celebrations. They’re not just delicious, but they remind me that sometimes, the easiest ideas can turn into the most memorable moments. So if you’re looking for a sweet, simple way to celebrate a grad or any special occasion, this recipe might just become your go-to treat.
Why You’ll Love This Recipe
After countless trials and tweaking, I can say this mini cheesecake recipe is a winner for several reasons. It’s not just about the dessert itself, but how effortlessly it fits into the party vibe.
- Quick & Easy: The whole batch comes together in about 45 minutes, perfect for those last-minute celebrations or when you’re juggling multiple dishes.
- Simple Ingredients: No need for fancy or hard-to-find items. Most of these are pantry staples, so you can whip them up anytime.
- Perfect for Graduations & Parties: The mini size makes them ideal for gatherings—easy to serve and share without the mess.
- Crowd-Pleaser: Kids and adults alike can’t get enough of these creamy, smooth cheesecakes. Plus, the whimsical graduation caps always spark conversations.
- Unbelievably Delicious: The texture is silky smooth, with a slightly tangy sweetness that feels just right—not too heavy or overly sweet.
What sets this recipe apart is the little graduation cap toppers, which are surprisingly simple yet instantly add a festive, personalized touch. Honestly, these caps made from black cardstock and a tiny tassel string turned plain mini cheesecakes into party stars. Plus, the crust-to-filling ratio is spot-on—no soggy bottoms here.
This recipe nails the balance between being a sweet treat and a charming party favor. It’s not just dessert, it’s a conversation starter, a memory maker, and a way to celebrate milestones with a little extra flair.
What Ingredients You Will Need
This recipe uses simple, wholesome ingredients to deliver bold flavor and satisfying texture without the fuss. Most items are pantry staples or easy to find, making this a stress-free bake.
- For the Crust:
- Graham cracker crumbs (1 cup / 100g) – crushed finely for a crisp base
- Unsalted butter, melted (4 tablespoons / 60g) – adds richness and binds the crust
- Granulated sugar (2 tablespoons / 25g) – balances the buttery flavor
- For the Cheesecake Filling:
- Cream cheese, softened (16 oz / 450g) – I recommend Philadelphia brand for smoothness
- Granulated sugar (3/4 cup / 150g) – sweetens without overpowering
- Large eggs (2, room temperature) – helps set the filling
- Sour cream (1/2 cup / 120ml) – adds tang and creaminess
- Vanilla extract (1 teaspoon) – boosts flavor
- All-purpose flour (1 tablespoon / 8g) – stabilizes the filling
- For the Graduation Cap Toppers:
- Black cardstock or thick paper – cut into 1.5-inch squares
- Toothpicks or small skewers – to attach the caps
- Thin black string or embroidery floss – for tassels (optional)
Seasonal substitutions: If you want to switch it up, try swapping the graham cracker crumbs with crushed ginger snaps or digestive biscuits for a different flavor twist. For a dairy-free option, use vegan cream cheese and coconut yogurt instead of sour cream. Just keep in mind that the texture may vary slightly.
Equipment Needed
- 12-cup muffin tin or mini cheesecake pan – essential for shaping the individual cheesecakes
- Paper cupcake liners – prevent sticking and make serving a breeze
- Electric mixer or stand mixer – for smooth, lump-free batter
- Mixing bowls – at least two, one for crust and one for filling
- Measuring cups and spoons – for accuracy
- Spatula – for scraping down bowl sides
- Cooling rack – to cool cheesecakes evenly and prevent sogginess
If you don’t have a stand mixer, a handheld electric mixer works just fine. When it comes to the muffin tin, non-stick or silicone versions are easier for removal, but paper liners help even more. For the graduation caps, just basic scissors and a ruler will do the job—you don’t need fancy crafting tools.
Preparation Method
- Preheat the oven to 325°F (160°C). Line a 12-cup muffin tin with paper cupcake liners for easy cleanup and perfect mini cheesecake shapes.
- Make the crust: In a medium bowl, combine 1 cup (100g) graham cracker crumbs, 4 tablespoons (60g) melted unsalted butter, and 2 tablespoons (25g) granulated sugar. Stir until the mixture looks like wet sand.
- Press the crust mixture firmly into the bottom of each cupcake liner, about 1 tablespoon per cup. Use the back of a spoon or your fingers to compact the crumbs well. This helps avoid crumbly bottoms.
- Bake the crusts for 8 minutes, then remove from the oven. Let them cool slightly while you prepare the filling.
- Prepare the filling: In a large bowl, beat 16 oz (450g) softened cream cheese with 3/4 cup (150g) sugar until smooth and creamy—no lumps! This usually takes about 3-4 minutes at medium speed.
- Add eggs one at a time, beating well after each addition. This helps the filling emulsify and stay smooth.
- Mix in 1/2 cup (120ml) sour cream, 1 teaspoon vanilla extract, and 1 tablespoon (8g) all-purpose flour until just combined. Avoid overmixing to prevent cracks during baking.
- Spoon the filling evenly over the crusts, filling each cup almost to the top—about 3 tablespoons per cupcake.
- Bake at 325°F (160°C) for 18-20 minutes, or until the edges are set but the center still jiggles slightly when you shake the pan. This ensures a creamy texture.
- Turn off the oven, leave the door slightly open, and let the cheesecakes cool inside for 30 minutes. This slow cooling reduces the risk of cracks.
- Remove from oven and transfer the pan to a cooling rack. Once completely cool, refrigerate for at least 3 hours or overnight—this step is key for the perfect texture.
- Prepare the graduation cap toppers: Cut black cardstock into 1.5-inch squares. Tie tiny tassels from black string and glue or tape them to the center of each square. Attach each cap to a toothpick.
- Just before serving, gently insert a topper into each mini cheesecake. Serve chilled for best flavor and texture.
Pro tip: If cracks appear, don’t fret—just top with fresh berries or a drizzle of chocolate sauce to hide imperfections.
Cooking Tips & Techniques
One of the trickiest parts of cheesecake baking is avoiding cracks and ensuring a silky texture. Here’s what I’ve learned the hard way:
- Room temperature ingredients matter: Make sure cream cheese and eggs aren’t cold. Cold ingredients create lumps and uneven baking.
- Don’t overmix: Once you add the flour and sour cream, mix just until combined. Overbeating adds air, which causes cracking and sinking.
- Water bath optional but helpful: For this mini version, I skip it for simplicity, but if you want ultra-smooth tops, try placing the muffin tin in a shallow pan of water in the oven.
- Slow cooling: Leaving cheesecakes in the slightly open oven after baking helps them set gently, reducing cracks.
- Paper liners are your friend: They help with clean removal and keep the crust intact.
When I first tried this recipe, I learned that baking too long makes the filling dry and crumbly—so timing is everything. Also, I like to prep the caps ahead, so the last step is easy and fun, especially when you’re juggling other party dishes like a hearty Irish lamb stew or a quick easy lo mein.
Variations & Adaptations
Feeling creative? These mini cheesecakes are a perfect base for twists:
- Fruit-flavored filling: Swirl in 1/4 cup of pureed strawberries or blueberries before baking for a burst of natural color and flavor.
- Chocolate lover’s version: Add 2 tablespoons of cocoa powder to the filling and use chocolate cookie crumbs for the crust.
- Gluten-free option: Substitute graham cracker crumbs with almond flour or gluten-free cookie crumbs.
- Vegan adaptation: Use vegan cream cheese and coconut yogurt, plus a flax egg instead of real eggs. Baking times may vary.
- Seasonal toppings: Try autumn-inspired pumpkin spice filling or top with caramel and toasted pecans for holiday parties.
I once made a batch with lemon zest and blueberry compote on top—it was a fresh, tangy hit that felt perfect for a spring graduation party. The versatility really makes this recipe adaptable to any occasion or palate.
Serving & Storage Suggestions
These mini cheesecakes taste best chilled, so plan to serve them straight from the fridge. They’re perfect finger foods, so no plates or forks required—ideal for mingling guests.
Pair them with a cup of coffee, a glass of sparkling wine, or even a refreshing iced tea for a well-rounded party snack. For a full celebration menu, they complement savory dishes like creamy cacio e pepe pasta wonderfully.
Store leftovers in an airtight container in the refrigerator for up to 4 days. For longer storage, freeze them without the toppers for up to 2 months. Thaw in the fridge overnight before serving. Flavors tend to deepen after a day, so making them a day ahead is actually a smart move.
Nutritional Information & Benefits
Each mini cheesecake (about 2.5 inches in diameter) contains roughly:
| Calories | Fat | Protein | Carbohydrates | Sugar |
|---|---|---|---|---|
| 180 | 12g | 4g | 15g | 12g |
Cream cheese provides a good source of calcium and vitamin A, while the protein and fat content offer satisfying richness to keep you full. Using simple ingredients means no unnecessary additives or preservatives. This recipe can fit into a balanced diet when enjoyed in moderation.
If you’re watching carbs, swapping the crust for almond flour reduces the carbohydrate load, making it friendlier for low-carb diets. Just be mindful of the sugar content in the filling.
Conclusion
Perfect mini cheesecakes with graduation cap toppers are more than just a dessert; they’re a sweet way to celebrate milestones with minimal fuss and maximum charm. Whether you’re juggling a busy schedule or just want to impress with something homemade, this recipe brings the creamy, dreamy cheesecake experience in a fun, bite-sized form.
I love how these little treats bring people together, sparking smiles and conversations. And honestly, the caps are such a simple touch but they make the whole thing special.
Feel free to tweak the flavors or decorations to suit your party vibe, and don’t hesitate to share your own unique takes—I’m always excited to hear how others make the recipe their own. Here’s to sweet celebrations and easy, delicious baking!
FAQs
Can I make these mini cheesecakes ahead of time?
Absolutely! They actually taste better after chilling overnight. Just add the graduation cap toppers just before serving.
What if I don’t have graham crackers for the crust?
You can use crushed digestive biscuits, ginger snaps, or even crushed vanilla wafers as a tasty alternative crust.
How do I prevent cracks on the cheesecake surface?
Mix ingredients gently, bake at a moderate temperature, and allow the cheesecakes to cool slowly in the oven with the door slightly open.
Can I use frozen mini cheesecakes?
Yes, you can freeze them without the toppers for up to 2 months. Thaw in the refrigerator overnight for best results.
Are these mini cheesecakes suitable for a large party?
Definitely! They’re perfect bite-sized treats that guests can enjoy without utensils, making them ideal for any size gathering.
Pin This Recipe!
Perfect Mini Cheesecakes Recipe with Easy Graduation Cap Toppers for Parties
These mini cheesecakes are creamy, smooth, and perfect for celebrations, topped with playful graduation cap toppers. Quick and easy to make, they are ideal for parties and gatherings.
- Prep Time: 15 minutes
- Cook Time: 28 minutes
- Total Time: 3 hours 43 minutes
- Yield: 12 servings 1x
- Category: Dessert
- Cuisine: American
Ingredients
- 1 cup (100g) graham cracker crumbs
- 4 tablespoons (60g) unsalted butter, melted
- 2 tablespoons (25g) granulated sugar (for crust)
- 16 oz (450g) cream cheese, softened
- 3/4 cup (150g) granulated sugar (for filling)
- 2 large eggs, room temperature
- 1/2 cup (120ml) sour cream
- 1 teaspoon vanilla extract
- 1 tablespoon (8g) all-purpose flour
- Black cardstock or thick paper, cut into 1.5-inch squares (for toppers)
- Toothpicks or small skewers (for toppers)
- Thin black string or embroidery floss (optional, for tassels)
Instructions
- Preheat the oven to 325°F (160°C). Line a 12-cup muffin tin with paper cupcake liners.
- In a medium bowl, combine graham cracker crumbs, melted butter, and granulated sugar. Stir until mixture resembles wet sand.
- Press about 1 tablespoon of the crust mixture firmly into the bottom of each cupcake liner.
- Bake crusts for 8 minutes, then remove from oven and let cool slightly.
- In a large bowl, beat softened cream cheese with sugar until smooth and creamy, about 3-4 minutes.
- Add eggs one at a time, beating well after each addition.
- Mix in sour cream, vanilla extract, and flour until just combined; avoid overmixing.
- Spoon filling evenly over crusts, filling each cup about 3 tablespoons full.
- Bake at 325°F (160°C) for 18-20 minutes, until edges are set but centers jiggle slightly.
- Turn off oven, leave door slightly open, and let cheesecakes cool inside for 30 minutes.
- Remove from oven and transfer pan to a cooling rack. Once cool, refrigerate for at least 3 hours or overnight.
- Prepare graduation cap toppers by cutting black cardstock into squares, tying tassels from string, and attaching to toothpicks.
- Just before serving, gently insert a topper into each mini cheesecake. Serve chilled.
Notes
Use room temperature cream cheese and eggs to avoid lumps. Do not overmix after adding flour and sour cream to prevent cracks. Slow cooling in the oven with door slightly open helps reduce cracking. Paper liners aid in easy removal and keep crust intact. If cracks appear, top with fresh berries or chocolate sauce. For a water bath, place muffin tin in a shallow pan of water in the oven for ultra-smooth tops (optional).
Nutrition
- Serving Size: One mini cheesecake
- Calories: 180
- Sugar: 12
- Fat: 12
- Carbohydrates: 15
- Protein: 4
Keywords: mini cheesecakes, graduation party dessert, easy cheesecake recipe, party treats, creamy cheesecake, bite-sized desserts