“You can’t rush good bread,” my friend joked over a text, sending a photo of her latest baking disaster. I chuckled, remembering my own early attempts at sourdough, where dough sticking to the counter was my signature move. But then, one evening, in the quiet hum of my kitchen, I stumbled upon this easy no-knead Dutch oven sourdough bread that changed everything. No frantic kneading, no precision folding, just a simple mix and a waiting game that somehow birthed a loaf with a crusty crust that crackled as I sliced into it. Honestly, it felt a bit like magic—especially after a long day when the last thing I wanted was fuss.
What stuck with me wasn’t just the ease but the way the bread smelled as it baked: warm, tangy, and inviting—like a cozy promise in the middle of chaos. This recipe became my go-to whenever I needed a little grounding or a quick way to impress without the usual stress of bread making. It’s funny how such a humble loaf can carry that kind of comfort, isn’t it? I guess that’s the charm of sourdough, and why this no-knead method feels like a quiet little victory every time it comes out of the oven.
Why You’ll Love This Recipe
Having tested this recipe multiple times (sometimes twice a week—no kidding), I’ve nailed down what makes this no-knead Dutch oven sourdough bread stand apart from the crowd. Here’s why it might just become your favorite, too:
- Quick & Easy: The hands-on time is under 15 minutes, making it perfect for those busy evenings when you want homemade bread without the hassle.
- Simple Ingredients: Flour, water, salt, and your trusty sourdough starter—no fancy add-ins or complicated steps needed.
- Perfect for Cozy Meals: Whether you’re making a hearty stew like Irish lamb stew with Guinness or a simple spread of cheeses, this bread holds up beautifully.
- Crowd-Pleaser: The crusty crust and airy crumb get raves from everyone—kids and adults alike ask for seconds (or thirds!).
- Unbelievably Delicious: That tangy sourdough flavor combined with the rustic crackle of the crust is pure comfort food bliss.
This isn’t just any sourdough loaf. The secret lies in baking it in a Dutch oven, which traps steam and creates that signature crust without any fancy equipment. Plus, the no-knead method means even if you’re “not really a baker,” you can pull this off with confidence. It’s like having a professional bakery right in your oven, minus the intimidating process.
What Ingredients You Will Need
This recipe keeps it straightforward with pantry staples and your live sourdough starter. Each ingredient plays a role in delivering that perfect balance of flavor and texture.
- Bread Flour: 500 grams (about 4 cups), preferably high-protein for that chewy crumb. I usually go with King Arthur for consistent results.
- Water: 375 grams (1 ½ cups), lukewarm to activate the starter without killing the natural yeasts.
- Sourdough Starter: 100 grams (about ½ cup), active and bubbly. If your starter is sluggish, feed it a few hours before baking.
- Salt: 10 grams (2 teaspoons), fine sea salt works best to evenly season the dough without weighing it down.
If you don’t have bread flour, all-purpose flour can work in a pinch, though the texture will be a bit softer. For gluten-free friends, swapping to a gluten-free blend requires some trial and error, but I’ve heard good things about Bob’s Red Mill products.
Equipment Needed
- Dutch Oven: A 5 to 6 quart heavy-duty Dutch oven with a lid is ideal. The cast iron variety is my personal favorite because it retains heat so well, but enameled versions also do a great job.
- Mixing Bowl: A large one to comfortably mix and let the dough rise.
- Dough Scraper or Spatula: Helpful for folding the dough and transferring it without too much sticking.
- Kitchen Scale: For accurate measurements, especially of flour and water. It really makes a difference!
- Kitchen Towel or Plastic Wrap: To cover the dough during the long rise.
If you don’t have a Dutch oven, a heavy oven-safe pot with a lid can substitute, but be cautious about heat retention to avoid uneven baking. Also, keep your Dutch oven well-seasoned if it’s cast iron—this little maintenance tip will keep your bread from sticking and your cookware lasting for years.
Preparation Method

- Mix the Dough: In a large bowl, combine 500g bread flour and 10g salt. Add 375g lukewarm water and 100g active sourdough starter. Stir with a wooden spoon or spatula until no dry flour remains. The dough will be shaggy and sticky, which is perfect. This should take about 5 minutes.
- First Rest (Autolyse): Cover the bowl with a towel or plastic wrap and let the dough rest for 30-45 minutes. This helps the flour hydrate and kickstarts gluten development without kneading.
- Stretch and Fold: After resting, perform a gentle stretch and fold: reach under the dough, stretch it up, and fold it over itself. Repeat this 3-4 times around the bowl. This builds strength in the dough. Cover again and let it rise for 3-4 hours at room temperature, folding every 45 minutes.
- Shape the Dough: After the bulk rise, gently turn the dough onto a floured surface. Shape it into a tight ball by folding the edges underneath. This step helps create surface tension. Place the dough seam side down on a well-floured proofing basket or bowl lined with a tea towel.
- Final Proof: Cover and let the dough proof for 1-2 hours at room temperature or overnight in the fridge for a deeper flavor. If refrigerated, bring the dough back to room temp before baking (about 1 hour).
- Preheat the Oven and Dutch Oven: Place your Dutch oven with the lid inside your oven and preheat to 450°F (230°C) for at least 30 minutes. Preheating the pot is key for that crusty crust.
- Bake: Carefully remove the hot Dutch oven. Transfer the dough seam side up into the pot (use parchment paper to help). Score the top with a sharp knife or razor blade to help it expand. Cover with the lid and bake for 30 minutes.
- Finish Baking: Remove the lid and bake for another 15-20 minutes until the crust is deep golden brown and crackly. The loaf should sound hollow when tapped on the bottom.
- Cool: Let the bread cool completely on a wire rack before slicing. Patience here is key to avoid a gummy crumb.
Pro tip: If your dough feels too sticky to handle during shaping, dust with a bit more flour, but don’t overdo it—you want that hydration for the open crumb. Also, scoring is a little art and a little science; I like a few quick diagonal slashes for a rustic look.
Cooking Tips & Techniques
Getting that crusty crust and tender crumb can be tricky, but a few tricks helped me dodge the usual pitfalls:
- Hydration Balance: This recipe has a hydration of about 75%, which keeps the crumb open but manageable. If your dough feels too wet to handle, try slightly less water next time.
- Don’t Skip the Dutch Oven: The sealed environment traps steam, which is essential for the crust to blister and crackle. I tried baking on a stone or baking sheet, but it just wasn’t the same.
- Patience with Proofing: The proofing stage develops flavor and texture. Too short, and the bread will be dense; too long, and it might collapse. I usually check the dough’s springiness by gently pressing a finger into it—it should bounce back slowly.
- Scoring Technique: Use a sharp blade, hold it at a 30-degree angle, and be confident with your cuts. Wobbly scoring can cause uneven oven spring.
- Multitasking: While the dough rests or proofs, I prep sides like a fresh cacio e pepe pasta or a simple salad. It keeps the kitchen moving without stress.
I learned the hard way that rushing the cooling step leads to a gummy texture inside. Letting the loaf completely cool is worth that extra wait. Also, cleaning your Dutch oven promptly after use prevents seasoning damage and keeps it performing beautifully.
Variations & Adaptations
While this recipe shines as is, I’ve tried a few tweaks that might suit your taste or pantry:
- Whole Wheat Mix: Swap 100g of the bread flour for whole wheat flour for a nuttier flavor and heartier texture. Just increase water by 10-15g for proper hydration.
- Herb Infusion: Add fresh rosemary or thyme during the stretch and fold stage for an aromatic twist that pairs wonderfully with savory meals.
- Seeded Crust: Before baking, brush the dough with water and sprinkle sesame or sunflower seeds on top for extra crunch and flavor.
- Overnight Cold Proof: Refrigerate the dough overnight after shaping for a slower fermentation. It deepens the sourdough tang and works great if you want fresh bread in the morning.
- Gluten-Free Adaptation: While more challenging, you can substitute a gluten-free flour blend and add xanthan gum to mimic elasticity. I haven’t perfected this yet, but it’s worth experimenting.
One time, I tried adding some roasted garlic during the mix, and it gave the bread a subtle, savory richness that paired perfectly with creamy horchata for a comforting snack combo.
Serving & Storage Suggestions
This bread is best served at room temperature with a little butter or olive oil, letting the crust do its crackly thing while the crumb stays soft and chewy. It’s perfect alongside soups or stews like the Dublin coddle for dipping up all that flavorful broth.
For storage, wrap the cooled loaf loosely in a clean kitchen towel and keep it at room temperature for up to two days. For longer storage, slice and freeze the bread in an airtight bag. Toast slices straight from the freezer for a fresh-baked taste.
Reheating in a hot oven (around 350°F/175°C) for 5-10 minutes refreshes that crust nicely—just don’t microwave it or you’ll lose all the crispness. Over time, the sourdough flavor deepens, so leftovers can taste even better the next day.
Nutritional Information & Benefits
One slice (about 60g) of this homemade sourdough bread provides roughly 150 calories, 30g of carbohydrates, 5g of protein, and 1g of fat. Thanks to the fermentation process, sourdough is often easier to digest and has a lower glycemic index than standard bread.
The long fermentation breaks down gluten and phytic acid, making minerals more bioavailable. Plus, the natural wild yeast and bacteria are a small boost for gut health, compared to commercial yeast breads. Of course, it still contains gluten, so it’s not suitable for celiac diets.
Pairing this bread with nutrient-rich ingredients like fresh vegetables or hearty proteins creates balanced meals that satisfy both taste buds and wellness goals.
Conclusion
This easy no-knead Dutch oven sourdough bread has earned a permanent spot in my kitchen routine. It’s the kind of recipe that feels approachable but delivers bakery-worthy results—crust that shatters and a flavorful crumb that makes you pause and savor. Whether you’re new to sourdough or just want a fuss-free loaf, this method is a game-changer.
Don’t hesitate to tweak it to your liking—add seeds, herbs, or try different flours. I love how flexible it is. And if you ever want a change of pace, pairing this bread with a rich meal like miso-glazed salmon turns a simple loaf into something special.
Give it a try and let me know how your crusty crust turns out. Bread baking is a journey, and this recipe is a friendly companion to get you there with minimal fuss and maximum deliciousness.
FAQs
Can I use all-purpose flour instead of bread flour?
Yes, you can substitute all-purpose flour, but expect a slightly softer crumb and less chew. Bread flour’s higher protein content helps develop gluten for that classic sourdough texture.
How do I know if my sourdough starter is active enough?
Look for bubbles, a pleasant tangy smell, and that it doubles in size within 4-6 hours after feeding. If it’s sluggish, give it a few more feedings before baking.
What if I don’t have a Dutch oven?
Use any heavy, oven-safe pot with a lid to trap steam. A covered roasting pan or a deep ceramic casserole dish can work, but a Dutch oven’s heat retention is ideal for crust development.
How long can I store leftover bread?
Keep it wrapped in a towel at room temperature for up to 2 days. For longer storage, slice and freeze. Toast slices directly from the freezer for best texture.
Is the no-knead method suitable for beginners?
Absolutely! The no-knead approach is forgiving and requires minimal hands-on time, making it perfect for first-timers or busy cooks who want fresh sourdough without stress.
Pin This Recipe!
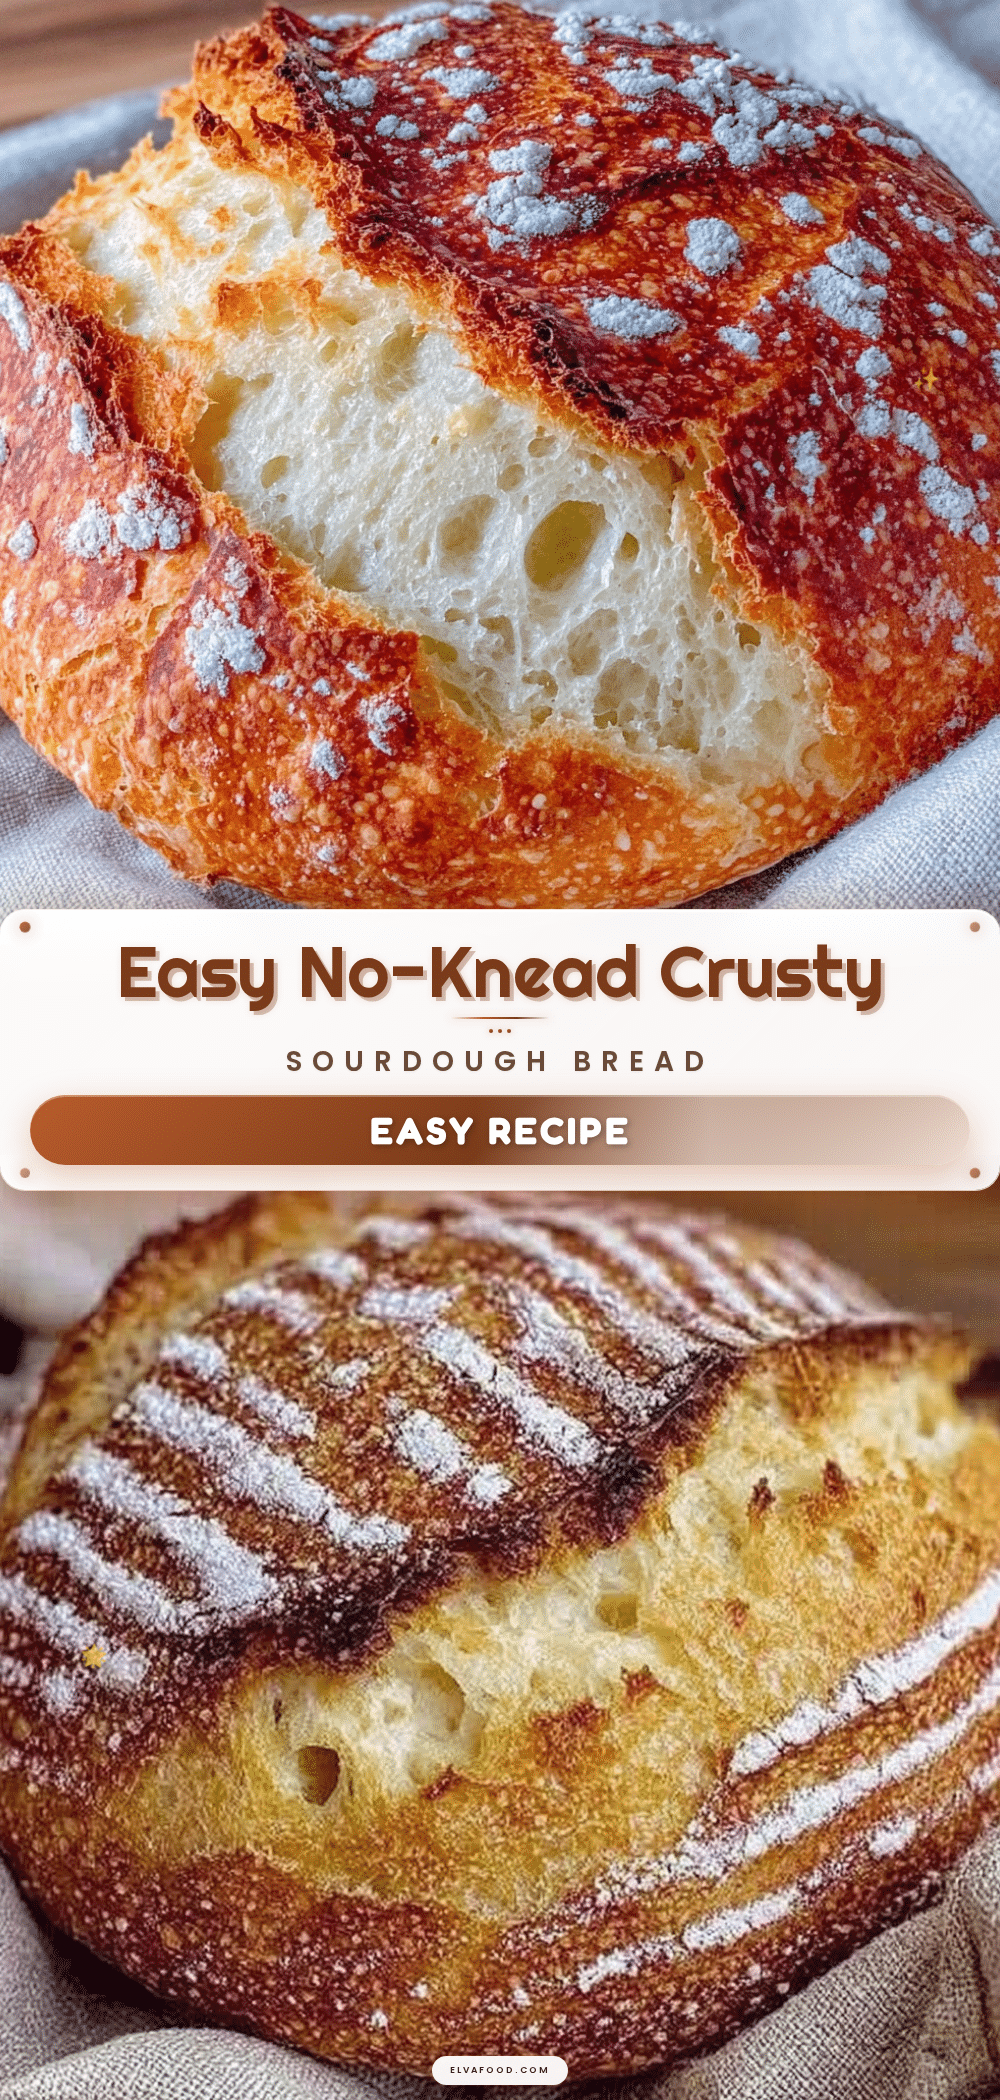
Easy No-Knead Dutch Oven Sourdough Bread Recipe for Perfect Crusty Crust

A simple no-knead sourdough bread baked in a Dutch oven that yields a crusty crust and airy crumb with minimal hands-on time.
- Prep Time: 15 minutes
- Cook Time: 45 minutes
- Total Time: 4 hours 45 minutes to overnight (including rising and proofing times)
- Yield: 1 loaf (about 8-10 servings) 1x
- Category: Bread
- Cuisine: American
Ingredients
- 500 grams (about 4 cups) bread flour, preferably high-protein
- 375 grams (1 ½ cups) lukewarm water
- 100 grams (about ½ cup) active sourdough starter
- 10 grams (2 teaspoons) fine sea salt
Instructions
- In a large bowl, combine 500g bread flour and 10g salt. Add 375g lukewarm water and 100g active sourdough starter. Stir with a wooden spoon or spatula until no dry flour remains. The dough will be shaggy and sticky. This should take about 5 minutes.
- Cover the bowl with a towel or plastic wrap and let the dough rest for 30-45 minutes to hydrate the flour.
- Perform a gentle stretch and fold: reach under the dough, stretch it up, and fold it over itself. Repeat 3-4 times around the bowl. Cover and let it rise for 3-4 hours at room temperature, folding every 45 minutes.
- Turn the dough onto a floured surface and shape it into a tight ball by folding the edges underneath. Place seam side down on a floured proofing basket or bowl lined with a tea towel.
- Cover and let the dough proof for 1-2 hours at room temperature or overnight in the fridge. If refrigerated, bring to room temperature before baking (about 1 hour).
- Preheat the oven and Dutch oven to 450°F (230°C) for at least 30 minutes.
- Carefully remove the hot Dutch oven. Transfer the dough seam side up into the pot using parchment paper. Score the top with a sharp knife or razor blade. Cover with the lid and bake for 30 minutes.
- Remove the lid and bake for another 15-20 minutes until the crust is deep golden brown and crackly. The loaf should sound hollow when tapped on the bottom.
- Let the bread cool completely on a wire rack before slicing.
Notes
Use a Dutch oven to trap steam for a crusty crust. If dough is too sticky during shaping, dust lightly with flour but maintain hydration. Score the dough at a 30-degree angle with a sharp blade for best oven spring. Let bread cool completely before slicing to avoid gummy crumb. Store wrapped in a towel at room temperature for up to 2 days or freeze sliced bread for longer storage.
Nutrition
- Serving Size: 1 slice (about 60 gr
- Calories: 150
- Fat: 1
- Carbohydrates: 30
- Protein: 5
Keywords: no-knead sourdough bread, Dutch oven bread, crusty sourdough, easy sourdough recipe, homemade bread, no-knead bread