There’s just something about the first whiff of crushed Oreo cookies mixing with cool mint that makes your senses perk right up. The kitchen fills with that unmistakable chocolatey aroma, and the air almost tingles with anticipation. Picture this: you’re pressing the last crumbly bit of Oreo into a pie dish, and the creamy, pastel-green filling is swirling in your mixer. It’s the kind of moment where you just have to pause—spatula in hand—and grin, because you know you’re crafting something downright magical.
The first time I tasted a Grasshopper Pie, I was maybe knee-high to a grasshopper myself, sneaking a slice at a summer church potluck. One bite of that fluffy, minty filling sandwiched between a decadent Oreo crust and I was instantly hooked. I remember thinking, “Why don’t we have this at every family gathering?” Honestly, I wish I had learned to make this years ago, because it’s become a staple for every occasion in my own house now.
My family can never resist the combination—the kids see the dreamy green layers and their eyes go wide, while the grown-ups sneak forkfuls straight from the fridge (you know who you are). It’s the sort of dessert that disappears before you can blink, leaving behind nothing but a few minty crumbs and a chorus of “who made that pie?” This Creamy Grasshopper Pie with Oreo Crust isn’t just a treat; it’s pure, nostalgic comfort, easy enough for a lazy weekend but fancy enough to brighten up your Pinterest board or impress at any potluck.
I’ve tested and tweaked this recipe more times than I can count (in the name of research, of course). Every slice feels like a cool, minty hug—so if you’re looking for a pie that’s as fun to make as it is to eat, bookmark this one. You’ll be glad you did.
Why You’ll Love This Creamy Grasshopper Pie with Oreo Crust
Let’s face it—there are plenty of mint desserts out there, but this Creamy Grasshopper Pie with Oreo Crust is something truly special. I’ve made more versions than I can count, and every time I serve it, people ask for the recipe before they’ve even finished their slice. Here’s why you’ll fall head over heels for this dreamy pie (and why it’s a family favorite in my house):
- Quick & Easy: This pie comes together in under 30 minutes (plus chilling time), making it perfect for last-minute gatherings or when you’re craving something sweet without the work.
- Simple Ingredients: No wild goose chases at the grocery store—chances are, you already have most of what you need in your pantry and fridge.
- Perfect for Any Occasion: Whether it’s a summer BBQ, a winter holiday, or just a random Tuesday, this pie fits right in. It’s a hit at potlucks, birthday parties, and family dinners.
- Crowd-Pleaser: Kids love the fun color and adults adore the nostalgic, cool mint flavor. I’ve yet to see leftovers when I bring this to a gathering.
- Unbelievably Delicious: The texture is what dreams are made of—creamy, fluffy filling with that perfect crunchy chocolate crust. Each bite is a little celebration.
What really sets this Grasshopper Pie apart is the technique. I blend the filling just enough to get that airy, mousse-like texture—no gelatin, no fake flavors, just real whipped cream, good-quality mint liqueur, and a hint of vanilla. The mint isn’t overpowering; it’s subtle, balanced, and dances on your tongue. And the Oreo crust? It’s thick, buttery, and holds up beautifully—even after a night in the fridge.
This isn’t just another mint pie recipe. It’s the one that makes you close your eyes and go “oh wow” with the first bite. It’s comfort food, pure and simple—faster, lighter, and honestly, a whole lot more fun than most desserts out there. You can toss it together without breaking a sweat, and it always looks Pinterest-worthy by the time it hits the table.
If you’re looking for a dessert that delivers happiness in every slice, this Creamy Grasshopper Pie with Oreo Crust is the answer. It’s tested, trusted, and guaranteed to make your next gathering just a bit sweeter.
What Ingredients You Will Need
This Creamy Grasshopper Pie with Oreo Crust is all about simple, feel-good ingredients that come together for a showstopping mint dessert. Most are pantry staples, and you can easily swap a few for what you have on hand.
For the Oreo Crust
- 24 Oreo cookies (with filling)
- 1/4 cup (60g) unsalted butter, melted (adds richness and helps the crust hold together)
For the Creamy Mint Filling
- 1 cup (240ml) heavy whipping cream, cold (for fluffy, stable peaks)
- 8 oz (225g) cream cheese, softened (full-fat for best texture, or use Neufchâtel for a lighter version)
- 1 cup (120g) powdered sugar (superfine texture melts right in)
- 1/4 cup (60ml) crème de menthe liqueur (gives that classic minty flavor and pretty green color)
- 2 tbsp (30ml) crème de cacao liqueur (adds creamy chocolate undertones—replace with extra crème de menthe if you want more mint)
- 1 tsp vanilla extract (rounds out the flavors—go for pure extract if you can)
- Green food coloring (optional, a few drops for that signature pastel look)
For the Whipped Cream Topping (Optional, but highly recommended!)
- 1 cup (240ml) heavy whipping cream, cold
- 2 tbsp (15g) powdered sugar
- 1/2 tsp vanilla extract
- Mini chocolate chips, Andes mints, or extra Oreo crumbs for garnish
Ingredient Notes & Substitutions
- No crème de menthe? Use peppermint extract (1/2 tsp) and a little green food coloring instead. Add a splash of milk for volume.
- Dairy-free? Swap in coconut cream for the whipped cream and use a vegan cream cheese (like Violife or Kite Hill).
- Gluten-free? Use gluten-free chocolate sandwich cookies for the crust—brands like Glutino work well.
- Lighter option: Try Neufchâtel cheese or reduced-fat cream cheese for a slightly lighter texture.
Honestly, I’m not picky about brands, but I do like to use Philadelphia cream cheese and Nabisco Oreos for the most consistent results. The liqueurs make the flavor so much better, but if you need to skip the alcohol, the extract swap (with a little milk) works in a pinch. And don’t worry if you’re out of green food coloring—the pie will still taste amazing (just a tad less Instagram-worthy).
Equipment Needed
You don’t need a fancy kitchen to make this Creamy Grasshopper Pie with Oreo Crust. Here’s what you’ll want to have on hand:
- 9-inch pie dish (glass or ceramic both work; a springform pan also does the trick for easy slicing)
- Food processor or blender (for crushing Oreos—if you don’t have one, a zip-top bag and rolling pin get the job done just fine!)
- Mixing bowls (medium and large)
- Electric mixer or stand mixer (makes whipping cream and blending the filling much easier, but a whisk and elbow grease work in a pinch)
- Measuring cups and spoons
- Rubber spatula (for scraping every last bit of filling)
- Offset spatula or butter knife (for smoothing the filling in the pie dish)
I’ve made this pie in everything from a thrift-store pie plate to a disposable foil pan (great for potlucks). If you’re using a glass dish, you can see the layers—very pretty for presentation. Just be gentle with your crust so it doesn’t crumble when slicing. And for crushing Oreos, honestly, the zip-top bag is a childhood classic. Clean-up is a breeze!
One tip: If you use a springform pan, line the bottom with parchment for extra-easy serving. And if you’re on a budget, basic hand mixers and plastic mixing bowls work just as well as the fancy stuff. Just rinse your beaters between the cream and the filling for best results.
Preparation Method
-
Crush the Oreos: Add 24 Oreo cookies (filling included) to a food processor or blender. Pulse until you have fine, uniform crumbs—like damp sand. (If using a zip-top bag, bash with a rolling pin until finely crushed.)
Tip: Don’t leave big chunks, or your crust might not hold together well. -
Make the Crust: Pour Oreo crumbs into a medium mixing bowl. Add 1/4 cup (60g) melted unsalted butter and stir until all crumbs are evenly moistened. Press the mixture firmly into the bottom and sides of a 9-inch pie dish.
Use the bottom of a flat measuring cup for a tidy, even crust. - Chill the Crust: Place the crust in the freezer for at least 20 minutes while you prepare the filling. (This helps it firm up so it doesn’t crumble when you add the filling.)
-
Whip the Cream: In a large mixing bowl, whip 1 cup (240ml) cold heavy cream to stiff peaks (about 2-3 minutes with an electric mixer). Set aside.
Don’t over-whip—stop when the cream holds its shape but isn’t grainy. -
Make the Minty Cream Cheese Base: In another medium bowl, beat 8 oz (225g) softened cream cheese until smooth and creamy. Gradually add 1 cup (120g) powdered sugar, continuing to beat until fluffy and no lumps remain.
If your cream cheese is too cold, you might get lumps. Let it sit at room temp for 15 minutes if needed! -
Add Liqueurs & Color: Mix in 1/4 cup (60ml) crème de menthe, 2 tbsp (30ml) crème de cacao, and 1 tsp vanilla extract. For a classic look, add a few drops of green food coloring until you reach a pale minty hue.
You want the filling to taste minty but not toothpaste-like. Taste and adjust, a drop at a time! -
Fold in Whipped Cream: Gently fold the whipped cream into the minty cream cheese base. Use a spatula to blend until just combined—don’t overmix, or you’ll lose that fluffy texture.
The filling should be light, airy, and pale green, with no streaks. -
Fill the Crust: Spoon the filling into your chilled crust. Smooth the top with an offset spatula or the back of a spoon.
If you want a picture-perfect swirl, run a spoon in gentle circles on the surface. -
Chill to Set: Cover the pie loosely with plastic wrap or foil. Refrigerate for at least 4 hours (overnight is even better) until completely set and sliceable.
Don’t rush this step! The filling needs time to firm up for clean slices. -
Make the Topping (Optional): Whip 1 cup (240ml) heavy cream with 2 tbsp (15g) powdered sugar and 1/2 tsp vanilla to stiff peaks. Pipe or dollop over the chilled pie. Garnish with mini chocolate chips, chopped Andes mints, or more Oreo crumbs.
I love using a star tip for a bakery-style finish, but a spoon works just as well. - Slice & Serve: For the cleanest slices, run a sharp knife under hot water and wipe clean between cuts. Serve chilled and enjoy the creamy, minty magic!
If the crust crumbles a little, don’t sweat it—it happens to the best of us! And if your filling feels too soft, chill it longer. The pie sets up beautifully with just a little patience (and the leftovers—if there are any—taste even better the next day).
Cooking Tips & Techniques
- Don’t skip chilling the crust. The butter needs time to solidify, which keeps the crust sturdy when you add the soft filling. I’ve tried skipping this step (when I was impatient, let’s be honest), and the crust always fell apart.
- Use cold cream for best whipping. If your kitchen’s warm, pop your mixing bowl and beaters in the fridge for 10 minutes before starting. The cream will whip up faster and hold more air.
- Go easy on the food coloring. Mint desserts should look inviting, not radioactive. Start with a drop or two and build up—trust me, a little goes a long way.
- Taste as you go. Crème de menthe brands vary in strength and sweetness. If you like a stronger mint flavor, add an extra teaspoon. If you prefer it mellow, cut back a bit. Always taste the filling before you add the whipped cream (I learned this the hard way—too much mint can be overwhelming).
- For extra stability, use stabilized whipped cream. Blend 2 tbsp instant vanilla pudding mix into your whipped cream if you need the pie to hold up for several days or in warm weather (it’s a trick I learned from a pastry chef friend).
- Be gentle folding in the cream. Overmixing can deflate the filling, making it dense instead of light and dreamy. Use a big spatula and gentle strokes—think of “scooping and turning” rather than stirring.
One of my early mistakes was using room-temp cream, and it never whipped up right. And don’t worry if your crust isn’t perfectly even—imperfections add charm. The most important thing? Chill time. Give it a good, long rest so everything sets up just right. Multitask by making the pie the night before and chilling overnight—it’s even better the next day.
Variations & Adaptations
The best part about this Creamy Grasshopper Pie with Oreo Crust is how adaptable it is. Here are a few twists to suit your taste, season, or dietary needs:
- Gluten-Free: Swap in gluten-free chocolate sandwich cookies for the crust. The filling is naturally gluten-free, so this is an easy fix (I’ve used Glutino cookies with great success).
- Alcohol-Free: Replace the liqueurs with 1/2 to 3/4 tsp peppermint extract and extra milk or cream. A few drops of green food coloring keep the classic look. Perfect for family-friendly or kiddo-approved versions.
- Chocolate Mint Lovers: Add 1/2 cup (90g) mini chocolate chips to the filling, or drizzle the finished pie with a quick chocolate ganache. A sprinkle of crushed Andes mints on top adds even more minty goodness.
- Seasonal Swaps: For a holiday twist, use red and green food coloring in separate batches and swirl together. In summer, top with fresh mint leaves and serve with a scoop of chocolate chip ice cream.
- Individual Servings: Spoon the filling into mini mason jars or ramekins for adorable, grab-and-go desserts (I’ve done this for picnics and it’s always a big hit).
- Dairy-Free/Vegan: Substitute coconut cream for both the filling and topping, and use a vegan cream cheese alternative. The flavor stays bright and creamy!
One of my favorite variations is to add a thin layer of hot fudge sauce under the filling for a “mint chocolate sundae” vibe. The possibilities are endless—mix and match based on what you love or what you have on hand. Play around and make it your own!
Serving & Storage Suggestions
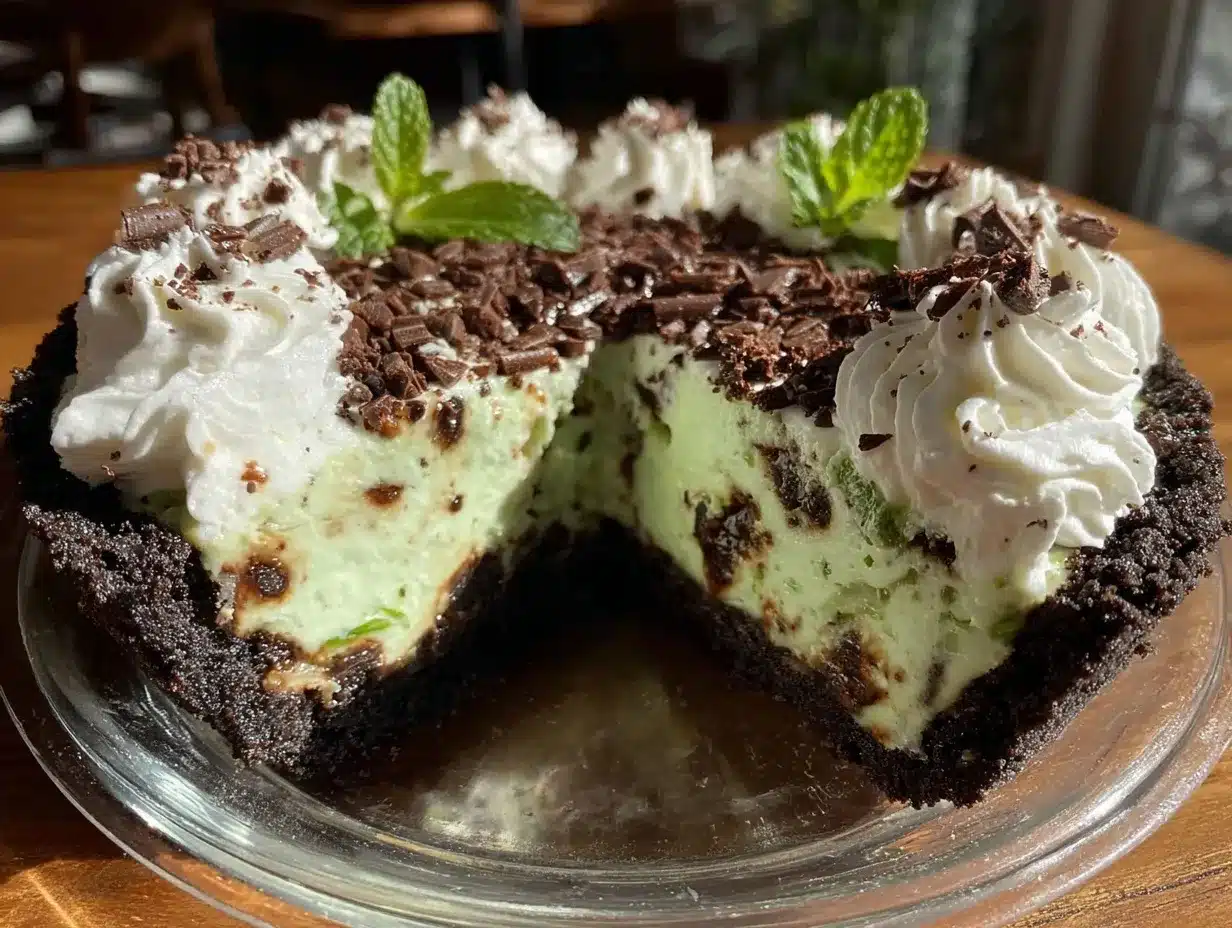
This Creamy Grasshopper Pie with Oreo Crust is best served cold, straight from the fridge. The filling is cool and refreshing, and the crust stays crisp for days. For a showstopping slice, top with whipped cream swirls, a sprinkle of mini chocolate chips, and a sprig of fresh mint.
- Serving Temperature: Serve chilled for the dreamiest texture. If it sits out for more than an hour (say, at a party), pop it back in the fridge to keep it firm.
- Presentation Ideas: Slice with a hot, clean knife for neat edges. Serve on a pretty cake stand or pie plate to show off those minty layers. A drizzle of chocolate sauce or a dusting of cocoa powder looks lovely for special occasions.
- Pairing Suggestions: This pie goes perfectly with a cup of hot coffee, a glass of cold milk, or—if you’re feeling fancy—a minty cocktail. It’s a classic companion for all things chocolatey or creamy.
- Storage: Store covered in the refrigerator for up to 4 days. The flavors deepen and mellow over time (some say the second day is even better).
- Freezing: You can freeze the pie (without whipped cream topping) for up to 2 months. Wrap tightly in plastic wrap and foil. Thaw overnight in the fridge before serving—add fresh whipped cream just before eating.
- Reheating: No need! This pie is meant to be served cold. If you accidentally freeze a slice too hard, let it sit at room temperature for 15 minutes before enjoying.
Flavors meld beautifully as the pie chills, so don’t be afraid to make it ahead of time. Honestly, I always snag a slice for myself before it hits the table, just to “test” it. Priorities, right?
Nutritional Information & Benefits
Here’s an estimated breakdown for one slice (based on 10 slices):
- Calories: 410
- Carbs: 41g
- Fat: 26g
- Protein: 4g
- Sugar: 28g
The star players here are calcium-rich cream cheese and heavy cream, which add a dose of comfort and creaminess. Mint liqueur provides a classic flavor with a touch of herbal brightness. If you’re opting for a gluten-free or dairy-free version, you can keep the pie allergy-friendly (just watch for Oreo alternatives and vegan swaps).
As with most desserts, this is a treat to savor and share. I like to think of it as soul food—something that feeds happiness just as much as hunger. Indulge in moderation, and enjoy every minty bite!
Conclusion
If you’re searching for a dessert that’s easy, crowd-pleasing, and just plain fun to make, this Creamy Grasshopper Pie with Oreo Crust needs a spot in your recipe box. It’s a pie that always gets rave reviews, whether you serve it at a holiday party or sneak a slice on a lazy Sunday afternoon.
Don’t be afraid to tweak it—add chocolate chips, swap out the liqueurs, or try a gluten-free crust. The beauty of this recipe is how easy it is to make your own. For me, it’s a slice of nostalgia and a guaranteed smile at the end of a meal.
If you try this recipe, I’d love to hear how it turned out! Leave a comment below, snap a pic for Pinterest, or share your creative twists. Thanks for baking along with me—and here’s to many more slices of creamy, minty happiness.
Frequently Asked Questions
Can I make Grasshopper Pie without alcohol?
Absolutely! Just use 1/2 to 3/4 teaspoon peppermint extract and a few drops of green food coloring. Add a splash of milk or cream to replace the missing liquid from the liqueurs.
How far in advance can I prepare this Creamy Grasshopper Pie?
You can make the pie up to two days in advance. Cover it tightly and store in the fridge. Add the whipped cream topping just before serving for best results.
Can I freeze the pie for later?
Yes! Wrap the pie well (without the whipped cream topping) and freeze for up to two months. Thaw overnight in the fridge before serving and add fresh toppings.
What’s the best way to crush Oreos if I don’t have a food processor?
Place the cookies in a zip-top bag, seal it, and use a rolling pin to crush them into fine crumbs. It’s a little more work, but it gets the job done with minimal cleanup.
How do I make this recipe gluten-free?
Simply use gluten-free chocolate sandwich cookies for the crust. The filling is naturally gluten-free, so this is the only swap needed.
Pin This Recipe!
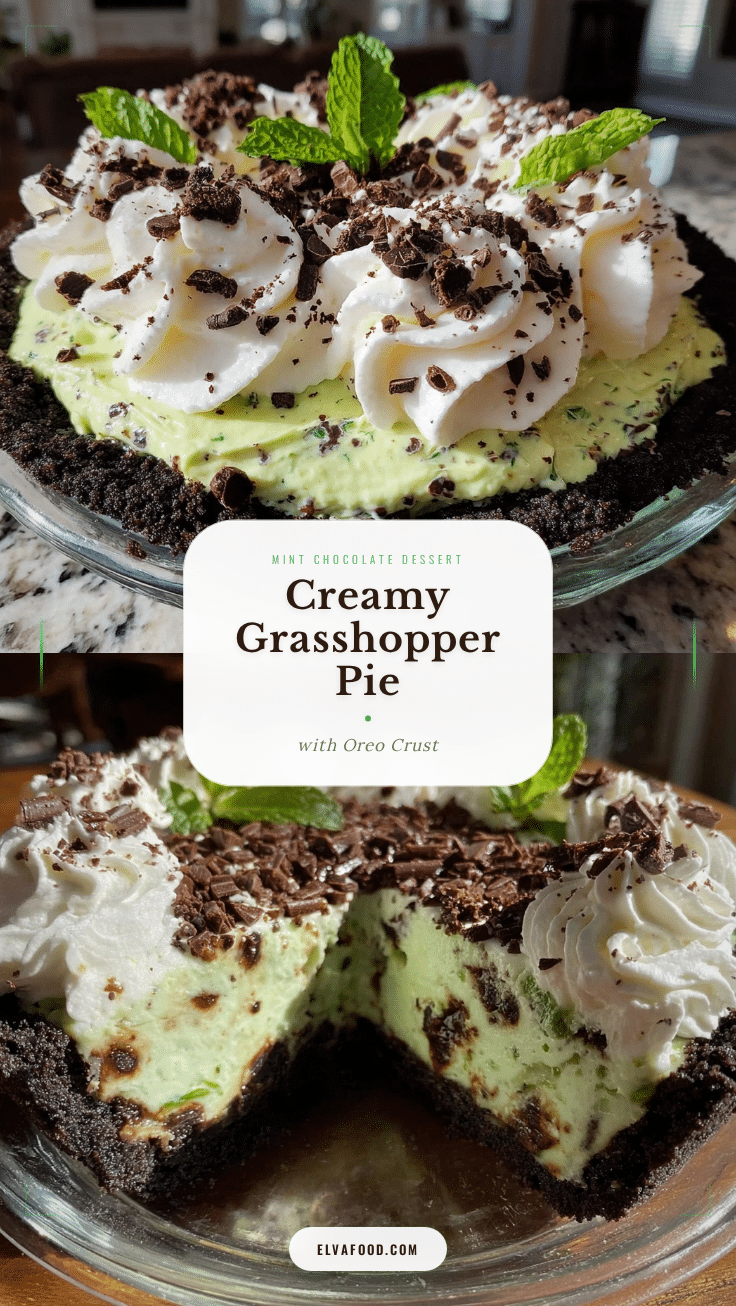
Creamy Grasshopper Pie with Oreo Crust

This easy, no-bake mint dessert features a fluffy, pastel-green cream filling spiked with crème de menthe and crème de cacao, nestled in a decadent Oreo cookie crust. It’s a nostalgic, crowd-pleasing treat perfect for potlucks, holidays, or any occasion.
- Prep Time: 20 minutes
- Cook Time: 0 minutes
- Total Time: 4 hours 20 minutes
- Yield: 10 servings 1x
- Category: Dessert
- Cuisine: American
Ingredients
- 24 Oreo cookies (with filling)
- 1/4 cup (60g) unsalted butter, melted
- 1 cup (240ml) heavy whipping cream, cold
- 8 oz (225g) cream cheese, softened
- 1 cup (120g) powdered sugar
- 1/4 cup (60ml) crème de menthe liqueur
- 2 tbsp (30ml) crème de cacao liqueur
- 1 tsp vanilla extract
- Green food coloring (optional, a few drops)
- 1 cup (240ml) heavy whipping cream, cold (for topping, optional)
- 2 tbsp (15g) powdered sugar (for topping, optional)
- 1/2 tsp vanilla extract (for topping, optional)
- Mini chocolate chips, Andes mints, or extra Oreo crumbs for garnish (optional)
Instructions
- Add 24 Oreo cookies (filling included) to a food processor or blender and pulse until finely crushed. Alternatively, place cookies in a zip-top bag and crush with a rolling pin.
- Pour Oreo crumbs into a medium mixing bowl. Add melted butter and stir until evenly moistened.
- Press the mixture firmly into the bottom and sides of a 9-inch pie dish. Use the bottom of a flat measuring cup for an even crust.
- Place the crust in the freezer for at least 20 minutes to firm up.
- In a large mixing bowl, whip 1 cup cold heavy cream to stiff peaks (about 2-3 minutes with an electric mixer). Set aside.
- In another medium bowl, beat softened cream cheese until smooth and creamy. Gradually add powdered sugar, beating until fluffy and lump-free.
- Mix in crème de menthe, crème de cacao, and vanilla extract. Add a few drops of green food coloring for a pale minty hue, if desired.
- Gently fold the whipped cream into the minty cream cheese base using a spatula until just combined.
- Spoon the filling into the chilled crust and smooth the top.
- Cover loosely with plastic wrap or foil and refrigerate for at least 4 hours (overnight is best) until set.
- For the topping (optional): Whip 1 cup heavy cream with 2 tbsp powdered sugar and 1/2 tsp vanilla to stiff peaks. Pipe or dollop over the chilled pie. Garnish with mini chocolate chips, chopped Andes mints, or Oreo crumbs.
- Slice with a hot, clean knife for neat edges. Serve chilled and enjoy!
Notes
Chill the crust before adding filling for best results. Use cold cream for whipping. Adjust mint flavor to taste. For gluten-free, use GF sandwich cookies. For alcohol-free, substitute peppermint extract and milk for liqueurs. Pie can be made ahead and is even better the next day. Freezes well without whipped topping.
Nutrition
- Serving Size: 1 slice (1/10 of pie
- Calories: 410
- Sugar: 28
- Sodium: 220
- Fat: 26
- Saturated Fat: 16
- Carbohydrates: 41
- Fiber: 2
- Protein: 4
Keywords: grasshopper pie, mint dessert, Oreo crust, no bake pie, creamy pie, potluck dessert, easy pie recipe, holiday dessert, summer dessert, chocolate mint pie