Let me tell you, the scent of cocoa mingled with a subtle hint of vanilla and a burst of green from matcha or food coloring wafting from my oven is enough to make anyone’s mouth water. The first time I baked these creamy green velvet whoopie pies, I was instantly hooked—the kind of moment where you pause, take a deep breath, and just smile because you know you’re onto something truly special. It was years ago, when I was knee-high to a grasshopper, helping my grandma in her cozy kitchen. She’d always say, “Sweet treats bring folks together,” and honestly, these whoopie pies are a perfect example.
My family couldn’t stop sneaking them off the cooling rack (and I can’t really blame them). There’s something about that soft, cake-like texture paired with the luscious frosting that feels like a warm hug on a chilly afternoon. You know what? These pies are dangerously easy to make and bring pure, nostalgic comfort with every bite. Perfect for potlucks, a sweet treat for your kids, or to brighten up your Pinterest cookie board, these creamy green velvet whoopie pies have become a staple for family gatherings and gifting — tested multiple times in the name of research, of course.
Why You’ll Love This Creamy Green Velvet Whoopie Pies Recipe
After countless trials and tweaks, I can confidently say this recipe stands apart. Here’s why you’ll fall for these green velvet whoopie pies:
- Quick & Easy: Comes together in under 45 minutes, perfect for busy weeknights or last-minute cravings.
- Simple Ingredients: No fancy grocery trips needed; most ingredients are pantry staples you probably already have.
- Perfect for Any Occasion: Whether it’s a holiday party, brunch, or just a cozy dessert, these pies fit right in.
- Crowd-Pleaser: Kids and adults alike rave about the unique twist on classic whoopie pies.
- Unbelievably Delicious: The creamy frosting perfectly balances the tender green velvet cake for a next-level flavor combo.
What sets this recipe apart? It’s the silky, luscious frosting that isn’t too sweet—just right to complement the moist, tender green velvet cakes. I use a pinch of matcha powder to give it that vibrant green color and a subtle earthy undertone, but you could also use natural food coloring if you’re not a fan of matcha’s unique flavor. This isn’t just another whoopie pie recipe; it’s a little bit of magic and a dash of nostalgia packed into every bite. Honestly, it’s the kind of dessert that makes you close your eyes after the first bite and smile.
What Ingredients You Will Need
This recipe uses simple, wholesome ingredients to deliver bold flavor and satisfying texture without the fuss. Most are pantry staples, and substitutions are easy if needed.
For the Green Velvet Cake Pies:
- All-purpose flour – 2 ½ cups (315 grams), sifted
- Cocoa powder – ¼ cup (20 grams), unsweetened (adds depth to the velvet flavor)
- Baking soda – 1 teaspoon
- Baking powder – 1 teaspoon
- Salt – ½ teaspoon
- Granulated sugar – 1 ¾ cups (350 grams)
- Unsalted butter – ½ cup (115 grams), softened (I prefer Kerrygold for richness)
- Large eggs – 2, room temperature
- Buttermilk – 1 cup (240 ml), room temperature (for tender crumb)
- Vanilla extract – 1 teaspoon
- Matcha powder or green food coloring – 1 ½ tablespoons matcha or 1 teaspoon green food coloring (adds vibrant color and subtle flavor)
For the Luscious Frosting:
- Cream cheese – 8 ounces (225 grams), softened (use full-fat for best texture)
- Unsalted butter – ½ cup (115 grams), softened
- Powdered sugar – 3 to 3 ½ cups (360-420 grams), sifted
- Vanilla extract – 1 teaspoon
- Heavy cream – 2 to 3 tablespoons (optional, for fluffier frosting)
Feel free to swap buttermilk with a mix of milk and a splash of lemon juice if you don’t have buttermilk on hand. For a dairy-free version, almond or coconut milk with dairy-free cream cheese works surprisingly well. For the green color, I recommend using ceremonial grade matcha powder for the best flavor, but if you’re after brighter green without the earthy taste, natural food coloring is your friend. This recipe is forgiving, so you can play with what you have!
Equipment Needed
- Mixing bowls – at least two, medium and large size
- Electric mixer or stand mixer – highly recommended for smooth batter and frosting
- Measuring cups and spoons – for precise ingredient amounts
- Sifter or fine mesh strainer – to sift dry ingredients and powdered sugar for a light texture
- Baking sheets – preferably two, lined with parchment paper or silicone mats
- Cooling rack – to cool the whoopie pies evenly
- Spatula and offset spatula – for mixing and spreading frosting
- Cookie scoop or tablespoon – to portion batter evenly
If you don’t have a stand mixer, a handheld electric mixer works just fine. For those on a budget, silicone baking mats are worth the investment—they prevent sticking and reduce waste. Personally, I love using an offset spatula to frost the pies perfectly, but a butter knife will do in a pinch. Keeping your cream cheese and butter at room temperature makes mixing a breeze and prevents lumps.
Preparation Method
- Preheat your oven to 350°F (177°C). Line two baking sheets with parchment paper or silicone mats. This step is key to prevent sticking and help with even baking.
- Mix dry ingredients: In a large bowl, sift together the all-purpose flour, cocoa powder, baking soda, baking powder, salt, and matcha powder. Set aside. Sifting ensures no lumps and a fluffy texture.
- Cream butter and sugar: In another bowl, beat the softened unsalted butter and granulated sugar with an electric mixer until light and fluffy, about 3-4 minutes. This step traps air in the batter, making the pies soft and tender.
- Add eggs and vanilla: Beat in the eggs one at a time, followed by the vanilla extract. Make sure each egg is fully incorporated before adding the next.
- Alternate adding dry ingredients and buttermilk: Gradually add the sifted dry ingredients and buttermilk to the butter mixture, alternating between them. Start and end with the dry ingredients. Mix until just combined—overmixing can make the cakes tough. The batter should be thick but scoopable.
- Portion the batter: Using a cookie scoop or tablespoon, drop rounded mounds about 2 inches (5 cm) apart on the prepared baking sheets. Each mound should be roughly 2 inches in diameter once baked.
- Bake: Place the sheets in the preheated oven and bake for 12-14 minutes, or until the tops spring back when lightly pressed. Keep an eye on them; ovens vary. The edges should be set but the center soft.
- Cool: Remove from the oven and let the cakes cool on the sheets for 5 minutes, then transfer to a cooling rack to cool completely. Warm cakes can melt the frosting, so patience here pays off.
- Prepare the frosting: In a large bowl, beat the softened cream cheese and butter together until smooth and creamy. Gradually add the powdered sugar, beating on low speed to avoid a sugar cloud, then increase speed until fluffy. Add vanilla extract and, if desired, heavy cream to reach your preferred consistency.
- Assemble whoopie pies: Pair cakes of similar size, spread or pipe a generous dollop of frosting on the flat side of one cake, then sandwich with its partner. Press gently to spread the frosting evenly but don’t squish out the edges.
- Chill (optional): For a firmer frosting, chill the assembled pies in the fridge for 30 minutes before serving. This step helps the flavors meld and makes them easier to handle.
Pro tip: If your batter feels too thick, add a splash more buttermilk. If it’s too runny, a little extra flour will help. Baking time may need slight adjustment depending on your oven’s quirks, so keep an eye on that golden green glow!
Cooking Tips & Techniques
Honestly, baking whoopie pies is pretty straightforward, but a few insider tips can save you from common pitfalls. First, always get your butter and cream cheese to room temperature. Trust me, lumps in frosting are no fun, and cold butter will just fight with your mixer.
Don’t skip sifting—especially with matcha powder and cocoa. It helps the dry ingredients blend evenly, giving you that tender crumb you want. When mixing wet and dry ingredients, be gentle. Overmixing develops gluten in the flour, which can lead to dense, rubbery cakes. Nobody wants that.
Using a cookie scoop for batter drops keeps your pies uniform in size for even baking and pretty presentation. I learned this the hard way after uneven batches baked unevenly (lesson learned!).
Timing matters: If you’re juggling a busy kitchen, bake one sheet at a time for consistent results. Also, don’t frost the cakes while they’re warm or the frosting will melt and get messy. Let them cool completely, or pop them in the fridge for a few minutes if you’re impatient like me.
Feel free to chill the assembled whoopie pies before serving. It firms up the frosting and helps the flavors develop deeper. And hey, if you want to get fancy, try piping the frosting with a pastry bag and star tip — it looks gorgeous and adds a professional touch.
Variations & Adaptations
You can make these creamy green velvet whoopie pies truly your own by trying a few easy twists. Here are some ideas I’ve played with over the years:
- Dairy-Free Version: Swap cream cheese for vegan cream cheese and use coconut or almond milk instead of buttermilk. The results are surprisingly close to the original.
- Flavor Boost: Add a teaspoon of almond extract to the frosting for a nutty twist, or fold mini white chocolate chips into the batter for extra sweetness and texture.
- Seasonal Spin: In spring, try swapping matcha powder with finely chopped fresh mint leaves for a fresh green color and flavor. In fall, add a pinch of cinnamon and nutmeg to the batter for a cozy vibe.
- Alternative Sweeteners: Use coconut sugar instead of granulated sugar for a deeper flavor and slight caramel notes.
- Gluten-Free: Substitute all-purpose flour with a 1:1 gluten-free baking flour blend. Just be sure to check your baking powder is gluten-free too.
Personally, I once tried folding in some crushed pistachios into the frosting for a nutty crunch. It was a hit at a family get-together and felt like a fancy upgrade without extra fuss. Feel free to experiment with your favorite flavors or dietary needs!
Serving & Storage Suggestions
These whoopie pies are best served at room temperature or slightly chilled. When you bite into one, you want that soft, creamy contrast that melts in your mouth. They look beautiful stacked on a cake stand or wrapped individually in parchment paper for gifting.
Pair these sweet treats with a hot cup of tea or a glass of cold milk for the ultimate cozy snack. If you’re serving at a party, place them on a platter with fresh strawberries or mint leaves for a pop of color.
Storage is straightforward: keep them in an airtight container in the refrigerator for up to 5 days. They also freeze well—wrap each whoopie pie individually in plastic wrap and place in a freezer-safe bag for up to 3 months. To thaw, leave them in the fridge overnight and bring to room temperature before serving.
Reheating isn’t necessary, but if you prefer warm, microwave for 10-15 seconds—just don’t overdo it or the frosting might get melty. Flavors actually deepen after a day or two in the fridge, so sometimes waiting is the hardest part!
Nutritional Information & Benefits
Each creamy green velvet whoopie pie (with frosting) roughly contains:
| Calories | ~320 kcal |
|---|---|
| Fat | 15g (7g saturated fat) |
| Carbohydrates | 40g (includes 25g sugars) |
| Protein | 4g |
| Fiber | 1g |
Key ingredients like cream cheese provide calcium and protein, while matcha powder adds antioxidants and a gentle caffeine boost without jitters. Using buttermilk adds a pleasant tang and contributes to a moist texture. This recipe is not gluten-free unless you substitute the flour, and it contains dairy and eggs, so keep that in mind for allergies.
From a wellness perspective, these whoopie pies are a treat to be enjoyed mindfully. The balance of ingredients means you get indulgent flavor without overwhelming sweetness. Plus, the hint of matcha introduces some healthful antioxidants that traditional whoopie pies don’t offer.
Conclusion
In short, these creamy green velvet whoopie pies with luscious frosting are a dessert you’ll want to keep coming back to. They’re simple enough for everyday baking but special enough to impress guests and delight your family. Customize the frosting, play with flavors, or keep it classic—the recipe adapts to your style.
I love this recipe because it feels like a warm hug wrapped in vibrant green, with every bite delivering comfort and joy. If you try it, please drop a comment and share how you made it your own—I’m always curious how folks put their twist on a good thing.
Ready to bake? Bookmark this and get your oven preheated—you’re about to create a batch of delicious green velvet whoopie pies that might just become your new favorite treat!
FAQs about Creamy Green Velvet Whoopie Pies
Can I make the green velvet whoopie pies ahead of time?
Absolutely! You can bake the cakes a day or two in advance and store them in an airtight container. Assemble with frosting just before serving for the freshest taste.
What can I use if I don’t have buttermilk?
Simply mix 1 cup (240 ml) of milk with 1 tablespoon of lemon juice or white vinegar. Let it sit for 5 minutes, then use as a buttermilk substitute.
How do I store leftover whoopie pies?
Keep them in an airtight container in the refrigerator for up to 5 days. They can also be frozen individually and thawed overnight in the fridge.
Is it possible to make these gluten-free?
Yes, swap the all-purpose flour with a gluten-free baking blend and check that your baking powder is gluten-free too. The texture might be slightly different but still delicious.
Can I use food coloring instead of matcha powder?
Definitely! Food coloring will give you a brighter green without the earthy taste of matcha. Adjust the amount to achieve your desired color.
Pin This Recipe!

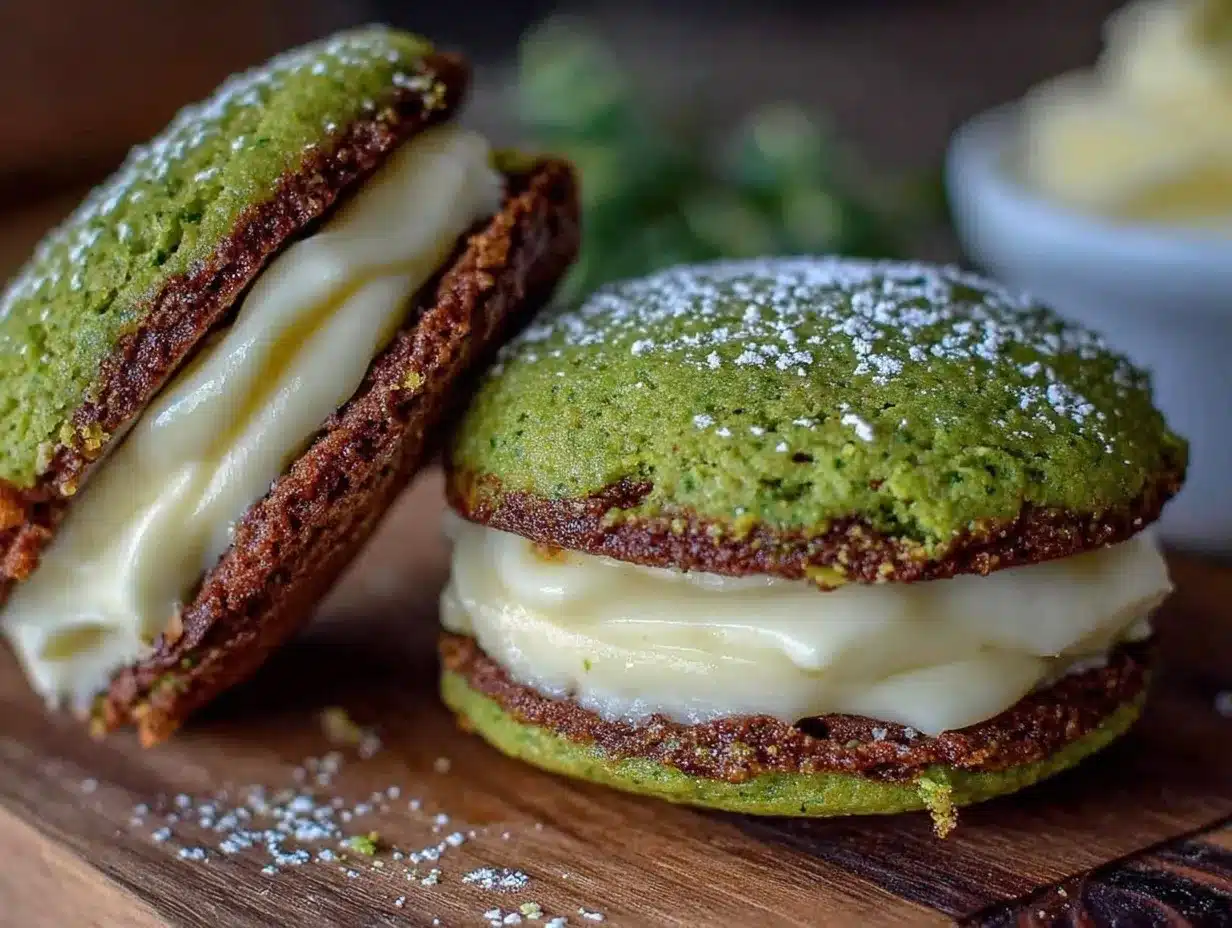
Creamy Green Velvet Whoopie Pies

Soft, tender green velvet whoopie pies paired with luscious, creamy frosting featuring matcha or green food coloring for a vibrant twist. Perfect for family gatherings, potlucks, or cozy desserts.
- Prep Time: 15 minutes
- Cook Time: 14 minutes
- Total Time: 45 minutes
- Yield: 24 whoopie pies 1x
- Category: Dessert
- Cuisine: American
Ingredients
- 2 ½ cups (315 grams) all-purpose flour, sifted
- ¼ cup (20 grams) unsweetened cocoa powder
- 1 teaspoon baking soda
- 1 teaspoon baking powder
- ½ teaspoon salt
- 1 ¾ cups (350 grams) granulated sugar
- ½ cup (115 grams) unsalted butter, softened
- 2 large eggs, room temperature
- 1 cup (240 ml) buttermilk, room temperature
- 1 teaspoon vanilla extract
- 1 ½ tablespoons matcha powder or 1 teaspoon green food coloring
- 8 ounces (225 grams) cream cheese, softened
- ½ cup (115 grams) unsalted butter, softened
- 3 to 3 ½ cups (360–420 grams) powdered sugar, sifted
- 1 teaspoon vanilla extract
- 2 to 3 tablespoons heavy cream (optional)
Instructions
- Preheat your oven to 350°F (177°C). Line two baking sheets with parchment paper or silicone mats.
- In a large bowl, sift together the all-purpose flour, cocoa powder, baking soda, baking powder, salt, and matcha powder. Set aside.
- In another bowl, beat the softened unsalted butter and granulated sugar with an electric mixer until light and fluffy, about 3-4 minutes.
- Beat in the eggs one at a time, followed by the vanilla extract, ensuring each egg is fully incorporated before adding the next.
- Gradually add the sifted dry ingredients and buttermilk to the butter mixture, alternating between them, starting and ending with the dry ingredients. Mix until just combined.
- Using a cookie scoop or tablespoon, drop rounded mounds about 2 inches apart on the prepared baking sheets.
- Bake for 12-14 minutes, or until the tops spring back when lightly pressed.
- Remove from oven and let the cakes cool on the sheets for 5 minutes, then transfer to a cooling rack to cool completely.
- In a large bowl, beat the softened cream cheese and butter together until smooth and creamy.
- Gradually add the powdered sugar, beating on low speed to avoid a sugar cloud, then increase speed until fluffy.
- Add vanilla extract and heavy cream if desired to reach preferred consistency.
- Pair cakes of similar size, spread or pipe a generous dollop of frosting on the flat side of one cake, then sandwich with its partner.
- Press gently to spread the frosting evenly without squishing out the edges.
- Optional: Chill the assembled pies in the fridge for 30 minutes before serving to firm up the frosting.
Notes
Keep butter and cream cheese at room temperature to avoid lumps. Sift dry ingredients for a fluffy texture. Avoid overmixing to prevent tough cakes. Use a cookie scoop for uniform size. Chill assembled pies for firmer frosting and better flavor melding. Substitute buttermilk with milk plus lemon juice if needed. For dairy-free, use vegan cream cheese and plant milk. Matcha powder adds subtle earthy flavor; use food coloring for brighter green without matcha taste.
Nutrition
- Serving Size: 1 whoopie pie
- Calories: 320
- Sugar: 25
- Fat: 15
- Saturated Fat: 7
- Carbohydrates: 40
- Fiber: 1
- Protein: 4
Keywords: green velvet, whoopie pies, matcha, creamy frosting, easy dessert, homemade, family recipe, potluck dessert