There was this one evening when I came home after a whirlwind day—emails piling up, errands running late, and honestly, zero energy to conjure up something fancy for dinner. I opened the fridge, spotted some chicken breasts, and thought, “Well, this has to be dinner.” Honestly, I wasn’t expecting much beyond a quick pan-fry. But then, as I rummaged through the pantry, I found a jar of capers and a lemon sitting on the counter, remnants from a long-forgotten recipe attempt.
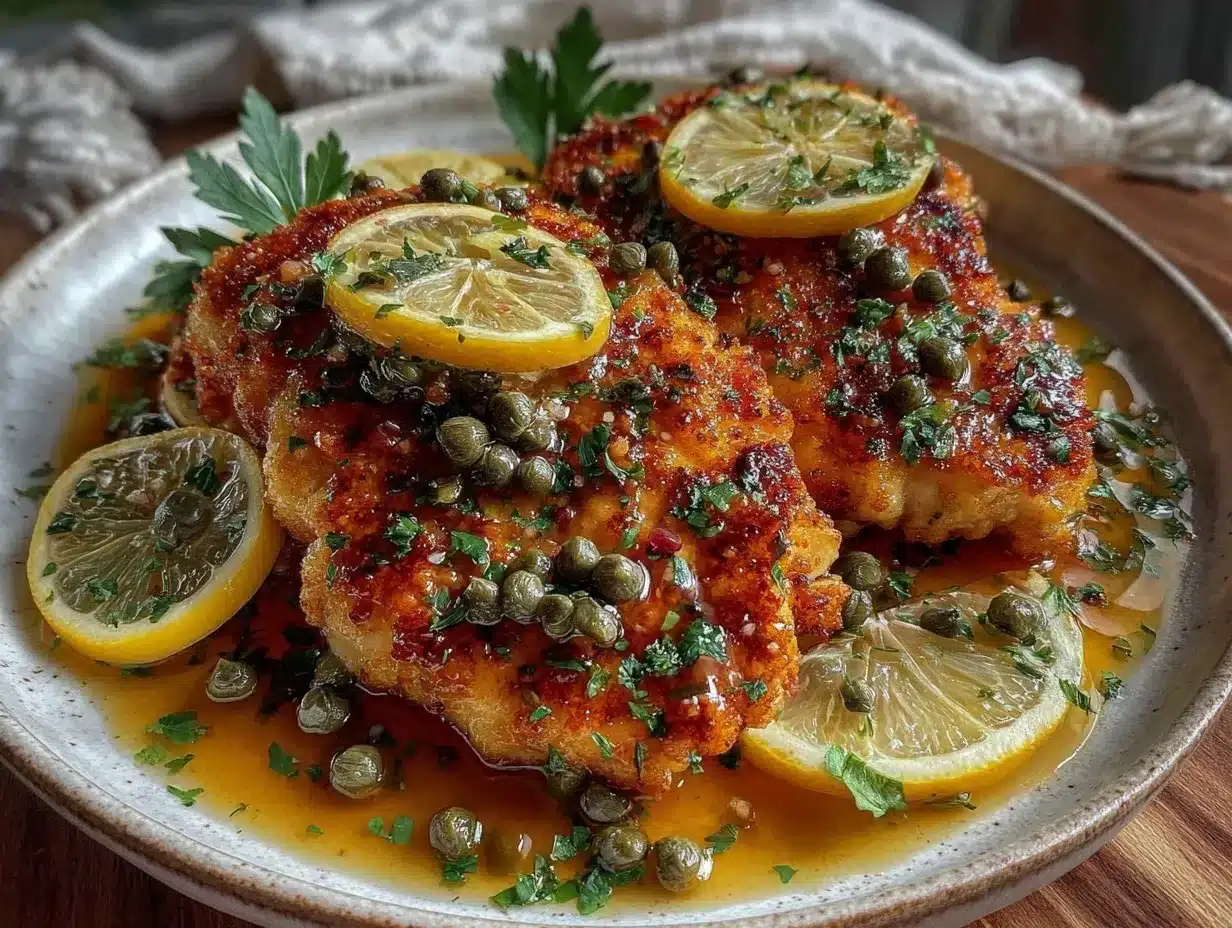
I figured, why not toss together something simple yet flavorful? The result? This Easy Crispy Chicken Piccata with Tangy Lemon Caper Sauce—a dish that surprised me with its bright, punchy flavors and that incredible crispy crust. It was like a little culinary reset after a chaotic day. The tang from the lemon and the salty pop of capers paired perfectly with the juicy chicken, and the crispy coating gave it that satisfying crunch I didn’t know I needed.
Since then, I’ve found myself making this chicken piccata recipe multiple times a week—sometimes on purpose, sometimes just because it’s the kind of meal that feels like a hug on a plate. It’s quick, fuss-free, and honestly, it tastes like you spent way more time than you did. This recipe stuck around because it’s approachable, dependable, and full of personality—just like those evenings when you need dinner to be a little more than just food.
Why You’ll Love This Recipe
- Quick & Easy: Comes together in under 30 minutes, perfect for busy weeknights or unexpected guests.
- Simple Ingredients: No fancy trips to specialty stores—chances are you already have most of what’s needed.
- Perfect for Cozy Dinners: The comforting crispy chicken paired with a bright, tangy sauce hits the spot every time.
- Crowd-Pleaser: Kids and adults alike tend to ask for seconds thanks to the crispy texture and zesty flavor.
- Unbelievably Delicious: The combo of a golden, crunchy crust and the lemon caper sauce delivers a flavor punch that feels both fresh and indulgent.
This isn’t your average chicken piccata. The secret lies in getting that irresistible crisp on the chicken while keeping the meat juicy inside. Plus, the sauce is perfectly balanced—not too sour, not too salty—thanks to a little personal tweaking over time. I’ve tested this dish through busy nights and casual dinners, and it never disappoints. Whether you’re feeding a family or just cooking for yourself, this recipe feels both special and effortless.
It’s the kind of meal that makes you pause, savor, and maybe even close your eyes for a moment to really appreciate the tang and crunch. Trust me, once you make it, it’ll become one of those easy go-to dinners you rely on more than you’d expect.
What Ingredients You Will Need
This recipe uses simple, wholesome ingredients to deliver bold flavor and satisfying texture without the fuss. Most of these are pantry staples, perfect for last-minute meals or planned dinners alike.
- Chicken breasts: 2 large, boneless and skinless (about 1 lb / 450 g), pounded thin for even cooking
- All-purpose flour: ½ cup (60 g), for dredging the chicken to get that crispy crust
- Salt and black pepper: To taste, for seasoning both chicken and sauce
- Olive oil: 3 tablespoons, plus extra for frying (I prefer a good quality extra virgin olive oil for flavor)
- Unsalted butter: 2 tablespoons, adds richness to the sauce
- Garlic: 2 cloves, minced, for aromatic depth
- Fresh lemon juice: ¼ cup (60 ml), freshly squeezed for that bright tangy punch
- Chicken broth: ½ cup (120 ml), low sodium preferred to control saltiness
- Capers: 2 tablespoons, drained (look for small, firm capers for best texture)
- Fresh parsley: 2 tablespoons, chopped, for garnish and fresh flavor
Optional substitutions: Use almond flour for a gluten-free version, or swap chicken broth with vegetable broth if preferred. If you don’t have fresh lemons, bottled lemon juice works in a pinch, though fresh is always best.
Equipment Needed
- Meat mallet or rolling pin: To pound chicken breasts evenly; a sturdy plastic bag can help keep things tidy.
- Large non-stick skillet or sauté pan: Essential for crisping the chicken and simmering the sauce evenly.
- Tongs or spatula: For flipping chicken carefully without tearing the crust.
- Measuring cups and spoons: For precise ingredient amounts.
- Microplane or fine grater: Optional, if zesting lemons to add extra flavor.
- Cutting board and sharp knife: For prepping garlic and parsley.
If you don’t have a meat mallet, pressing the chicken between two sheets of parchment paper with a heavy pan works just fine. A cast iron skillet also works beautifully for frying if you want extra crispiness, though non-stick is easier for cleanup. For budget-friendly options, basic stainless steel pans do the trick too.
Preparation Method
- Pound the chicken breasts: Place each breast between two pieces of plastic wrap or parchment paper. Using a meat mallet or rolling pin, gently pound the chicken until about ¼ inch (6 mm) thick. This helps the chicken cook evenly and stay tender. (About 5 minutes)
- Season and dredge: Season both sides of the chicken with salt and pepper. Pour the flour onto a shallow plate. Lightly coat each chicken breast in flour, shaking off any excess. This step creates the crispy crust you’re after.
- Heat the pan: Warm 3 tablespoons of olive oil in a large skillet over medium-high heat until shimmering but not smoking. (About 2 minutes)
- Cook the chicken: Carefully place the chicken breasts in the pan. Cook for about 3-4 minutes on each side, until golden brown and cooked through (internal temp should hit 165°F / 74°C). Avoid overcrowding the pan—cook in batches if needed. Remove chicken and set aside on a warm plate. (Total 8 minutes)
- Make the sauce: Reduce heat to medium. Add 2 tablespoons of butter to the pan and melt. Toss in minced garlic and sauté until fragrant, about 30 seconds (don’t let it burn!). Pour in chicken broth, lemon juice, and capers. Stir and let simmer for 3-4 minutes until the sauce slightly thickens and flavors meld.
- Finish the dish: Return the chicken to the pan, spoon some sauce over, and warm gently for a minute. Sprinkle chopped parsley on top before serving.
Pro tip: If the sauce seems too thin, whisk in a teaspoon of flour or cornstarch mixed with water to thicken it up a bit. Watch the garlic closely—burnt garlic can ruin the sauce, so remove from heat if it starts to brown too fast.
Cooking Tips & Techniques
One trick I learned (the hard way) is to really get the chicken dry before dredging. Pat it down with paper towels so the flour sticks better and the crust crisps up nicely. Wet chicken leads to soggy coating, and honestly, no one wants that.
Also, crowding your pan is a quick way to lose heat and end up with steamed rather than crispy chicken. Cook in batches if needed and keep finished pieces warm on a rack or plate tented with foil.
When making the lemon caper sauce, fresh lemon juice is key. Bottled lemon juice can be a bit harsh or flat, which dulls the brightness of the dish. And don’t rush the simmer! Let the sauce bubble gently to marry the flavors, but keep an eye so it doesn’t reduce too much.
Finally, multitasking helps a ton here—while the chicken cooks, prep the garlic and parsley so the sauce comes together quickly without overcooking the chicken.
Variations & Adaptations
- Gluten-free: Swap all-purpose flour with almond flour or a gluten-free flour blend for dredging. The texture changes slightly but still crisps nicely.
- Protein swaps: Try this method with thin pork cutlets or turkey breast for a similar flavor profile.
- Herb twist: Add fresh thyme or oregano to the sauce for an earthy note. I once threw in some basil for a summer vibe, and it was a hit.
- Cooking methods: For a lighter version, bake the dredged chicken at 425°F (220°C) for about 15 minutes, flipping halfway, then drizzle with the sauce. The crust won’t be as crispy but still delicious.
- Dairy-free: Use olive oil instead of butter for the sauce, and swap chicken broth with vegetable broth if preferred.
Serving & Storage Suggestions
This Easy Crispy Chicken Piccata is best served immediately while the crust is still crisp and the sauce fresh. I like to plate it over a bed of buttery mashed potatoes, angel hair pasta, or even steamed rice to soak up the tangy sauce.
Pair with a simple green salad or roasted veggies for a balanced meal. A chilled glass of Sauvignon Blanc or a light Pinot Grigio complements the lemony brightness beautifully.
Store leftovers in an airtight container in the refrigerator for up to 3 days. Reheat gently in a skillet over medium-low heat to keep the crust from becoming too soggy—microwaving tends to soften the crispness.
The flavors actually deepen a bit after a day, so this dish makes a great next-day lunch if you don’t mind the crust losing some crunch. Just add a quick squeeze of fresh lemon before serving to brighten it back up.
Nutritional Information & Benefits
Per serving (based on 4 servings): approximately 350 calories, 25g protein, 20g fat, and 8g carbohydrates.
Chicken breasts provide lean protein essential for muscle repair and energy. The olive oil and butter add healthy fats that help absorb fat-soluble vitamins. Lemons are rich in vitamin C, supporting immune health, while capers add antioxidants and a unique flavor with minimal calories.
This recipe is naturally gluten-containing unless adapted with gluten-free flour, and contains dairy from the butter. It’s a balanced meal option that combines protein and healthy fats with fresh, bright flavors, making it a satisfying choice for those watching their carb intake.
Conclusion
This Easy Crispy Chicken Piccata with Tangy Lemon Caper Sauce is the kind of recipe that feels like a little celebration on a plate without any fuss. Its blend of crispy texture and punchy sauce makes it a reliable favorite for busy nights or when you want something comforting yet fresh. The simplicity of ingredients and quick prep mean you can make it again and again without getting bored.
Feel free to tweak the herbs or swap proteins based on what you have on hand—this recipe is forgiving and flexible. I love it because it’s both approachable for weeknight cooks and impressive enough to serve guests without breaking a sweat.
Give it a try, and if you do, I’d love to hear how you make it your own. There’s something really satisfying about perfecting a dish that hits all the right notes every time.
FAQs
Can I use chicken thighs instead of breasts?
Yes! Boneless, skinless chicken thighs work well and stay juicy. You might need to adjust cooking time slightly as they can be thicker.
How do I get the chicken extra crispy?
Make sure the chicken is patted dry, dredge well in flour, and don’t overcrowd the pan. Cooking in batches and using a hot pan helps develop that golden crust.
Can I prepare the sauce ahead of time?
The sauce is best made fresh to keep the bright lemon flavor. However, you can prepare the garlic and capers in advance to save time.
What can I serve with chicken piccata?
It pairs well with pasta, mashed potatoes, rice, or steamed veggies. A crisp salad also balances the tangy sauce nicely.
Is this recipe freezer-friendly?
You can freeze cooked chicken piccata, but the crust may lose its crispness. Reheat gently in a skillet to help restore some texture.
Pin This Recipe!
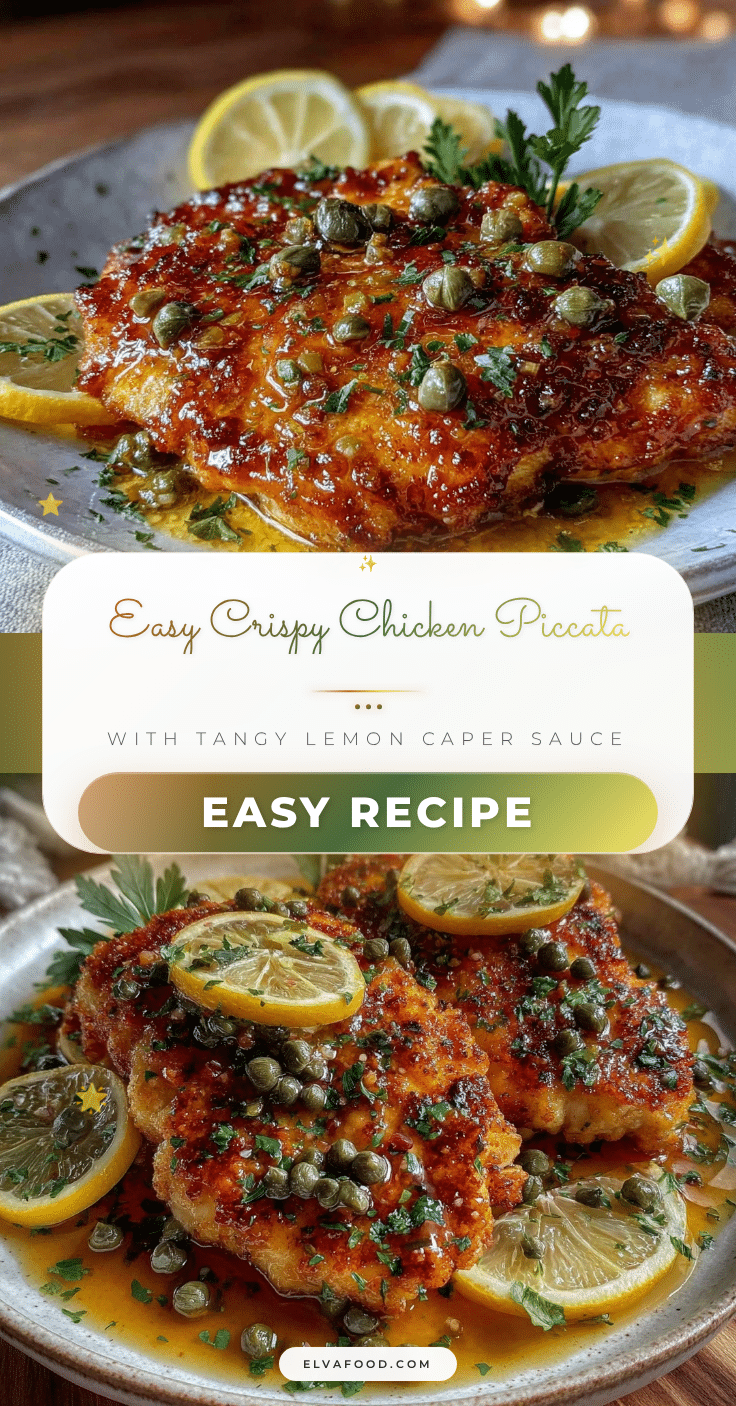
Easy Crispy Chicken Piccata Recipe with Tangy Lemon Caper Sauce

A quick and easy chicken piccata recipe featuring crispy chicken breasts with a bright, tangy lemon caper sauce. Perfect for busy weeknights and cozy dinners.
- Prep Time: 10 minutes
- Cook Time: 15 minutes
- Total Time: 25 minutes
- Yield: 4 servings 1x
- Category: Main Course
- Cuisine: Italian-American
Ingredients
- 2 large boneless, skinless chicken breasts (about 1 lb / 450 g), pounded thin
- ½ cup (60 g) all-purpose flour
- Salt and black pepper, to taste
- 3 tablespoons olive oil, plus extra for frying
- 2 tablespoons unsalted butter
- 2 cloves garlic, minced
- ¼ cup (60 ml) fresh lemon juice
- ½ cup (120 ml) low sodium chicken broth
- 2 tablespoons capers, drained
- 2 tablespoons fresh parsley, chopped
Instructions
- Place each chicken breast between two pieces of plastic wrap or parchment paper. Using a meat mallet or rolling pin, gently pound the chicken until about ¼ inch (6 mm) thick.
- Season both sides of the chicken with salt and pepper. Pour the flour onto a shallow plate. Lightly coat each chicken breast in flour, shaking off any excess.
- Heat 3 tablespoons of olive oil in a large skillet over medium-high heat until shimmering but not smoking.
- Carefully place the chicken breasts in the pan. Cook for about 3-4 minutes on each side, until golden brown and cooked through (internal temperature should reach 165°F / 74°C). Remove chicken and set aside on a warm plate.
- Reduce heat to medium. Add 2 tablespoons of butter to the pan and melt. Add minced garlic and sauté until fragrant, about 30 seconds.
- Pour in chicken broth, lemon juice, and capers. Stir and let simmer for 3-4 minutes until the sauce slightly thickens.
- Return the chicken to the pan, spoon some sauce over, and warm gently for a minute.
- Sprinkle chopped parsley on top before serving.
Notes
Pat chicken dry before dredging to ensure a crispy crust. Cook chicken in batches to avoid overcrowding the pan. Use fresh lemon juice for best flavor. To thicken sauce, whisk in a teaspoon of flour or cornstarch mixed with water if needed. Reheat leftovers gently in a skillet to maintain crispness.
Nutrition
- Serving Size: 1 chicken breast wit
- Calories: 350
- Sugar: 1
- Sodium: 400
- Fat: 20
- Saturated Fat: 6
- Carbohydrates: 8
- Fiber: 1
- Protein: 25
Keywords: chicken piccata, crispy chicken, lemon caper sauce, quick dinner, easy chicken recipe, weeknight meal