It was one of those evenings when I’d just gotten home after a long day, and honestly, the thought of turning on the oven felt like climbing a mountain. I wanted something sweet, something that felt like a little reward, but also quick—because, you know, sometimes life just doesn’t wait. That’s when I stumbled on this Easy No-Bake Oreo Cheesecake Bars recipe. I was skeptical at first. No baking? Could it really be that simple and still taste like a proper indulgence?
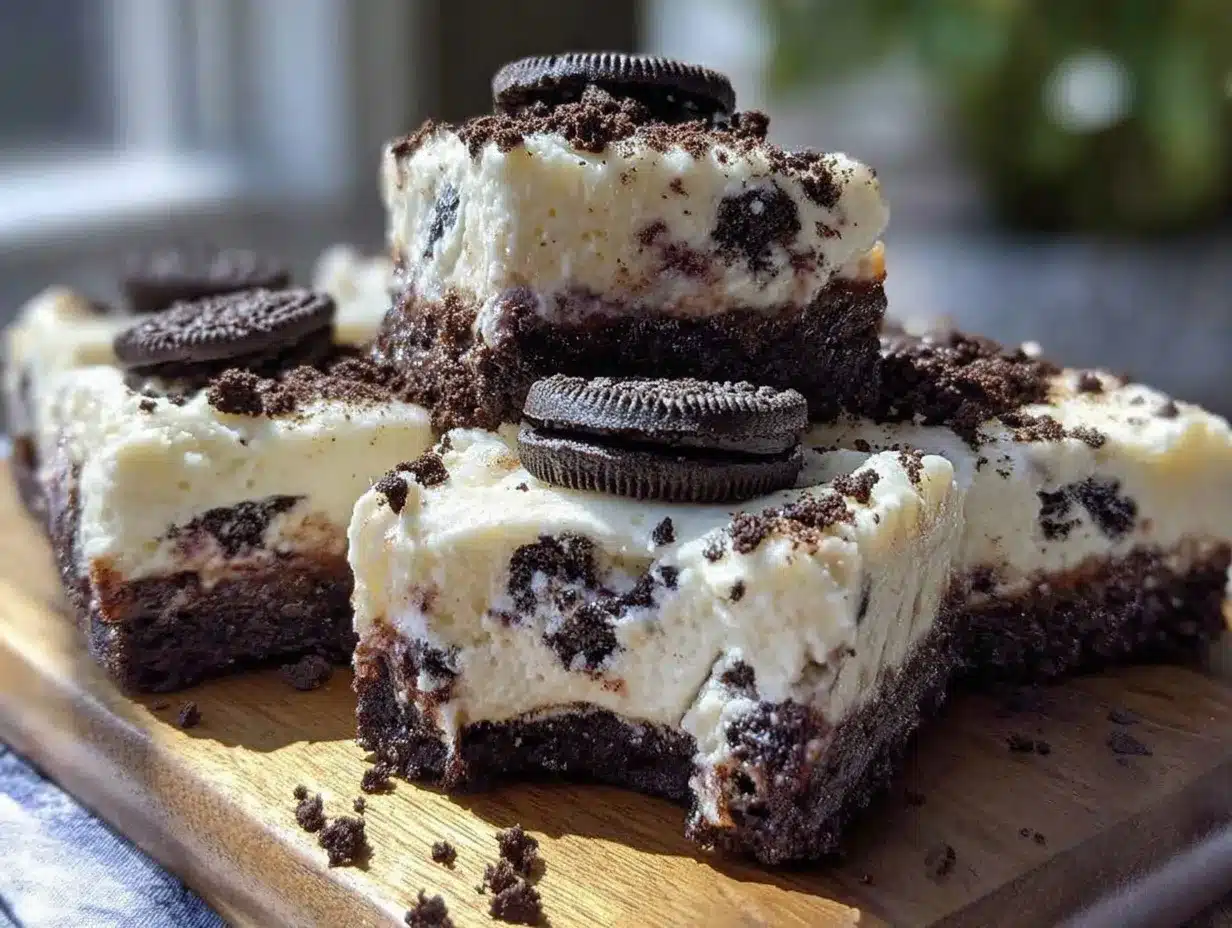
So, I gave it a shot. The mix of crushed Oreos with creamy cheesecake filling came together with barely any effort, no heat, and minimal cleanup. The texture was smooth and rich, just enough crunch from the cookie base, and that familiar chocolatey Oreo flavor swirling through every bite. It quickly became my go-to for those “I need dessert now” moments—or when unexpected guests show up and there’s no time to fuss.
What stuck with me is how this recipe manages to feel like a treat without the usual hassle. It’s the kind of dessert that’s easy to whip up in minutes but somehow doesn’t skimp on the wow factor. I’ve made it several times since, tweaking it just a little here and there, but honestly, the core recipe remains the same. If you’re anything like me, juggling a busy day and craving something sweet, these cheesecake bars might just become your new best friend.
Why You’ll Love This Recipe
- Quick & Easy: This recipe comes together in under 20 minutes, perfect for busy weeknights or those last-minute sweet cravings.
- Simple Ingredients: No fancy or hard-to-find ingredients here—just staples you probably already have, including Oreos, cream cheese, and a touch of sugar.
- Perfect for Any Occasion: Whether it’s a casual family gathering, a potluck, or a cozy night in, these bars fit right in with minimal effort.
- Crowd-Pleaser: The combination of Oreo crunch and creamy cheesecake filling always gets rave reviews from both kids and adults alike.
- Unbelievably Delicious: That perfect balance of sweet, creamy, and slightly crunchy texture makes it next-level dessert comfort food.
This isn’t just another Oreo cheesecake recipe. It’s the kind where the crust stays delightfully crisp without baking, and the filling is smooth without feeling too heavy. The trick? Whipping the cream cheese until ultra-smooth and folding in cool whipped cream for lightness. It’s a little trick I picked up after a few tries that makes all the difference. Honestly, it’s the kind of dessert that makes you close your eyes for a moment after the first bite—and want another.
What Ingredients You Will Need
This recipe uses simple, wholesome ingredients to deliver bold flavor and satisfying texture without the fuss. You’ll find most of these in your pantry or fridge, making it super easy to pull together anytime.
- Oreo cookies (about 24 pieces): crushed, divided (for crust and topping) — I recommend the classic Oreos for that perfect balance of chocolate and cream.
- Unsalted butter (6 tablespoons / 85 grams): melted — this binds the crust together and adds richness.
- Cream cheese (16 ounces / 450 grams): softened to room temperature — the star of the creamy filling; make sure it’s smooth for the best texture.
- Powdered sugar (3/4 cup / 90 grams): adds sweetness without grittiness.
- Vanilla extract (1 teaspoon): for a subtle depth of flavor.
- Heavy whipping cream (1 cup / 240 ml): chilled — whipped to soft peaks to fold into the cream cheese, lending lightness.
If you want to experiment, you can swap regular Oreos with gluten-free ones for a dietary tweak or try dairy-free cream cheese and coconut cream to make it vegan-friendly. Just keep in mind that the texture might shift slightly, but the flavor stays deliciously close.
Equipment Needed
- 8×8-inch (20×20 cm) baking pan: for setting the bars; I use a glass pan, but a metal one works fine too.
- Mixing bowls: one large for the filling and one smaller for the crust mixture.
- Electric mixer or stand mixer: essential for whipping cream cheese and cream until smooth and fluffy.
- Food processor or rolling pin: to crush Oreos finely for the crust and topping (I prefer a food processor for ease).
- Spatula: for folding and spreading the filling evenly.
If you don’t have a food processor, placing the Oreos in a sealed plastic bag and crushing them with a rolling pin or even a heavy pan works just as well. For whipping cream, a hand mixer is a great budget-friendly option and gives you good control over the texture. Keeping your cream cheese and whipping cream chilled until right before use makes mixing smoother and helps achieve that perfect, airy filling.
Preparation Method
- Prepare the crust: Start by crushing 18 Oreos in a food processor until fine crumbs form (about 1 cup / 100 grams). If using a rolling pin, crush in a sealed bag until finely ground. In a medium bowl, mix the crumbs with 6 tablespoons (85 grams) of melted unsalted butter until combined and the mixture holds together when pressed. This should take about 5 minutes.
- Press crust into pan: Transfer the Oreo crust mixture into your 8×8-inch (20×20 cm) baking pan. Use the back of a spoon or the bottom of a glass to press it firmly and evenly across the bottom. This step is important—press firmly so the crust sets well without baking. Place in the fridge to chill while you prepare the filling (about 10 minutes).
- Make the filling: In a large mixing bowl, beat 16 ounces (450 grams) of softened cream cheese with 3/4 cup (90 grams) powdered sugar and 1 teaspoon vanilla extract until smooth and creamy. This usually takes about 3-4 minutes with an electric mixer on medium speed. Scrape down the sides as needed to avoid lumps.
- Whip the cream: In a separate bowl, whip 1 cup (240 ml) of cold heavy whipping cream until soft peaks form—this means when you lift the whisk, the cream holds its shape but curls over slightly. It should take around 3-5 minutes depending on your mixer.
- Fold whipped cream into cream cheese: Gently fold the whipped cream into the cream cheese mixture using a spatula. Take your time with this step—fold until combined but don’t overmix or you’ll lose the light texture. The filling should be fluffy and smooth.
- Assemble the bars: Spread the cheesecake filling evenly over the chilled Oreo crust. Use a spatula or offset knife to smooth the top. Then, crush the remaining 6 Oreos roughly and sprinkle on top for a little extra crunch and Oreo goodness.
- Chill to set: Cover the pan with plastic wrap and refrigerate for at least 4 hours, preferably overnight. This resting time allows the bars to firm up and the flavors to meld. You’ll know it’s ready when the filling feels set and no longer jiggly.
- Cut and serve: Once chilled, remove from the fridge and run a sharp knife around the edges before slicing into squares. For cleaner cuts, dip your knife in hot water and wipe dry between slices.
These steps might sound like a lot, but really, the hands-on time is under 20 minutes. The rest is just waiting, which is perfect when you want to prep in advance or let the fridge do the work while you relax.
Cooking Tips & Techniques
- Room temperature cream cheese: Makes a huge difference. Cold cream cheese leads to lumps and uneven texture. Leave it out for about 30 minutes before mixing.
- Don’t skip chilling the crust: Pressing and chilling the crust prevents it from crumbling when you cut the bars later. It sets like a cookie base without baking.
- Whip cream just right: Soft peaks are the goal—too loose, and the filling won’t hold; too stiff, and it becomes grainy. Watch carefully and stop whipping as soon as you see soft peaks.
- Folding gently: Use a light hand when folding whipped cream into cream cheese. Overmixing deflates the air and results in a dense filling.
- Knife hacks for cutting: Warm your knife under hot water and dry it before slicing bars. This helps cut clean edges without sticking or crumbling.
- Storage tip: Keep leftovers refrigerated in an airtight container and consume within 3-4 days for best freshness.
Early on, I used to rush the chilling step (impatient me!), and the bars just wouldn’t slice cleanly. Lesson learned: patience pays off with this recipe. Also, crushing Oreos finely for the crust is key to making it hold together and feel like a true base rather than loose crumbs.
Variations & Adaptations
- Peanut Butter Oreo Bars: Add 1/2 cup (125 grams) smooth peanut butter to the cream cheese mixture before folding in whipped cream. It’s an irresistible combo that adds a nutty twist.
- Berry Swirl: Gently fold in 1/2 cup (75 grams) mashed fresh or thawed frozen berries (strawberries or raspberries work great) into the filling for a fruity, colorful variation.
- Chocolate Lovers: Mix 1/4 cup (25 grams) cocoa powder into the cream cheese before adding whipped cream for a chocolaty cheesecake bar.
- Vegan/Dairy-Free Option: Use dairy-free cream cheese and coconut whipping cream. Swap Oreos for a vegan-certified brand (most Oreos are already vegan, but double-check!). Chill longer as the texture may firm up differently.
- Mini Cheesecake Bites: Instead of an 8×8 pan, press crust and filling into mini muffin tins lined with cupcake liners for bite-sized treats perfect for parties.
One time, I tried adding a sprinkle of sea salt on top right before chilling—it created this unexpected salty-sweet contrast that I still can’t get enough of. Honestly, this recipe welcomes your favorite flavors and tweaks, so feel free to make it your own.
Serving & Storage Suggestions
These Oreo cheesecake bars are best served chilled straight from the fridge, where their creamy texture shines brightest. If you let them sit out too long, they might soften too much, so keep that in mind when planning to serve.
For presentation, dust a little cocoa powder or extra crushed Oreos on top. Pair them with a cold glass of milk or a cup of strong coffee to balance the sweetness. They also work well alongside fresh berries for a pop of freshness.
Store any leftovers covered tightly in the refrigerator for up to 4 days. For longer storage, you can freeze the bars in an airtight container for up to 2 months. To thaw, place in the fridge overnight and slice once soft but still chilled.
Reheating isn’t recommended here since the filling is delicate, but if you want a softer bite, let the bars sit at room temperature for 10-15 minutes before serving. Over time, the flavors meld and the texture becomes silkier, making leftovers just as enjoyable.
Nutritional Information & Benefits
Each bar (assuming 12 servings) contains approximately 280 calories, 18 grams of fat, 25 grams of carbohydrates, and 4 grams of protein. These are estimates and can vary depending on exact brands and ingredient choices.
The cream cheese provides calcium and protein, while the Oreos add a bit of chocolatey sweetness. Using powdered sugar keeps the texture smooth without extra graininess common with granulated sugar.
For those watching gluten intake, consider gluten-free Oreo alternatives. And using whipped cream rather than heavy cream straight adds volume and lightness without excess calories.
While this dessert is definitely a treat, the portion-controlled bars help keep indulgence in check. I find it’s a satisfying way to enjoy a rich dessert without overdoing it.
Conclusion
These Easy No-Bake Oreo Cheesecake Bars are proof that indulgence doesn’t have to mean hours in the kitchen or fancy ingredients. The recipe’s simplicity, combined with its creamy, crunchy texture, makes it a staple in my dessert lineup—especially when time is tight or when I just need a quick sweet fix.
Feel free to play around with flavors or toppings to make it your own—you might find a new favorite variation that surprises even you. I love how forgiving and adaptable this recipe is, which is why it keeps coming back to my fridge.
Give these bars a try next time you want to treat yourself or impress without stress. And hey, if you tweak the recipe or have a favorite add-in, I’d love to hear about it!
Here’s to easy treats that taste like a little slice of joy.
FAQs
Can I make these cheesecake bars ahead of time?
Absolutely! In fact, chilling them overnight improves texture and flavor. Just keep them covered and refrigerated until ready to serve.
What if I don’t have Oreos? Can I use another cookie?
You can substitute with any chocolate sandwich cookies or even chocolate graham crackers for a slightly different but tasty crust.
How do I store leftover bars?
Store leftovers in an airtight container in the fridge for up to 4 days. They can also be frozen for up to 2 months if you want to save some for later.
Is there a way to make these bars vegan or dairy-free?
Yes! Use vegan cream cheese and coconut whipping cream, and make sure to pick vegan-certified Oreos or similar cookies. Chill longer as texture may vary.
Can I freeze the cheesecake bars?
Yes, freeze them in an airtight container for up to 2 months. Thaw in the refrigerator overnight before slicing and serving.
Pin This Recipe!
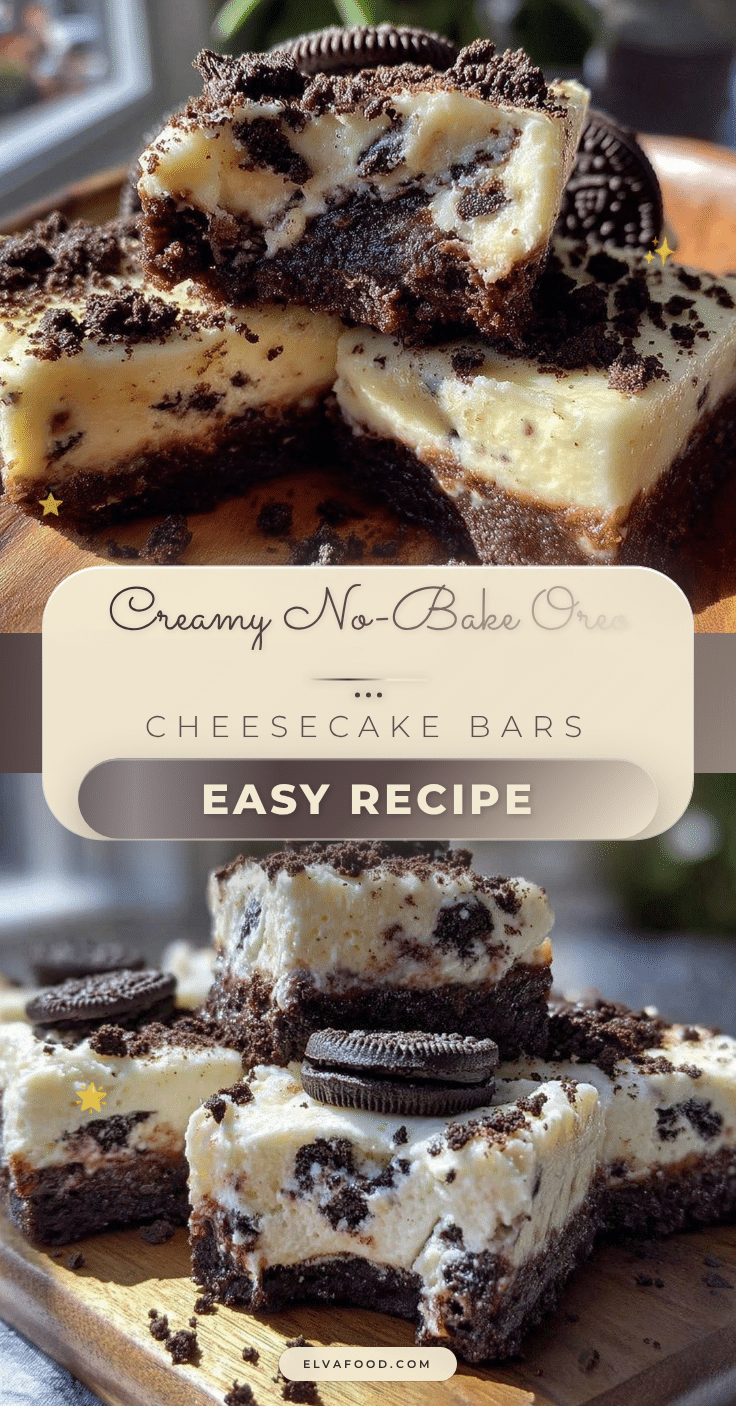
Easy No-Bake Oreo Cheesecake Bars

A quick and delicious no-bake dessert featuring a crunchy Oreo crust and creamy cheesecake filling, perfect for busy days or last-minute sweet cravings.
- Prep Time: 15 minutes
- Cook Time: 0 minutes
- Total Time: 4 hours 15 minutes
- Yield: 12 servings 1x
- Category: Dessert
- Cuisine: American
Ingredients
- 24 Oreo cookies, crushed and divided
- 6 tablespoons (85 grams) unsalted butter, melted
- 16 ounces (450 grams) cream cheese, softened to room temperature
- 3/4 cup (90 grams) powdered sugar
- 1 teaspoon vanilla extract
- 1 cup (240 ml) heavy whipping cream, chilled
Instructions
- Crush 18 Oreos into fine crumbs using a food processor or rolling pin.
- Mix Oreo crumbs with melted butter until combined and holds together when pressed.
- Press crust mixture firmly into an 8×8-inch baking pan and chill for 10 minutes.
- Beat cream cheese, powdered sugar, and vanilla extract until smooth and creamy.
- Whip heavy cream until soft peaks form.
- Gently fold whipped cream into cream cheese mixture until combined and fluffy.
- Spread filling evenly over chilled crust.
- Crush remaining 6 Oreos roughly and sprinkle on top.
- Cover and refrigerate for at least 4 hours or overnight to set.
- Cut into bars using a knife warmed in hot water for clean edges.
Notes
[‘Use room temperature cream cheese for smooth texture.’, ‘Press and chill crust well to prevent crumbling.’, ‘Whip cream to soft peaks for best filling texture.’, ‘Fold whipped cream gently to keep filling light and fluffy.’, ‘Warm knife under hot water and dry before slicing for clean cuts.’, ‘Store leftovers refrigerated in airtight container for up to 4 days or freeze up to 2 months.’]
Nutrition
- Serving Size: 1 bar (1/12 of recip
- Calories: 280
- Fat: 18
- Carbohydrates: 25
- Protein: 4
Keywords: no-bake, Oreo, cheesecake bars, quick dessert, easy dessert, no oven, creamy, crunchy, sweet treat