For a while, I just accepted that Halloween treats wouldn’t quite hit the mark for me — you know, those seasonal sweets that look fun but miss that real depth of flavor. I mean, I’m all for festive, but if it’s all sugar and no substance, I tend to lose interest fast. One chilly October evening, while sorting through some old recipe notes and half-remembered experiments, I realized something was missing in my lineup of spooky snacks: a bite-sized brownie that actually tasted like it belonged in the season. Not just chocolate slapped with orange food coloring, but something with a little kick, a zesty brightness that cuts through the rich, fudgy base.
That’s how these Flavorful Witch Hat Brownie Bites with Zesty Orange Frosting came to be. I wasn’t chasing a viral trend or flashy decoration (though, honestly, the witch hat shape is a cheeky nod to the season). I was just trying to create a snack with personality — something that felt cozy but had a little spark. Something I could make in a batch without fuss, then watch disappear at a gathering with a quiet smile.
The brownie bites have this dense, fudge-like texture that’s not too sweet but deeply chocolatey. The frosting? It’s where the orange zest and a touch of citrus juice come in, balancing the chocolate with a lively tang. Nothing over-the-top, just a thoughtful twist. I remember the first time I took a bite and caught that hint of bright orange — it was a quiet revelation; the kind of thing that sticks with you because it’s genuinely satisfying, not just flashy. And that’s why I keep coming back to this recipe every fall.
Why You’ll Love This Recipe
It’s not every day you find a Halloween treat that’s both festive and genuinely tasty. These witch hat brownie bites are exactly that — a little bit of magic with a lot of real flavor. Here’s why I think you’ll appreciate making them:
- Quick & Easy: These come together in under 45 minutes, including frosting time, which is perfect when you want something seasonal without the fuss.
- Simple Ingredients: No need to hunt down obscure spices or specialty chocolates; most items are pantry staples, and the orange zest adds that special touch.
- Perfect for Halloween Parties: Whether it’s a kids’ gathering or a cozy night with friends, these bites add a festive charm without being overly sweet.
- Crowd-Pleaser: I’ve tested these with family and coworkers — they always disappear fast, and I get asked for the recipe every year.
- Unbelievably Delicious: The combo of fudgy chocolate and zesty orange frosting is honestly a little addictive. It’s comfort food with a bright little twist.
This isn’t your run-of-the-mill brownie recipe. By folding in a bit of espresso powder and using a blend of cocoa powders, I found a balance that brings out the chocolate’s richness without it turning bitter. The frosting isn’t just orange-flavored sugar—it’s fresh, with real zest and juice that cut through the sweetness. It’s those details that make the bites feel special, even if you’re whipping them up on a weeknight.
Honestly, this recipe stuck with me because it’s flexible and friendly. You can tweak the frosting’s tanginess or make the brownie a bit cakier if you want. It’s the kind of treat that fits quietly into any Halloween spread, but you’ll find yourself reaching for seconds anyway.
What Ingredients You Will Need
This recipe uses simple, wholesome ingredients to deliver bold flavor and satisfying texture without the fuss. Most are pantry staples, while the orange zest and juice bring a seasonal freshness that really sets these apart.
- For the Brownie Bites:
- Unsalted butter, 1/2 cup (113g), melted (adds richness and moistness)
- Granulated sugar, 1 cup (200g)
- Large eggs, 2, room temperature (helps with structure and moisture)
- Pure vanilla extract, 1 teaspoon (for warmth and depth)
- All-purpose flour, 3/4 cup (95g)
- Natural unsweetened cocoa powder, 1/4 cup (25g) (I prefer Ghirardelli for its smooth flavor)
- Espresso powder, 1 teaspoon (optional but recommended to boost chocolate flavor)
- Salt, 1/4 teaspoon (balances sweetness)
- Baking powder, 1/4 teaspoon (for a slight lift)
- For the Zesty Orange Frosting:
- Powdered sugar, 1 1/2 cups (190g), sifted (for smoothness)
- Unsalted butter, 1/4 cup (56g), softened (makes frosting creamy)
- Fresh orange zest, 1 tablespoon (adds bright citrus aroma)
- Fresh orange juice, 1 tablespoon (balances sweetness with acidity)
- Vanilla extract, 1/2 teaspoon
- Pinch of salt (to round out flavors)
- For Decoration:
- Mini chocolate chips or edible candy eyes (to top the witch hats)
- Chocolate wafer cookies or triangular crackers (to form the hat’s brim)
If you want to swap to gluten-free, almond flour works nicely here but expect a slightly more crumbly texture. For a dairy-free version, try coconut oil instead of butter and a dairy-free powdered sugar blend. The orange zest and juice are key to the frosting’s unique flavor, so fresh is best — frozen juice tends to dull that zing.
Equipment Needed
- 8×8-inch (20×20 cm) square baking pan – perfect size for uniform brownie bites
- Mixing bowls – a couple, for wet and dry ingredients
- Electric mixer or sturdy whisk – makes frosting smooth and fluffy
- Rubber spatula – for folding batter gently
- Zester or microplane – to get fresh orange zest finely grated
- Measuring cups and spoons – accuracy matters for brownies
- Cooling rack – helps brownies cool evenly before frosting
- Small offset spatula or butter knife – for spreading frosting precisely
If you don’t have an electric mixer, a good whisk can work for the frosting but expect to spend a few more minutes whipping it up. For zesting, a fine grater or even a vegetable peeler can do the trick if you don’t have a microplane. I’ve used disposable piping bags before to pipe the frosting for that neat witch hat look, but a small zip-top bag with the corner snipped works just as well.
Preparation Method
- Preheat your oven to 350°F (175°C) and grease your 8×8-inch pan or line it with parchment paper for easy removal. This prevents sticking and helps those brownie bites come out cleanly.
- Mix the dry ingredients: In a medium bowl, whisk together 3/4 cup all-purpose flour, 1/4 cup cocoa powder, 1 teaspoon espresso powder, 1/4 teaspoon baking powder, and 1/4 teaspoon salt. Set aside. The espresso powder might sound odd, but it really boosts the chocolate notes without tasting like coffee.
- Combine wet ingredients: In a large bowl, whisk the melted butter with 1 cup granulated sugar until combined but not grainy. Add 2 eggs one at a time, beating well after each addition, then stir in 1 teaspoon vanilla extract. The batter should feel smooth and shiny.
- Fold dry into wet: Gradually add the dry mix to the wet ingredients, folding gently with a spatula. Don’t overmix — just enough until no flour streaks remain. The batter will be thick but glossy.
- Pour batter into the pan: Spread evenly with a spatula. Tap the pan lightly on the counter to settle the batter and remove air bubbles.
- Bake for 20-25 minutes. Check at 20 minutes: insert a toothpick into the center — it should come out with a few moist crumbs but not wet batter. Baking longer will give a cakier brownie, shorter keeps it fudgy. Let cool in the pan on a rack for at least 30 minutes before cutting.
- While brownies cool, prepare the frosting: Beat 1/4 cup softened butter until creamy, about 2 minutes. Gradually add 1 1/2 cups powdered sugar, alternating with 1 tablespoon fresh orange juice, beating well after each addition. Stir in 1 tablespoon orange zest, 1/2 teaspoon vanilla extract, and a pinch of salt. If frosting feels too thick, add a little more juice; if too thin, add more powdered sugar.
- Cut cooled brownies into small squares, approximately 1.5-inch (4 cm) pieces. These will be the base for your witch hats.
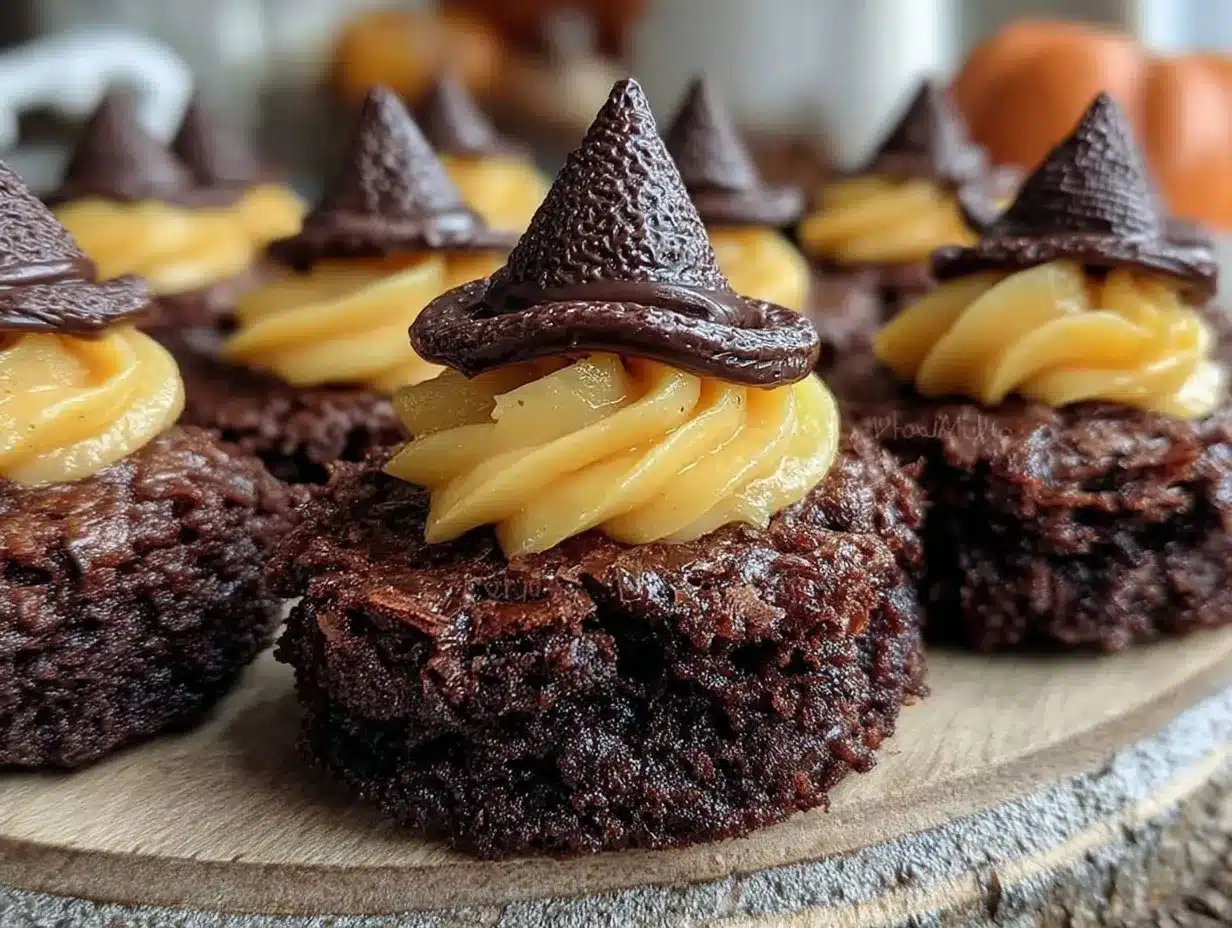
- Frost each brownie bite: Use a small offset spatula or butter knife to spread the orange frosting on top. For a tidier look, pipe the frosting with a piping bag fitted with a round tip, swirling it up into a point to mimic a hat’s cone.
- Add decorations: Place a triangular chocolate wafer or cracker at the base of the frosting swirl to form the hat’s brim. Top with a mini chocolate chip or candy eye for a playful touch.
Patience is key here — let the brownies cool fully before frosting, or the frosting might melt and slide off. I usually let them sit about an hour if I’m not in a rush. The frosting consistency is a little tweakable; if you want it thicker for piping, add more powdered sugar. For a softer spread, juice is your friend.
Cooking Tips & Techniques
Getting these witch hat brownie bites just right took a few tries, and I learned some things worth sharing:
- Don’t skip the espresso powder. It’s subtle but makes the chocolate flavor deeper and less one-dimensional. You won’t taste coffee, I promise.
- Watch your baking time closely. Overbaking makes brownies dry; underbaking leaves them gooey. A toothpick test is your best friend here.
- Use fresh orange zest and juice. The frosting’s zing depends on it. Dried or bottled juice won’t have the same bright lift.
- Cool brownies completely before frosting. I learned this the hard way — warm brownies melt frosting fast, turning your witch hats into sad puddles.
- For a smoother frosting: Sift your powdered sugar and beat your butter well before adding sugar. It really helps avoid lumps.
- Multitasking tip: While brownies bake, prep your frosting and zest your orange. It saves time and keeps your kitchen workflow smooth.
- Decoration hacks: If you don’t have wafer cookies, triangular-shaped crackers or even small pieces of chocolate bark work well for the hat brim.
Variations & Adaptations
This recipe is pretty flexible, and I’ve played around with a few tweaks depending on the crowd and occasion:
- Flavor twists: Swap orange for blood orange or mandarin zest and juice to change the citrus profile. For a spicier touch, add a pinch of cayenne to the frosting.
- Diet-friendly options: Use gluten-free flour blends instead of all-purpose flour; coconut oil replaces butter for a dairy-free version. I’ve also tried vegan frosting by swapping butter for vegan margarine and using powdered sugar without cornstarch.
- Cooking methods: This batter works well in muffin tins too, just reduce baking time to 15-18 minutes for mini muffins that you can frost and decorate similarly.
- Seasonal adaptations: Swap the orange frosting for cream cheese frosting with a hint of cinnamon for a fall pumpkin vibe. Or, try a peppermint frosting in winter for a holiday twist.
- Personal variation: Once, I added finely chopped candied ginger into the brownie batter for a surprising zing that paired beautifully with the orange frosting — a grown-up version that vanished fast.
Serving & Storage Suggestions
These witch hat brownie bites are best served at room temperature so you can enjoy the full flavor and texture of the rich brownie and zesty frosting. They make a perfect centerpiece for Halloween parties or a sweet finish to an autumn dinner.
Pair them with a warm spiced tea or a rich coffee to complement the chocolate and citrus notes. For a full meal vibe, you might want to check out the hearty Irish lamb stew recipe with Guinness or the cozy flavors in the Dublin coddle sausage potato stew — both perfect main dishes before these sweet bites.
Store leftovers in an airtight container at room temperature for up to 2 days. If you want to keep them longer, refrigeration is fine but bring them back to room temperature before serving to soften the frosting. You can freeze unfrosted brownie squares wrapped tightly for up to 3 months; thaw overnight in the fridge and frost fresh before serving.
Flavors tend to deepen after a day, so if you have the patience, making them a day ahead isn’t a bad idea at all.
Nutritional Information & Benefits
Each witch hat brownie bite clocks in at roughly 150 calories, depending on the size and frosting thickness. The recipe includes moderate amounts of sugar and fat, balanced by the antioxidant-rich cocoa powder and the vitamin C from fresh orange zest and juice.
Using unsalted butter and controlling sugar quantities helps keep the sweetness in check. The espresso powder adds a flavor punch without caffeine overload. This recipe can easily be adapted to gluten-free or dairy-free diets, making it accessible to many.
While these are treats and best enjoyed in moderation, the thoughtful use of fresh citrus and quality chocolate means they’re a bit more satisfying than the typical overly sweet Halloween candy.
Conclusion
These Flavorful Witch Hat Brownie Bites with Zesty Orange Frosting are the kind of seasonal treat that feels both familiar and a little special. They’re easy enough to make on a busy weeknight but impressive enough for a party spread. I love that they bring together rich chocolate with a refreshing citrus punch, making each bite a little moment of joy.
Feel free to play with the flavors to suit your taste — whether that means more orange zing or a different frosting altogether. For me, they’re a quiet Halloween tradition now, something I make when I want simple but memorable sweets.
If you try this recipe, I’d love to hear how you make it your own. And if you enjoy the chocolate and citrus combo, you might appreciate the bright, fresh vibe of the fresh spring vegetable frittata I shared earlier — a totally different meal but with the same thoughtful flavor approach.
Happy baking, and here’s to treats that taste as good as they look!
FAQs
Can I make these witch hat brownie bites ahead of time?
Yes, you can bake the brownies a day or two in advance, store them in an airtight container, and frost just before serving to keep the frosting fresh and vibrant.
What if I don’t have fresh oranges for the frosting?
Fresh orange zest and juice give the best flavor, but if not available, you can use bottled orange juice concentrate (use less sugar to balance) and dried orange zest, though the flavor will be less bright.
Can I use a different frosting for these brownie bites?
Absolutely! Cream cheese frosting or a simple vanilla buttercream would work well. Just keep in mind the orange frosting adds a unique zing that balances the chocolate nicely.
Are these brownie bites gluten-free?
The original recipe uses all-purpose flour, but you can substitute a gluten-free flour blend to make it suitable for gluten-free diets. The texture might be slightly different but still delicious.
How do I store leftover witch hat brownie bites?
Store them in an airtight container at room temperature for up to 2 days or in the fridge for up to 5 days. Bring to room temperature before serving to soften the frosting.
Pin This Recipe!
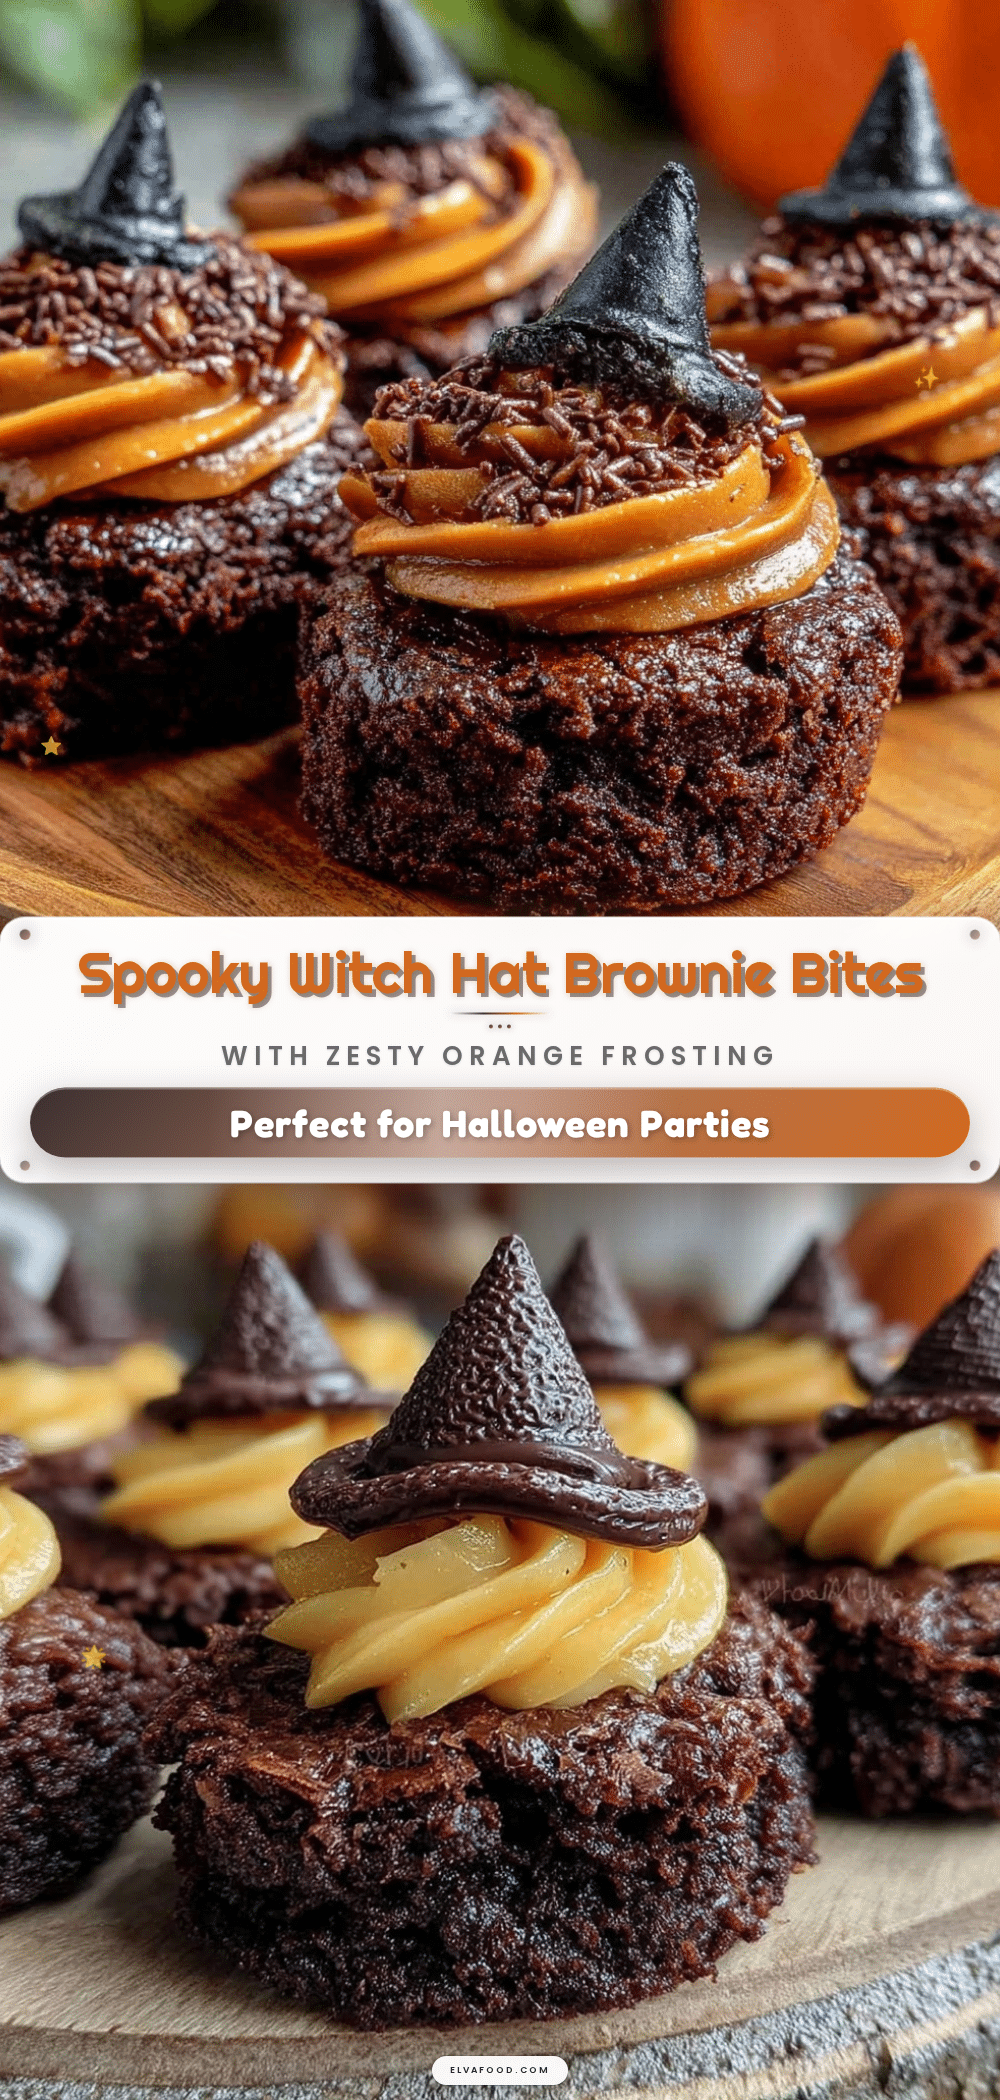
Flavorful Witch Hat Brownie Bites Recipe with Easy Zesty Orange Frosting
These witch hat brownie bites combine a dense, fudgy chocolate base with a bright, zesty orange frosting, perfect for Halloween parties and festive gatherings.
- Prep Time: 15 minutes
- Cook Time: 25 minutes
- Total Time: 45 minutes
- Yield: 16 servings 1x
- Category: Dessert
- Cuisine: American
Ingredients
- 1/2 cup (113g) unsalted butter, melted
- 1 cup (200g) granulated sugar
- 2 large eggs, room temperature
- 1 teaspoon pure vanilla extract
- 3/4 cup (95g) all-purpose flour
- 1/4 cup (25g) natural unsweetened cocoa powder
- 1 teaspoon espresso powder (optional)
- 1/4 teaspoon salt
- 1/4 teaspoon baking powder
- 1 1/2 cups (190g) powdered sugar, sifted
- 1/4 cup (56g) unsalted butter, softened
- 1 tablespoon fresh orange zest
- 1 tablespoon fresh orange juice
- 1/2 teaspoon vanilla extract
- Pinch of salt
- Mini chocolate chips or edible candy eyes (for decoration)
- Chocolate wafer cookies or triangular crackers (for hat brim)
Instructions
- Preheat oven to 350°F (175°C) and grease an 8×8-inch pan or line with parchment paper.
- In a medium bowl, whisk together flour, cocoa powder, espresso powder, baking powder, and salt.
- In a large bowl, whisk melted butter and granulated sugar until combined but not grainy.
- Add eggs one at a time, beating well after each addition, then stir in vanilla extract.
- Fold dry ingredients into wet ingredients gently until no flour streaks remain.
- Pour batter into prepared pan and spread evenly. Tap pan lightly to remove air bubbles.
- Bake for 20-25 minutes. Check at 20 minutes with a toothpick; it should come out with a few moist crumbs.
- Let brownies cool in pan on a rack for at least 30 minutes before cutting.
- Prepare frosting by beating softened butter until creamy, then gradually add powdered sugar alternating with orange juice, beating well after each addition.
- Stir in orange zest, vanilla extract, and a pinch of salt. Adjust consistency with more juice or powdered sugar as needed.
- Cut cooled brownies into 1.5-inch squares.
- Frost each brownie bite with orange frosting using a small offset spatula or piping bag to create a witch hat cone shape.
- Place a triangular chocolate wafer or cracker at the base of the frosting swirl to form the hat brim.
- Top with a mini chocolate chip or candy eye for decoration.
Notes
Do not skip the espresso powder as it deepens the chocolate flavor without tasting like coffee. Use fresh orange zest and juice for best frosting flavor. Cool brownies completely before frosting to prevent melting. Adjust frosting thickness by adding more powdered sugar or juice as needed. Decorations can be substituted with triangular crackers or chocolate bark if wafer cookies are unavailable.
Nutrition
- Serving Size: 1 brownie bite (appr
- Calories: 150
- Sugar: 17
- Sodium: 70
- Fat: 7
- Saturated Fat: 4
- Carbohydrates: 22
- Fiber: 2
- Protein: 2
Keywords: Halloween treats, brownie bites, orange frosting, witch hat brownies, festive desserts, chocolate orange dessert


