My phone buzzed with a photo of a half-eaten cookie shaped like a ghost, its little icing face smeared across a napkin. The text just said, “Can you make these again? Please?” It was my sister, and the cookies in question were from a batch I’d thrown together for a small Halloween gathering the weekend before. I hadn’t even thought much of them—just a simple sugar cookie base and some royal icing I’d experimented with. But apparently, they’d made an impression. That request, simple as it was, stuck with me. It wasn’t about the perfect piping or the fancy decorations. It was about the fact that a homemade cookie, even with its slightly crooked spiderweb, could make someone’s day.
I’ve always loved Halloween, but honestly? I’m not a huge fan of the overly sweet, store-bought cookies that come in those plastic tubs. They’re fine, I guess, but they never taste like anything special. So a few years back, I decided to make my own. I wanted something that looked festive but didn’t require a pastry degree. Something that tasted like real butter and vanilla, not just sugar and food coloring. These frosted Halloween sugar cookies with royal icing are exactly that—they’re the kind of treat that feels like a celebration, even if you’re just making them for yourself on a quiet October evening.
The first time I iced a batch, I was convinced I’d ruined them. The icing was too runny, the colors bled into each other, and my pumpkin looked more like a lumpy orange blob. But when I bit into one, none of that mattered. The cookie was soft, the icing was perfectly crisp, and the flavor was exactly what I’d been chasing. That’s the thing about these cookies—they’re forgiving. They don’t need to be perfect to be wonderful. And that’s the kind of recipe I love sharing. So if you’ve ever wanted to make a batch of Halloween cookies that actually taste as good as they look, you’re in the right place. Let me show you how.
Why You’ll Love This Recipe
I’ve tested this recipe more times than I can count, and I can honestly say it’s the best version I’ve ever made. It’s not just another sugar cookie—it’s a cookie that holds its shape, stays soft for days, and pairs perfectly with a glossy royal icing that sets hard enough to stack. Here’s why it works so well:
- Quick & Easy: From start to finish, you’re looking at about 2 hours (including chilling and cooling). The actual hands-on time is less than 30 minutes, which means you can whip up a batch even on a busy weekday.
- Simple Ingredients: No weird extracts or hard-to-find flours. You probably have everything in your pantry right now—butter, sugar, eggs, flour, vanilla, and a few basic pantry staples.
- Perfect for Halloween Parties: Whether you’re hosting a spooky soiree or sending treats to school, these cookies are always the first thing to disappear. They’re festive without being fussy.
- Crowd-Pleaser: Kids love the bright colors and fun shapes, and adults appreciate that they actually taste like real cookies—not just sugar bombs. I’ve had grown men ask me for the recipe after one bite.
- Unbelievably Delicious: The texture is the real star here. The cookie is soft but sturdy, with a slight chew around the edges and a tender center. The royal icing adds a satisfying snap that contrasts beautifully with the soft cookie underneath.
What makes this recipe different from all the others? It’s the balance. I spent weeks tweaking the ratio of butter to sugar, testing different chilling times, and figuring out the exact consistency for the royal icing. Most recipes either spread too much in the oven or end up dry and crumbly. This one? It holds its shape like a champ and stays soft for up to a week. Plus, the royal icing recipe is foolproof—no more runny mess or clumpy piping bags. It’s the kind of recipe that makes you look like a pro, even if you’re just starting out.
These cookies aren’t just good—they’re the kind that make you close your eyes after the first bite. The kind that make you think, “Why don’t I make these more often?” And when you see the smiles on people’s faces as they bite into a perfectly iced ghost or pumpkin, you’ll know exactly why this recipe is worth keeping close.
What Ingredients You Will Need
This recipe uses simple, wholesome ingredients to deliver bold flavor and satisfying texture without the fuss. Most of these are pantry staples, so you won’t need to make a special trip to the store—unless you’re out of vanilla, in which case, grab an extra bottle because you’ll want to make these again.
For the Sugar Cookies
- All-purpose flour (3 cups / 360g) — Spoon and level it for accuracy. Too much flour makes cookies dense, so don’t scoop directly from the bag.
- Unsalted butter (1 cup / 226g, softened) — I prefer Land O’Lakes for consistent results. Make sure it’s truly softened, not melted. You want it to give slightly when pressed.
- Granulated sugar (1 cup / 200g) — Regular white sugar works perfectly. No need for superfine or powdered.
- Large egg (1, room temperature) — Cold eggs can seize the butter, so let it sit out for 30 minutes first.
- Vanilla extract (1 teaspoon) — Pure vanilla makes a difference. I use Nielsen-Massey, but any good brand works. Avoid imitation if you can.
- Baking powder (1/2 teaspoon) — Helps the cookies rise just slightly without spreading.
- Salt (1/4 teaspoon) — Balances the sweetness and enhances the vanilla flavor.
For the Royal Icing

- Powdered sugar (2 cups / 240g) — Sift it if it’s lumpy. Trust me, clumpy icing is a nightmare to pipe.
- Meringue powder (2 tablespoons) — This is the secret to a hard, glossy finish. You can find it at most craft stores or online. I use Wilton brand.
- Warm water (3-4 tablespoons) — Add slowly. The consistency should be thick enough to hold a ribbon for 10 seconds when you lift the spoon.
- Vanilla extract (1/2 teaspoon) — Adds a subtle flavor that cuts through the sweetness.
- Gel food coloring (orange, black, purple, green) — Gel is much better than liquid. Liquid can thin the icing and make it runny. I like Americolor for vibrant shades.
Optional Decorations
- Sandling sugar (orange, black, or white) — Adds sparkle and texture.
- Edible glitter — Because Halloween deserves a little magic.
- Black and orange sprinkles — Fun for kids to help with.
For the royal icing, I highly recommend using meringue powder instead of raw egg whites. It’s safer, more consistent, and gives a beautiful matte finish that sets hard within a few hours. If you’re in a pinch, you can use pasteurized egg whites, but the texture won’t be quite as smooth.
Equipment Needed
You don’t need a professional bakery setup to make these cookies, but a few key tools will make your life easier. Here’s what I recommend:
- Stand mixer or hand mixer — A stand mixer with a paddle attachment is ideal for creaming the butter and sugar. If you’re using a hand mixer, just be prepared to hold it for a few minutes. It’s doable, but your arm might get a workout.
- Rolling pin — I use a simple wooden rolling pin, but if you have an adjustable one, it’s great for getting even thickness. Aim for about 1/4 inch.
- Halloween cookie cutters — Ghosts, pumpkins, bats, and cats are my go-to. You can find sets online or at craft stores for under $10.
- Parchment paper or silicone baking mat — Parchment is non-negotiable for easy cleanup and even baking. Silicone mats work too, but cookies might spread slightly more.
- Piping bags and tips — I use disposable piping bags with a #2 or #3 round tip for outlining and flooding. If you don’t have tips, you can snip a tiny corner off a zip-top bag. It’s not as precise, but it works in a pinch.
- Cooling rack — Essential for letting the royal icing set without sticking to a flat surface.
- Small bowls or ramekins — For dividing and coloring the icing. I use 4-ounce ramekins for each color.
- Toothpicks — For popping air bubbles in the icing and for creating swirls and patterns.
If you don’t have a stand mixer, don’t worry. I made these cookies for years with a hand mixer and a lot of patience. The key is to cream the butter and sugar for a full 2-3 minutes until it’s light and fluffy. That’s where the texture comes from.
Preparation Method
Step 1: Make the Cookie Dough
In a medium bowl, whisk together the flour, baking powder, and salt. Set aside. In the bowl of your stand mixer (or a large bowl with a hand mixer), cream the softened butter and granulated sugar on medium speed until light and fluffy—about 2-3 minutes. Scrape down the sides of the bowl. Add the egg and vanilla extract, then beat on low until just combined. The mixture might look slightly curdled; that’s fine. Gradually add the dry ingredients, mixing on low speed until a soft dough forms. Don’t overmix—stop as soon as you don’t see any more flour streaks.
Step 2: Chill the Dough
Divide the dough into two equal discs, wrap each tightly in plastic wrap, and refrigerate for at least 1 hour. This step is non-negotiable. Chilling firms up the butter, which prevents the cookies from spreading in the oven. If you skip this, you’ll end up with flat, misshapen blobs instead of crisp ghosts and pumpkins. You can chill the dough for up to 3 days, or freeze it for up to 3 months.
Step 3: Roll and Cut
Preheat your oven to 350°F (175°C). Line two baking sheets with parchment paper. Lightly flour your work surface and rolling pin. Roll one disc of dough to about 1/4-inch thickness. If the dough feels too soft, pop it back in the fridge for 10 minutes. Cut out your desired shapes and place them on the prepared baking sheets, spacing them about 1 inch apart. Gather the scraps, re-roll, and cut again. You should get about 24-30 cookies depending on the size of your cutters.
Step 4: Bake
Bake for 8-10 minutes, rotating the pans halfway through. The cookies should be just barely golden around the edges—the centers will look pale and slightly puffy. Don’t overbake! They’ll continue to set as they cool. Let the cookies rest on the baking sheet for 5 minutes, then transfer to a wire rack to cool completely. This is important: royal icing will not set properly on warm cookies.
Step 5: Make the Royal Icing
In the bowl of your stand mixer (or a medium bowl with a hand mixer), combine the powdered sugar and meringue powder. Add 3 tablespoons of warm water and the vanilla extract. Beat on low speed until combined, then increase to medium-high and beat for 3-4 minutes until the icing is thick, glossy, and holds a stiff peak. If it’s too thick, add water 1 teaspoon at a time. If it’s too thin, add a little more powdered sugar.
Step 6: Color and Thin the Icing
Divide the icing into separate bowls for each color. For each bowl, add gel food coloring a tiny drop at a time and stir until you reach your desired shade. Then, thin each color by adding water 1/2 teaspoon at a time until it reaches “10-second consistency”—when you lift the spoon, the icing should take about 10 seconds to flatten back into itself. This is the perfect consistency for flooding (filling in the cookies).
Step 7: Decorate
Fit your piping bags with #2 or #3 tips and fill with the colored icing. Outline each cookie first, then fill in the center with a back-and-forth motion. Use a toothpick to spread the icing into corners and pop any air bubbles. Let the base layer dry for at least 1 hour before adding details like eyes, mouths, or stripes. For a two-tone effect (like a pumpkin with green stem), pipe the stem first, then flood the orange body immediately while the green is still wet—it will blend slightly for a seamless look.
Step 8: Let Set
Allow the decorated cookies to dry at room temperature for 4-6 hours, or overnight. The icing should be completely hard to the touch before stacking or storing. If you’re in a humid environment, this might take longer—patience is key.
Cooking Tips & Techniques
I’ve learned a few things the hard way, and I’m happy to share them so you don’t have to repeat my mistakes. Here are my top tips for perfect Halloween sugar cookies every time:
- Don’t skip the chill: I know it’s tempting to skip the chilling step when you’re in a hurry, but it’s the single most important factor for shape retention. I once baked a batch after only 20 minutes of chilling, and my bats looked more like blobs. Learn from my impatience.
- Flour your cutters: Dip your cookie cutters in flour before each cut. It prevents the dough from sticking and gives you clean, sharp edges. I keep a small bowl of flour next to my rolling station just for this.
- Use a toothpick for details: For tiny details like eyes or mouths, dip a toothpick in the icing and dot it onto the cookie. It’s much easier than trying to pipe tiny dots with a bag, and it gives you more control.
- Watch the humidity: Royal icing is sensitive to humidity. If it’s a rainy day, your icing might take longer to set. I’ve had cookies that took 8 hours to dry on a humid summer day. Plan accordingly.
- Practice on parchment: Before you start decorating your actual cookies, practice piping a few lines and shapes on a piece of parchment paper. It helps you get a feel for the pressure and consistency without wasting cookies.
- Keep a damp paper towel: When you’re not using a piping bag, cover the tip with a damp paper towel. It prevents the icing from drying out and clogging the tip. This is a game-changer for multi-color decorating sessions.
One of my biggest failures? I once tried to rush the drying process by putting the cookies in the refrigerator. The icing turned sticky and never fully set. Lesson learned: room temperature is your friend. Just let them sit out, and they’ll be perfect by morning.
Variations & Adaptations
The beauty of this recipe is how adaptable it is. Here are a few ways to switch things up depending on your mood, dietary needs, or what you have on hand:
- Gluten-Free Version: Swap the all-purpose flour with a 1:1 gluten-free baking flour (I like King Arthur Measure for Measure). The dough will be slightly more crumbly, so handle it gently and chill it for an extra 30 minutes. The texture is still soft and delicious—I’ve tested it with my gluten-sensitive friends and they couldn’t tell the difference.
- Vegan Adaptation: Use vegan butter (I recommend Earth Balance) and replace the egg with a flax egg (1 tablespoon ground flaxseed + 3 tablespoons water, let sit for 5 minutes). For the royal icing, replace the meringue powder with aquafaba (the liquid from a can of chickpeas)—use 2 tablespoons of aquafaba in place of the meringue powder and water. The icing won’t be quite as stiff, but it still sets beautifully.
- Flavor Twists: Add 1/2 teaspoon of almond extract along with the vanilla for a subtle nutty flavor. Or, for a pumpkin spice version, add 1 teaspoon of pumpkin pie spice to the dry ingredients. I’ve also made a chocolate version by replacing 1/4 cup of the flour with cocoa powder—they’re amazing with orange icing.
- No-Icing Option: If royal icing feels too fussy, you can skip it entirely. Instead, brush the unbaked cookies with a beaten egg wash and sprinkle with coarse sanding sugar or colored sprinkles before baking. They’ll still look festive and taste delicious.
- Mini Cookie Version: Use mini cookie cutters for bite-sized treats. Bake for 6-7 minutes instead of 8-10. These are perfect for party platters or for packing in lunchboxes.
My personal favorite variation? I made a batch with a pinch of cayenne pepper in the dough—just a tiny amount, not enough to be spicy, but enough to add a warm, mysterious heat that pairs beautifully with the sweet icing. I called them “Witch’s Brew” cookies, and they were a hit at my Halloween party.
Serving & Storage Suggestions
These cookies are best served at room temperature, and they actually improve after a day or two—the flavors meld together and the icing sets to a perfect snap. Here’s how to serve and store them:
- Serving Temperature: Room temperature is ideal. If you’ve stored them in the fridge, let them sit out for 15-20 minutes before serving. The cookie will be softer and the icing will have the perfect texture.
- Presentation: Arrange them on a platter lined with black or orange tissue paper for a festive look. I like to group them by shape—ghosts together, pumpkins together—for a visually striking display. Add a few candy corn or mini pumpkins around the edges for extra flair.
- Complementary Dishes: These cookies pair beautifully with a warm cup of spiced apple cider or a creamy pumpkin latte. For a dessert table, they’re perfect alongside rainbow pot of gold cupcakes for a colorful spread, or Baileys Irish cream cheesecake for an adult-friendly dessert option.
- Storage: Store the decorated cookies in an airtight container at room temperature, layered between sheets of parchment paper. They’ll stay fresh for up to 1 week. Do not refrigerate—the moisture will soften the icing and make it sticky.
- Freezing: You can freeze undecorated baked cookies for up to 3 months. Wrap them tightly in plastic wrap and place in a freezer-safe bag. When you’re ready to decorate, thaw at room temperature for 30 minutes, then ice as usual. I’ve also frozen the raw dough discs for up to 3 months—just thaw overnight in the fridge before rolling and cutting.
- Flavor Development: Honestly, these cookies taste even better on day two. The butter and vanilla flavors deepen, and the royal icing becomes perfectly crisp. If you’re making them for a party, bake and decorate them a day ahead—your future self will thank you.
Nutritional Information & Benefits
Let’s be real: these are cookies, not health food. But that doesn’t mean they can’t have a place in a balanced lifestyle. Here’s what you should know:
- Estimated per cookie (based on 28 cookies): Calories: 145, Fat: 6g, Carbs: 22g, Protein: 2g, Sugar: 14g. These are estimates and will vary based on your specific ingredients and decorating choices.
- Health Benefits of Key Ingredients: Butter provides fat-soluble vitamins A, D, E, and K, while eggs offer high-quality protein and choline for brain health. The vanilla extract contains small amounts of antioxidants (though honestly, the sugar cancels out any real health claims—I’m not here to pretend otherwise).
- Dietary Considerations: This recipe contains gluten, dairy, and eggs. For gluten-free or vegan options, see the variations section above. The cookies are nut-free as written (check your vanilla extract for any nut-based additives).
- Potential Allergens: Dairy, eggs, gluten. If you’re using meringue powder, check the label—some brands contain soy or cornstarch.
- Personal Perspective: I believe in enjoying treats in moderation. These cookies are meant for celebration—Halloween, birthdays, or just a Tuesday that needs a little magic. I’d rather have one perfectly frosted cookie that makes me smile than a dozen mediocre ones. So go ahead, have a cookie. Just maybe not the whole batch in one sitting (speaking from experience).
Conclusion
These easy frosted Halloween sugar cookies with royal icing are everything I want in a holiday treat—they’re fun to make, gorgeous to look at, and absolutely delicious to eat. The soft, buttery cookie paired with the crisp, glossy icing is a combination that never gets old. And honestly? The process of decorating them is half the fun. There’s something meditative about piping those little ghosts and pumpkins, especially with a cup of tea and a spooky playlist in the background.
I hope you give this recipe a try. Don’t worry if your first few cookies look a little wonky—mine certainly did. That’s part of the charm. Each cookie is unique, and that’s what makes them special. Play around with the colors, try different shapes, and make them your own. And if you come up with a variation I haven’t thought of, I’d love to hear about it.
If you’re looking for more festive ideas, you might also enjoy mini lemon blueberry cheesecakes for a non-cookie option, or easy strawberry shortcake bars for a summer-inspired twist. And for more cozy fall recipes, check out Irish lamb stew with Guinness for a hearty dinner that pairs perfectly with a sweet treat afterward.
Drop a comment below and let me know how your cookies turned out—I love seeing your creations! And if you share them on social media, tag me so I can cheer you on. Happy Halloween, and happy baking!
Frequently Asked Questions
Can I use store-bought frosting instead of royal icing?
You can, but it won’t give you the same results. Store-bought frosting is too soft to pipe detailed shapes, and it won’t set hard like royal icing. If you want a quick alternative, try a simple powdered sugar glaze (powdered sugar + milk + vanilla) for a softer, glossy finish. It won’t be as crisp, but it’s still delicious.
Why did my cookies spread in the oven?
The most common reason is that the dough wasn’t chilled long enough. Make sure you chill it for at least 1 hour, and if your kitchen is warm, pop the cut-out cookies back in the fridge for 10 minutes before baking. Another culprit is over-creaming the butter and sugar—that incorporates too much air, which can cause spreading. Cream just until light and fluffy, not a second longer.
How do I get the royal icing to be perfectly smooth?
The key is consistency. Your icing should be thin enough to flow off a spoon in a ribbon that disappears in about 10 seconds. If it’s too thick, add water 1/2 teaspoon at a time. If it’s too thin, add more powdered sugar. Also, use a toothpick to pop any air bubbles right after you flood the cookie—that’s what gives you that smooth, professional finish.
Can I freeze the decorated cookies?
I don’t recommend freezing decorated cookies because the royal icing can become sticky or crack when thawed. However, you can freeze undecorated baked cookies for up to 3 months. Just thaw at room temperature, then ice as usual. The raw dough also freezes beautifully for up to 3 months.
How long do these cookies stay fresh?
Stored in an airtight container at room temperature, they’ll stay fresh for up to 1 week. The cookie will remain soft, and the icing will stay crisp. After that, the cookie may start to dry out. If you’re making them for a party, I recommend baking and decorating them 1-2 days ahead for the best texture and flavor.
Pin This Recipe!
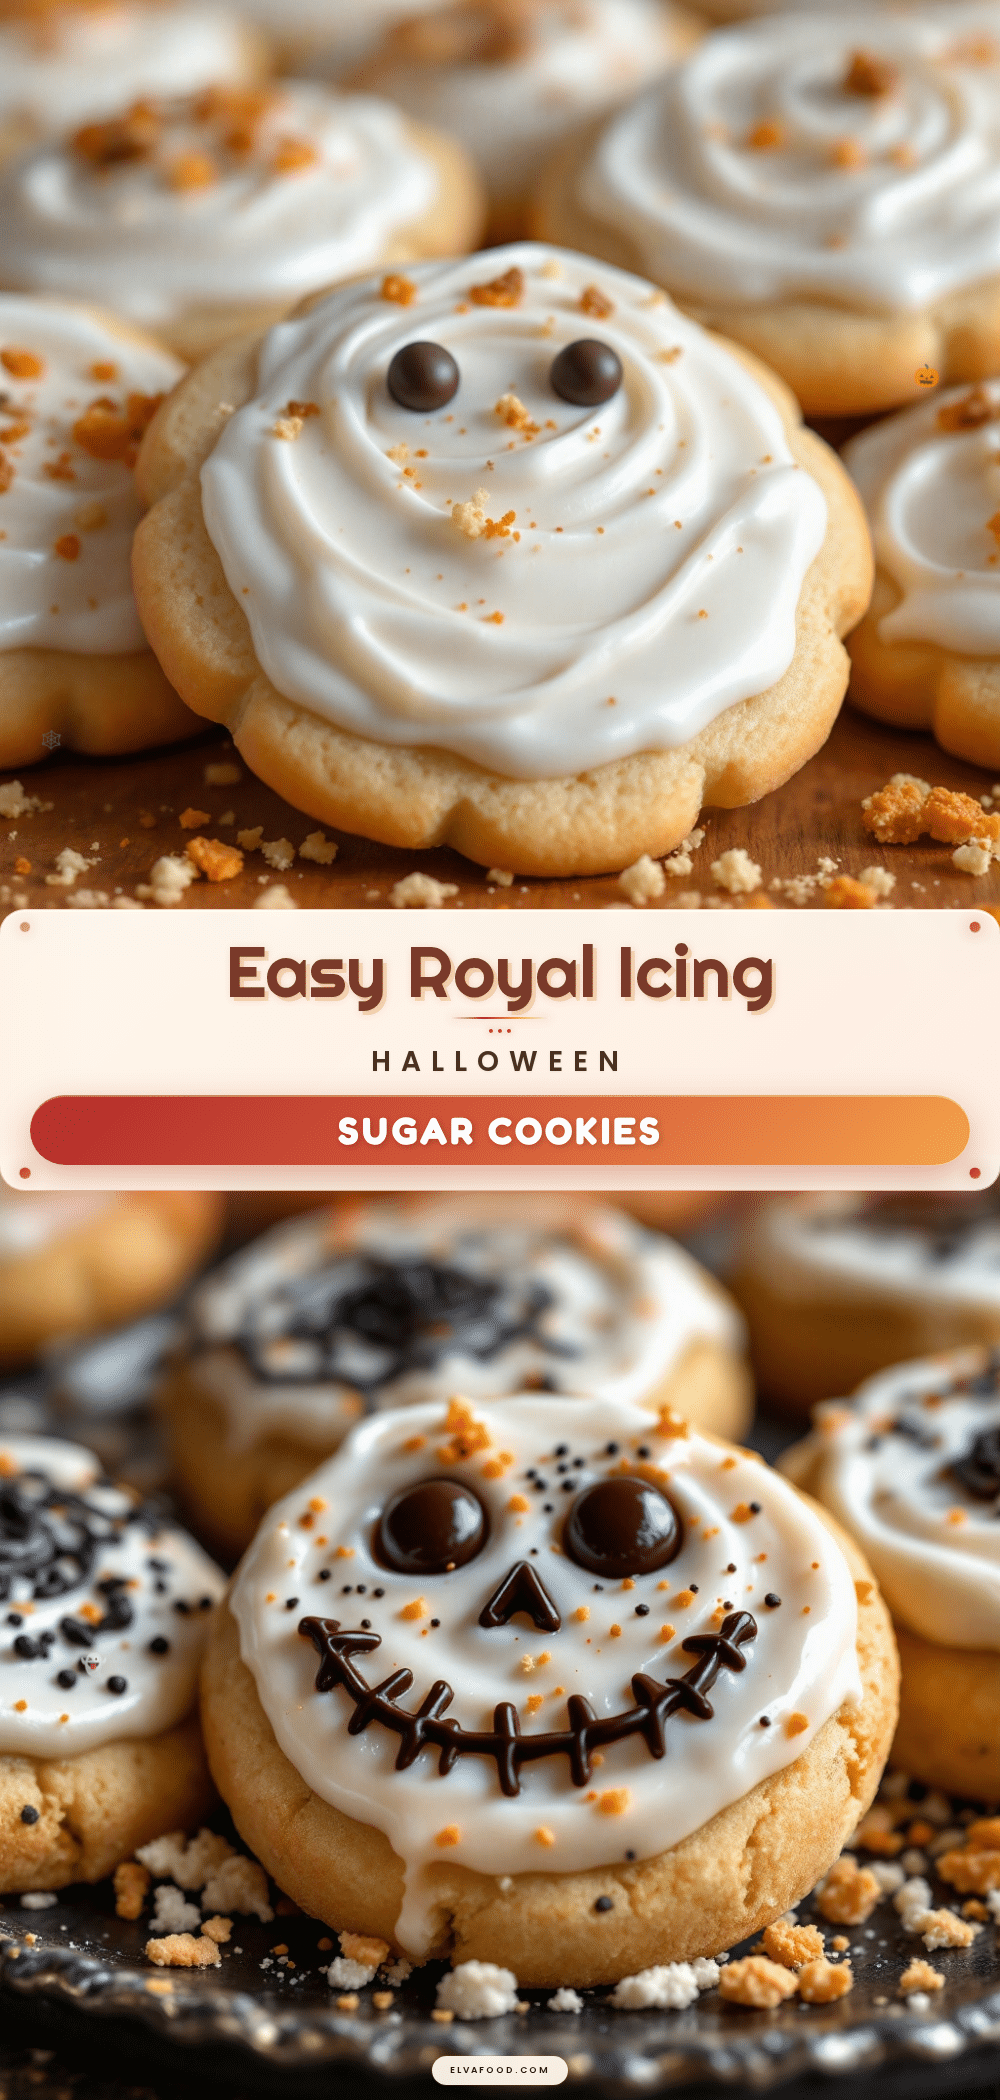
Easy Frosted Halloween Sugar Cookies with Royal Icing

Soft, buttery sugar cookies with a crisp royal icing, perfect for Halloween. These festive treats hold their shape, stay soft for days, and are easy to decorate with fun ghost, pumpkin, and bat shapes.
- Prep Time: 30 minutes
- Cook Time: 10 minutes
- Total Time: 2 hours (includes chilling and cooling)
- Yield: 24-30 cookies 1x
- Category: Dessert
- Cuisine: American
Ingredients
- 3 cups (360g) all-purpose flour
- 1 cup (226g) unsalted butter, softened
- 1 cup (200g) granulated sugar
- 1 large egg, room temperature
- 1 teaspoon vanilla extract
- 1/2 teaspoon baking powder
- 1/4 teaspoon salt
- 2 cups (240g) powdered sugar
- 2 tablespoons meringue powder
- 3–4 tablespoons warm water
- 1/2 teaspoon vanilla extract (for icing)
- Gel food coloring (orange, black, purple, green)
- Optional: sanding sugar, edible glitter, black and orange sprinkles
Instructions
- In a medium bowl, whisk together flour, baking powder, and salt. Set aside.
- In a stand mixer or large bowl, cream softened butter and granulated sugar on medium speed until light and fluffy, about 2-3 minutes. Scrape down sides.
- Add egg and vanilla extract, beat on low until just combined. Gradually add dry ingredients, mixing on low until a soft dough forms. Do not overmix.
- Divide dough into two equal discs, wrap tightly in plastic wrap, and refrigerate for at least 1 hour (up to 3 days).
- Preheat oven to 350°F (175°C). Line baking sheets with parchment paper.
- Lightly flour work surface and rolling pin. Roll one disc of dough to 1/4-inch thickness. Cut into desired shapes and place on prepared baking sheets, spacing 1 inch apart. Re-roll scraps and repeat.
- Bake for 8-10 minutes, rotating pans halfway through, until edges are just barely golden. Centers should look pale and slightly puffy.
- Let cookies rest on baking sheet for 5 minutes, then transfer to a wire rack to cool completely.
- For royal icing: In a stand mixer bowl, combine powdered sugar and meringue powder. Add 3 tablespoons warm water and 1/2 teaspoon vanilla extract. Beat on low, then increase to medium-high for 3-4 minutes until thick, glossy, and holds a stiff peak. Adjust consistency with water or powdered sugar as needed.
- Divide icing into separate bowls for each color. Add gel food coloring a tiny drop at a time until desired shade is reached. Thin each color with water 1/2 teaspoon at a time until it reaches ’10-second consistency’ (icing takes about 10 seconds to flatten when lifted with a spoon).
- Fit piping bags with #2 or #3 tips and fill with colored icing. Outline each cookie, then fill in center with a back-and-forth motion. Use a toothpick to spread icing into corners and pop air bubbles.
- Let base layer dry for at least 1 hour before adding details. For two-tone effects, pipe the second color immediately while the first is still wet.
- Allow decorated cookies to dry at room temperature for 4-6 hours or overnight until icing is completely hard to the touch.
Notes
Chilling the dough is essential to prevent spreading. Royal icing is sensitive to humidity; allow extra drying time on humid days. Cookies taste even better on day two. Store in an airtight container at room temperature for up to 1 week. Do not refrigerate decorated cookies.
Nutrition
- Serving Size: 1 cookie
- Calories: 145
- Sugar: 14
- Sodium: 50
- Fat: 6
- Saturated Fat: 3.5
- Carbohydrates: 22
- Protein: 2
Keywords: Halloween cookies, sugar cookies, royal icing, frosted cookies, ghost cookies, pumpkin cookies, easy Halloween treats


