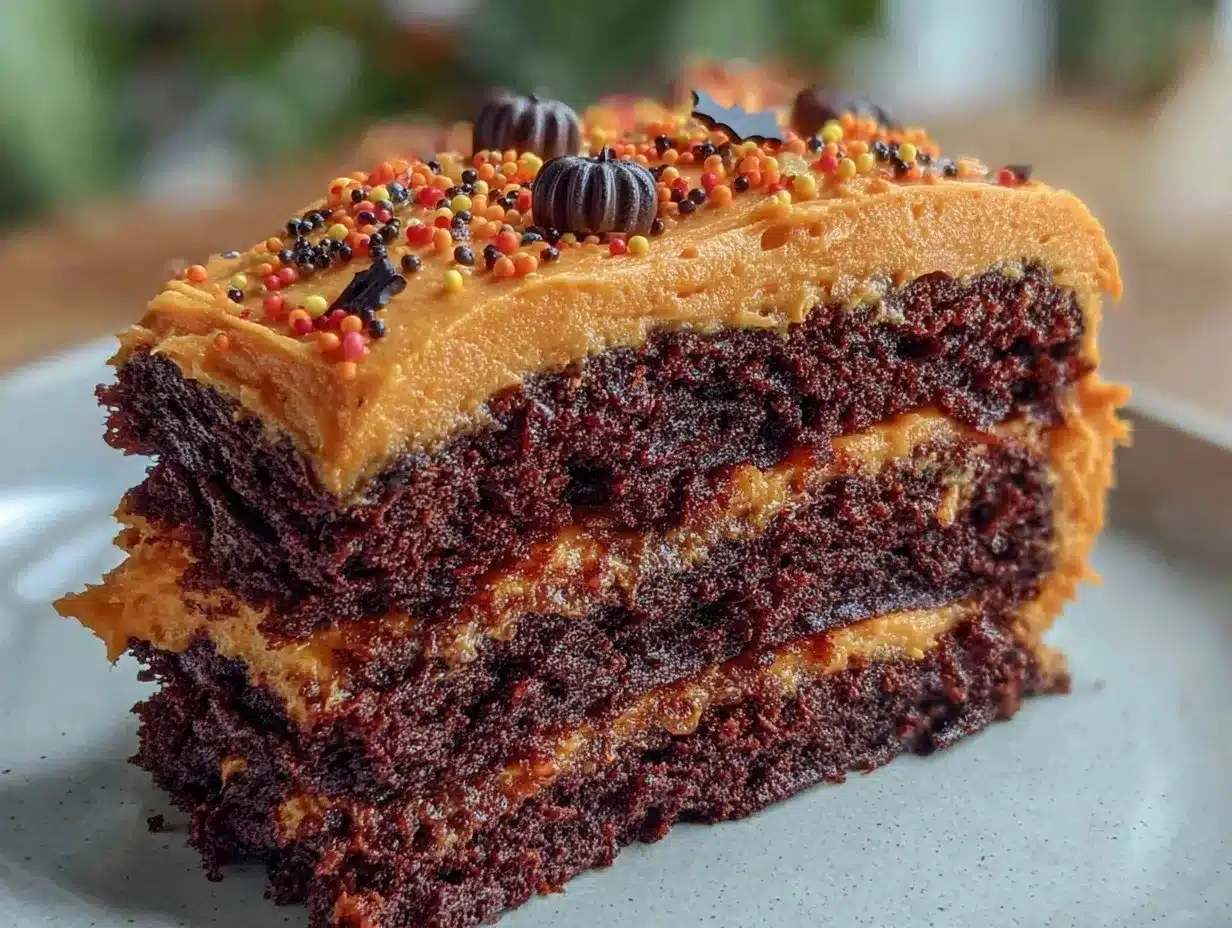
So, there I was in my kitchen, whisking together the deep, rich batter that looked almost midnight black. The scent of cocoa and a hint of espresso filled the air, promising something special. I layered the cake carefully, smearing the bright orange cream frosting between each tier, feeling like I was crafting a little edible Halloween masterpiece. It wasn’t just a cake; it was a mood, a celebration of fall’s darker, cozier side.
What I love most about this recipe is how it plays with contrasts—the black velvet cake’s moist, tender crumb against the zesty, creamy frosting. It’s not your usual pumpkin spice or candy overload. Instead, it feels like the grown-up treat you didn’t know you needed for Halloween night or a spooky gathering. And honestly, the orange cream frosting? It’s so easy and fresh, it almost makes you forget you’re eating something so rich.
Making this cake was a quiet reminder of why I enjoy baking for holidays—those little moments of creativity and joy that sneak up on you when you least expect it. This recipe has stuck with me since that night because it’s got personality and a subtle show-stopping vibe without trying too hard. If you like desserts that bring a little drama to the table (and who doesn’t?), this black velvet cake will do just that—no tricks, just a whole lot of delicious treats.
Why You’ll Love This Decadent Black Velvet Halloween Layer Cake with Easy Orange Cream Frosting Recipe
This cake has become a favorite in my kitchen for a bunch of reasons, and I’m pretty sure you’ll feel the same way once you try it. Here’s why it stands out:
- Quick & Easy: From start to finish, you can have this cake ready in about 90 minutes—perfect for last-minute Halloween plans or when you want a showstopper without spending all day.
- Simple Ingredients: No fancy or hard-to-find stuff here. Most are pantry staples like cocoa powder, buttermilk, and a few basics you probably already have.
- Perfect for Halloween Parties: The striking black and orange colors make it a natural centerpiece for spooky celebrations or fall gatherings.
- Crowd-Pleaser: Kids and adults alike rave about the moist texture and the bright, creamy frosting that balances the deep flavors of the cake.
- Unbelievably Delicious: The black velvet cake is rich but not heavy, tender but not crumbly, with a hint of espresso that lifts the cocoa notes to the next level.
What makes this recipe different? It’s the frosting. Instead of the usual cream cheese or buttercream, the orange cream frosting is light, tangy, and fresh, with just enough sweetness to complement the cake without overpowering it. Plus, blending in a splash of orange extract really brings out that citrusy pop.
Honestly, this cake isn’t just for Halloween. It’s the kind of dessert that could easily become a fall staple—something you pull out when you want to impress guests without fuss or when you want to treat yourself after a busy day. It’s cozy, fun, and just a little dramatic, which is exactly what October calls for.
What Ingredients You Will Need
This recipe uses simple, wholesome ingredients to deliver bold flavor and satisfying texture without the fuss. Most of these are pantry staples, and if you shop seasonally, you can find fresh oranges for zest and juice that make a world of difference.
- For the Black Velvet Cake:
- All-purpose flour (2 ½ cups / 315 grams) — sifted for a light crumb
- Cocoa powder, unsweetened (½ cup / 50 grams) — I prefer Valrhona for its deep flavor
- Baking soda (1 ½ teaspoons)
- Baking powder (1 teaspoon)
- Salt (1 teaspoon)
- Buttermilk (1 cup / 240 ml) — room temperature, adds tang and moisture
- Vegetable oil (1 cup / 240 ml) — keeps the cake super moist
- Granulated sugar (2 cups / 400 grams)
- Large eggs (2) — room temperature for better mixing
- Vanilla extract (2 teaspoons)
- Instant espresso powder (1 teaspoon) — optional but recommended for depth
- Black food coloring (1 tablespoon) — to get that signature black velvet color
- For the Orange Cream Frosting:
- Unsalted butter (1 cup / 227 grams), softened — for a creamy base
- Powdered sugar (4 cups / 480 grams), sifted to avoid lumps
- Heavy cream (3 tablespoons / 45 ml) — adds silkiness
- Orange zest (2 teaspoons) — fresh zest packs the best punch
- Freshly squeezed orange juice (2 tablespoons) — freshly squeezed is key here
- Vanilla extract (1 teaspoon)
- Salt (a pinch) — balances the sweetness
For substitutions: You can swap all-purpose flour with a gluten-free blend if needed, but results may vary slightly. Use dairy-free milk or coconut cream in place of buttermilk and heavy cream for a vegan adaptation, and replace butter with plant-based margarine accordingly.
Equipment Needed
- Two 9-inch (23 cm) round cake pans — if you only have one, you can bake layers one at a time
- Mixing bowls — medium and large sizes
- Electric mixer or stand mixer — for smooth batter and frosting
- Whisk and spatula — for folding and scraping
- Measuring cups and spoons — accuracy matters for baking
- Cake cooling racks — helps layers cool evenly without sogginess
- Offset spatula or butter knife — for frosting the layers neatly
If you don’t have a stand mixer, a good quality hand mixer works fine. I used a silicone spatula to get every bit of that luscious frosting out of the bowl — it’s worth having one around. For budget-friendly baking, simple glass pans work just as well as metal, though baking time might shift by a few minutes.
Preparation Method
- Preheat your oven to 350°F (175°C). Grease and flour two 9-inch round cake pans or line them with parchment paper. This step is crucial to get the cake out cleanly.
- Mix your dry ingredients: In a large bowl, sift together the all-purpose flour, cocoa powder, baking soda, baking powder, and salt. Set aside.
- Combine the wet ingredients: In another bowl, whisk together the buttermilk, vegetable oil, granulated sugar, eggs, vanilla extract, instant espresso powder, and black food coloring until smooth and well combined.
- Slowly add the dry ingredients to the wet mixture, stirring gently with a spatula or on low speed with your mixer. Don’t overmix here—stop as soon as everything is incorporated to keep the cake tender.
- Divide the batter evenly between the prepared pans. You can use a kitchen scale for precision (about 600 grams per pan). Smooth the tops with a spatula for even layers.
- Bake for 28-32 minutes, rotating pans halfway through. You’ll know they’re done when a toothpick inserted in the center comes out with a few moist crumbs but no wet batter.
- Cool the cakes in the pans for 10 minutes before turning them out onto cooling racks. Let them cool completely (at least 1 hour) before frosting. This prevents the frosting from melting.
- Make the orange cream frosting: Beat the softened butter on medium speed until creamy, about 2 minutes. Gradually add powdered sugar, alternating with heavy cream, until fluffy.
- Add the orange zest, orange juice, vanilla extract, and a pinch of salt to the frosting. Mix on low speed to combine, then increase speed briefly to make it light and airy. Taste and adjust—add more juice or zest if you want a brighter flavor.
- Assemble the cake: Place one cake layer on your serving plate. Spread about 1 cup (240 ml) of frosting evenly on top. Place the second layer on top and apply a thin crumb coat of frosting all over the cake.
- Chill for 15-20 minutes to set the crumb coat, then apply a final thick layer of frosting. Use an offset spatula to create swirls or smooth edges, whatever feels right for your spooky vibe.
- Optional: Decorate with Halloween-themed sprinkles, edible glitter, or candied orange slices for a festive finish.
Pro tip: If your batter feels a little thick, a splash more buttermilk can loosen it up. And don’t skip the espresso powder—it’s the secret to making the cocoa flavor pop without tasting like coffee.
Cooking Tips & Techniques
One thing I learned the hard way is that black velvet cake batter needs just the right balance of food coloring and cocoa powder. Too much food coloring can taste bitter; too little and you lose that dramatic black shade. Start with a tablespoon and add more if needed.
When mixing, folding gently is key. Overmixing develops gluten and can make the cake dense instead of that tender crumb you want. I usually stop as soon as I don’t see any streaks of flour.
Cooling the cakes completely before frosting is a must. I’ve had layers slide off or frosting melt when I got impatient. To speed things up, pop the layers in the fridge once they’re cool to the touch.
For frosting, room temperature butter beats cold butter every time—it whips up smooth and light. If your frosting looks too thick, a teaspoon of orange juice or cream will loosen it without losing flavor.
Multitasking tip: While the cakes bake, zest your oranges and prep the frosting ingredients. That way, as soon as the cakes cool, you’re ready to assemble.
Variations & Adaptations
- Spiced Black Velvet: Add 1 teaspoon of pumpkin pie spice or cinnamon to the dry ingredients for a warm autumn twist.
- Vegan Version: Replace eggs with flax eggs (2 tbsp ground flaxseed + 6 tbsp water), swap buttermilk for almond milk mixed with 1 tbsp vinegar, and use a vegan butter alternative for the frosting.
- Chocolate Orange Ganache: Instead of the orange cream frosting, pour a rich dark chocolate ganache infused with orange zest over the cake for a glossy, decadent finish.
- Mini Cakes or Cupcakes: Use this batter to make cupcakes, adjusting baking time to 18-22 minutes, great for Halloween parties or gifting.
- Personal Favorite: I once added a layer of homemade spiced pumpkin butter between the cake layers before frosting—it was a game-changer for fall flavor.
Serving & Storage Suggestions
This cake is best served at room temperature so the frosting is creamy and the crumb soft. It pairs beautifully with a hot cup of spiced tea or a glass of chilled sparkling apple cider for a festive touch.
Store any leftovers covered tightly in the refrigerator for up to 4 days. For longer storage, you can freeze the cake (whole or sliced) wrapped in plastic wrap and foil for up to 3 months. Thaw overnight in the fridge before serving and bring to room temperature to get that perfect texture back.
Reheating frosting isn’t recommended, but if you want a slightly softer frosting, just let the cake sit out for 30 minutes before serving.
Fun fact: The flavors of the orange cream frosting meld and mellow when chilled, so the next day, it tastes even better—like a little Halloween magic in your fridge.
Nutritional Information & Benefits
Each slice of this Decadent Black Velvet Halloween Layer Cake with Orange Cream Frosting clocks in at roughly 450-500 calories, depending on slice size. It’s a treat, sure, but with wholesome ingredients like real orange juice and zest, it has a fresh brightness that cuts through the richness.
The cocoa powder adds antioxidants, and buttermilk contributes calcium and protein. Plus, the orange zest offers a dose of vitamin C and a natural lift to mood and flavor.
If you need gluten-free, swapping flour works, but keep an eye on texture—it may be denser. For low-sugar versions, reduce powdered sugar in the frosting a bit and use a sugar substitute if you prefer.
Conclusion
This Decadent Black Velvet Halloween Layer Cake with Easy Orange Cream Frosting isn’t just a dessert—it’s a little celebration of fall’s bold flavors and fun contrasts. It’s the kind of cake I reach for when I want something dramatic but approachable, spooky but delicious.
Feel free to tweak the frosting or add your own seasonal twists. Whether you’re hosting a Halloween bash or just want a cozy treat, this recipe fits right in. I love it because it’s not overly sweet, not too fussy, and full of personality.
Give it a try, and don’t be shy about sharing your own spin on it—I’d love to hear how you make it your own!
FAQs about Decadent Black Velvet Halloween Layer Cake
Can I make this cake a day ahead?
Absolutely! Bake and frost it the day before, then store it covered in the fridge. Bring it to room temperature before serving for the best texture.
What if I don’t have buttermilk?
Mix 1 tablespoon of vinegar or lemon juice with 1 cup of milk and let it sit for 5 minutes. This homemade buttermilk works great in the recipe.
How do I get the cake so black without it tasting like food coloring?
Use a good-quality cocoa powder and only about 1 tablespoon of black food coloring. The espresso powder also helps deepen the color and flavor without bitterness.
Can I freeze the cake after assembling?
Yes, wrap it tightly in plastic wrap and foil, then freeze for up to 3 months. Thaw in the fridge overnight and let it warm to room temp before serving.
Is the orange cream frosting suitable for piping decorations?
It’s smooth and creamy but a bit soft for intricate piping. Chill it slightly to firm up before piping simple designs or use it mostly for spreading.
If you’re curious about other comforting, hearty dishes to pair with your seasonal baking, you might enjoy the Irish lamb stew recipe with Guinness or the Dublin coddle sausage and potato stew. Both bring that cozy, warming vibe that pairs perfectly with a slice of this black velvet cake after dinner.
Pin This Recipe!
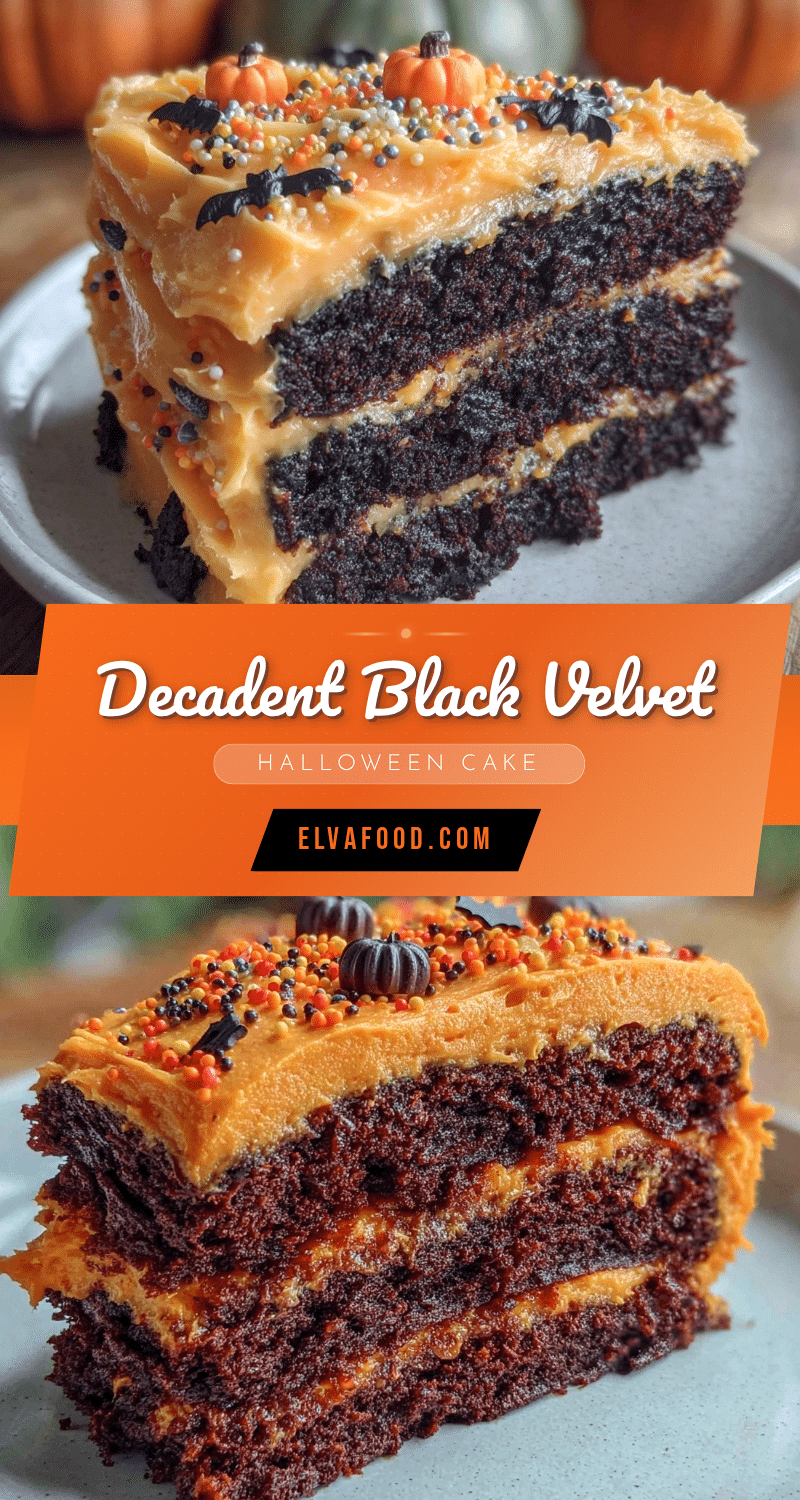
Decadent Black Velvet Halloween Layer Cake with Easy Orange Cream Frosting
A rich, moist black velvet cake with a hint of espresso, layered with a light, tangy orange cream frosting. Perfect for Halloween or fall gatherings, this cake offers a dramatic yet approachable dessert experience.
- Prep Time: 30 minutes
- Cook Time: 32 minutes
- Total Time: 90 minutes
- Yield: 12 servings 1x
- Category: Dessert
- Cuisine: American
Ingredients
- 2 ½ cups (315 grams) all-purpose flour, sifted
- ½ cup (50 grams) unsweetened cocoa powder
- 1 ½ teaspoons baking soda
- 1 teaspoon baking powder
- 1 teaspoon salt
- 1 cup (240 ml) buttermilk, room temperature
- 1 cup (240 ml) vegetable oil
- 2 cups (400 grams) granulated sugar
- 2 large eggs, room temperature
- 2 teaspoons vanilla extract
- 1 teaspoon instant espresso powder (optional)
- 1 tablespoon black food coloring
- 1 cup (227 grams) unsalted butter, softened
- 4 cups (480 grams) powdered sugar, sifted
- 3 tablespoons (45 ml) heavy cream
- 2 teaspoons orange zest
- 2 tablespoons freshly squeezed orange juice
- 1 teaspoon vanilla extract
- Pinch of salt
Instructions
- Preheat oven to 350°F (175°C). Grease and flour two 9-inch round cake pans or line with parchment paper.
- In a large bowl, sift together flour, cocoa powder, baking soda, baking powder, and salt. Set aside.
- In another bowl, whisk together buttermilk, vegetable oil, granulated sugar, eggs, vanilla extract, espresso powder, and black food coloring until smooth.
- Slowly add dry ingredients to wet mixture, stirring gently until just combined. Do not overmix.
- Divide batter evenly between prepared pans (about 600 grams per pan). Smooth tops with a spatula.
- Bake for 28-32 minutes, rotating pans halfway through. Test doneness with a toothpick; it should come out with a few moist crumbs.
- Cool cakes in pans for 10 minutes, then turn out onto cooling racks. Cool completely (at least 1 hour) before frosting.
- To make frosting, beat softened butter on medium speed until creamy, about 2 minutes.
- Gradually add powdered sugar, alternating with heavy cream, beating until fluffy.
- Add orange zest, orange juice, vanilla extract, and salt. Mix on low speed to combine, then briefly increase speed to lighten frosting. Adjust flavor as desired.
- Place one cake layer on serving plate. Spread about 1 cup (240 ml) frosting evenly on top.
- Place second layer on top and apply a thin crumb coat of frosting all over the cake.
- Chill cake for 15-20 minutes to set crumb coat.
- Apply a final thick layer of frosting, smoothing or creating swirls with an offset spatula.
- Optional: Decorate with Halloween-themed sprinkles, edible glitter, or candied orange slices.
Notes
Use good-quality cocoa powder and limit black food coloring to 1 tablespoon to avoid bitterness. Do not overmix batter to keep cake tender. Cool cakes completely before frosting to prevent melting. Room temperature butter is best for frosting. Adjust frosting thickness with orange juice or cream if needed. Espresso powder enhances cocoa flavor without coffee taste.
Nutrition
- Serving Size: 1 slice (1/12 of cak
- Calories: 475
- Sugar: 45
- Sodium: 320
- Fat: 25
- Saturated Fat: 12
- Carbohydrates: 62
- Fiber: 3
- Protein: 5
Keywords: black velvet cake, Halloween cake, orange cream frosting, layered cake, spooky dessert, fall dessert, cocoa cake, espresso cake


