Third time in five days I’d made a pumpkin roll, and this time the cream cheese filling finally didn’t squirt out the side when I rolled it. I stood there in my kitchen, staring at this perfect little spiral, and honestly? I almost cried. Not because it was hard—it’s not, once you get the hang of it—but because the first two attempts were these sad, cracked, leaking messes that tasted amazing but looked like they’d been through a blender. There’s something about a pumpkin roll that feels almost personal. It’s not just a cake; it’s a test of patience, a dance between warm spiced cake and cool creamy filling, and when it works, you feel like you’ve won something.
I kept coming back to it because the flavor was worth the frustration. That first bite of a properly made pumpkin roll—soft, tender cake wrapped around tangy, sweet cream cheese—tastes like fall in a way that pumpkin pie just can’t match. It’s lighter, more delicate, but still that deep, cozy pumpkin spice thing we all crave when the air gets crisp. And once I figured out the tricks (a clean kitchen towel, a gentle hand, and not overbaking by even thirty seconds), it became my go-to for everything from Thanksgiving dessert to random Tuesday coffee breaks.
This perfect pumpkin roll with cream cheese filling is the one I make now, every single time. It’s the version I trust—the one that rolls without cracking, slices cleanly, and makes people close their eyes when they eat it. If you’ve ever been intimidated by a rolled cake, I promise this is the recipe that changes that.
Why You’ll Love This Recipe
Let me tell you why this pumpkin roll has earned a permanent spot in my recipe rotation. I’ve tested this thing at least a dozen times—different pans, different rolling techniques, different cream cheese ratios—and this version is the one that works every single time, no drama.
- Quick & Easy: From start to finish, you’re looking at about 30 minutes of active time. The cake bakes in 12-15 minutes, and while it cools, you whip up the filling. It’s fast enough for a weeknight craving but fancy enough for company.
- Simple Ingredients: You probably have most of this in your pantry right now. Canned pumpkin, basic baking staples, cream cheese, and powdered sugar. No weird specialty items or expensive extracts.
- Perfect for Fall Gatherings: This is the dessert that disappears first at Thanksgiving, Friendsgiving, or any autumn potluck. It slices into these beautiful spirals that look way more impressive than the effort required.
- Crowd-Pleaser: I’ve served this to kids who hate pumpkin pie and adults who claim they’re “not dessert people,” and everyone goes back for seconds. The cream cheese filling balances the pumpkin spice perfectly—not too sweet, not too tangy.
- Unbelievably Delicious: The texture is what gets me every time. That thin, tender cake layer wrapped around silky cream cheese—it’s like a pumpkin spice latte in cake form, but better because you can actually eat it with a fork.
What makes this recipe different from all the others? It’s the technique. Most pumpkin roll recipes tell you to roll the cake in a towel and hope for the best. I’m showing you exactly how to get that perfect spiral without cracks, how to keep the filling from squeezing out, and how to slice it cleanly. This isn’t just another version—it’s the one I’d make for my mom, and she’s brutally honest about baked goods.
There’s something about that first bite of a perfect pumpkin roll that just makes everything feel right. It’s comfort food, sure, but it’s also a little bit of magic—taking simple ingredients and turning them into something that looks like it came from a fancy bakery. And honestly? Making it yourself feels pretty good too.
What Ingredients You Will Need
This recipe uses simple, wholesome ingredients that work together to create that perfect pumpkin roll texture and flavor. I’ve tested different combinations, and this lineup delivers the best results every time.
For the Pumpkin Cake
- ¾ cup all-purpose flour (spooned and leveled—don’t scoop straight from the bag or you’ll get too much)
- 1 teaspoon baking powder (make sure it’s fresh; old baking powder ruins the rise)
- ½ teaspoon baking soda (helps the cake stay light and tender)
- 1 teaspoon ground cinnamon (I prefer Saigon cinnamon for its bold, slightly sweet warmth)
- ½ teaspoon ground ginger (adds that subtle warmth that makes pumpkin spice taste authentic)
- ½ teaspoon ground nutmeg (freshly grated if you have it—it really does make a difference)
- ¼ teaspoon ground cloves (just enough to round out the spice blend)
- ½ teaspoon salt (balances the sweetness and enhances the pumpkin flavor)
- 3 large eggs, room temperature (cold eggs don’t incorporate as smoothly)
- 1 cup granulated sugar (regular white sugar works perfectly here)
- ⅔ cup canned pumpkin puree (not pumpkin pie filling—make sure it’s 100% pumpkin)
- 1 teaspoon vanilla extract (pure vanilla, not imitation, if you can swing it)
- Powdered sugar for dusting (you’ll use this when rolling the cake)
For the Cream Cheese Filling
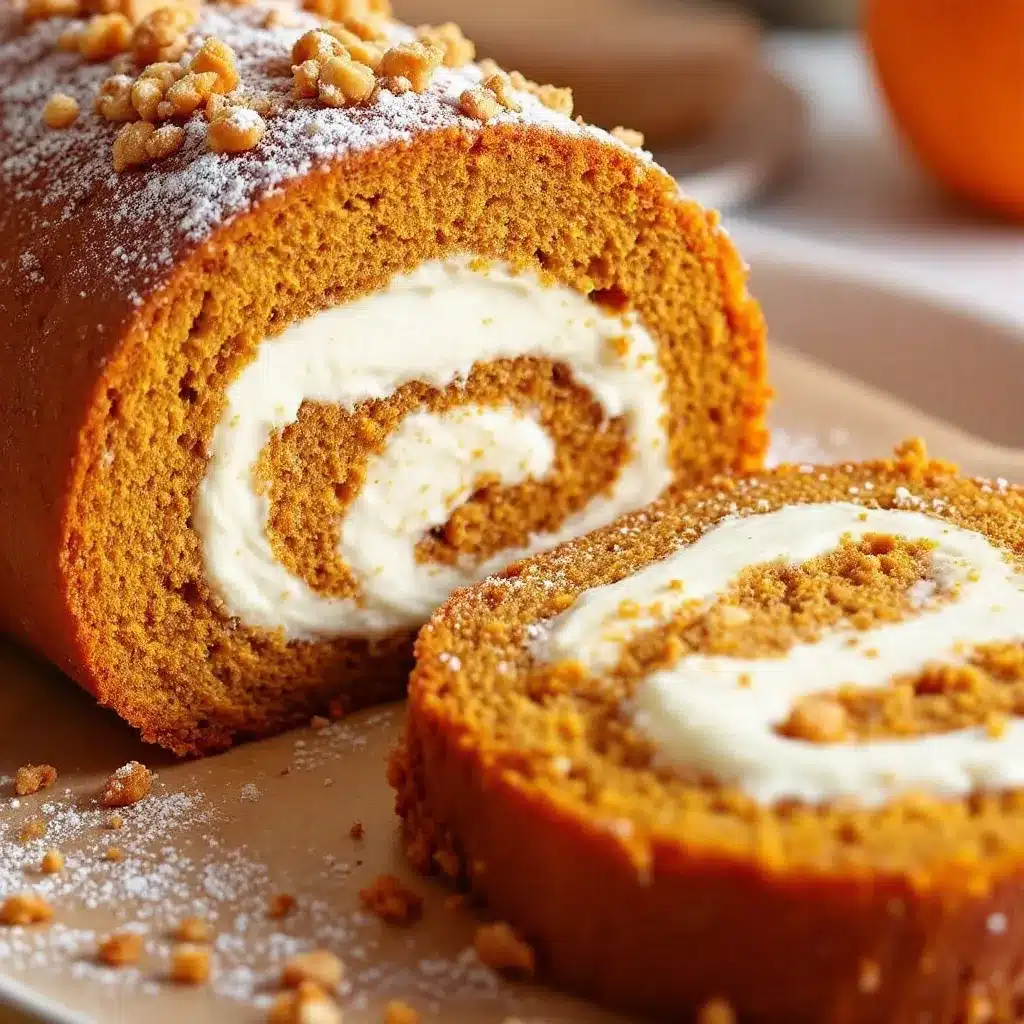
- 8 ounces cream cheese, softened to room temperature (full-fat works best for texture and stability)
- 1 cup powdered sugar, sifted (sifting prevents lumps—trust me on this one)
- 6 tablespoons unsalted butter, softened (I use Land O’Lakes for consistent results)
- 1 teaspoon vanilla extract (adds depth to the cream cheese flavor)
Ingredient Notes & Substitutions:
- For a gluten-free version, swap the all-purpose flour with a 1:1 gluten-free baking blend that contains xanthan gum. I’ve had good results with King Arthur’s measure-for-measure blend.
- If you don’t have pumpkin pie spice, you can substitute 2 teaspoons of pumpkin pie spice for the individual spices listed above. Just adjust the amount slightly—pumpkin pie spice is a bit milder than the sum of its parts.
- For the cream cheese, I really recommend using full-fat. Low-fat cream cheese has more water content, which can make the filling runny and cause it to squeeze out when you roll the cake.
- If you’re dairy-free, there are decent plant-based cream cheese options now. Just make sure they’re the block style, not the spreadable kind, which has too much water.
Equipment Needed
You don’t need a fancy kitchen to make this perfect pumpkin roll. Here’s what you’ll actually use:
- 15×10-inch jelly roll pan (also called a half-sheet pan—this specific size matters for the right cake thickness)
- Parchment paper (don’t skip this—it’s what makes the cake release cleanly from the pan)
- Clean kitchen towel (a thin, lint-free one works best; I use a flour sack towel)
- Electric mixer (handheld or stand mixer both work fine)
- Large mixing bowls (one for dry ingredients, one for wet)
- Rubber spatula (for folding and spreading)
- Cooling rack (helps the cake cool evenly)
- Sharp knife or serrated knife (for clean slices)
- Sifter or fine-mesh strainer (for dusting powdered sugar)
Tool Tips: If you don’t have a jelly roll pan, you can use a 9×13-inch baking dish, but the cake will be thicker and harder to roll. The 15×10 size really is ideal. For the kitchen towel, avoid terry cloth or anything fuzzy—the texture can stick to the cake. I bought a pack of flour sack towels specifically for rolled cakes, and they work perfectly. Also, parchment paper is non-negotiable here. Wax paper will melt in the oven, and greasing the pan alone won’t give you the clean release you need.
Preparation Method
Let’s walk through this step by step. I’ve included all the little details I wish someone had told me the first time I made a pumpkin roll.
Step 1: Preheat and Prepare the Pan
Preheat your oven to 350°F (175°C). Line your 15×10-inch jelly roll pan with parchment paper, leaving about an inch of overhang on the long sides. Lightly spray the parchment with non-stick cooking spray—this extra step ensures the cake releases perfectly. Set the pan aside while you mix the batter.
Step 2: Mix the Dry Ingredients
In a medium bowl, whisk together the flour, baking powder, baking soda, cinnamon, ginger, nutmeg, cloves, and salt. Whisking aerates the flour and distributes the spices evenly. Set this aside.
Step 3: Beat the Eggs and Sugar
In a large bowl, beat the eggs and granulated sugar together with an electric mixer on medium-high speed for about 2-3 minutes. The mixture should become thick, pale, and slightly fluffy—it should look like a thick milkshake. This step is important because it incorporates air that helps the cake rise properly.
Step 4: Add Pumpkin and Vanilla
Reduce the mixer speed to low and add the pumpkin puree and vanilla extract. Mix until just combined. Don’t overmix here—you want everything incorporated, but you don’t want to deflate all that air you just beat in.
Step 5: Fold in the Dry Ingredients
Add the dry ingredients to the wet mixture in two additions, folding gently with a rubber spatula after each addition. Fold until you no longer see streaks of flour. A few small lumps are fine—overmixing will make the cake tough. The batter will be thick and slightly fluffy.
Step 6: Spread and Bake
Pour the batter into the prepared pan and spread it evenly using an offset spatula or the back of a spoon. Make sure it reaches all the corners and is relatively even in thickness. Bake for 12-15 minutes, or until the top springs back when lightly touched and the edges start to pull away from the pan. The cake should look set and slightly golden around the edges. Don’t overbake—even one extra minute can make the cake dry and prone to cracking when rolled.
Step 7: The Rolling Technique (This Is Crucial)
While the cake is still hot, run a knife around the edges of the pan to loosen it. Lay a clean kitchen towel flat on your counter and dust it generously with powdered sugar. Invert the cake onto the towel (the parchment paper should be facing up). Carefully peel off the parchment paper. Starting from one short end, gently roll the cake and towel together into a tight log. Let the rolled cake cool completely on a wire rack—this takes about 30-40 minutes. Rolling the cake while it’s still warm “trains” it to hold that shape, which prevents cracking later.
Step 8: Make the Cream Cheese Filling
While the cake cools, make the filling. In a medium bowl, beat the softened cream cheese, powdered sugar, butter, and vanilla extract together until smooth and creamy. Beat for about 2-3 minutes on medium speed—you want it light and fluffy, not dense. Scrape down the sides of the bowl as needed. Set aside at room temperature; don’t refrigerate it yet or it will be too stiff to spread.
Step 9: Unroll, Fill, and Re-roll
Once the cake is completely cool, carefully unroll it. The cake will have a slight curl to it—that’s normal. Spread the cream cheese filling evenly over the cake, leaving a ½-inch border around the edges. Using the towel to help you, gently re-roll the cake (without the towel this time). Roll it tightly but gently—you want a nice spiral without squeezing the filling out the sides. Wrap the rolled cake tightly in plastic wrap and refrigerate for at least 1 hour before slicing. Chilling helps the filling set and makes slicing much cleaner.
Step 10: Slice and Serve
When you’re ready to serve, remove the pumpkin roll from the refrigerator. Trim the ends for a clean look (the ends are usually a bit messy—that’s the baker’s treat). Slice into 1-inch rounds using a sharp, thin-bladed knife. Wipe the knife clean between slices for the prettiest presentation. Dust with powdered sugar just before serving.
Cooking Tips & Techniques
Over the course of those five days of testing, I learned some things the hard way. Here’s what I wish I’d known from the start:
Don’t overbake the cake. This is the number one reason pumpkin rolls crack. The cake should be just set—when you touch the center, it should spring back, not leave an indent. If it looks dry around the edges, you’ve gone too far. Set a timer for 12 minutes and check it. Every oven runs differently, so start checking early.
Use room temperature ingredients. Cold eggs don’t incorporate well into the batter, and cold cream cheese makes lumpy filling. Take everything out of the fridge about 30 minutes before you start. If you’re in a hurry, you can warm eggs in a bowl of warm water for 5 minutes.
Roll the cake while it’s hot. I know it seems counterintuitive—you’re handling a hot cake—but this is what creates that perfect spiral. If you wait until the cake is cool, it will crack when you try to roll it. The powdered sugar on the towel prevents sticking, so don’t skimp on it.
Let the rolled cake cool completely before filling. I made the mistake of rushing this step once, and the warm cake melted the cream cheese filling into a soupy mess that squirted out everywhere. Patience pays off here.
Use a sharp knife for slicing. A dull knife will squish the cake and smear the filling. Run the knife under hot water, wipe it dry, then slice. Clean the blade between each cut for picture-perfect slices.
One thing I learned from my failed attempts: if your cake does crack (and it might, especially the first time), don’t panic. The cream cheese filling acts like glue. Just spread the filling over the crack and roll carefully. Once it’s chilled and sliced, no one will ever know.
Variations & Adaptations
Once you’ve mastered the basic pumpkin roll, there are so many ways to make it your own. Here are some of my favorite variations:
Chocolate Pumpkin Roll: Replace ¼ cup of the all-purpose flour with ¼ cup of unsweetened cocoa powder. The chocolate and pumpkin spices are surprisingly good together—it’s like a mocha pumpkin situation that works beautifully.
Maple Cream Cheese Filling: Add 2 tablespoons of pure maple syrup to the cream cheese filling and reduce the powdered sugar by 2 tablespoons. The maple flavor pairs perfectly with the pumpkin spice. I made this for a Friendsgiving last year and it was gone in minutes.
Gluten-Free Version: Use a 1:1 gluten-free baking blend that contains xanthan gum. I’ve tested this with King Arthur’s measure-for-measure blend and it works perfectly—the texture is slightly more delicate, but the flavor is spot on.
Vegan Adaptation: This one takes a bit more work, but it’s doable. Use flax eggs (1 tablespoon ground flaxseed mixed with 3 tablespoons water per egg) and a vegan cream cheese alternative. The texture won’t be quite as tender, but the flavor is still delicious.
Spice It Up: Add a pinch of cayenne pepper or black pepper to the spice blend for a subtle warmth that complements the pumpkin. This is a trick I learned from a pastry chef friend, and it adds a surprising depth that most people can’t quite identify but love.
I’ve also tried adding chopped pecans or walnuts to the filling for some crunch, and it’s a nice textural contrast. Just fold in about ½ cup of finely chopped nuts after you’ve made the filling.
Serving & Storage Suggestions
This pumpkin roll is best served chilled, straight from the refrigerator. The cold filling contrasts beautifully with the tender cake, and the flavors have had time to meld together. I like to dust the top with a light snowfall of powdered sugar just before serving—it makes the presentation look extra special.
What to Serve With It: A dollop of fresh whipped cream is always welcome, especially if you’re serving this as a Thanksgiving dessert. A drizzle of caramel sauce takes it over the top. For drinks, it pairs beautifully with hot coffee, spiced chai, or even a glass of cold milk. If you’re feeling fancy, a dessert wine like a late-harvest Riesling complements the pumpkin and cream cheese flavors perfectly.
Storage: Wrap the pumpkin roll tightly in plastic wrap and store it in the refrigerator for up to 5 days. The flavors actually improve after a day or two—the spices meld with the cream cheese filling in a way that makes every bite more delicious. You can also freeze the pumpkin roll for up to 3 months. Wrap it in plastic wrap, then aluminum foil, and thaw it overnight in the refrigerator before serving.
Reheating: I actually prefer this dessert cold, but if you want to serve it warm, microwave individual slices for about 10-15 seconds. Don’t overheat it or the filling will melt and the cake will get soggy.
One thing I’ve noticed: the cake absorbs some moisture from the filling as it sits, which makes it even more tender after a day or two. So if you can plan ahead, making this a day before you need it is actually ideal.
Nutritional Information & Benefits
Let’s be real—this is a dessert, not a health food. But it does have some redeeming qualities. Pumpkin is packed with vitamin A, fiber, and antioxidants. It’s also relatively low in calories compared to other dessert bases. The cream cheese adds protein and calcium, though it’s also where most of the fat comes from.
Here’s an approximate nutritional breakdown per slice (based on 10 slices):
- Calories: 290-320
- Fat: 14-16g
- Carbohydrates: 38-42g
- Protein: 4-5g
- Fiber: 1-2g
- Sugar: 28-32g
Dietary Considerations: This recipe contains gluten, dairy, and eggs. For gluten-free and vegan options, see the variations section above. The pumpkin itself is naturally gluten-free and low in FODMAPs, so if you’re sensitive to certain foods, the cake portion can work with modifications.
I personally love that this dessert feels indulgent without being overly heavy. One slice is satisfying—you don’t need to go back for thirds. And because it’s so rich and flavorful, a little goes a long way.
Conclusion
This perfect pumpkin roll with cream cheese filling has become my fall baking signature for a reason. It’s the dessert that looks like you spent hours in the kitchen but actually comes together in about 30 minutes of active time. It’s impressive enough for Thanksgiving but simple enough for a random Tuesday when you’re craving something cozy and sweet.
I love that this recipe has room for your own personality. Maybe you’ll add extra cinnamon, or swap in maple syrup, or go wild with a chocolate version. That’s the beauty of a good base recipe—it gives you a foundation to build on. Don’t be afraid to make it your own.
If you try this recipe, I’d love to hear how it turns out. Drop a comment below and let me know if your family fought over the last slice (mine did). And if you have your own pumpkin roll tips or variations, share those too—I’m always looking for new ideas to test out in my kitchen.
Now go make that pumpkin roll. Your fall season deserves it.
Frequently Asked Questions
Why did my pumpkin roll crack when I rolled it?
The most common reason is overbaking. The cake should be just set—bake it for 12-15 minutes max, and check it early. Another common issue is rolling the cake when it’s too cool. You need to roll it while it’s still warm (but not hot) so it “learns” the shape. If it’s already cracked, don’t worry—the cream cheese filling acts like glue, and once it’s sliced, no one will notice.
Can I make this pumpkin roll ahead of time?
Absolutely. In fact, I recommend it. The pumpkin roll actually tastes better after a day in the refrigerator because the flavors meld together. You can make it up to 3 days in advance and keep it wrapped tightly in plastic wrap in the fridge. Just dust with powdered sugar right before serving.
Can I freeze pumpkin roll?
Yes! Pumpkin roll freezes beautifully. Wrap it tightly in plastic wrap, then a layer of aluminum foil, and freeze for up to 3 months. Thaw it overnight in the refrigerator before serving. The texture remains tender and the filling stays creamy—it’s one of the few desserts that freezes this well.
Can I use fresh pumpkin instead of canned?
You can, but I don’t recommend it for this recipe. Canned pumpkin has a consistent moisture content that’s crucial for the cake’s texture. Fresh pumpkin puree tends to be more watery, which can make the cake soggy and harder to roll. If you really want to use fresh pumpkin, make sure to strain it through cheesecloth for several hours to remove excess liquid.
Why did my cream cheese filling come out runny?
This usually happens for one of two reasons: either the cream cheese wasn’t fully softened (leading to lumps that melt later), or the cake was still warm when you spread the filling. Always let the rolled cake cool completely before unrolling and filling. Also, make sure you’re using full-fat cream cheese—low-fat versions have more water and can make the filling unstable.
Pin This Recipe!
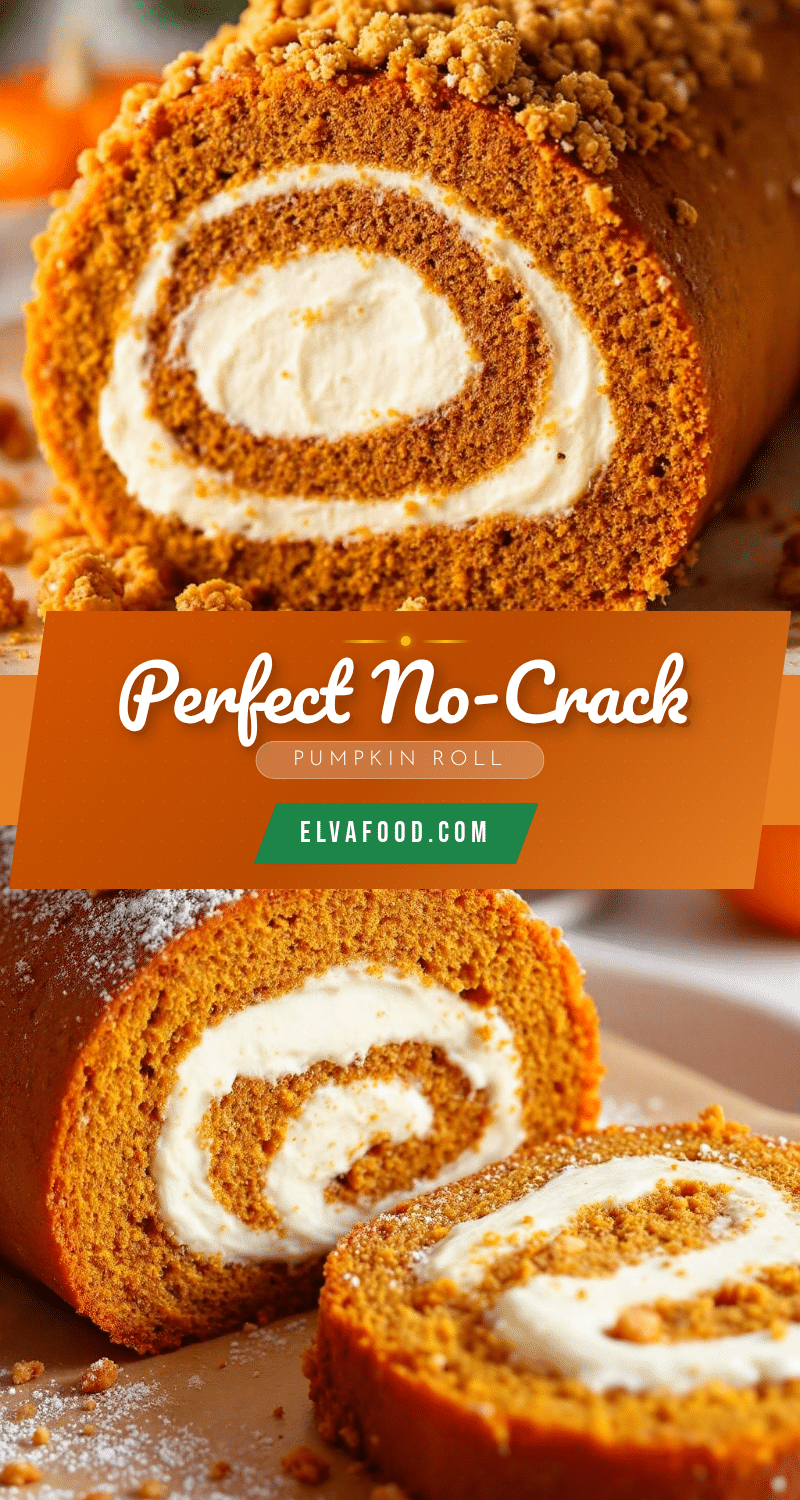
Perfect Pumpkin Roll with Cream Cheese Filling: Easy 30-Minute Dessert
A tender, spiced pumpkin cake rolled around a creamy, tangy cream cheese filling. This foolproof recipe delivers a beautiful spiral without cracks, perfect for fall gatherings or a cozy weeknight treat.
- Prep Time: 30 minutes
- Cook Time: 15 minutes
- Total Time: 45 minutes
- Yield: 10 servings 1x
- Category: Dessert
- Cuisine: American
Ingredients
- ¾ cup all-purpose flour (spooned and leveled)
- 1 teaspoon baking powder
- ½ teaspoon baking soda
- 1 teaspoon ground cinnamon (preferably Saigon cinnamon)
- ½ teaspoon ground ginger
- ½ teaspoon ground nutmeg (freshly grated if possible)
- ¼ teaspoon ground cloves
- ½ teaspoon salt
- 3 large eggs, room temperature
- 1 cup granulated sugar
- ⅔ cup canned pumpkin puree (not pumpkin pie filling)
- 1 teaspoon vanilla extract (pure vanilla preferred)
- Powdered sugar for dusting
- 8 ounces cream cheese, softened to room temperature (full-fat)
- 1 cup powdered sugar, sifted
- 6 tablespoons unsalted butter, softened
- 1 teaspoon vanilla extract
Instructions
- Preheat oven to 350°F (175°C). Line a 15×10-inch jelly roll pan with parchment paper, leaving about an inch overhang on the long sides. Lightly spray the parchment with non-stick cooking spray.
- In a medium bowl, whisk together flour, baking powder, baking soda, cinnamon, ginger, nutmeg, cloves, and salt. Set aside.
- In a large bowl, beat eggs and granulated sugar with an electric mixer on medium-high speed for 2-3 minutes until thick, pale, and slightly fluffy.
- Reduce mixer speed to low and add pumpkin puree and vanilla extract. Mix until just combined.
- Add dry ingredients to wet mixture in two additions, folding gently with a rubber spatula until no streaks of flour remain. Do not overmix.
- Pour batter into prepared pan and spread evenly. Bake for 12-15 minutes, until top springs back when lightly touched and edges start to pull away from pan. Do not overbake.
- While cake is hot, run a knife around edges to loosen. Lay a clean kitchen towel flat on counter and dust generously with powdered sugar. Invert cake onto towel (parchment facing up). Carefully peel off parchment paper.
- Starting from one short end, gently roll cake and towel together into a tight log. Let rolled cake cool completely on a wire rack, about 30-40 minutes.
- While cake cools, make filling: In a medium bowl, beat softened cream cheese, sifted powdered sugar, butter, and vanilla extract until smooth and creamy, about 2-3 minutes. Set aside at room temperature.
- Once cake is completely cool, carefully unroll it. Spread cream cheese filling evenly over cake, leaving a ½-inch border around edges. Using the towel to help, gently re-roll cake (without towel) tightly but gently.
- Wrap rolled cake tightly in plastic wrap and refrigerate for at least 1 hour before slicing.
- To serve, trim ends, slice into 1-inch rounds with a sharp knife, and dust with powdered sugar.
Notes
Roll the cake while it’s still warm to prevent cracking. Use room temperature ingredients for best results. If cake cracks, cream cheese filling acts as glue. For gluten-free, use a 1:1 gluten-free baking blend with xanthan gum. For dairy-free, use block-style plant-based cream cheese. Store in refrigerator for up to 5 days or freeze for up to 3 months.
Nutrition
- Serving Size: 1 slice (1/10 of rol
- Calories: 305
- Sugar: 30
- Sodium: 280
- Fat: 15
- Saturated Fat: 9
- Carbohydrates: 40
- Fiber: 1.5
- Protein: 4.5
Keywords: pumpkin roll, cream cheese filling, pumpkin dessert, fall dessert, Thanksgiving dessert, rolled cake, pumpkin spice


