I figured slow cooker ground beef was a lost cause—dry, crumbly, and sad. It took about three batches of what I can only describe as beef-flavored sawdust to realize I was doing it all wrong. The first time I tried this method, I actually walked away mid-cooking, convinced I’d ruined another dinner. When I came back and lifted the lid, the meat was still sitting in this glossy, fragrant pool of its own juices, not a dry strand in sight. That moment felt a little like culinary betrayal—turns out, the trick was doing the exact opposite of what every recipe told me.
This Perfect Never-Dry Slow Cooker Ground Beef Taco Meat became my weeknight salvation not because it was fancy, but because it finally made sense. No browning first (controversial, I know), no draining halfway through, and absolutely no dry, stringy aftermath. Just tender, juicy beef that actually tastes like it was simmered with care, not abandoned to the heat. I’ve made it for taco Tuesdays, burrito bowls, and even folded into easy lo mein noodles on nights when I crave something completely different. Honestly, it’s the kind of recipe that makes you wonder why you ever stressed over taco meat in the first place.
The secret? It’s embarrassingly simple, and I’m still annoyed I didn’t figure it out sooner.
Why You’ll Love This Recipe
Let’s be real—there are a million taco meat recipes out there. But this one actually works without babysitting it. Here’s why it’s different:
- No Browning Required: You read that right. Dump the raw beef straight into the slow cooker. No greasy stovetop splatter, no extra pan to wash. It stays tender because it cooks gently in its own fat and liquid from the start.
- Stays Juicy for Hours: Unlike stovetop versions that dry out if you look away for five minutes, this meat holds its moisture even on the “warm” setting for an extra hour or two. Perfect for when dinner runs late.
- Simple Pantry Ingredients: You probably have everything already—ground beef, taco seasoning, broth, and a few aromatics. No fancy trips to a specialty store.
- Crowd-Pleaser Status: I’ve served this at family gatherings, game day spreads, and casual weeknight dinners. Kids load it up, adults go back for seconds, and nobody guesses it came from a slow cooker.
- Set It and Forget It: Five minutes of prep in the morning, and dinner’s ready when you are. That’s the kind of math I can get behind.
This isn’t just another taco meat recipe—it’s the one that makes you stop searching. The texture is tender, not mushy. The flavor is deep without being overwhelming. And honestly, it’s the kind of meal that makes you close your eyes after the first bite, even if you’re just standing over the counter in sweatpants.
What Ingredients You Will Need
This recipe uses simple, wholesome ingredients that come together to create bold, satisfying taco meat without any fuss. Most of these are pantry staples you probably already have on hand.
For the Taco Meat Base
- 2 pounds ground beef (80/20 or 85/15 works best—the fat keeps it moist; leaner blends can dry out)
- 1 small yellow onion, finely diced (about 1 cup)
- 4 cloves garlic, minced (or 1 teaspoon garlic powder if you’re in a rush)
- 1 packet (1 ounce) taco seasoning (I prefer McCormick or Old El Paso for consistent flavor)
- 1/2 cup low-sodium beef broth (or chicken broth if that’s what you’ve got)
- 1 can (4 ounces) diced green chiles, undrained (adds mild heat and acidity)
- 1 tablespoon tomato paste (deepens the savory flavor without making it saucy)
- 1 teaspoon smoked paprika (optional, but adds a lovely smoky undertone)
- 1/2 teaspoon ground cumin (for that classic taco warmth)
- 1/2 teaspoon salt (adjust to taste—seasoning blends vary in saltiness)
- 1/4 teaspoon black pepper
For Serving (Optional but Recommended)
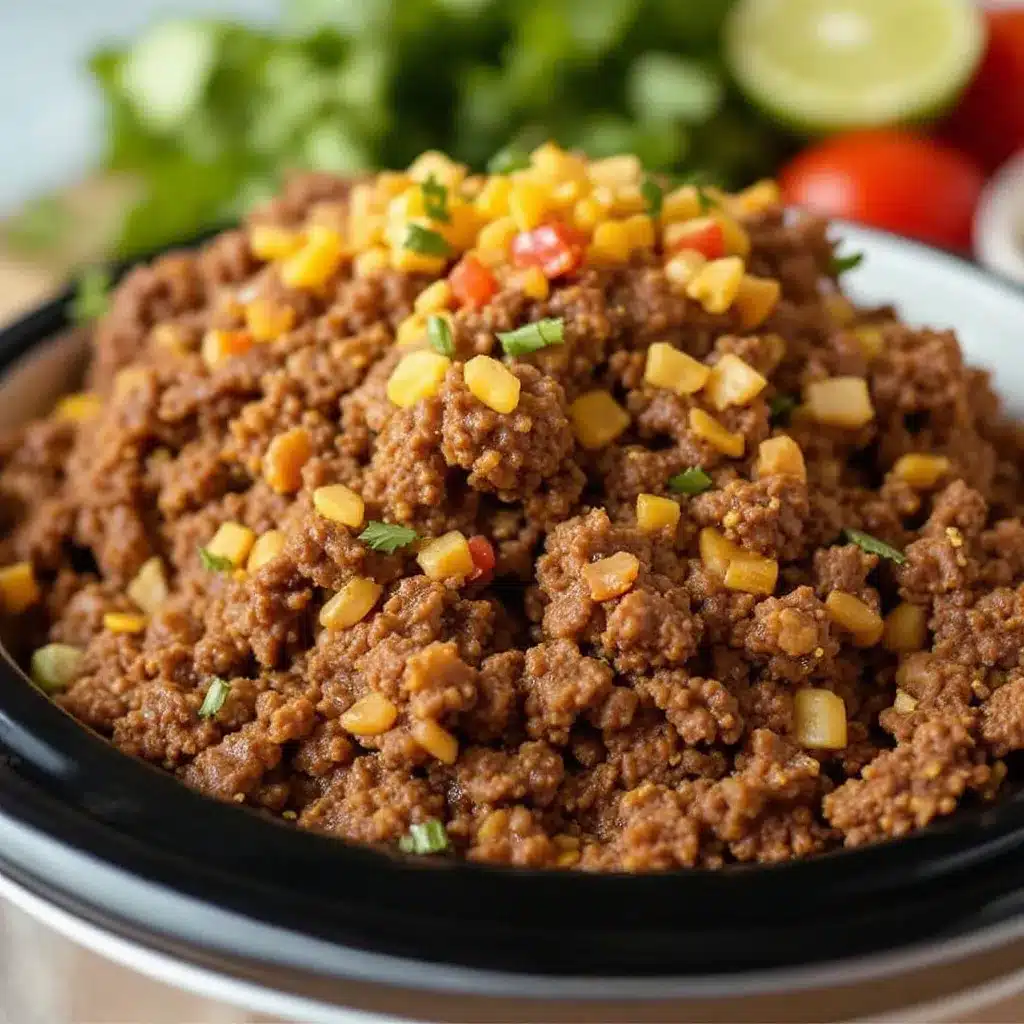
- 12-16 taco shells (hard or soft, your call)
- Shredded lettuce
- Diced tomatoes
- Shredded cheddar or Mexican blend cheese
- Sour cream
- Salsa or pico de gallo
- Fresh cilantro, chopped
- Lime wedges
Ingredient Tips: For the best texture, avoid extra-lean ground beef (93/7 or leaner). The fat is what keeps the meat from drying out during the long, slow cook. If you’re using homemade taco seasoning, use about 3 tablespoons and adjust salt accordingly. I’ve also made this with ground turkey (93/7) and added an extra tablespoon of olive oil to compensate—it works, but beef is definitely superior here.
Equipment Needed
You don’t need a fancy kitchen to pull this off. Here’s what you’ll need:
- Slow cooker (4-quart or larger—I use a 6-quart Crock-Pot and it works perfectly)
- Large skillet (optional, only if you choose to brown the beef first—but I promise you don’t need to)
- Wooden spoon or spatula for breaking up the meat
- Cutting board and knife for dicing onion and mincing garlic
- Measuring cups and spoons
- Can opener
- Slotted spoon for serving (optional, but helps drain excess liquid if needed)
Budget-Friendly Tip: If you don’t own a slow cooker, you can adapt this recipe for a Dutch oven on the stovetop or in the oven at 300°F for about 2 hours. But honestly, a basic slow cooker is worth the investment for hands-off meals like this one.
Preparation Method
This is where the magic happens. Follow these steps, and you’ll never go back to stovetop taco meat again.
- Prep the aromatics: Dice the onion and mince the garlic. If you’re using pre-minced garlic from a jar, go ahead—I won’t judge. Just use about 1 teaspoon.
- Combine everything in the slow cooker: Add the ground beef directly to the slow cooker insert. Break it up gently with a wooden spoon—no need to crumble it perfectly; it will break apart as it cooks. Add the diced onion, minced garlic, taco seasoning, beef broth, undrained diced green chiles, tomato paste, smoked paprika (if using), cumin, salt, and pepper.
- Mix thoroughly: Use your spoon or spatula to stir everything together until the seasoning and tomato paste are evenly distributed. Don’t worry if it looks a little messy—that’s exactly how it should look. The raw beef will seem loose, but that’s fine.
- Cook low and slow: Cover the slow cooker and cook on LOW for 5-6 hours or HIGH for 3-4 hours. I prefer LOW for the most tender results, but HIGH works in a pinch. About halfway through, give it a quick stir to help the meat break into smaller pieces.
- Break up the meat: About 30 minutes before serving, use your spoon to break the beef into your desired crumble size. Some people like it fine for tacos; I prefer slightly larger chunks for texture. Taste and adjust salt or seasoning if needed.
- Drain (if necessary): If there’s more liquid than you’d like, use a slotted spoon to serve, or tilt the slow cooker and spoon off excess fat. Honestly, I rarely drain it—the liquid keeps the meat moist and flavorful.
- Keep warm: Switch the slow cooker to the “Warm” setting until you’re ready to serve. The meat will stay juicy for up to 2 hours on warm without drying out.
Sensory Cue: At the 3-hour mark on LOW, your kitchen should smell like a taco truck. The beef will look darker and richer, and the liquid will have thickened slightly. If it still looks watery, don’t panic—it will continue to reduce as it sits.
Cooking Tips & Techniques
I’ve made this recipe more times than I can count, and I’ve learned a few things the hard way. Here’s what I wish someone had told me:
- Don’t brown the beef first. I know every recipe says to do it, but trust me—browning dries out the exterior of the meat before it even hits the slow cooker. By skipping that step, the beef stays tender and juicy because it cooks evenly from raw.
- Use the right fat content. 80/20 ground beef is ideal. If you use leaner meat, add a tablespoon of olive oil or an extra splash of broth to compensate. I learned this after a disastrous batch with 93/7 that turned into sad, dry crumbles.
- Don’t over-stir. Stirring too aggressively early on can make the meat mushy. Let it cook undisturbed for the first few hours, then break it up gently near the end.
- Toast your shells. While the meat finishes cooking, warm your taco shells in a 350°F oven for 5 minutes. It makes a surprising difference in texture and flavor.
- Double the batch. This freezes beautifully. Make a double batch and freeze half in a zip-top bag for emergency taco nights. Just thaw in the fridge overnight and reheat gently on the stovetop or microwave.
Common Mistake Alert: One time, I added too much broth because I thought “more liquid = more moisture.” Nope. I ended up with soupy taco meat that required draining. Stick to the 1/2 cup—it’s the sweet spot.
Variations & Adaptations
This recipe is endlessly adaptable. Here are some of my favorite twists:
- Spicy Version: Add 1-2 minced chipotle peppers in adobo sauce along with the other ingredients. It adds smoky heat without overwhelming the taco flavor. I tried this for a game day batch and it disappeared in minutes.
- Low-Carb/Keto: Serve the meat over lettuce wraps, cauliflower rice, or in bell pepper boats. The recipe itself is naturally low-carb—just skip the tortillas and load up on cheese, sour cream, and avocado.
- Vegetarian Option: Substitute the ground beef with 2 pounds of plant-based crumbles (like Beyond Meat or Impossible) and reduce cooking time to 2-3 hours on LOW. The texture is surprisingly similar, and the seasoning does all the heavy lifting.
- Smoky Chipotle Version: Add 1 teaspoon chipotle powder and 1/2 teaspoon liquid smoke along with the other seasonings. This gives the meat a rich, barbecue-like depth that’s incredible in burrito bowls.
- Mild for Kids: Omit the green chiles and use mild taco seasoning. My nephew refuses anything with “spice,” and this version gets his stamp of approval every time.
I once made a batch with extra cumin and a splash of lime juice right before serving—it brightened the whole dish and became my go-to for summer taco nights. Don’t be afraid to experiment.
Serving & Storage Suggestions
This taco meat is versatile enough for more than just tacos. Here’s how I like to serve and store it:
Serving: Spoon the meat into warm taco shells and top with shredded lettuce, diced tomatoes, cheese, sour cream, and a squeeze of fresh lime. For a taco bar, set out all the fixings and let everyone build their own. It also works beautifully over rice, in quesadillas, or stuffed into bell peppers and baked until tender.
Storage: Let the meat cool completely, then transfer to an airtight container. Refrigerate for up to 4 days. The flavor actually deepens overnight, so leftovers taste even better the next day. For longer storage, freeze in a zip-top bag or container for up to 3 months. Thaw overnight in the refrigerator.
Reheating: Reheat gently on the stovetop over medium-low heat with a splash of broth or water to restore moisture. You can also microwave in 30-second bursts, stirring between each. Avoid high heat, which can dry it out again.
Flavor Development: This is one of those rare recipes that actually improves after a day in the fridge. The spices meld together, and the meat absorbs all the savory goodness. I often make it a day ahead on purpose.
Nutritional Information & Benefits
Here’s the estimated nutritional breakdown per serving (about 4 ounces of meat, without shells or toppings):
| Nutrient | Amount |
|---|---|
| Calories | 280 |
| Protein | 24g |
| Fat | 18g |
| Saturated Fat | 7g |
| Carbohydrates | 4g |
| Fiber | 1g |
| Sugar | 2g |
| Sodium | 680mg |
Health Benefits: Ground beef is an excellent source of high-quality protein, iron, and B vitamins (especially B12), which support energy metabolism and red blood cell production. The onions and garlic provide prebiotic fiber and antioxidants. Using low-sodium broth and seasoning helps keep the salt content in check without sacrificing flavor.
Dietary Considerations: This recipe is naturally gluten-free (check your taco seasoning label), low-carb, and keto-friendly. For dairy-free serving, skip the cheese and sour cream or use plant-based alternatives. It’s also freezer-friendly, making it great for meal prep.
Conclusion
This Perfect Never-Dry Slow Cooker Ground Beef Taco Meat has genuinely changed how I approach weeknight dinners. It’s the kind of recipe that proves simple doesn’t mean boring, and that a little patience (and a slow cooker) can turn the most basic ingredients into something worth looking forward to. Whether you’re feeding a crowd, meal-prepping for the week, or just craving tacos on a Tuesday, this meat delivers every single time.
I’d love to hear how it turns out for you. Did you add your own twist? Serve it over something unexpected? Drop a comment below and let me know—I read every single one, and your ideas often inspire my next batch. If you’re looking for more slow cooker inspiration, check out our slow cooker carnitas or this hearty Irish lamb stew for another set-it-and-forget-it win.
Happy cooking, and may your tacos always be juicy.
Frequently Asked Questions
Can I use ground turkey instead of beef?
Yes, but use 93/7 or 85/15 ground turkey and add 1 tablespoon of olive oil to prevent dryness. Reduce cooking time to 4-5 hours on LOW. The texture will be slightly different, but the seasoning does a great job of masking any turkey flavor.
How do I prevent the meat from becoming too watery?
Stick to the 1/2 cup of broth and avoid adding extra liquid. If the meat is still watery after cooking, remove the lid and cook on HIGH for 20-30 minutes to let some moisture evaporate. You can also use a slotted spoon to serve.
Can I make this recipe in advance for meal prep?
Absolutely. This meat actually tastes better the next day. Cook it, cool it completely, and store in an airtight container in the fridge for up to 4 days. Reheat gently with a splash of broth. It also freezes beautifully for up to 3 months.
What’s the best taco seasoning to use?
I prefer McCormick or Old El Paso for consistent flavor, but homemade works great too. If using homemade, use about 3 tablespoons and adjust salt accordingly. Avoid “low-sodium” seasoning blends unless you’re watching your salt intake—they often lack depth.
Can I cook this on HIGH instead of LOW?
Yes, cook on HIGH for 3-4 hours. The meat will be slightly less tender than LOW cooking, but it’s still delicious. Just keep an eye on it toward the end to avoid overcooking. I recommend LOW for the best texture if you have the time.
Pin This Recipe!
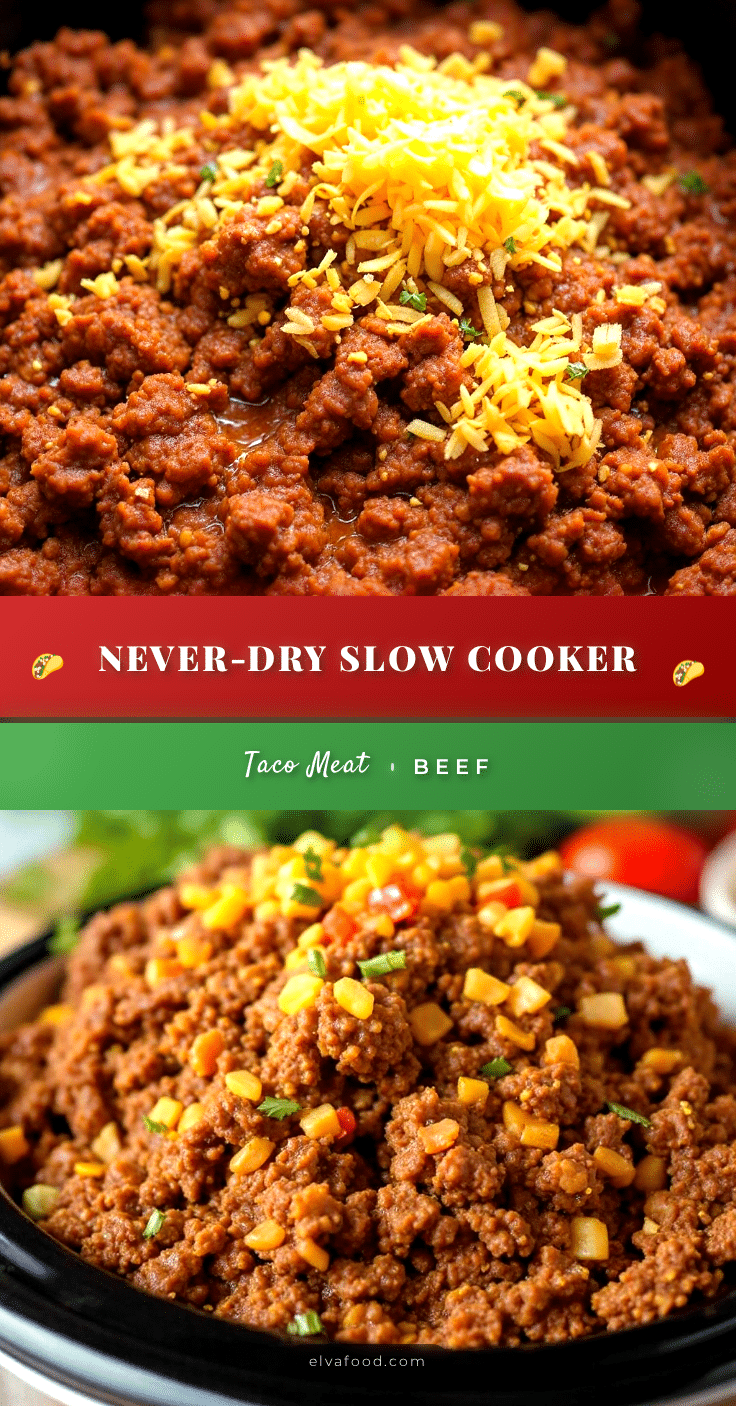
Perfect Never-Dry Slow Cooker Ground Beef Tacos

This slow cooker ground beef taco meat stays tender and juicy without browning first. Just dump the raw beef into the slow cooker with simple pantry ingredients and let it cook low and slow for a hands-off, crowd-pleasing dinner.
- Prep Time: 10 minutes
- Cook Time: 5 hours (LOW) or 3 hours (HIGH)
- Total Time: 5 hours 10 minutes (LOW) or 3 hours 10 minutes (HIGH)
- Yield: 8 servings 1x
- Category: Main Course
- Cuisine: Mexican
Ingredients
- 2 pounds ground beef (80/20 or 85/15 works best)
- 1 small yellow onion, finely diced (about 1 cup)
- 4 cloves garlic, minced (or 1 teaspoon garlic powder)
- 1 packet (1 ounce) taco seasoning (McCormick or Old El Paso preferred)
- 1/2 cup low-sodium beef broth (or chicken broth)
- 1 can (4 ounces) diced green chiles, undrained
- 1 tablespoon tomato paste
- 1 teaspoon smoked paprika (optional)
- 1/2 teaspoon ground cumin
- 1/2 teaspoon salt (adjust to taste)
- 1/4 teaspoon black pepper
- 12–16 taco shells (hard or soft, for serving)
- Shredded lettuce (for serving)
- Diced tomatoes (for serving)
- Shredded cheddar or Mexican blend cheese (for serving)
- Sour cream (for serving)
- Salsa or pico de gallo (for serving)
- Fresh cilantro, chopped (for serving)
- Lime wedges (for serving)
Instructions
- Prep the aromatics: Dice the onion and mince the garlic.
- Combine everything in the slow cooker: Add the ground beef directly to the slow cooker insert. Break it up gently with a wooden spoon. Add the diced onion, minced garlic, taco seasoning, beef broth, undrained diced green chiles, tomato paste, smoked paprika (if using), cumin, salt, and pepper.
- Mix thoroughly: Stir everything together until the seasoning and tomato paste are evenly distributed.
- Cook low and slow: Cover and cook on LOW for 5-6 hours or HIGH for 3-4 hours. About halfway through, give it a quick stir to help the meat break into smaller pieces.
- Break up the meat: About 30 minutes before serving, use your spoon to break the beef into your desired crumble size. Taste and adjust salt or seasoning if needed.
- Drain (if necessary): If there’s more liquid than you’d like, use a slotted spoon to serve, or tilt the slow cooker and spoon off excess fat.
- Keep warm: Switch the slow cooker to the ‘Warm’ setting until ready to serve. The meat will stay juicy for up to 2 hours on warm.
Notes
For best texture, avoid extra-lean ground beef (93/7 or leaner). The fat keeps the meat moist. If using homemade taco seasoning, use about 3 tablespoons and adjust salt accordingly. This recipe can also be made with ground turkey (93/7) by adding 1 tablespoon of olive oil and reducing cooking time to 4-5 hours on LOW. The meat freezes well for up to 3 months.
Nutrition
- Serving Size: 4 ounces of meat (wi
- Calories: 280
- Sugar: 2
- Sodium: 680
- Fat: 18
- Saturated Fat: 7
- Carbohydrates: 4
- Fiber: 1
- Protein: 24
Keywords: slow cooker ground beef tacos, never-dry taco meat, easy taco recipe, slow cooker taco meat, juicy ground beef tacos, no-browning taco meat


