“So you’re telling me I can make that cold foam thing at home?” my sister said, squinting at her phone screen. She’d just sent me a screenshot of a Starbucks menu with the pumpkin cream cold foam listed under “fall favorites” — and a price tag that made both of us wince. I’d been dodging that drink all season, not because I didn’t want it (I did, desperately), but because paying five bucks for what amounts to sweetened cream on top of iced coffee felt like a betrayal of my own kitchen. That conversation — her skepticism, my stubbornness — turned into a week of testing.
I wanted the real thing. Not close. Not “pretty good for homemade.” The real, velvety, pumpkin-spiced, barely-sweet cream that sits on top of cold brew like a cloud that decided to stick around. And honestly? After seven attempts (and one very sad batch that turned into pumpkin butter), I cracked it. This copycat Starbucks pumpkin cream cold foam recipe is the one I texted her a photo of, and she responded with three exclamation points and a request for the recipe before I could even type it out.
What I love most about this version is how simple it actually is. No fancy equipment required — just a jar, a whisk, or a milk frother if you have one. The cream sits perfectly on top of your coffee, slowly swirling down in ribbons as you drink. It feels luxurious, tastes like autumn in a glass, and costs pennies compared to the drive-thru version. That first sip, when the cold foam hits your lips before the coffee does? That’s the moment you realize you didn’t need Starbucks at all — you just needed a good recipe and a little patience.
Why You’ll Love This Recipe
I’ve tested this recipe more times than I care to admit, and here’s what I know for sure: it works every single time, and it’s genuinely better than anything you’ll get from a barista who’s rushing through a line of impatient customers. The cream is stable, the flavor is spot-on, and you can make it in under five minutes.
- Quick & Easy: Comes together in under 5 minutes — seriously, that’s faster than waiting in line at Starbucks.
- Simple Ingredients: Heavy cream, milk, pumpkin puree, maple syrup, and pumpkin pie spice. That’s it. No weird stabilizers or artificial flavors.
- Perfect for Fall Mornings: Whether you’re sipping it on a crisp October morning or a rainy November afternoon, this drink feels like a hug in a mug.
- Crowd-Pleaser: I’ve served this at brunch gatherings and watched people’s eyes go wide after the first sip. It’s that good.
- Unbelievably Delicious: The texture is silky, the pumpkin flavor is subtle but present, and the sweetness is perfectly balanced — not cloying, just right.
What makes this recipe different from the countless other copycat versions out there? It’s the technique. Most recipes tell you to just whisk everything together and pour it over coffee, but that gives you a thin, watery mess that sinks straight to the bottom. My method — using a specific ratio of heavy cream to milk and a quick frothing technique — creates that thick, luxurious foam that actually sits on top of your coffee and slowly melts into it. I learned this through trial and error, and I promise you, it’s worth the extra 30 seconds.
This isn’t just a drink — it’s the kind of thing that makes you slow down and actually enjoy your morning. It’s comfort in a glass, reimagined as something you can make yourself without any special skills or equipment. Perfect for impressing guests at brunch, treating yourself on a lazy Sunday, or just making your regular coffee feel like a special occasion.
What Ingredients You Will Need
This recipe uses simple, everyday ingredients to create something that tastes anything but ordinary. Most of these are probably already in your pantry or fridge — which is exactly the point.
For the Pumpkin Cream Cold Foam
- Heavy cream, ¼ cup (60 ml) — This is the backbone of the foam. Heavy cream has a high fat content (around 36%), which means it whips up thick and stable. Don’t substitute with half-and-half or milk alone — you need the fat for that luxurious texture.
- Whole milk, ¼ cup (60 ml) — The milk thins the cream just enough so it pours easily over coffee while still holding its shape. I recommend whole milk for the richest result, but 2% works in a pinch (your foam will be slightly less stable).
- Pumpkin puree, 2 tablespoons (30 ml) — Make sure you’re using pure pumpkin puree, not pumpkin pie filling. The filling has added sugar and spices that will throw off the balance. I prefer Libby’s brand for its consistent texture and flavor.
- Maple syrup, 1 tablespoon (15 ml) — This adds sweetness and a warm, earthy note that complements the pumpkin beautifully. You can substitute with honey or agave if needed, but maple really is the star here.
- Pumpkin pie spice, ½ teaspoon — You can use store-bought or make your own with a mix of cinnamon, nutmeg, ginger, and cloves. I make my own because I like a little extra cinnamon in mine.
- Vanilla extract, ½ teaspoon — Pure vanilla extract adds depth and rounds out the spices. Imitation vanilla works, but the flavor won’t be as rich.
- Pinch of salt — Just a tiny pinch. Salt enhances all the other flavors and keeps the foam from tasting flat.
For the Coffee Base
- Cold brew or strong brewed coffee, 1 cup (240 ml) — Cold brew is ideal because it’s smooth and less acidic, but any strong coffee works. I brew mine double-strength so the coffee flavor doesn’t get lost under the cream.
- Ice cubes — Plenty of them. The foam sits best on a full glass of ice.
Ingredient Selection Tip: For the best results, make sure your heavy cream and milk are cold — straight from the fridge. Warm cream won’t whip properly, and your foam will be thin and sad. Trust me, I learned this the hard way.
Equipment Needed
You don’t need a fancy espresso machine or a professional milk frother for this recipe. Here’s what you’ll actually use:
- Milk frother — A handheld electric frother is my go-to. It costs about $10 and makes perfectly frothed cream in 30 seconds. I’ve had mine for three years and it’s still going strong.
- Small bowl or jar — You need something deep enough to froth the cream without splashing everywhere. A wide-mouth mason jar works great.
- Measuring spoons — For precise measurements. Eyeballing it works if you’re experienced, but for the first few times, measure carefully.
- Glass for serving — A clear glass lets you see those beautiful layers of coffee and cream. It’s not necessary, but it makes the experience so much more satisfying.
No frother? No problem. You can use a whisk and some elbow grease — it’ll take about 2-3 minutes of vigorous whisking, but it works. Alternatively, a French press works surprisingly well for frothing cream: just pump the plunger up and down for about 30 seconds. I’ve used all three methods, and honestly, the results are nearly identical.
Preparation Method
- Brew your coffee first — Start with your cold brew or strong coffee. Pour it over a full glass of ice and set it aside. You want the coffee to be cold before you add the foam, otherwise the heat will melt the cream immediately.
- Combine the foam ingredients — In a small bowl or jar, add ¼ cup heavy cream, ¼ cup whole milk, 2 tablespoons pumpkin puree, 1 tablespoon maple syrup, ½ teaspoon pumpkin pie spice, ½ teaspoon vanilla extract, and a pinch of salt. Stir gently with a spoon to combine — don’t whisk yet.
- Froth the cream — Use your handheld frother to whip the mixture until it’s thick and foamy, about 30-45 seconds. You’re looking for soft peaks — the cream should hold its shape when you lift the frother out, but it shouldn’t be stiff like whipped cream. It should be pourable but thick enough to sit on top of the coffee.
- Check the consistency — Lift the frother and watch how the cream drips off. It should fall in ribbons, not in a steady stream. If it’s too thin, froth for another 10-15 seconds. If it’s too thick (like whipped cream), add a splash of milk and stir gently.
- Pour over the coffee — Using a spoon, gently spoon the foam over the back of the spoon onto the top of your iced coffee. This technique helps the foam sit on top instead of sinking. Don’t pour it directly — trust me, it’ll disappear into the coffee and you’ll be left with sad, foamless coffee.
- Finish with a sprinkle of spice — Dust the top with a little extra pumpkin pie spice or cinnamon. This is optional, but it makes the drink look gorgeous and adds a little extra flavor as you sip.
- Serve immediately — This foam doesn’t hold well — it’s best enjoyed right away. Grab a straw, give it a gentle stir if you want the cream to swirl into the coffee, or drink it through the foam for that perfect first sip.
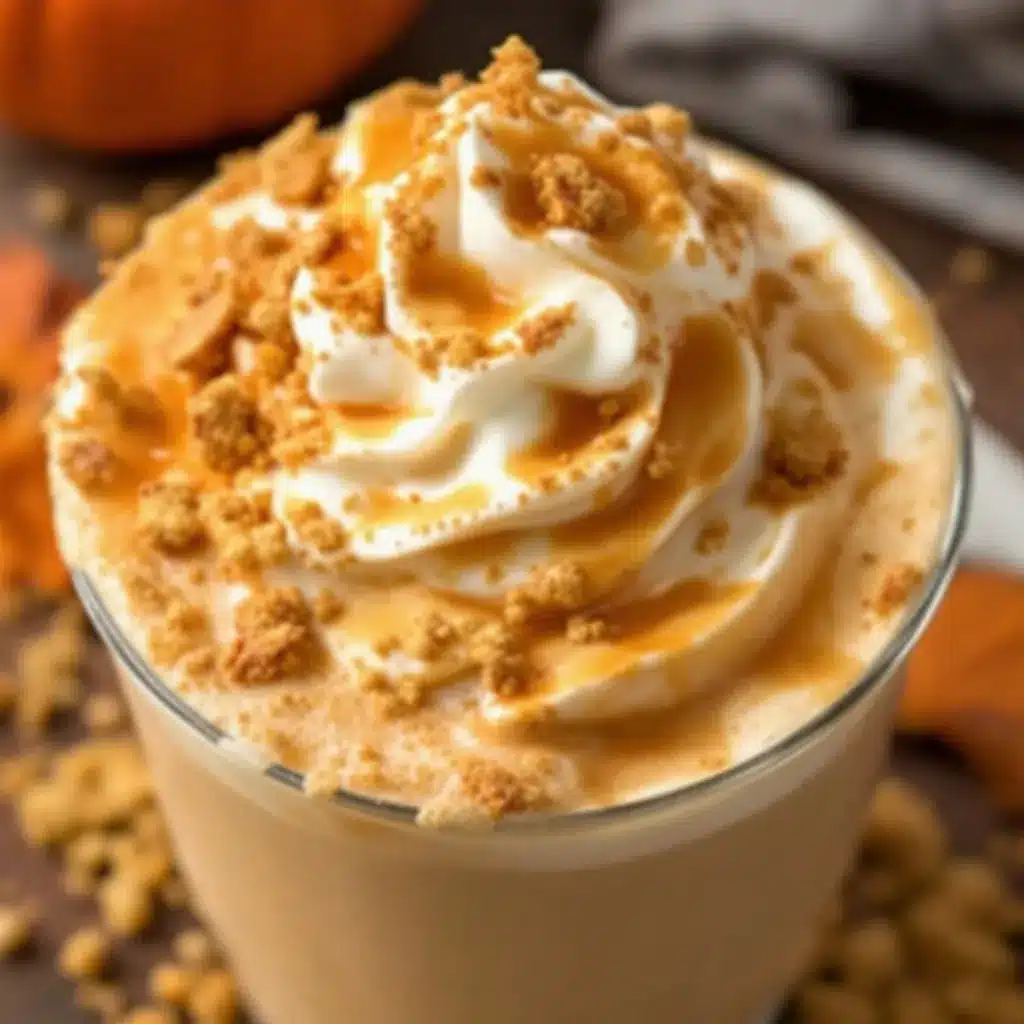
Sensory Cue: When you’ve frothed the cream properly, it should look like a thick, velvety cloud — pale orange from the pumpkin, with tiny bubbles on the surface. It should smell like pumpkin pie and vanilla, with just a hint of maple. When you pour it over the coffee, it should sit on top like a blanket, slowly starting to melt into the coffee around the edges.
Pro Tip: If you’re making this for a crowd, you can double or triple the foam recipe. Just make sure your bowl is big enough — the cream expands as it froths, so leave plenty of room.
Cooking Tips & Techniques
I’ve made this recipe at least twenty times now, and I’ve learned a few things the hard way. Here are my best tips for perfect pumpkin cream cold foam every time:
Temperature matters — Cold cream froths better than warm cream. I keep my cream in the coldest part of the fridge (usually the back, not the door) and take it out right before I’m ready to froth. If your cream is even slightly warm, the foam will be thin and watery.
Don’t over-froth — This is the most common mistake. If you froth too long, you’ll end up with stiff whipped cream that won’t pour at all. You want soft peaks — the cream should be thick enough to hold its shape but loose enough to pour. Think of it as a thick milkshake consistency.
Strain your pumpkin puree — This is a game-changer. Pumpkin puree can be a little watery, which thins out your foam. Before adding it to the cream, press the puree through a fine-mesh sieve or just blot it with a paper towel. You’ll remove excess liquid and end up with a much thicker, more stable foam. I started doing this after my third failed batch, and it made all the difference.
Layer carefully — When pouring the foam over your coffee, use the back of a spoon to break the fall. This technique (called “spooning” in barista speak) helps the foam sit on top of the coffee instead of sinking. It takes an extra five seconds and makes the drink look professional.
Make it ahead (sort of) — You can mix the dry ingredients (pumpkin pie spice, salt) and wet ingredients (cream, milk, pumpkin puree, maple syrup, vanilla) separately and store them in the fridge for up to 24 hours. When you’re ready to serve, just combine and froth. This is great for busy mornings or when you’re hosting brunch.
Variations & Adaptations
One of the best things about this recipe is how customizable it is. Here are a few variations I’ve tried and loved:
Dairy-Free Version — Use full-fat canned coconut cream instead of heavy cream, and unsweetened oat milk instead of whole milk. The coconut cream whips up beautifully and adds a subtle tropical note that actually works well with the pumpkin spice. I tested this for a friend who’s lactose intolerant, and she said it was even better than the original.
Extra Pumpkin Flavor — If you’re a pumpkin fanatic (like me), add an extra tablespoon of pumpkin puree and a pinch more pumpkin pie spice. The flavor will be more pronounced, and the foam will have a slightly thicker texture. Just make sure to strain the extra puree to avoid a watery foam.
Spiced Maple Variation — Swap the maple syrup for brown sugar and add a pinch of cayenne pepper or chipotle powder. The heat from the spice balances the sweetness beautifully and gives the drink a cozy, adult twist. I made this for a fall dinner party and it was a hit.
Hot Coffee Version — Yes, this works with hot coffee too! Just brew your coffee as usual, and pour the foam over the top. The foam will melt a little faster than with iced coffee, but it’s still delicious. I actually prefer it with hot coffee on chilly mornings.
Pumpkin Cream Cold Brew — If you want the full Starbucks experience, use cold brew concentrate instead of regular coffee. The cold brew is smoother and less acidic, which lets the pumpkin cream shine. I make my own cold brew by steeping coarse-ground coffee in cold water for 12-24 hours, then straining it. It’s easy and way cheaper than buying it.
Serving & Storage Suggestions
This drink is best served immediately — the foam is at its peak right after you froth it, and it starts to deflate after about 10 minutes. But here’s how to make the most of it:
Serving Temperature: Serve over plenty of ice for the iced version, or pour into a warm mug for the hot version. The foam should be cold either way — it’s the contrast between the cold cream and the room-temperature or hot coffee that makes it so satisfying.
Presentation: Use a clear glass so you can see the layers. Start with ice, pour your coffee, then spoon the foam on top. Garnish with a sprinkle of pumpkin pie spice or a cinnamon stick for a beautiful finish. If you’re feeling fancy, add a drizzle of caramel or maple syrup over the foam.
Complementary Dishes: This drink pairs beautifully with fall-themed treats. Try it alongside these crispy raspberry cheesecake French toast roll-ups for a brunch that feels like a celebration. Or serve it with these mini lemon blueberry cheesecakes for a dessert spread that balances the warm pumpkin spice with bright citrus.
Storage: If you have leftover foam (unlikely, but possible), store it in an airtight container in the fridge for up to 24 hours. It will deflate and separate, but you can re-froth it for about 10-15 seconds to bring it back to life. It won’t be quite as good as fresh, but it’s still delicious.
Flavor Development: The pumpkin spice flavor actually deepens and becomes more pronounced after the foam sits in the fridge for a few hours. If you’re planning ahead, you can make the foam base (without frothing) the night before, then froth it fresh in the morning. The flavors will be even better.
Nutritional Information & Benefits
Here’s the estimated nutritional breakdown for one serving (using the full recipe as written):
| Nutrient | Amount |
|---|---|
| Calories | 210 |
| Total Fat | 16g |
| Saturated Fat | 10g |
| Carbohydrates | 14g |
| Sugar | 11g |
| Protein | 3g |
| Fiber | 1g |
This drink is a treat — it’s not exactly health food, but it’s made with real ingredients and no artificial anything. The pumpkin puree adds a small amount of vitamin A and fiber, while the maple syrup provides antioxidants (yes, really — maple syrup contains polyphenols). The heavy cream and milk give you calcium and vitamin D.
Dietary Considerations: This recipe is vegetarian and can be made gluten-free by ensuring your pumpkin pie spice blend is certified gluten-free. For a dairy-free version, use the substitutions listed in the variations section. It’s not low-carb or keto-friendly as written, but you can experiment with sugar-free sweeteners and heavy cream only for a lower-carb version.
Potential Allergens: This recipe contains dairy. It’s nut-free and egg-free as written, but always check your ingredient labels if you have specific allergies.
Personally, I see this drink as a way to treat myself without the guilt of processed ingredients. It’s real food — cream, milk, pumpkin, maple syrup — combined in a way that feels indulgent but isn’t loaded with preservatives or artificial flavors. That’s a win in my book.
Conclusion
This copycat Starbucks pumpkin cream cold foam is one of those recipes that makes you feel like you’ve discovered a secret. It’s so simple, so fast, and so delicious that you’ll wonder why you ever spent money on the drive-thru version. The first time you make it, you’ll probably text a photo to someone (I did). The second time, you’ll start experimenting with variations. By the third time, it’ll be part of your fall routine — as natural as pulling out your sweaters and lighting a pumpkin spice candle.
I love this recipe because it’s proof that you don’t need a fancy coffee setup or a degree in food science to make something that tastes incredible. You just need a few good ingredients, a little patience, and the willingness to try. And honestly? Even if your first batch isn’t perfect (mine wasn’t), the process of making it is part of the fun. There’s something deeply satisfying about creating a cafe-quality drink in your own kitchen.
So go ahead — give it a try. Make it for yourself on a quiet morning, or whip up a batch for friends at brunch. Experiment with the spices, adjust the sweetness, make it your own. And when you take that first sip and the cold foam hits your lips, come back and tell me about it. I’d love to hear how it turned out, what variations you tried, and whether you managed to resist the urge to make a second one immediately.
Now go make some magic in your kitchen. Your coffee is waiting.
Frequently Asked Questions
Can I make this without a milk frother?
Absolutely! You can use a whisk and some elbow grease — it’ll take about 2-3 minutes of vigorous whisking. A French press also works: just pump the plunger up and down for about 30 seconds. I’ve tested all three methods, and the results are very similar.
Why did my foam sink to the bottom of the coffee?
This usually happens for one of three reasons: your cream wasn’t cold enough, you didn’t froth it enough, or you poured the foam directly into the coffee instead of using the back of a spoon. Make sure your cream is straight from the fridge, froth until you see soft peaks, and always spoon the foam over the back of a spoon onto the coffee.
Can I use pumpkin pie filling instead of pumpkin puree?
I don’t recommend it. Pumpkin pie filling has added sugar and spices that will make your foam too sweet and throw off the flavor balance. Stick with pure pumpkin puree — it gives you control over the sweetness and spice level.
How long does the foam last in the fridge?
You can store the finished foam in an airtight container in the fridge for up to 24 hours. It will deflate and separate, but you can re-froth it for about 10-15 seconds to bring it back to life. The flavor will actually be even better the next day as the spices meld together.
Can I make this vegan or dairy-free?
Yes! Use full-fat canned coconut cream instead of heavy cream, and unsweetened oat milk instead of whole milk. The coconut cream whips up beautifully and adds a subtle tropical note that works well with the pumpkin spice. Just make sure your coconut cream is cold before frothing.
Pin This Recipe!
Easy Copycat Starbucks Pumpkin Cream Cold Foam Recipe

Make Starbucks’ famous pumpkin cream cold foam at home with just a few simple ingredients. This quick and easy recipe delivers a velvety, pumpkin-spiced cream that sits perfectly on top of iced coffee, saving you money and time.
- Prep Time: 5 minutes
- Cook Time: 0 minutes
- Total Time: 5 minutes
- Yield: 1 serving 1x
- Category: Beverage
- Cuisine: American
Ingredients
- ¼ cup heavy cream (60 ml)
- ¼ cup whole milk (60 ml)
- 2 tablespoons pumpkin puree (30 ml)
- 1 tablespoon maple syrup (15 ml)
- ½ teaspoon pumpkin pie spice
- ½ teaspoon vanilla extract
- Pinch of salt
- 1 cup cold brew or strong brewed coffee (240 ml)
- Ice cubes
Instructions
- Brew your coffee first: Start with your cold brew or strong coffee. Pour it over a full glass of ice and set it aside. You want the coffee to be cold before you add the foam, otherwise the heat will melt the cream immediately.
- Combine the foam ingredients: In a small bowl or jar, add ¼ cup heavy cream, ¼ cup whole milk, 2 tablespoons pumpkin puree, 1 tablespoon maple syrup, ½ teaspoon pumpkin pie spice, ½ teaspoon vanilla extract, and a pinch of salt. Stir gently with a spoon to combine — don’t whisk yet.
- Froth the cream: Use your handheld frother to whip the mixture until it’s thick and foamy, about 30-45 seconds. You’re looking for soft peaks — the cream should hold its shape when you lift the frother out, but it shouldn’t be stiff like whipped cream. It should be pourable but thick enough to sit on top of the coffee.
- Check the consistency: Lift the frother and watch how the cream drips off. It should fall in ribbons, not in a steady stream. If it’s too thin, froth for another 10-15 seconds. If it’s too thick (like whipped cream), add a splash of milk and stir gently.
- Pour over the coffee: Using a spoon, gently spoon the foam over the back of the spoon onto the top of your iced coffee. This technique helps the foam sit on top instead of sinking. Don’t pour it directly — trust me, it’ll disappear into the coffee and you’ll be left with sad, foamless coffee.
- Finish with a sprinkle of spice: Dust the top with a little extra pumpkin pie spice or cinnamon. This is optional, but it makes the drink look gorgeous and adds a little extra flavor as you sip.
- Serve immediately: This foam doesn’t hold well — it’s best enjoyed right away. Grab a straw, give it a gentle stir if you want the cream to swirl into the coffee, or drink it through the foam for that perfect first sip.
Notes
For best results, use cold heavy cream and milk straight from the fridge. Strain pumpkin puree through a fine-mesh sieve to remove excess liquid for a thicker foam. If you don’t have a frother, use a whisk or a French press. The foam is best served immediately but can be stored in the fridge for up to 24 hours and re-frothed.
Nutrition
- Serving Size: 1 serving
- Calories: 210
- Sugar: 11
- Sodium: 50
- Fat: 16
- Saturated Fat: 10
- Carbohydrates: 14
- Fiber: 1
- Protein: 3
Keywords: pumpkin cream cold foam, Starbucks copycat, pumpkin spice, cold foam, iced coffee, fall drink, homemade Starbucks


