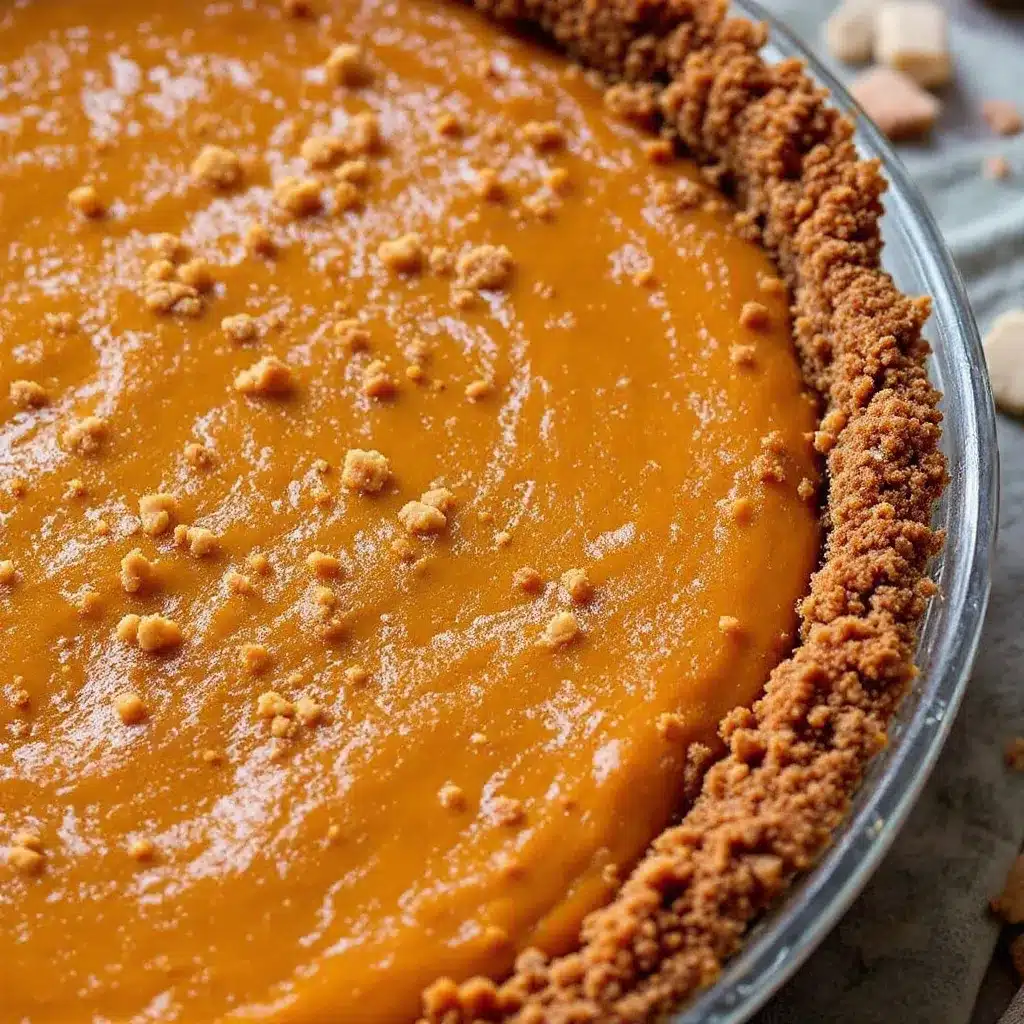
I figured a no-bake pumpkin pie would be a compromise—something you make when you want the flavor but can’t be bothered with the real thing. It took about one bite of this Easy No-Bake Pumpkin Pie with Gingersnap Crust for that assumption to fall apart completely. The filling is ridiculously creamy, not that dense, sometimes-grainy texture you get from a baked custard. And the crust? That spicy, crunchy gingersnap situation is honestly better than any pastry shell I’ve ever fussed with.
This wasn’t some planned kitchen triumph. I had a can of pumpkin puree staring at me from the pantry, a block of cream cheese that needed using up, and about fifteen minutes before I needed to be doing something else entirely. I figured I’d throw something together, and what came out of the fridge a few hours later was so good I actually stood there eating it straight from the pie plate. No shame. It was that kind of good.
The thing about this recipe is it doesn’t taste like a shortcut. It tastes intentional. The ginger and molasses in the crust do something magical with the pumpkin and warm spices—they don’t just sit on top of each other, they actually meld. And because there’s no oven involved, you don’t have to worry about cracks, over-baking, or that dreaded soggy bottom. It sets up firm and clean in the fridge, slices beautifully, and tastes even better the next day.
I’ve made this for Thanksgiving, for random Tuesday cravings, and for when I needed to bring a dessert somewhere and forgot until the last minute. Every single time, someone asks for the recipe. And every single time, I get to say the best words in dessert-making: “It’s no-bake.”
Why You’ll Love This Recipe
Let me tell you why this Easy No-Bake Pumpkin Pie with Gingersnap Crust has become my most-requested dessert. It’s not just because it’s easy—though honestly, that’s a big part of it. It’s because it delivers on flavor and texture in a way that makes people forget it took almost no effort.
- No Oven Required: Your oven can stay off. This is perfect for hot days, crowded holiday kitchens, or when you just don’t want to deal with baking.
- Ready in 5 Minutes of Active Time: I’m not exaggerating. The filling comes together in a bowl with a hand mixer, and the crust is just crushed cookies and melted butter. That’s it.
- Make-Ahead Magic: This pie needs at least 4 hours to set, which means you can make it the night before and forget about it. It actually gets better with time.
- No Cracks, No Stress: Baked pumpkin pies crack. It’s a fact of life. This one doesn’t, because it’s not baked. Perfect presentation, every single time.
- That Gingersnap Crust: I will never go back to a graham cracker crust for pumpkin pie. The spicy, molasses-forward flavor of gingersnaps is a match made in dessert heaven.
- Crowd-Pleaser Status: I’ve served this to pumpkin pie purists and watched them go back for seconds. It’s that good.
What makes this recipe different from the dozens of other no-bake pumpkin pies out there? It’s the texture. So many no-bake pies use instant pudding mix, which gives you that weird, jiggly, almost artificial consistency. This one uses cream cheese and real pumpkin puree, so the filling is rich, smooth, and dense without being heavy. It tastes like a real pie, not a dessert that took a shortcut.
This is the kind of dessert that makes you close your eyes after the first bite. It’s comfort food reimagined—faster, easier, but with the same soul-soothing satisfaction. Perfect for impressing guests without stress, or turning a simple Tuesday into something memorable.
What Ingredients You Will Need
This recipe uses simple, wholesome ingredients to deliver bold flavor and satisfying texture without the fuss. Most of these are pantry staples or easy to find at any grocery store.
For the Gingersnap Crust
- 2 cups (about 200g) gingersnap cookie crumbs – I use Nabisco Ginger Snaps, but any brand works. You can crush them in a food processor or put them in a zip-top bag and go at them with a rolling pin. (The food processor is faster, and honestly, less messy.)
- 6 tablespoons (85g) unsalted butter, melted – Salted butter works too, just cut the added salt if you’re using it. Let it cool slightly so it doesn’t make the crumbs greasy.
- 2 tablespoons (25g) granulated sugar – This is optional if your gingersnaps are already sweet, but I like the little extra sweetness it brings.
- Pinch of salt – Only if your butter is unsalted. It balances the sweetness.
For the Pumpkin Filling
- 8 ounces (226g) cream cheese, softened – This is non-negotiable for the texture. Let it sit out for at least 30 minutes, or microwave it for about 10 seconds if you’re in a hurry. (I’ve done both, and room temperature is better.)
- 1 cup (200g) granulated sugar – You can reduce this to ¾ cup if you prefer a less sweet pie. The gingersnap crust is already sweet, so don’t feel like you need to go overboard.
- 1 can (15 ounces or 425g) pumpkin puree – Not pumpkin pie filling. Make sure you grab the 100% pure pumpkin. Libby’s is my go-to, but store brands work fine.
- 1 teaspoon vanilla extract – Pure vanilla extract makes a difference here. Imitation works in a pinch, but the real stuff is worth it.
- 1 teaspoon ground cinnamon – I like to use Ceylon cinnamon for a milder, more floral flavor, but Cassia works too.
- ½ teaspoon ground ginger – This doubles down on the gingersnap flavor. Don’t skip it.
- ¼ teaspoon ground nutmeg – Freshly grated is amazing, but pre-ground is perfectly fine.
- ¼ teaspoon ground cloves – Just a pinch. Cloves are strong, and too much can make the pie taste like a candle.
- 1 cup (240ml) heavy whipping cream – This gets whipped and folded into the cream cheese mixture. It’s what gives the filling that light, mousse-like texture.
For the Topping (Optional but Recommended)
- 1 cup (240ml) heavy whipping cream – For homemade whipped cream. Store-bought works too, but homemade is so much better.
- 2 tablespoons (15g) powdered sugar – For sweetening the whipped cream.
- ½ teaspoon vanilla extract – Again, pure is best.
- Crushed gingersnaps and fresh mint leaves – For garnish. Makes it look fancy with zero extra effort.
Equipment Needed
You don’t need a lot of fancy equipment for this Easy No-Bake Pumpkin Pie with Gingersnap Crust. Here’s what you’ll need:
- 9-inch pie plate – A standard metal or glass pie plate works perfectly. I prefer glass because you can see if the crust is evenly pressed.
- Food processor or zip-top bag and rolling pin – For crushing the gingersnaps. The food processor is faster and gives you more consistent crumbs, but the bag-and-rolling-pin method is great for stress relief.
- Electric hand mixer or stand mixer – You need this to whip the cream and beat the cream cheese mixture. A whisk and some serious arm strength could work, but honestly, don’t do that to yourself.
- Large mixing bowls – One for the crust mixture, one for the cream cheese base, and one for the whipped cream. I use my grandmother’s old ceramic bowls, but any large bowl works.
- Rubber spatula – For folding the whipped cream into the pumpkin mixture. A wooden spoon will deflate all that air you just whipped in.
- Measuring cups and spoons – Accuracy matters here, especially with the spices.
- Plastic wrap – To cover the pie while it chills.
If you don’t have a food processor, don’t worry. I’ve made this crust many times using the bag method, and it works just fine. Just make sure you crush the cookies into fine, even crumbs—no big chunks, or the crust won’t hold together properly.
Preparation Method
Let me walk you through this step by step. I’ve made this pie more times than I can count, and I’ve learned a few things along the way.
Step 1: Make the Gingersnap Crust (5 minutes)
Start by crushing your gingersnaps into fine crumbs. If you’re using a food processor, pulse until you have about 2 cups of crumbs. If you’re using the bag method, put the cookies in a sturdy zip-top bag, seal it, and go at them with a rolling pin until they’re crushed. (Pro tip: Do this on a cutting board, not your countertop, unless you want to explain dents to your landlord.)
Pour the crumbs into a medium bowl. Add the melted butter, sugar, and salt if you’re using it. Stir with a fork until the mixture looks like wet sand and holds together when you press it between your fingers. If it’s too dry, add another tablespoon of melted butter. If it’s too wet, add a few more crumbs.
Press the mixture firmly into the bottom and up the sides of your 9-inch pie plate. Use the bottom of a measuring cup or a flat-bottomed glass to get it even and compact. (I use a small glass—it works perfectly.) Make sure the crust is evenly thick, especially at the edges where it tends to be thinner. Pop it in the fridge while you make the filling.
Step 2: Whip the Cream (3 minutes)
Pour 1 cup of cold heavy whipping cream into a large, chilled bowl. (Chilling the bowl helps the cream whip faster—I stick mine in the freezer for 5 minutes before I start.) Using an electric hand mixer on medium-high speed, whip the cream until soft peaks form. This means when you lift the beaters, the cream forms peaks that flop over slightly. Add 2 tablespoons of powdered sugar and ½ teaspoon of vanilla extract, then continue whipping until stiff peaks form. Be careful not to over-whip, or you’ll end up with butter. Set the whipped cream aside in the fridge.
Step 3: Make the Pumpkin Filling (5 minutes)
In a separate large bowl, beat the softened cream cheese with an electric mixer on medium speed until it’s smooth and creamy, about 1 minute. Scrape down the sides of the bowl with a rubber spatula. Add the granulated sugar and beat until combined, about 30 seconds.
Add the pumpkin puree, vanilla extract, cinnamon, ginger, nutmeg, and cloves. Beat on medium speed until everything is well combined and smooth, about 1-2 minutes. Scrape down the sides again. The mixture should be thick, smooth, and beautifully orange. Taste it here—you want the spices to be bold, not shy. Add a pinch more cinnamon if you think it needs it.
Step 4: Fold in the Whipped Cream (2 minutes)
Take the whipped cream out of the fridge. Add about one-third of it to the pumpkin mixture and fold it in gently with a rubber spatula. (Folding means you cut through the center, scrape along the bottom, and bring the mixture up and over. It’s gentler than stirring.) This first addition lightens the pumpkin mixture so the rest of the whipped cream incorporates more easily.
Add the remaining whipped cream and fold until no white streaks remain. Be gentle—you want to keep as much air in the mixture as possible. The final filling should be light, airy, and mousse-like.
Step 5: Assemble and Chill (4 hours minimum)
Pour the filling into the chilled gingersnap crust. Spread it evenly with a spatula, smoothing the top. Give the pie plate a few gentle taps on the counter to settle the filling and remove any air bubbles.
Cover the pie loosely with plastic wrap and refrigerate for at least 4 hours, but preferably overnight. The filling needs time to set up properly. If you try to slice it too early, it will be soft and messy. Trust me on this—I’ve made that mistake, and it’s disappointing. The overnight chill is worth the wait.
Step 6: Serve (5 minutes)
When you’re ready to serve, make the whipped cream topping if you want it. Whip 1 cup of cold heavy cream with 2 tablespoons of powdered sugar and ½ teaspoon of vanilla extract until stiff peaks form. Spread or pipe it over the pie. Sprinkle with crushed gingersnaps and garnish with fresh mint leaves if you’re feeling fancy.
Slice with a sharp knife, wiping the blade clean between cuts for neat slices. Serve cold.
Cooking Tips & Techniques
I’ve learned a few things the hard way so you don’t have to. Here are my best tips for making this Easy No-Bake Pumpkin Pie with Gingersnap Crust perfectly every time.
Room temperature cream cheese is crucial. I cannot stress this enough. Cold cream cheese will give you lumpy filling, and nobody wants that. Leave it on the counter for at least 30 minutes before you start. If you forget, unwrap it, cut it into cubes, and microwave it on low power for 10-15 seconds. It should be soft but not melted.
Don’t skip the chill time. I know it’s tempting to rush this, especially if you’re craving pumpkin pie right now. But the filling needs those hours in the fridge to firm up. Four hours is the absolute minimum. Overnight is ideal. The texture goes from soft and mousse-like to firm and sliceable, and the flavors meld together beautifully.
Press the crust firmly. A loose crust will crumble when you try to serve the pie. Use the bottom of a measuring cup or a flat glass to press the crumbs down firmly and evenly. Pay extra attention to the edges and the corner where the bottom meets the side. That’s where crusts tend to be thin and weak.
Fold, don’t stir. When you’re combining the whipped cream with the pumpkin mixture, use a gentle folding motion. Stirring vigorously will deflate all that air you whipped in, and your filling will be dense instead of light and creamy.
Taste and adjust the spices. Pumpkin spice blends vary wildly in intensity. Some are mild, some are punchy. Taste your filling before you fold in the whipped cream, and adjust the spices to your preference. I like mine bold, so I usually add an extra ¼ teaspoon of cinnamon.
One mistake I made early on: I used pumpkin pie filling instead of pure pumpkin puree. The pie was way too sweet, and the texture was off because the filling already had sugar and spices in it. Learn from my error—always grab the 100% pure pumpkin.
Variations & Adaptations
This recipe is wonderfully flexible. Here are some ways I’ve adapted it over the years:
Gluten-Free Version: Use gluten-free gingersnap cookies for the crust. Most major brands make a gluten-free option, or you can use gluten-free graham crackers with added ginger and molasses for a similar flavor profile.
Dairy-Free Version: Substitute the cream cheese with a high-quality dairy-free cream cheese (I like Kite Hill or Miyoko’s). Use coconut cream instead of heavy whipping cream—chill a can of full-fat coconut milk overnight, scoop off the solid cream, and whip it. It works surprisingly well.
Low-Sugar Version: Reduce the sugar in the filling to ½ cup, and use a sugar substitute like monk fruit or erythritol in the crust. The pie will be less sweet but still delicious, and the spices will shine through more.
Pumpkin Chiffon Pie: For an even lighter, airier texture, fold in an extra cup of whipped cream. The pie will be taller and more delicate, like a chiffon. Just be careful when slicing—it’s a bit more fragile.
Spiced-Up Version: Add ¼ teaspoon of cardamom or allspice to the filling for a more complex flavor profile. I tried this last Thanksgiving, and it was a hit. The cardamom adds a floral, slightly citrusy note that pairs beautifully with the pumpkin.
Mini Pie Version: Press the crust into a muffin tin lined with cupcake liners, fill with the pumpkin mixture, and chill for 2-3 hours. You’ll get about 12 mini pies, perfect for parties or portion control.
Serving & Storage Suggestions
This Easy No-Bake Pumpkin Pie with Gingersnap Crust is best served cold, straight from the refrigerator. The texture is firm but creamy, and the flavors are clean and bright.
Serving Suggestions: Top each slice with a generous dollop of whipped cream and a sprinkle of crushed gingersnaps. A drizzle of caramel sauce is also amazing if you want to go all out. For a complete fall dessert spread, serve it alongside a warm cup of creamy homemade horchata or a hot apple cider. The pie also pairs beautifully with a scoop of vanilla ice cream—the temperature contrast is lovely.
Storage: Cover the pie tightly with plastic wrap or transfer it to an airtight container. It will keep in the refrigerator for up to 5 days. The crust may soften slightly over time, but the flavor actually improves as the spices meld.
Freezing: This pie freezes beautifully. Wrap it tightly in plastic wrap, then in aluminum foil, and freeze for up to 3 months. Thaw it overnight in the refrigerator before serving. I’ve done this for holiday prep, and it’s a lifesaver. Just don’t add the whipped cream topping until after it’s thawed.
Reheating: This is a no-bake pie, so there’s no reheating involved. But if you prefer your pumpkin pie at room temperature, let it sit out for 15-20 minutes before serving. The texture will soften slightly, and the flavors will become more pronounced.
Flavor Development: This pie is one of those rare desserts that actually gets better with time. The spices meld with the pumpkin, the ginger from the crust infuses into the filling, and everything becomes more cohesive. Day two is better than day one. Day three is even better. If you can wait that long.
Nutritional Information & Benefits
Here’s the approximate nutritional breakdown for one slice of this Easy No-Bake Pumpkin Pie with Gingersnap Crust (based on 8 servings, without the whipped cream topping):
| Nutrient | Amount per Serving |
|---|---|
| Calories | 385 |
| Total Fat | 24g |
| Saturated Fat | 14g |
| Cholesterol | 75mg |
| Sodium | 280mg |
| Total Carbohydrates | 40g |
| Dietary Fiber | 3g |
| Sugars | 27g |
| Protein | 5g |
| Vitamin A | 180% DV |
| Calcium | 6% DV |
| Iron | 8% DV |
Health Benefits: Pumpkin is packed with vitamin A, which supports eye health and immune function. It’s also a good source of fiber, which aids digestion. The ginger in the crust has anti-inflammatory properties, and the cinnamon may help regulate blood sugar. Of course, this is still a dessert, so enjoy it in moderation. But it’s nice to know there’s some nutritional value hiding in that creamy, delicious filling.
Dietary Considerations: This recipe contains gluten, dairy, and eggs (in the crust if using store-bought gingersnaps). See the variations section for gluten-free and dairy-free adaptations.
Conclusion
This Easy No-Bake Pumpkin Pie with Gingersnap Crust has become my go-to dessert for fall gatherings, last-minute dinner parties, and quiet nights when I just want something sweet without the fuss. It’s proof that you don’t need to spend hours in the kitchen to create something genuinely impressive.
What I love most about this recipe is how forgiving it is. You can tweak the spices, swap the crust, adjust the sweetness—it’s hard to mess up. And the result is always a pie that looks like you put in way more effort than you actually did. That’s my favorite kind of cooking.
I’d love to hear how this pie turns out for you. Did you add your own twist? Did it disappear at your holiday table? Drop a comment below and let me know. And if you’re looking for more easy, impressive desserts, check out my Baileys Irish Cream Cheesecake or these Mini Lemon Blueberry Cheesecakes for more no-fuss baking inspiration.
Happy no-baking, friends. I hope this pie brings you as much joy as it’s brought me.
Frequently Asked Questions
Can I use homemade pumpkin puree instead of canned?
Absolutely. Just make sure you strain it well to remove excess moisture. Homemade pumpkin puree tends to be more watery than canned, so line a strainer with cheesecloth, add the puree, and let it drain for about an hour. Squeeze out any remaining liquid before using it in the recipe.
How do I know when the pie is fully set?
The pie should feel firm to the touch, not jiggly. When you gently shake the pie plate, the center should move as one solid mass, not ripple like liquid. If it still seems soft, give it another hour or two in the fridge. Overnight is always the safest bet.
Can I make this pie in advance for a party?
Yes, and I actually recommend it. This pie needs at least 4 hours to set, but it’s at its best when made a day ahead. The flavors meld and deepen overnight. Just wait to add the whipped cream topping until right before serving so it stays fresh and fluffy.
My crust keeps falling apart. What did I do wrong?
Two most likely culprits: not enough butter, or not pressing firmly enough. The crust mixture should feel like wet sand and hold together when squeezed. If it’s crumbly, add another tablespoon of melted butter. And when pressing it into the pie plate, use the bottom of a glass or measuring cup to really compact it. Don’t be gentle—you want it dense and firm.
Can I use a different type of cookie for the crust?
You can, but the flavor will change. Graham crackers work in a pinch, but you lose that spicy ginger-molasses kick that makes this crust so special. If you use graham crackers, I recommend adding ½ teaspoon of ground ginger and 1 tablespoon of molasses to the butter mixture to mimic the gingersnap flavor. Speculoos or Biscoff cookies also make an excellent substitute.
Pin This Recipe!
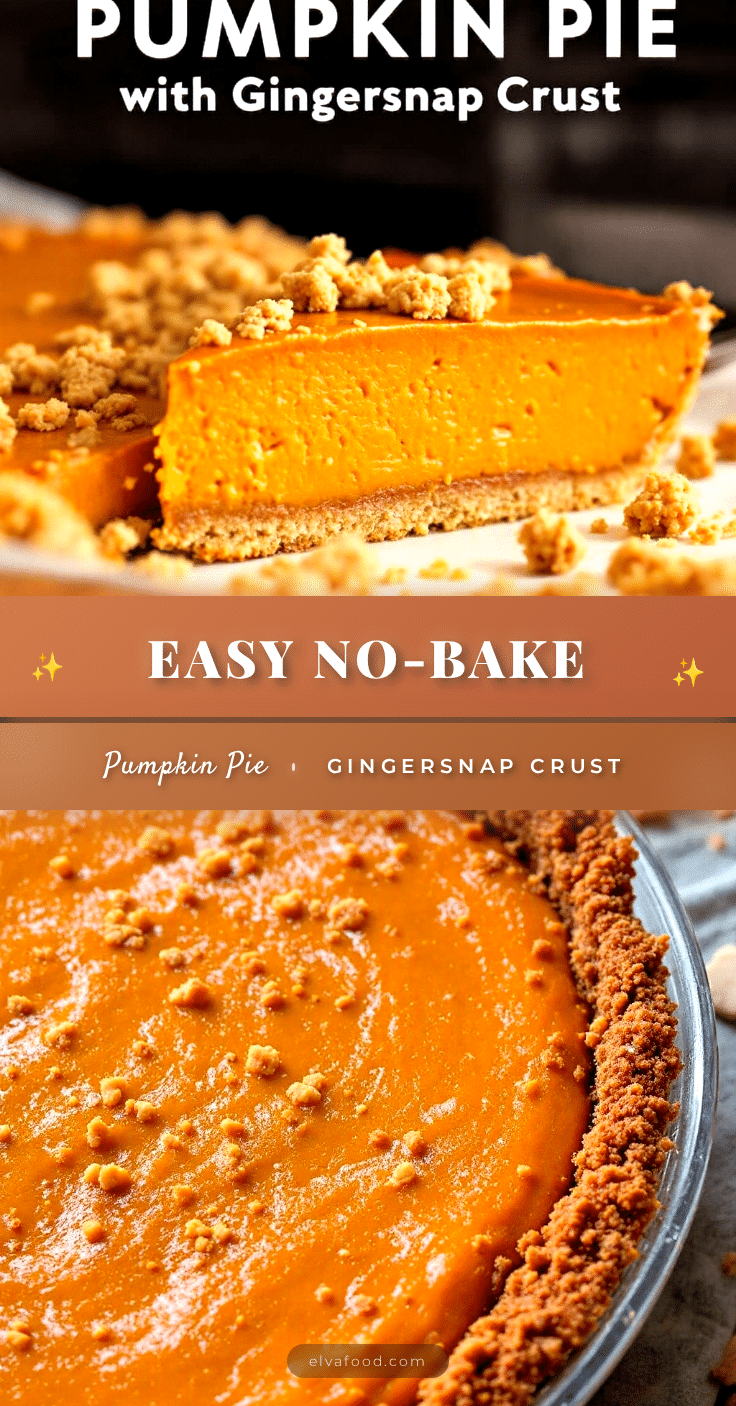
Easy No-Bake Pumpkin Pie with Gingersnap Crust: Best 5-Minute Dessert

This no-bake pumpkin pie features a ridiculously creamy filling and a spicy, crunchy gingersnap crust. It’s ready in just 5 minutes of active time and sets up perfectly in the fridge, making it an ideal make-ahead dessert for any occasion.
- Prep Time: 5 minutes
- Cook Time: 0 minutes
- Total Time: 4 hours 5 minutes (includes chilling)
- Yield: 8 servings 1x
- Category: Dessert
- Cuisine: American
Ingredients
- 2 cups (about 200g) gingersnap cookie crumbs
- 6 tablespoons (85g) unsalted butter, melted
- 2 tablespoons (25g) granulated sugar
- Pinch of salt (if using unsalted butter)
- 8 ounces (226g) cream cheese, softened
- 1 cup (200g) granulated sugar
- 1 can (15 ounces or 425g) pumpkin puree (100% pure pumpkin)
- 1 teaspoon vanilla extract
- 1 teaspoon ground cinnamon
- ½ teaspoon ground ginger
- ¼ teaspoon ground nutmeg
- ¼ teaspoon ground cloves
- 1 cup (240ml) heavy whipping cream
- For the topping (optional): 1 cup (240ml) heavy whipping cream, 2 tablespoons (15g) powdered sugar, ½ teaspoon vanilla extract, crushed gingersnaps and fresh mint leaves for garnish
Instructions
- Make the crust: Crush gingersnaps into fine crumbs (using a food processor or a zip-top bag and rolling pin). In a medium bowl, combine crumbs, melted butter, sugar, and salt (if using). Stir until mixture resembles wet sand and holds together when pressed. Press firmly into the bottom and up the sides of a 9-inch pie plate. Refrigerate while making the filling.
- Whip the cream: In a large chilled bowl, beat 1 cup cold heavy whipping cream with an electric mixer on medium-high speed until soft peaks form. Add 2 tablespoons powdered sugar and ½ teaspoon vanilla extract, then continue whipping until stiff peaks form. Set aside in the fridge.
- Make the pumpkin filling: In a separate large bowl, beat softened cream cheese on medium speed until smooth, about 1 minute. Add granulated sugar and beat until combined, about 30 seconds. Add pumpkin puree, vanilla extract, cinnamon, ginger, nutmeg, and cloves. Beat on medium speed until well combined and smooth, about 1-2 minutes. Scrape down sides as needed.
- Fold in the whipped cream: Add one-third of the whipped cream to the pumpkin mixture and fold gently with a rubber spatula until combined. Add remaining whipped cream and fold until no white streaks remain. The filling should be light and mousse-like.
- Assemble and chill: Pour the filling into the chilled crust. Spread evenly and tap the pie plate gently on the counter to settle. Cover loosely with plastic wrap and refrigerate for at least 4 hours, preferably overnight.
- Serve: When ready to serve, make the whipped cream topping (optional) by whipping 1 cup cold heavy cream with 2 tablespoons powdered sugar and ½ teaspoon vanilla extract until stiff peaks form. Spread or pipe over the pie. Garnish with crushed gingersnaps and mint leaves. Slice with a sharp knife, wiping the blade clean between cuts.
Notes
Room temperature cream cheese is crucial for a smooth filling. Don’t skip the chill time—4 hours minimum, overnight is best. Press the crust firmly to prevent crumbling. Fold the whipped cream gently to keep the filling light. Taste and adjust spices to your preference. Use 100% pure pumpkin, not pumpkin pie filling.
Nutrition
- Serving Size: 1 slice (1/8 of pie)
- Calories: 385
- Sugar: 27
- Sodium: 280
- Fat: 24
- Saturated Fat: 14
- Carbohydrates: 40
- Fiber: 3
- Protein: 5
Keywords: no-bake pumpkin pie, gingersnap crust, easy pumpkin pie, 5-minute dessert, no-bake dessert, pumpkin pie recipe, fall dessert, Thanksgiving dessert


