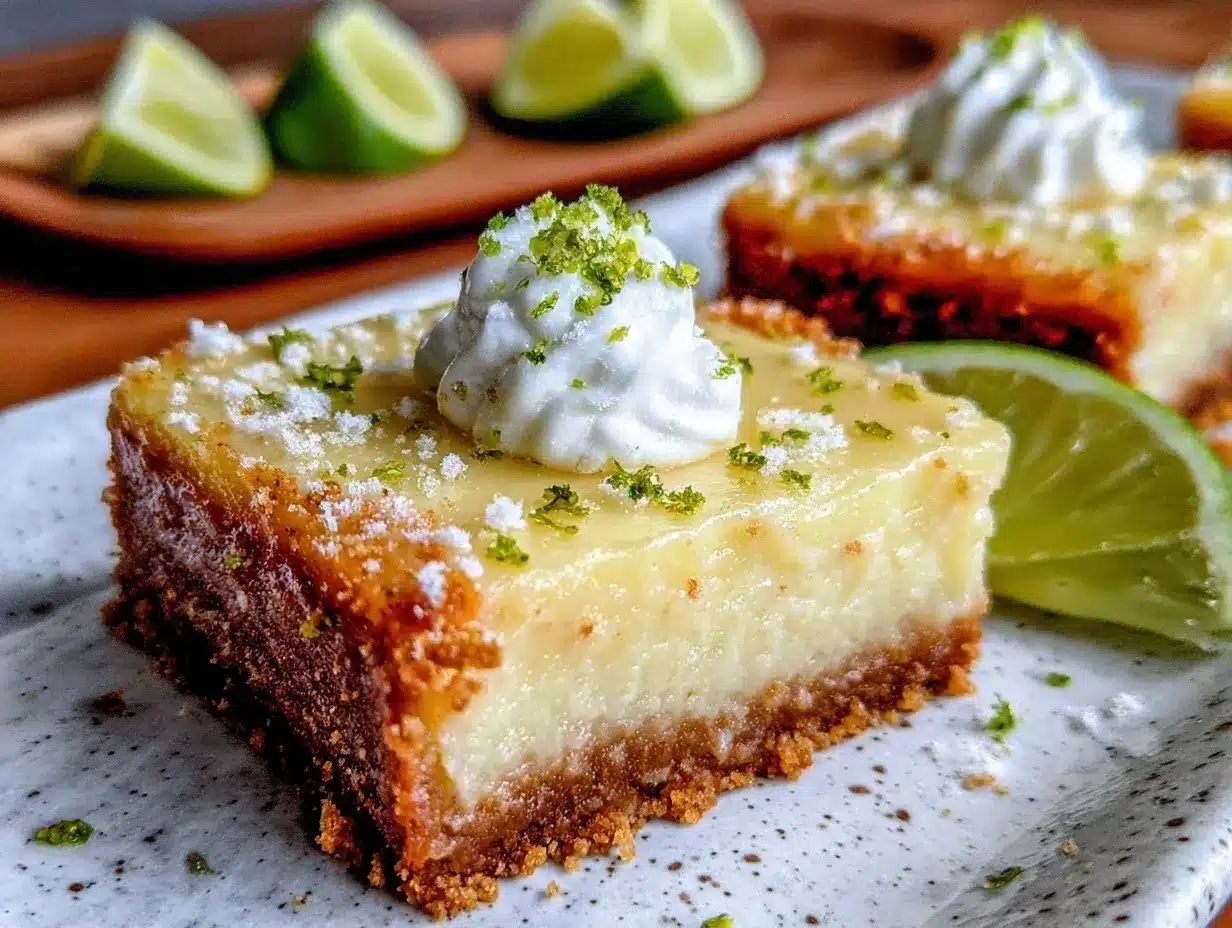
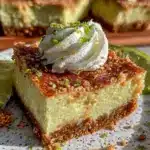
The last crumb vanished before I even reached for my fork. Three friends had circled the kitchen, each sending a text minutes later: “Can you send me the recipe?” Honestly, I was a bit surprised. It started as a quick experiment with some leftover limes and a box of graham crackers I didn’t want to waste. I wasn’t expecting that buttery crust and tangy, creamy filling to disappear so fast or earn such praise. The way the lime zest hit your nose before the first bite, then that smooth, sweet-tart filling melting against the crunch of the crust—it’s like a little tropical getaway in every square.
This recipe snuck in during a lazy afternoon, when I just wanted something easy but special for a casual get-together. No fancy equipment, no complicated steps, just simple ingredients coming together in a way that made everyone pause and smile. What’s funny is I wasn’t even sure if the filling would set up right, but it did—perfectly smooth and just the right amount of tartness.
Now, whenever I make these creamy key lime pie bars with buttery graham cracker crust, I remember that moment—the surprise, the satisfaction, and the quiet joy of sharing something homemade that felt like a treat but wasn’t a fuss. It’s a recipe that stuck around because it’s approachable, comforting, and honestly, it’s that zing of lime that keeps everyone coming back for more.
These bars aren’t just dessert—they’re a little moment of sunshine on a plate. And that’s why they’ve become a favorite to bring out whenever I want to impress with minimal effort but maximum flavor.
Why You’ll Love This Creamy Key Lime Pie Bars Recipe
This recipe has been tested more times than I can count, and it reliably delivers every time. I’ve made it for weekend family brunches, casual barbecues, and even potlucks where the dessert table is usually a battleground of sweets. Here’s why it stands out:
- Quick & Easy: The whole process takes under 45 minutes, with most of that being hands-off baking and chilling time. Perfect for when you want something homemade but don’t have hours to spend in the kitchen.
- Simple Ingredients: No need for fancy or hard-to-find items. You probably have graham crackers, sweetened condensed milk, and limes right in your pantry and fridge.
- Perfect for Any Occasion: Whether it’s a casual weekend get-together, a festive summer party, or just a sweet pick-me-up, these bars fit the bill.
- Crowd-Pleaser: The balance of creamy, tangy, and buttery hits all the right notes, making it a favorite with both kids and grown-ups alike.
- Unbelievably Delicious: The texture contrast—the crunchy crust with the silky, tart filling—is something I haven’t found in other key lime recipes. It’s comfort food with a bright twist.
What makes these bars different? Honestly, I think it’s the crust. I press the graham cracker mixture firmly and bake it just long enough to get that perfect snap without dryness. The filling blends sweetened condensed milk with fresh lime juice and zest, no artificial shortcuts, which gives it that fresh, authentic zing. Plus, a small addition of cream cheese smooths out the filling to make it ultra-creamy without losing the brightness.
Making these bars always brings back that quiet moment of surprise when someone takes that first bite and closes their eyes. It’s simple, it’s satisfying, and it’s just the right kind of indulgence that feels like a little celebration on a plate.
What Ingredients You Will Need
This recipe keeps it straightforward with ingredients that highlight fresh lime flavor and a rich, buttery base. The components come together for bold taste and a satisfying texture without any fuss or weird add-ons.
- For the Buttery Graham Cracker Crust:
- 1 1/2 cups graham cracker crumbs (about 10 full sheets; I like using Honey Maid for a sweet, crunchy base)
- 6 tablespoons unsalted butter, melted (adds richness and helps the crust hold together)
- 1/4 cup granulated sugar (balances the tartness and adds a touch of crispness)
- For the Creamy Key Lime Filling:
- 1 (14 oz) can sweetened condensed milk (the secret to that creamy, luscious texture)
- 4 large egg yolks (room temperature, helps thicken the filling)
- 1/2 cup freshly squeezed key lime juice (about 4-5 key limes; you can use regular limes if key limes are unavailable, but key limes add that distinct tartness)
- 1 tablespoon finely grated lime zest (for an extra burst of citrus aroma)
- 4 oz cream cheese, softened (this one’s a subtle twist for extra creaminess and a slight tang)
- 1 teaspoon vanilla extract (rounds out the flavor)
- Pinch of salt (balances sweetness and enhances the lime flavor)
If you’re feeling adventurous or need to swap ingredients:
- For gluten-free options, use gluten-free graham crackers or substitute with crushed gluten-free cookies.
- For dairy-free, replace butter with coconut oil and sweetened condensed milk with a coconut condensed milk alternative.
- In summer, I sometimes swap lime zest for lemon zest for a slightly different citrus note.
Equipment Needed
- 9×9-inch baking pan (glass or metal works fine; glass takes a little longer to bake but heats evenly)
- Mixing bowls (one larger for crust, another for filling)
- Electric mixer or sturdy whisk (I prefer a handheld mixer for the filling to get it super smooth)
- Measuring cups and spoons (accuracy matters for balance)
- Microplane or fine grater (for zesting your limes)
- Rubber spatula (for scraping the bowl clean and folding ingredients gently)
- Cooling rack (optional, but helps the bars cool evenly after baking)
If you don’t have a microplane, using the fine side of a box grater or carefully peeling thin strips of zest with a vegetable peeler works in a pinch. For the crust, I’ve also used a food processor to crush graham crackers quickly, but crushing them in a sealed plastic bag with a rolling pin works just as well and saves on washing.
Preparation Method
- Preheat your oven: Set it to 350°F (175°C). This ensures the crust bakes evenly right away.
- Make the crust: In a medium bowl, combine 1 1/2 cups graham cracker crumbs, 6 tablespoons melted unsalted butter, and 1/4 cup granulated sugar. Mix thoroughly until the crumbs are evenly moistened and clump together when pressed.
- Press the crust: Transfer the mixture into your 9×9-inch baking pan and press it firmly and evenly into the bottom. I like using the bottom of a flat glass or measuring cup to really compact it—that gives it the best snap after baking.
- Bake the crust: Place the pan in the oven for 8-10 minutes. The crust should turn a light golden brown and smell buttery. Watch carefully to avoid burning. Remove and let cool slightly while you prepare the filling.
- Prepare the filling: In a large bowl, beat together 4 large egg yolks and 4 oz softened cream cheese until smooth and creamy. Next, add the 1 (14 oz) can sweetened condensed milk, 1/2 cup freshly squeezed key lime juice, 1 tablespoon lime zest, 1 teaspoon vanilla extract, and a pinch of salt. Beat the mixture until fully combined and slightly thickened. The mixture should look glossy and smooth—no lumps.
- Pour the filling over the crust: Spread the mixture evenly over the baked crust, smoothing the top gently with a spatula.
- Bake again: Return the pan to the oven and bake for 15-18 minutes. The filling should be just set—slightly jiggly in the center but not liquid. Overbaking can cause cracking or a dry texture.
- Cool completely: Remove the bars from the oven and let them cool to room temperature on a wire rack. Then refrigerate for at least 3 hours, preferably overnight. This chilling step is crucial for the filling to fully set and develop that creamy texture.
- Slice and serve: Use a sharp knife warmed under hot water and wiped dry to cut clean squares. This prevents cracking or crumbling.
Pro tip: When zesting limes, avoid the white pith beneath the skin—it’s bitter and can throw off the flavor. Also, using fresh key lime juice instead of bottled makes a noticeable difference in brightness.
Cooking Tips & Techniques
One thing I learned the hard way is that the filling consistency depends a lot on how you mix your ingredients. Overbeating the egg yolks can scramble them, but under-mixing leaves lumps. So, go slow and steady with your electric mixer or whisk.
Baking time is another key factor. I’ve made the mistake of leaving the bars in too long, ending up with a cracked, dry texture that no one wanted. Keep a close eye—removing the bars when the filling is just set but still a bit jiggly will give you that silky, creamy finish.
The crust can be tricky too. If you don’t pack it down firmly, the bars will crumble when sliced. I press it down hard with the bottom of a measuring cup or glass to create a solid base.
When slicing, warming your knife under hot water and wiping it dry between cuts helps keep the edges clean and prevents the filling from sticking.
Multitasking tip: While the crust is baking, prep the filling to save time. This way, you can pour it in immediately and keep the cooking momentum going.
Variations & Adaptations
These bars are wonderfully flexible, so I’ve tried a few variations over time:
- Dairy-Free Version: Substitute butter with coconut oil and use a dairy-free condensed milk alternative. The bars turn out just as creamy but with a slight coconut undertone.
- Ginger Snap Crust: Swap graham crackers for crushed ginger snap cookies for a spicy twist that pairs beautifully with the lime.
- Key Lime & Coconut: Add 1/3 cup shredded unsweetened coconut to the crust or sprinkle on top before baking. It adds a lovely texture and tropical flavor.
- Mini Bars: Use a mini muffin tin instead of a baking pan for bite-sized treats—great for parties or kid-friendly snacks.
Also, if you want to get creative with the filling, stirring in a tablespoon of mascarpone can add a silky richness. Or swirl in a raspberry coulis before baking for a pretty color and a tart contrast.
Serving & Storage Suggestions
Serve these key lime pie bars chilled, straight from the fridge. The cool creaminess is what makes them so refreshing, especially on warm days. I like to garnish with a little extra lime zest or a thin slice of lime for a touch of elegance.
They pair beautifully with a cup of iced tea or a light white wine if you’re serving adults. For a casual brunch, consider serving alongside fresh fruit or a fresh spring vegetable frittata for a balanced spread.
Store leftovers in an airtight container in the refrigerator for up to 4 days. The flavors actually deepen and meld after a day, making the bars even more delicious. For longer storage, you can freeze the bars for up to 2 months—just thaw overnight in the fridge before serving.
When reheating, I recommend enjoying them cold, but if you prefer a slightly softer texture, let them sit at room temperature for 10-15 minutes before slicing.
Nutritional Information & Benefits
Each bar (assuming 16 servings) contains approximately:
| Nutrient | Amount |
|---|---|
| Calories | 180 |
| Fat | 9g |
| Carbohydrates | 22g |
| Protein | 3g |
| Sugar | 18g |
The key lime juice provides a good dose of vitamin C and antioxidants, which are great for immune support. Using fresh juice and zest means no artificial flavoring or preservatives. The recipe is gluten-containing unless you substitute gluten-free crackers, and it includes dairy and eggs, so keep that in mind for dietary restrictions.
From a wellness standpoint, I appreciate that these bars offer a satisfying sweet treat without overly processed ingredients, and the tartness helps balance the richness, making it a dessert that doesn’t leave you feeling weighed down.
Conclusion
These creamy key lime pie bars with buttery graham cracker crust have quietly become a staple in my recipe box—not because they’re flashy, but because they consistently deliver that perfect balance of creamy, tangy, and crunchy. Whether you’re looking for a quick dessert to impress or a refreshing treat for yourself, this recipe fits the bill.
Feel free to tweak the crust, add your favorite citrus twist, or even serve them mini style for parties. I love how adaptable they are, and honestly, they’re a little piece of sunshine I come back to again and again.
If you give these bars a try, I’d love to hear how you customized them or what memories they brought up. Recipes like this remind me that sometimes the simplest things bring the most joy.
FAQs about Creamy Key Lime Pie Bars
Can I use regular limes instead of key limes?
Yes! Regular limes work just fine and are easier to find. The flavor will be slightly less tart and aromatic, but still delicious.
How long do these bars need to chill?
At least 3 hours in the fridge for the filling to fully set. Overnight chilling is even better for clean slicing and flavor development.
Can I make these bars ahead of time?
Absolutely. They store well in the fridge for up to 4 days and can be frozen for up to 2 months. Just thaw in the fridge before serving.
What’s the best way to get a firm crust?
Press the graham cracker mixture firmly into the pan with the bottom of a glass or measuring cup before baking. This compacts the crumbs to prevent crumbling.
Can I make these bars vegan?
With substitutions like dairy-free cream cheese, coconut condensed milk, and vegan butter or coconut oil, you can adapt the recipe. Just note the texture and flavor may vary slightly.
For more easy, crowd-pleasing desserts, you might enjoy my easy strawberry shortcake bars or the rainbow pot of gold cupcakes—both perfect for celebrations and casual gatherings.
Pin This Recipe!
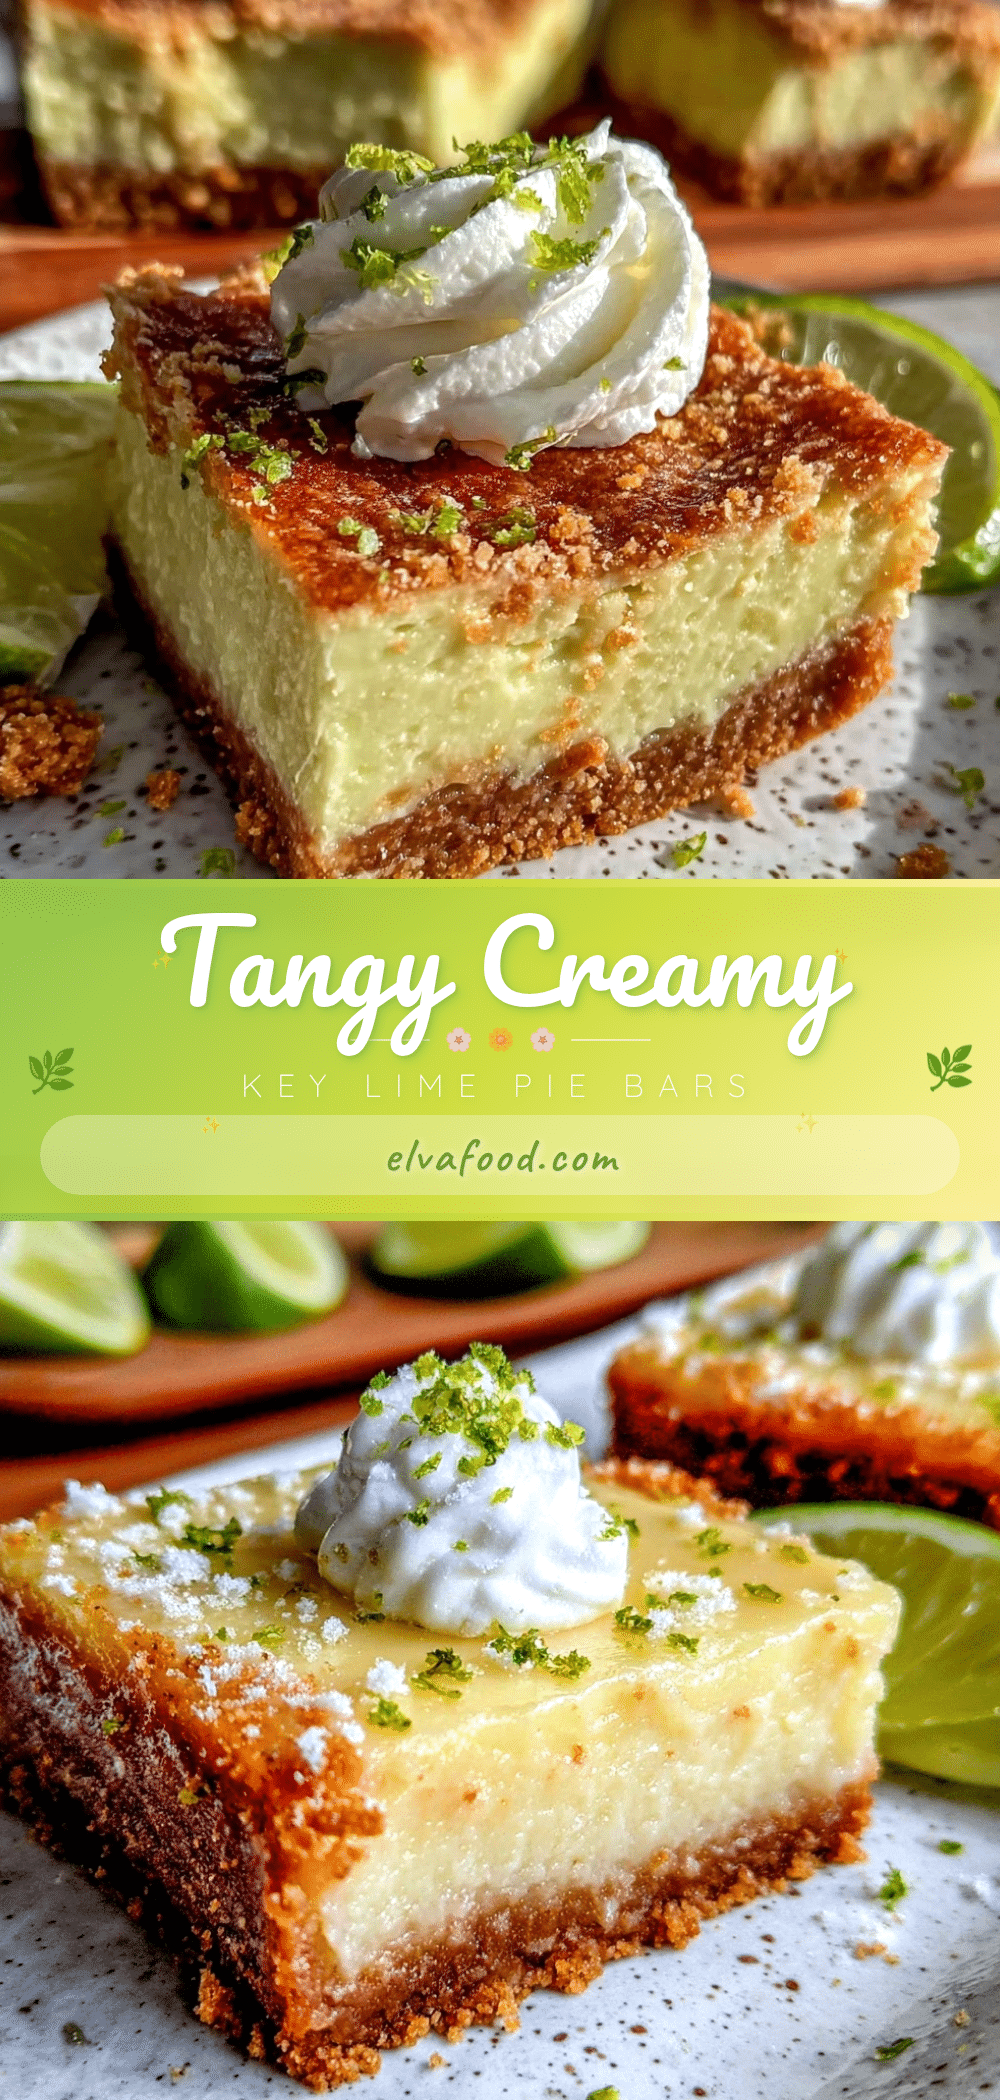
Creamy Key Lime Pie Bars
These creamy key lime pie bars feature a buttery graham cracker crust and a tangy, smooth filling that melts in your mouth. Perfect for quick, easy, and crowd-pleasing dessert moments.
- Prep Time: 15 minutes
- Cook Time: 25 minutes
- Total Time: 3 hours 40 minutes
- Yield: 16 servings 1x
- Category: Dessert
- Cuisine: American
Ingredients
- 1 1/2 cups graham cracker crumbs (about 10 full sheets)
- 6 tablespoons unsalted butter, melted
- 1/4 cup granulated sugar
- 1 (14 oz) can sweetened condensed milk
- 4 large egg yolks, room temperature
- 1/2 cup freshly squeezed key lime juice (about 4–5 key limes)
- 1 tablespoon finely grated lime zest
- 4 oz cream cheese, softened
- 1 teaspoon vanilla extract
- Pinch of salt
Instructions
- Preheat your oven to 350°F (175°C).
- In a medium bowl, combine graham cracker crumbs, melted butter, and granulated sugar. Mix until crumbs are evenly moistened and clump together when pressed.
- Press the crust mixture firmly and evenly into the bottom of a 9×9-inch baking pan.
- Bake the crust for 8-10 minutes until light golden brown and fragrant. Remove and let cool slightly.
- In a large bowl, beat egg yolks and softened cream cheese until smooth and creamy.
- Add sweetened condensed milk, key lime juice, lime zest, vanilla extract, and salt. Beat until fully combined and slightly thickened with a glossy smooth texture.
- Pour the filling evenly over the baked crust and smooth the top gently.
- Bake for 15-18 minutes until the filling is just set but still slightly jiggly in the center.
- Remove from oven and cool to room temperature on a wire rack.
- Refrigerate for at least 3 hours or preferably overnight to fully set the filling.
- Use a sharp knife warmed under hot water and wiped dry to cut into squares before serving.
Notes
Avoid zesting the white pith beneath the lime skin to prevent bitterness. Use fresh key lime juice for best brightness. Press crust firmly to avoid crumbling. Warm knife under hot water and dry between cuts for clean slices. Chill bars at least 3 hours or overnight for best texture.
Nutrition
- Serving Size: 1 bar (assuming 16 b
- Calories: 180
- Sugar: 18
- Fat: 9
- Carbohydrates: 22
- Protein: 3
Keywords: key lime pie bars, creamy key lime bars, graham cracker crust, easy dessert, homemade key lime bars, tangy lime dessert, summer dessert