The lunchbox came back empty. Not just the main compartment — the little fruit cup was scraped clean, and the yogurt pouch was flattened like a pancake. My kid, who normally picks at her lunch like she’s inspecting a science experiment, had apparently demolished everything. And the pinwheels? Gone. First. She asked if I could make them again the next day. That’s when I knew I had stumbled onto something. These turkey cheddar pinwheel roll-ups weren’t just a lunch win — they were a parenting victory I didn’t see coming.
I’d been in a lunch rut, honestly. Sandwiches that came back half-eaten. Bento boxes with untouched veggies. I needed something that felt fresh but didn’t require me to wake up at dawn. These roll-ups started as a desperate experiment on a Sunday night when I had leftover tortillas and deli meat staring at me from the fridge. I smeared some cream cheese, layered turkey and cheddar, rolled it tight, and sliced. The next morning, I packed them with a few berries and called it a day. I didn’t think much of it until I saw that empty lunchbox.
There’s something about the spiral shape that makes kids forget they’re eating lunch. It’s like a little surprise in every bite — the cream cheese holds everything together, the turkey gives it that savory punch, and the cheddar adds that familiar comfort. Plus, they’re easy to hold, easy to chew, and somehow more fun than a regular sandwich. I’ve been making them ever since, and I’ve never looked back. If you’re tired of the lunchbox struggle, these pinwheels might just be your new best friend.
Why You’ll Love This Recipe
Let me tell you why these turkey cheddar pinwheel roll-ups have become my go-to lunchbox staple. I’ve tested them through picky eaters, school field trips, and even grown-up snack platters, and they hold up every single time.
- Quick & Easy : These come together in under 10 minutes. Seriously, you can make a batch while your coffee brews in the morning. No cooking, no baking, no fuss.
- Simple Ingredients : You probably already have everything in your fridge. Tortillas, cream cheese, deli turkey, cheddar cheese. That’s it. No fancy grocery runs required.
- Perfect for School Lunches : They pack beautifully in lunchboxes, stay fresh for hours, and kids actually eat them. Plus, they’re easy to customize for different tastes.
- Crowd-Pleaser : I’ve served these at playdates, picnics, and even as appetizers for grown-up gatherings. Adults love them just as much as kids do. They disappear fast.
- Unbelievably Delicious : The combination of creamy, savory, and cheesy is just perfect. The texture is soft but not mushy, and every bite has that satisfying spiral look.
What makes these different from every other pinwheel recipe out there? It’s the cream cheese spread. I learned this the hard way after making batches that fell apart or tasted dry. The trick is to let the cream cheese soften to room temperature so it spreads smoothly and acts like glue for the fillings. That small step makes all the difference between roll-ups that hold their shape and ones that unravel in a lunchbox.
This recipe isn’t just good — it’s the kind that makes you feel like you’ve hacked the school lunch system. It’s fast, affordable, and actually gets eaten. No more wasted food or sad lunchbox notes. Just happy kids and an empty container at pickup time.
What Ingredients You Will Need
This recipe uses simple, everyday ingredients to create something that feels special without any extra effort. Most of these are pantry and fridge staples, which makes these roll-ups perfect for busy mornings when you need a reliable lunch solution.
- Flour tortillas (8-inch) — Look for soft, pliable tortillas that won’t crack when rolled. I prefer Mission or Guerrero brands for their flexibility. Whole wheat or spinach tortillas work great too if you want extra nutrition or color.
- Cream cheese (8 ounces) — Full-fat cream cheese gives the best flavor and holds everything together best. Let it soften at room temperature for about 20 minutes before spreading. Neufchâtel cheese works as a lighter option.
- Deli turkey slices (about 8 ounces) — Oven-roasted or smoked turkey both work beautifully. I like getting thick-cut slices from the deli counter for better texture. Avoid paper-thin slices that can tear when rolling.
- Cheddar cheese slices (about 6 ounces) — Sharp cheddar adds the most flavor, but mild cheddar works well for picky eaters. You can also use Colby Jack or provolone for a different taste. Shredded cheese won’t work as well here — stick with slices.
- Salt and black pepper (optional) — A tiny pinch of salt and pepper in the cream cheese spread adds a subtle savory boost. Skip this if your kids prefer plain flavors.
- Optional add-ins — Thinly sliced cucumber, bell pepper strips, or lettuce leaves can add crunch and color. Just make sure to pat vegetables dry so they don’t make the tortillas soggy.
I recommend using Philadelphia cream cheese for the smoothest spread — it really does make a difference in texture. For the turkey, Boar’s Head or Applegate Farms offer clean ingredient lists and great flavor. If you’re watching sodium, look for low-sodium turkey options.
For a dairy-free version, use vegan cream cheese and dairy-free cheddar-style slices. The texture will be slightly different, but the roll-ups still hold together well. I’ve tried this with Kite Hill cream cheese and Violife cheddar slices, and my kids didn’t notice the difference.
Equipment Needed
You don’t need much to make these turkey cheddar pinwheel roll-ups. That’s part of the beauty — simple tools, simple process, simple cleanup.
- Cutting board — A large, flat surface for assembling and rolling the tortillas. Wooden or plastic both work fine.
- Butter knife or offset spatula — For spreading the cream cheese evenly across the tortillas. An offset spatula gives you more control, but a regular butter knife does the job.
- Sharp chef’s knife or serrated knife — A sharp knife makes clean slices without squishing the roll-ups. A serrated knife works especially well because it cuts through the tortilla without tearing it. I learned this after ruining several rolls with a dull blade.
- Plastic wrap or parchment paper — For wrapping the rolled tortillas tightly before chilling. This step is crucial for clean slices.
- Baking sheet or large plate — To hold the wrapped rolls in the refrigerator. A flat surface helps them keep their shape.
- Toothpicks (optional) — For securing the roll-ups if you’re packing them for lunch and worried about unraveling. I use these for field trips or long days.
If you don’t have plastic wrap, you can use reusable beeswax wraps or even a damp paper towel wrapped around the roll. The goal is to keep the tortilla moist and help the filling set. I’ve also used a silicone mat to roll them up, which works great and reduces waste.
One tip I learned from making too many messy batches: chill the rolls for at least 30 minutes before slicing. It makes a world of difference. Warm cream cheese squishes out, but cold cream cheese holds firm. A sharp knife and cold rolls are the secret to those beautiful spiral slices.
Preparation Method

Making these turkey cheddar pinwheel roll-ups is straightforward, but a few small details make the difference between roll-ups that hold together and ones that fall apart. Follow these steps, and you’ll have perfect pinwheels every time.
- Soften the cream cheese. Take the cream cheese out of the refrigerator about 20 minutes before you start. You want it soft enough to spread like butter — not cold and stiff. If you’re short on time, microwave it for 10 seconds on low power. Be careful not to melt it.
- Prepare your work surface. Lay a large cutting board on your counter. Place one flour tortilla flat on the board. Make sure it’s at room temperature — cold tortillas crack when rolled.
- Spread the cream cheese. Using a butter knife or offset spatula, spread a thin, even layer of cream cheese over the entire surface of the tortilla. Go all the way to the edges — this helps seal the roll later. You want about 2 tablespoons per tortilla, but adjust based on your preference.
- Add a pinch of seasoning (optional). If you’re using salt and pepper, sprinkle a tiny amount evenly over the cream cheese. Don’t overdo it — the turkey and cheese already have plenty of flavor.
- Layer the turkey slices. Place 2 to 3 slices of deli turkey over the cream cheese, overlapping them slightly to cover the entire tortilla. Leave about half an inch bare at the top edge — this makes rolling easier and prevents filling from squeezing out.
- Add the cheddar cheese. Lay 1 to 2 slices of cheddar cheese over the turkey. Again, leave that small bare edge at the top. The cheese should cover most of the turkey layer.
- Roll it tight. Starting from the bottom edge closest to you, roll the tortilla tightly toward the top edge. Use your fingers to keep the filling tucked in as you roll. Apply gentle but firm pressure — you want a snug roll without squishing everything out. The cream cheese should help seal the edge when you finish.
- Wrap and chill. Place the rolled tortilla seam-side down on a piece of plastic wrap. Wrap it tightly, twisting the ends like a candy wrapper. This keeps the roll compact while it chills. Repeat with remaining tortillas. Place all wrapped rolls on a baking sheet or plate and refrigerate for at least 30 minutes. One hour is even better.
- Slice the pinwheels. After chilling, unwrap one roll at a time. Using a sharp knife, slice the roll into 1-inch thick rounds. A serrated knife works best — saw gently rather than pressing down. You should get about 6 to 8 pinwheels per tortilla, depending on how thick you slice them.
- Arrange and serve. Place the pinwheels on a plate or pack them directly into lunchboxes. They’re ready to eat cold or at room temperature. For school lunches, I pack them in a small container with a lid to keep them from getting squished.
Here’s a sensory cue to watch for: when you slice the chilled roll, you should see clean, distinct spirals of cream cheese, turkey, and cheddar. If the cream cheese squishes out, the roll wasn’t chilled long enough. If the tortilla cracks, it was too cold or too dry. Perfect pinwheels have a tight spiral with no gaps and no oozing filling.
One more thing — I always make extra. These disappear fast, and having a batch in the fridge means I can grab them for snacks, quick lunches, or even a light dinner on busy nights. They’re that versatile.
Cooking Tips & Techniques
After making these turkey cheddar pinwheel roll-ups dozens of times, I’ve picked up a few tricks that make the process smoother and the results better. Let me save you some trial and error.
The biggest mistake I made early on was not letting the cream cheese soften enough. I was in a hurry one morning and spread cold cream cheese straight from the fridge. It ripped the tortilla, clumped up unevenly, and the whole roll fell apart when I tried to slice it. Lesson learned — soft cream cheese is non-negotiable. It spreads like a dream and acts as the glue that holds everything together.
Another common issue is slicing too soon. I know you’re hungry and want to eat them right away, but trust me on this one. Chilling the rolls for at least 30 minutes firms up the cream cheese and makes the tortilla easier to cut. Without that chill time, you’ll end up with messy, squished pinwheels that look more like scrambled eggs than spirals.
Here’s a pro technique I learned from a caterer friend: after spreading the cream cheese, sprinkle a thin layer of finely chopped fresh herbs — chives, parsley, or dill work beautifully. It adds a pop of color and a subtle freshness that elevates the whole roll-up. My kids don’t even notice the green flecks, but the flavor is noticeably better.
For timing and multitasking, make these the night before. Assemble and roll all the tortillas, wrap them tightly, and let them chill overnight. In the morning, just slice and pack. It takes less than 5 minutes to slice a batch, which means you can have fresh pinwheels for lunch without any morning rush.
Consistency tip: use the same amount of filling for each tortilla. I measure my cream cheese by the tablespoon — two tablespoons per tortilla, spread evenly. This ensures every pinwheel has the same ratio of creamy to savory to cheesy. No one wants a bite that’s all tortilla or all cream cheese.
If you’re packing these for school lunches, add a small ice pack to the lunchbox. While the pinwheels are fine at room temperature for a few hours, the cream cheese stays firmer and tastes better when kept cool. I’ve also found that packing them in a small container with a tight lid prevents them from getting squished by heavier items in the lunchbox.
Variations & Adaptations
One of the best things about these turkey cheddar pinwheel roll-ups is how easy they are to adapt. I’ve tried dozens of variations over the years, and here are my favorites.
Dietary variations: For a gluten-free version, use corn tortillas or gluten-free flour tortillas. Corn tortillas are smaller and more delicate, so spread the cream cheese gently and roll carefully. For a dairy-free option, use vegan cream cheese and dairy-free cheddar slices. I’ve tested this with Kite Hill cream cheese and Follow Your Heart cheddar, and the texture holds up well.
Flavor variations: Swap the turkey for ham, roast beef, or even rotisserie chicken for a different protein. Replace cheddar with pepper jack for a spicy kick, or use provolone for a milder, meltier option. Add a thin layer of pesto or sun-dried tomato spread under the cream cheese for an Italian twist. I made a batch with pesto and provolone last summer, and they were a hit at a picnic.
Seasonal adaptations: In spring, add thinly sliced cucumber and fresh dill to the filling. Summer calls for roasted red peppers and fresh basil. Fall brings roasted turkey with cranberry sauce and brie. Winter is perfect for a hearty version with smoked turkey and sharp white cheddar. Each season offers new flavor combinations that keep these roll-ups exciting year-round.
Different cooking methods: While these are traditionally served cold, you can toast them for a warm version. Place the sliced pinwheels on a baking sheet and broil for 1 to 2 minutes until the cheese melts and the edges crisp up. They’re amazing as a warm snack or light lunch. I’ve also pan-fried them in a little butter for a crispy exterior — think of it as a quesadilla-pinwheel hybrid.
Customization for picky eaters: If your kids are particular about textures, keep the fillings simple. Just cream cheese and turkey, or cream cheese and cheddar alone. You can always add more ingredients later as their palates expand. My daughter started with just cream cheese and turkey, and now she asks for cucumber and bell pepper strips inside hers.
One personal variation I love: spread a thin layer of honey mustard or ranch dressing under the cream cheese. It adds a tangy kick that pairs beautifully with the turkey and cheddar. I discovered this by accident when I ran out of plain cream cheese and had to improvise. Now it’s my go-to version.
Serving & Storage Suggestions
These turkey cheddar pinwheel roll-ups are incredibly versatile when it comes to serving and storing. Here’s everything you need to know to keep them fresh and delicious.
Serving temperature: These are best served cold or at room temperature. Straight from the fridge, they’re firm and hold their shape perfectly. If you’re serving them at a party or picnic, let them sit at room temperature for about 10 minutes before serving — the cream cheese softens slightly and the flavors become more pronounced.
Presentation ideas: Arrange the pinwheels on a platter with the spiral sides facing up so everyone can see the beautiful layers. Garnish with fresh herbs like parsley or chives for a pop of color. For school lunches, pack them in a small container with a few berries, cucumber slices, or baby carrots on the side. The colorful presentation makes lunch feel special without any extra effort.
Complementary dishes: These pinwheels pair beautifully with a simple side salad, fresh fruit, or vegetable sticks. For a complete lunch, add a small cup of soup or a yogurt pouch. They also work great as part of a larger appetizer spread alongside hummus, olives, and crackers. If you’re looking for more lunchbox inspiration, check out this easy lo mein noodles recipe with chicken and veggies for another kid-friendly option that packs well.
Storage instructions: Store leftover pinwheels in an airtight container in the refrigerator for up to 3 days. Place a paper towel at the bottom of the container to absorb any excess moisture and keep the tortillas from getting soggy. Change the paper towel if it becomes damp.
Freezer instructions: You can freeze these roll-ups for up to 1 month. Wrap each roll tightly in plastic wrap, then place them in a freezer-safe bag. To thaw, transfer to the refrigerator overnight. Slice them while they’re still cold for the cleanest cuts. I don’t recommend freezing already-sliced pinwheels — they tend to get mushy when thawed.
Reheating methods: If you want to serve these warm, place the sliced pinwheels on a baking sheet and warm them in a 350°F oven for 5 to 7 minutes. You can also microwave them for 15 to 20 seconds, but be careful — the cream cheese can get too soft and the tortilla may become chewy. For a crispy version, pan-fry the slices in a little butter over medium heat for 1 to 2 minutes per side.
How flavors develop over time: These pinwheels actually taste better after a few hours in the fridge. The flavors meld together as the cream cheese absorbs the savory notes from the turkey and cheddar. That’s why they’re perfect for make-ahead lunches. I often make a batch on Sunday and enjoy them throughout the week — they never last past Wednesday in my house.
Nutritional Information & Benefits
These turkey cheddar pinwheel roll-ups are not only delicious but also offer a balanced nutritional profile that makes them a smart choice for school lunches and snacks.
Estimated nutritional values per serving (6 pinwheels):
| Nutrient | Amount |
|---|---|
| Calories | 320-380 |
| Protein | 22-26g |
| Carbohydrates | 24-28g |
| Fat | 16-20g |
| Saturated Fat | 8-10g |
| Fiber | 1-2g |
| Sodium | 680-820mg |
| Calcium | 15-20% DV |
| Iron | 8-10% DV |
Health benefits of key ingredients: Turkey is a lean protein source that helps keep kids full and focused throughout the school day. Cheddar cheese provides calcium for strong bones and teeth. Cream cheese adds healthy fats that support brain development. If you use whole wheat tortillas, you’ll also get extra fiber for digestive health.
Dietary considerations: This recipe can be made gluten-free by using corn or gluten-free tortillas. For a lower-sodium option, choose low-sodium deli turkey and reduced-fat cheese. The recipe is naturally low in added sugar, making it a great choice for families watching sugar intake.
Potential allergens: This recipe contains dairy (cream cheese, cheddar cheese) and gluten (tortillas). It may also contain traces of other allergens depending on the specific brands you use. Always check ingredient labels if you’re cooking for someone with food allergies.
From a wellness perspective, I love that these pinwheels offer a balanced mix of protein, carbs, and fats in a portable, kid-friendly format. They keep my kids satisfied until snack time without the sugar crash that comes from processed lunch foods. Plus, I know exactly what’s in them — no mystery ingredients or preservatives.
Conclusion
These turkey cheddar pinwheel roll-ups have genuinely changed the way I think about school lunches. They’re fast, simple, and actually get eaten — which is more than I can say for most of the lunch ideas I’ve tried over the years. The best part is how customizable they are. You can switch up the fillings based on what you have in the fridge or what your kids are in the mood for. It’s a recipe that works with you, not against you.
I encourage you to make these your own. Experiment with different cheeses, add some veggies, or try a new spread. The base recipe is forgiving enough to handle all kinds of tweaks. And if your kids are anything like mine, they’ll start requesting these by name. That empty lunchbox I mentioned at the beginning? It’s become a regular sight in our house. And honestly, that’s the best compliment a lunch can get.
If you try these turkey cheddar pinwheel roll-ups, I’d love to hear how they turned out. Drop a comment below and let me know what variations your family loved. Did you add something unexpected? Did your picky eater surprise you? Share your story — I read every comment and love hearing about your kitchen wins. And if you’re looking for more lunchbox-friendly recipes, don’t forget to browse the full recipe collection for more inspiration. Happy rolling!
Frequently Asked Questions
Can I make these turkey cheddar pinwheel roll-ups ahead of time?
Absolutely! These are perfect for meal prep. Assemble and roll the tortillas up to 2 days in advance. Keep them wrapped tightly in plastic wrap in the refrigerator. Slice them just before serving or packing for the best texture. You can also freeze the whole rolls for up to a month.
How do I keep the pinwheels from getting soggy in a lunchbox?
The key is to pat any add-ins like cucumber or bell peppers completely dry before adding them to the roll. Also, place a paper towel at the bottom of the lunch container to absorb excess moisture. If you’re packing them the night before, store the pinwheels separately from wet items like fruit.
What’s the best way to slice pinwheels without them falling apart?
Chill the rolled tortillas for at least 30 minutes before slicing. Use a sharp serrated knife and use a gentle sawing motion rather than pressing down. Clean the knife between cuts for the cleanest slices. If the cream cheese starts to squish out, the roll needs more chilling time.
Can I use different types of cheese besides cheddar?
Yes, absolutely! Provolone, Swiss, Colby Jack, mozzarella, and pepper jack all work beautifully. Harder cheeses like cheddar slice best, but softer cheeses can work if you keep the slices thin. I’ve even used brie for a fancy version — just remove the rind first.
Are these pinwheels suitable for a low-carb or keto diet?
They can be adapted! Use low-carb tortillas or large lettuce leaves instead of flour tortillas. Stick with full-fat cream cheese and cheese. The turkey provides plenty of protein. Each pinwheel made with a low-carb tortilla would have about 3-4g net carbs, making them a great option for low-carb lunchboxes. For a hearty dinner option that’s also satisfying, try this Irish lamb stew with Guinness — it’s a completely different vibe but just as comforting.
Pin This Recipe!
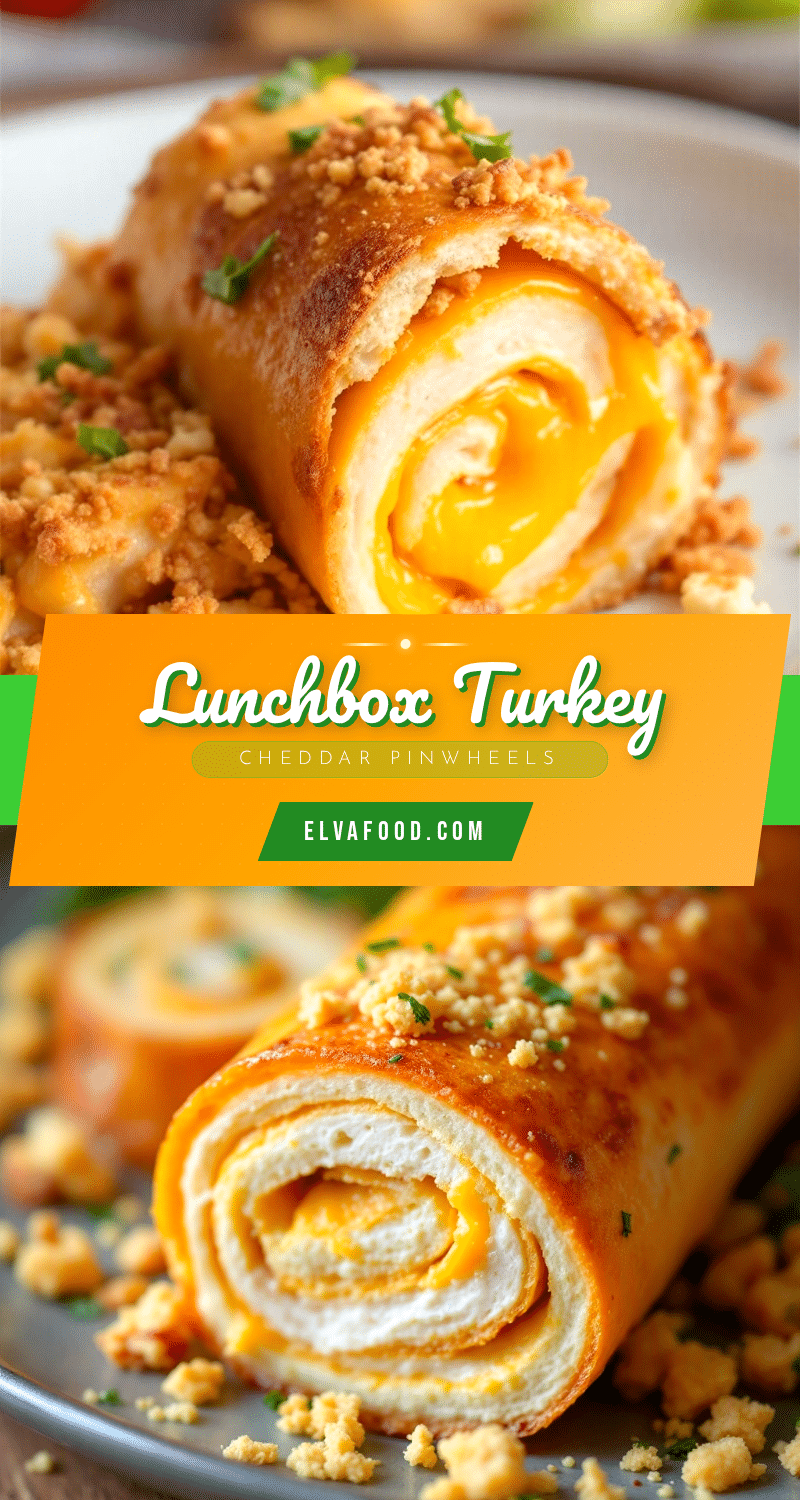
Easy Turkey Cheddar Pinwheel Roll-Ups Recipe

These turkey cheddar pinwheel roll-ups are a quick, kid-friendly lunchbox win made with simple ingredients like tortillas, cream cheese, deli turkey, and cheddar cheese. They come together in under 10 minutes and are perfect for school lunches, picnics, or appetizers.
- Prep Time: 10 minutes
- Cook Time: 0 minutes
- Total Time: 40 minutes (includes 30 minutes chilling)
- Yield: 4 servings (about 24-32 pinwheels) 1x
- Category: Appetizer / Snack / Lunch
- Cuisine: American
Ingredients
- 4 (8-inch) flour tortillas
- 8 ounces cream cheese, softened
- 8 ounces deli turkey slices
- 6 ounces cheddar cheese slices
- Salt and black pepper (optional)
- Optional add-ins: thinly sliced cucumber, bell pepper strips, or lettuce leaves
Instructions
- Soften the cream cheese by letting it sit at room temperature for about 20 minutes, or microwave for 10 seconds on low power.
- Lay a flour tortilla flat on a cutting board.
- Spread a thin, even layer of cream cheese over the entire surface of the tortilla, going all the way to the edges.
- If using, sprinkle a tiny pinch of salt and pepper over the cream cheese.
- Place 2 to 3 slices of deli turkey over the cream cheese, overlapping slightly to cover the tortilla, leaving about half an inch bare at the top edge.
- Lay 1 to 2 slices of cheddar cheese over the turkey, again leaving the top edge bare.
- Starting from the bottom edge, roll the tortilla tightly toward the top edge, keeping the filling tucked in.
- Place the rolled tortilla seam-side down on a piece of plastic wrap and wrap tightly, twisting the ends. Repeat with remaining tortillas.
- Refrigerate the wrapped rolls for at least 30 minutes, or up to overnight.
- Unwrap one roll at a time and slice into 1-inch thick rounds using a sharp serrated knife.
- Arrange on a plate or pack into lunchboxes. Serve cold or at room temperature.
Notes
Let cream cheese soften to room temperature for easy spreading. Chill rolls for at least 30 minutes before slicing for clean spirals. Use a serrated knife for best results. Make ahead and store in the refrigerator for up to 3 days. Freeze whole rolls for up to 1 month.
Nutrition
- Serving Size: 6 pinwheels
- Calories: 320380
- Sugar: 24
- Sodium: 680820
- Fat: 1620
- Saturated Fat: 810
- Carbohydrates: 2428
- Fiber: 12
- Protein: 2226
Keywords: turkey cheddar pinwheel roll-ups, easy lunchbox recipe, kid-friendly snack, no-cook appetizer, turkey cream cheese roll-ups


