“You’re not really making banana pudding, are you?” my friend asked skeptically over the phone as I rattled off a quick list of ingredients I had on hand. Honestly, I was half-expecting it to flop. I’d tossed together a batch one sleepy Sunday afternoon, mostly because I had a bunch of ripe bananas and a box of Nilla Wafers sitting around, and well, why not? What surprised me wasn’t just how easy it was to whip up something so creamy and comforting, but how it quickly became the dessert that everyone asked for at every family gathering afterward. The mix of silky pudding, those crisp yet softening wafers, and the fresh banana slices brought back this warm, nostalgic feeling—like a cozy hug after a long day.
It wasn’t fancy or complicated, no fancy gadgets or obscure ingredients. Just simple, honest food that felt like a little celebration in a bowl. And the best part? It’s one of those recipes where every bite reminds you why homemade is always better. I ended up making it so much that I lost count of how many times I found myself sneaking a spoonful straight from the fridge. If you’ve ever hesitated about making banana pudding from scratch, I get it—the idea might seem a bit intimidating at first. But trust me, once you taste this creamy homemade banana pudding with Nilla wafers, you’ll wonder why you never tried it sooner.
There’s a quiet satisfaction in layering those vanilla wafers with pudding and bananas, then letting it all chill and mingle overnight. It’s like the flavors get to know each other, and the texture goes from simple to downright dreamy. This recipe stuck with me because it’s the kind of dessert that’s both comfort and a little treat, effortlessly bringing people together without any fuss. So whether you’re after a no-fail crowd-pleaser or just a sweet moment to yourself, this banana pudding might just become your go-to too.
Why You’ll Love This Recipe
This creamy homemade banana pudding with Nilla wafers isn’t your everyday quick-fix dessert. Having tested this recipe multiple times (seriously, I made it three times in one week last summer), I can say it’s a reliable, crowd-pleasing favorite that hits all the right notes. Here’s what makes it stand out:
- Quick & Easy: It comes together in about 20 minutes, perfect for those times when you want something sweet without the wait.
- Simple Ingredients: No need for a special trip to the store; you likely already have most of the ingredients in your pantry or fridge.
- Perfect for Gatherings: Whether it’s a casual family dinner or a potluck, this banana pudding feels like a classic that everyone will ask for.
- Crowd-Pleaser: Kids love it, adults love it, and honestly, I haven’t met anyone who didn’t enjoy this creamy dessert.
- Unbelievably Delicious: The pudding is silky smooth, the bananas add fresh sweetness, and the Nilla wafers bring that nostalgic crunch-turned-soft texture magic.
What really makes this recipe different? It’s the homemade pudding base—no instant mixes here—crafted with real vanilla and a little bit of patience. I like to use vanilla bean paste when I can find it because it gives that beautiful speckled look and a richer flavor, but classic vanilla extract works just fine too. Plus, layering the bananas and wafers just right ensures every spoonful has that perfect mix of creamy and crunchy. This isn’t just a recipe; it’s a little bit of comfort food history that’s been perfected for modern kitchens.
Honestly, after tasting this, you might find yourself closing your eyes with the first bite, savoring that silky texture and sweet warmth. It’s a comforting dessert that feels like a warm blanket on a chilly day but light enough to enjoy any time. And if you’re looking for other easy, satisfying meals to pair with your dessert, you might enjoy the Irish lamb stew recipe with Guinness or the easy Lo Mein noodles with chicken and veggies—both are hearty, homey dishes that fit right into a relaxed dinner vibe.
What Ingredients You Will Need
This recipe uses simple, wholesome ingredients to deliver bold flavor and that classic creamy texture without any fuss. Most of these are pantry staples, with a few fresh picks, making it easy to pull together even on short notice.
- Bananas: 4-5 ripe bananas, sliced (ripe means yellow with a few brown spots—perfect for sweetness and softness)
- Nilla Wafers: About 45 wafers (I prefer the classic vanilla flavor, but you can find gluten-free options if needed)
- Milk: 3 cups (720 ml) whole milk for the creamiest pudding, or use 2% if you want something lighter
- Sugar: 3/4 cup (150 g) granulated sugar (you can reduce slightly if you want it less sweet)
- Egg Yolks: 4 large, room temperature (they give the pudding that rich texture)
- Cornstarch: 1/3 cup (42 g) for thickening the pudding perfectly
- Salt: 1/4 teaspoon to balance the sweetness
- Vanilla Extract or Vanilla Bean Paste: 2 teaspoons (adds that warm, comforting aroma; vanilla bean paste is my personal favorite)
- Butter: 2 tablespoons (28 g), unsalted, softened (adds richness and smooth finish)
For substitutions, if you want a dairy-free version, swap the milk with almond or oat milk; just note that the texture will be slightly different but still tasty. You can also use coconut sugar instead of granulated sugar for a deeper flavor. If you can’t find Nilla Wafers, graham crackers broken into pieces make a decent stand-in, though the texture will vary.
Equipment Needed
- Medium Saucepan: For cooking the pudding base evenly without scorching. A heavy-bottomed pan works best.
- Whisk: Essential for stirring the pudding mixture constantly to avoid lumps.
- Mixing Bowls: At least two—one for whisking egg yolks and sugar, another for assembling the pudding layers.
- Measuring Cups and Spoons: For precise ingredients, especially the cornstarch and sugar.
- Spatula: To fold in butter smoothly and scrape down the sides of the pan.
- 9×13 inch Baking Dish or Trifle Bowl: To layer your banana pudding. Glass dishes are great for showing off the pretty layers.
- Plastic Wrap or Lid: To cover the pudding while it chills.
If you don’t have a heavy-bottomed saucepan, just be sure to keep the heat medium-low and stir constantly to prevent burning. And while a trifle bowl looks lovely, any deep dish will do—trust me, I’ve used everything from Pyrex to ceramic bowls depending on what was clean that day! Keeping your whisk in good shape makes stirring less of a chore; I keep mine in a utensil holder where it’s easy to grab mid-cooking.
Preparation Method
- Slice the Bananas: Peel and slice 4-5 ripe bananas into 1/4-inch (6 mm) thick rounds. Set aside. (Tip: Slice right before assembling to avoid browning.)
- Mix Sugar, Cornstarch, Salt, and Egg Yolks: In a medium bowl, whisk together 3/4 cup (150 g) sugar, 1/3 cup (42 g) cornstarch, 1/4 teaspoon salt, and 4 large egg yolks until smooth and pale. This step ensures the pudding base thickens properly without lumps.
- Heat Milk: Pour 3 cups (720 ml) whole milk into a medium saucepan and warm over medium heat until just simmering—tiny bubbles forming around the edges but not boiling (about 5 minutes). Stir occasionally to prevent skin forming on top.
- Temper the Egg Mixture: Slowly pour about 1 cup (240 ml) of the hot milk into the egg mixture while whisking vigorously to raise the temperature without scrambling the eggs. Then, pour the egg-milk mix back into the saucepan with the remaining milk.
- Cook the Pudding: Return the saucepan to medium heat. Whisk constantly for 5-7 minutes until the pudding thickens and starts to bubble gently. The texture should be smooth and coat the back of a spoon. (Watch closely—too much heat or time, and it can curdle.)
- Remove from Heat and Add Butter and Vanilla: Off the heat, stir in 2 tablespoons (28 g) softened unsalted butter and 2 teaspoons vanilla extract or vanilla bean paste until melted and fully incorporated. This gives the pudding a silky finish.
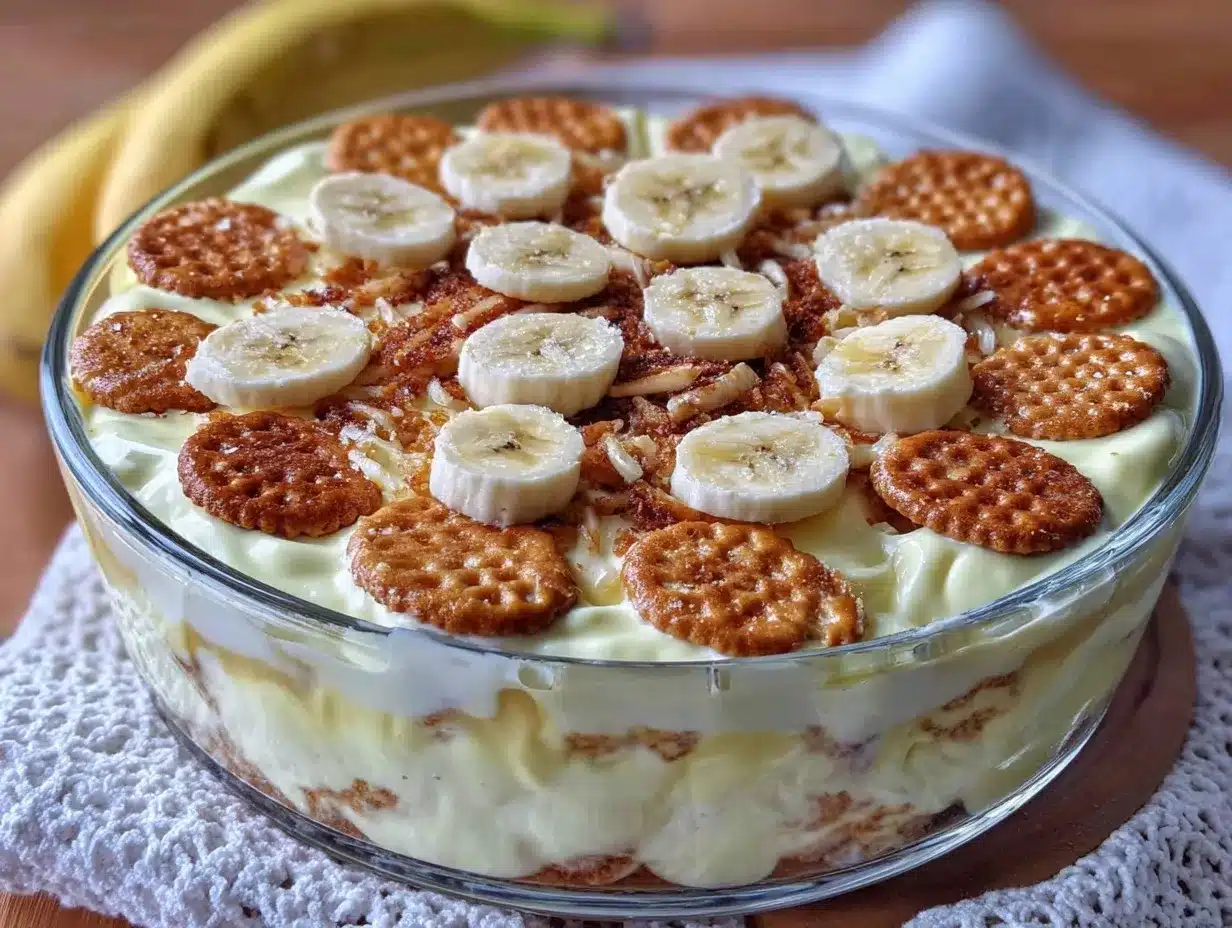
- Assemble the Layers: In your chosen dish, spread a thin layer of pudding to cover the bottom. Add a layer of Nilla Wafers (~15 wafers), then a layer of banana slices. Repeat layers (pudding, wafers, bananas) until all ingredients are used, ending with a thick pudding layer on top.
- Chill: Cover the pudding tightly with plastic wrap, pressing the wrap directly onto the surface of the pudding to prevent a skin from forming. Refrigerate for at least 4 hours, preferably overnight, to let flavors meld and wafers soften just right.
Pro tip: If your pudding looks a bit lumpy after cooking, a quick whisk off heat usually smooths it out. Also, some people like to toast the Nilla Wafers lightly before layering to deepen their flavor, but I prefer them straight from the box for that classic texture contrast.
Cooking Tips & Techniques
Making creamy homemade banana pudding is all about patience and careful stirring. Here are some tips from my own kitchen experiments:
- Constant whisking: When cooking the pudding, don’t walk away. Stirring constantly prevents lumps and scorching, which can ruin the texture.
- Tempering eggs: Adding hot milk slowly to the eggs is crucial. Pour too fast, and you get scrambled eggs in your pudding—not fun.
- Don’t rush chilling: The pudding needs time to set and for the wafers to soften just right. I promise, the wait is worth it.
- Banana freshness: Slice bananas just before assembling. If they brown too much, the pudding looks less inviting and tastes a bit off.
- Layer evenly: Try to keep layers uniform so every spoonful has pudding, bananas, and wafers. It’s about balance.
One time, I accidentally boiled the pudding too hard, and it curdled on me. Not the end of the world—I strained it through a fine sieve and salvaged it, but lesson learned: medium heat and patience are your friends here. Also, multitasking helps—while the pudding cools a bit, you can prep your bananas and wafers. That way, assembly goes fast and smooth.
Variations & Adaptations
This banana pudding recipe is pretty flexible, so you can tweak it based on your taste or dietary needs:
- Dairy-Free: Use coconut milk or almond milk instead of whole milk. Substitute butter with coconut oil for a tropical twist.
- Gluten-Free: Swap Nilla Wafers for gluten-free vanilla cookies or crushed gluten-free graham crackers.
- Extra Creamy: Fold in whipped cream or whipped topping after the pudding cools for a mousse-like texture.
- Chocolate Banana Pudding: Add 1/4 cup unsweetened cocoa powder to the pudding mixture for a chocolatey twist.
- Spiced Version: Sprinkle cinnamon or nutmeg between layers for a warm spice note—especially nice in cooler months.
Personally, I once made a batch using ripe mango in place of bananas (because I was out of bananas—don’t ask) and it was surprisingly refreshing. If you’re curious, you might also enjoy the silky coziness of the creamy cacio e pepe pasta recipe for a savory contrast on the same night.
Serving & Storage Suggestions
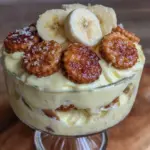
Serve this banana pudding chilled, straight from the fridge. The layers are at their best when cold, giving you that perfect creamy-cool bite with every spoonful. If you want to dress it up a bit, add a dollop of whipped cream or a sprinkle of crushed Nilla Wafers on top for extra crunch and presentation.
It pairs wonderfully with a cup of coffee or a light dessert wine if you’re feeling fancy. For a casual twist, try serving alongside fresh berries or a simple fruit salad for contrast.
Store leftovers covered tightly in the refrigerator for up to 3 days. The flavors actually deepen, but the wafers will continue to soften over time—if you like a bit of crunch, it’s best enjoyed within the first day. To reawaken the pudding’s creaminess, let it sit at room temperature for 10-15 minutes before serving.
Nutritional Information & Benefits
Each serving of this creamy homemade banana pudding with Nilla wafers provides a comforting dose of calcium and potassium, thanks to the milk and bananas. The eggs add protein, while the natural sugars in bananas mean you’re enjoying a little sweetness alongside beneficial vitamins. Using whole milk and butter boosts richness, but you can dial it down with lower-fat or dairy-free alternatives without losing the essence.
Keep in mind, this dessert does contain gluten (from the wafers) and eggs, so it’s not suitable for all allergies, but with substitutions, it can fit many diets. It’s a treat that balances indulgence with some nutritional perks, perfect for those moments when you want something sweet but not overly processed.
Conclusion
Creamy homemade banana pudding with Nilla wafers is one of those recipes that feels like a small, sweet reward after a busy day. It’s straightforward, comforting, and carries that kind of warmth that makes you want to share it with friends or savor it quietly yourself. I love how it’s easy to customize, yet remains so reliably delicious every time.
Don’t hesitate to make this recipe your own by switching up the flavors or textures—you might find your new favorite twist. If you try it, I’d really love to hear how it turned out, or what fun variations you came up with. Sometimes, the best recipes are the ones we make a little bit ours.
So, grab some ripe bananas and those Nilla wafers, and treat yourself to a bowl of this creamy goodness. You won’t regret it.
Frequently Asked Questions
Can I make banana pudding ahead of time?
Yes! It actually tastes better after chilling for a few hours or overnight, allowing the flavors to meld and the wafers to soften perfectly.
What if I don’t have Nilla Wafers?
You can substitute with graham crackers, vanilla cookies, or gluten-free cookies depending on your dietary needs.
How ripe should the bananas be?
Use bananas that are yellow with some brown spots for the best sweetness and texture. Avoid overly mushy or green bananas.
Can I use instant pudding mix instead of homemade pudding?
While instant pudding is quicker, homemade pudding has a richer, fresher flavor and creamier texture that really stands out.
How long does banana pudding last in the fridge?
Store it covered for up to 3 days. The texture changes as wafers soften more, so it’s best enjoyed within the first day or two.
Pin This Recipe!

Creamy Homemade Banana Pudding Recipe with Nilla Wafers Easy and Perfect
A creamy, comforting banana pudding made from scratch with real vanilla and layered with Nilla Wafers and ripe bananas. This easy recipe is a crowd-pleaser perfect for family gatherings or a sweet treat anytime.
- Prep Time: 15 minutes
- Cook Time: 10 minutes
- Total Time: 4 hours 25 minutes
- Yield: 8 servings 1x
- Category: Dessert
- Cuisine: American
Ingredients
- 4–5 ripe bananas, sliced
- About 45 Nilla Wafers
- 3 cups (720 ml) whole milk or 2% milk
- 3/4 cup (150 g) granulated sugar
- 4 large egg yolks, room temperature
- 1/3 cup (42 g) cornstarch
- 1/4 teaspoon salt
- 2 teaspoons vanilla extract or vanilla bean paste
- 2 tablespoons (28 g) unsalted butter, softened
Instructions
- Peel and slice 4-5 ripe bananas into 1/4-inch thick rounds. Set aside.
- In a medium bowl, whisk together sugar, cornstarch, salt, and egg yolks until smooth and pale.
- Pour 3 cups whole milk into a medium saucepan and warm over medium heat until just simmering (about 5 minutes), stirring occasionally.
- Slowly pour about 1 cup of the hot milk into the egg mixture while whisking vigorously to temper the eggs.
- Pour the egg-milk mixture back into the saucepan with the remaining milk.
- Return saucepan to medium heat and whisk constantly for 5-7 minutes until pudding thickens and bubbles gently.
- Remove from heat and stir in softened butter and vanilla extract or vanilla bean paste until fully incorporated.
- In a 9×13 inch baking dish or trifle bowl, spread a thin layer of pudding to cover the bottom.
- Add a layer of about 15 Nilla Wafers, then a layer of banana slices.
- Repeat layering pudding, wafers, and bananas until all ingredients are used, ending with a thick pudding layer on top.
- Cover tightly with plastic wrap pressed directly onto the pudding surface to prevent skin formation.
- Refrigerate for at least 4 hours, preferably overnight, to let flavors meld and wafers soften.
Notes
Constant whisking during cooking prevents lumps and scorching. Temper eggs slowly with hot milk to avoid scrambling. Slice bananas just before assembling to prevent browning. Cover pudding surface with plastic wrap to prevent skin. Refrigerate at least 4 hours or overnight for best texture. For dairy-free, substitute milk with almond or oat milk and butter with coconut oil. Gluten-free options available by swapping wafers.
Nutrition
- Serving Size: 1/8 of the recipe
- Calories: 320
- Sugar: 30
- Sodium: 150
- Fat: 12
- Saturated Fat: 7
- Carbohydrates: 45
- Fiber: 2
- Protein: 5
Keywords: banana pudding, homemade banana pudding, Nilla Wafers, creamy dessert, easy banana pudding, classic dessert, crowd-pleaser