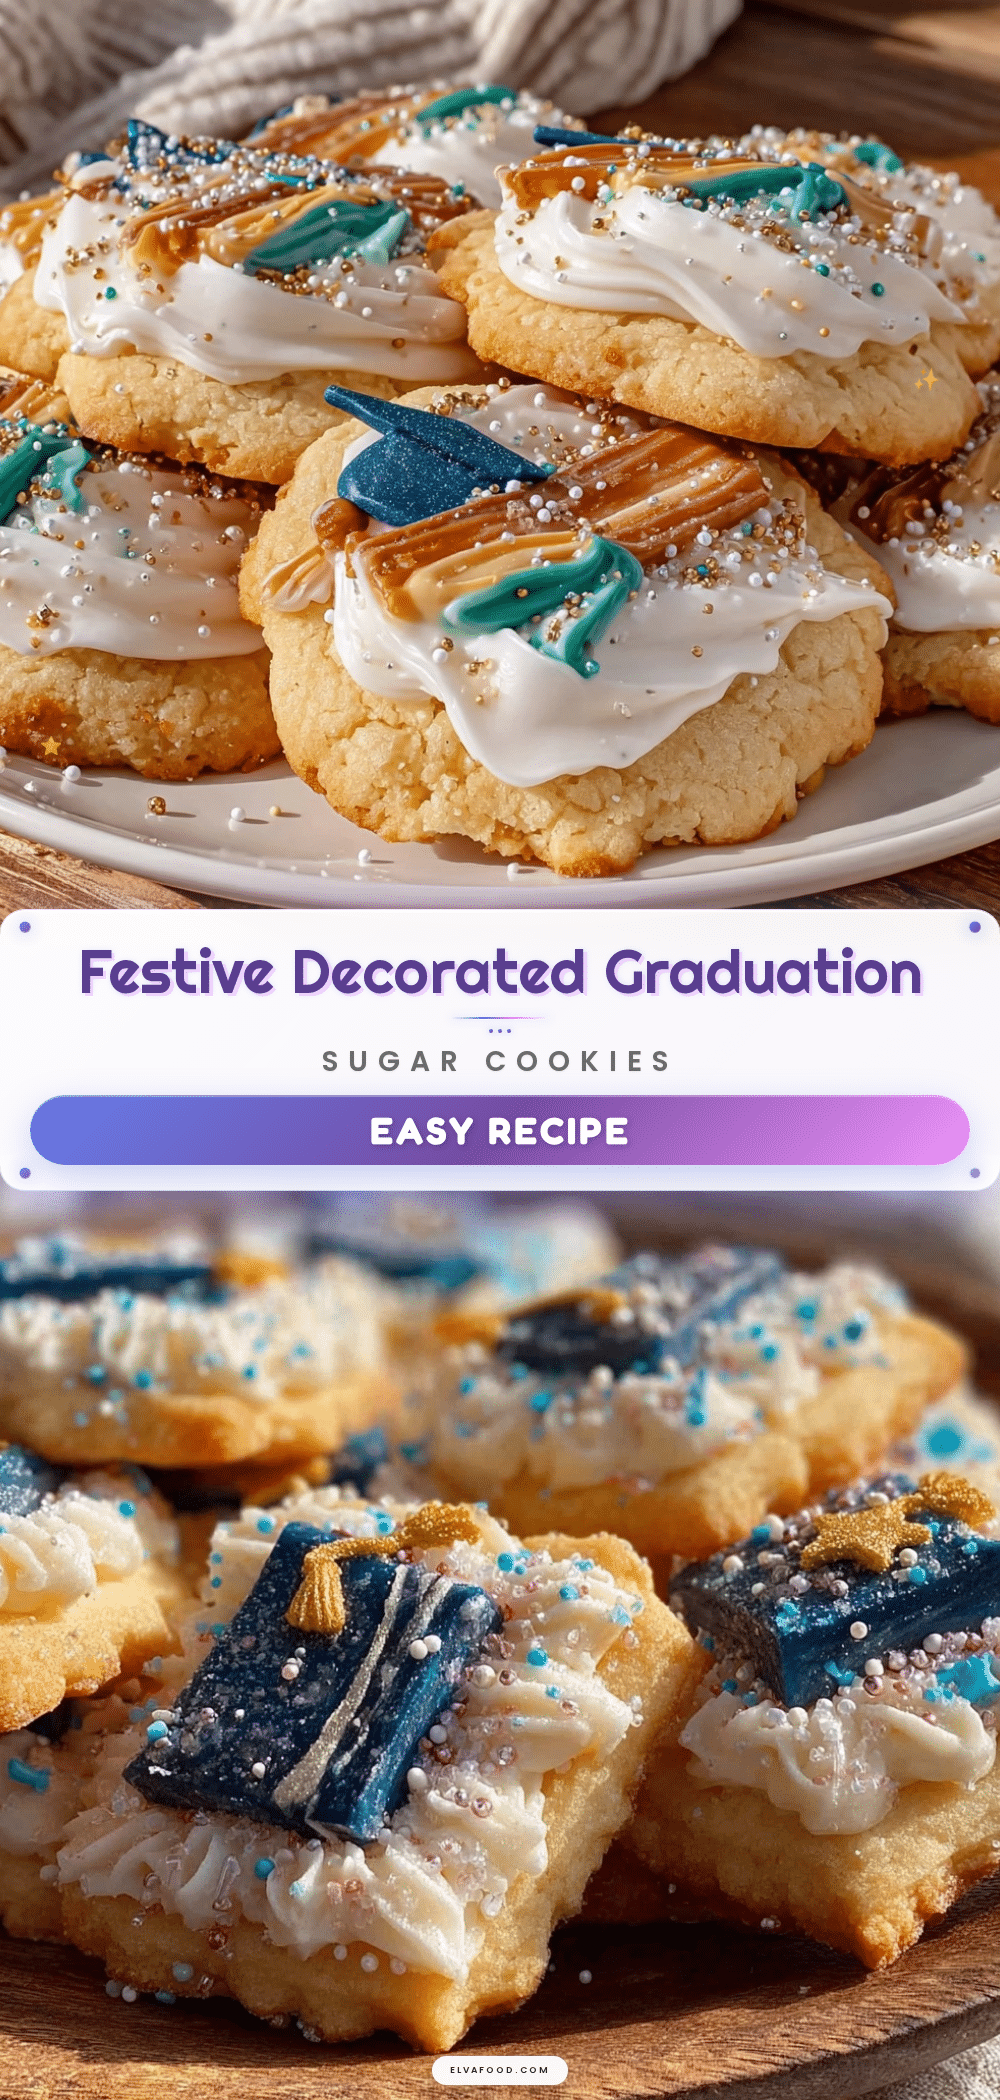
“Can you believe I’m actually doing this?” I muttered to myself in the quiet kitchen, staring down at a mound of sugar cookie dough and a bowl of glossy royal icing. It was the night before my niece’s graduation party, and my sister had texted me earlier, a little offhand but with a hint of expectation: “Could you maybe make those decorated sugar cookies again? You know, the ones with the caps and tassels?” Honestly, I was skeptical. Baking and decorating cookies isn’t exactly my usual jam, especially not with royal icing that demands precision and patience. But, you know what? Somehow, after a couple of late-night trials and a bit of icing disaster here and there, those cookies turned out to be the hit of the party.
What started as a rushed favor turned into a full-on obsession phase. I found myself making several batches in one week, tweaking colors and piping techniques, trying to get that perfect smooth finish and crisp edges. There’s something about watching the icing dry to a shiny, sturdy surface that feels oddly satisfying—like you crafted a little edible trophy. These perfect decorated graduation sugar cookies with royal icing became my little celebration ritual, the kind that brings a quiet kind of joy amidst all the chaos of planning and celebrating milestones.
In the end, it wasn’t just about the cookies—they became a symbol of pride and sweetness that matched the day’s mood perfectly. So, if you’re wondering how to pull off these charming treats without pulling your hair out, stick around. I’ll walk you through every step, with tips I wish I’d known before my first batch. Trust me, these cookies are worth that little extra effort, and they’ll bring a big smile on graduation day.
Why You’ll Love This Recipe
From my experience juggling cookie sheets and icing bags, this recipe for perfect decorated graduation sugar cookies with royal icing stands out for these reasons:
- Quick & Easy: The dough comes together in about 15 minutes, with a chill time that’s perfect for busy evenings or last-minute party prep.
- Simple Ingredients: Most of the ingredients are pantry staples—no need for specialty stores or last-minute runs.
- Ideal for Celebrations: Whether it’s a graduation party, a congratulatory brunch, or even a sweet gift, these cookies fit right in.
- Crowd-Pleaser: Kids and adults alike always ask for seconds, with their buttery base and sweet, smooth icing.
- Impressively Decorative: The royal icing dries hard, making it easy to add intricate designs like caps, diplomas, and tassels.
What makes this cookie recipe different from others? For one, the dough is sturdy enough to hold detailed shapes without spreading too much during baking. Plus, the royal icing recipe is just right — not too runny, not too stiff — which means you can pipe clean lines and fill areas without frustration. I’ve tried other recipes where the icing cracked or wouldn’t dry properly, but this one delivers a glossy, long-lasting finish every time.
Honestly, it feels like the kind of treat that brings a moment of calm and accomplishment to a busy day of celebrations. These cookies aren’t just tasty—they’re a little edible badge of honor for anyone who makes them.
What Ingredients You Will Need
This recipe calls for straightforward, wholesome ingredients that come together to create a buttery, tender cookie base and a smooth, pipeable royal icing. Most of these are pantry staples, so you can probably start mixing right away.
- For the Sugar Cookies:
- All-purpose flour (2 ¾ cups / 345 grams) – Provides structure for the cookies.
- Baking powder (1 teaspoon) – Helps the cookies rise just enough without puffing.
- Salt (½ teaspoon) – Balances the sweetness.
- Unsalted butter (1 cup / 227 grams), softened – For that rich, tender crumb. I like using Plugrá butter for consistent results.
- Granulated sugar (1 cup / 200 grams) – Sweetens the dough nicely.
- Large egg (1), room temperature – Binds everything together.
- Pure vanilla extract (1 teaspoon) – Adds warm flavor depth.
- Almond extract (optional, ½ teaspoon) – Adds a subtle nutty note that’s a personal favorite.
- For the Royal Icing:
- Powdered sugar (4 cups / 480 grams), sifted – The base of the icing for smoothness.
- Pasteurized egg whites (3 tablespoons) or 6 tablespoons meringue powder mixed with water – The secret to that firm, glossy finish.
- Fresh lemon juice (1 tablespoon) – Adds brightness and helps the icing set.
- Water (as needed) – To thin the icing to the right consistency.
- Gel food coloring – Use high-quality brands like AmeriColor for vibrant, bleed-resistant colors.
Feel free to swap almond extract with more vanilla if you prefer a simpler flavor. Also, for a gluten-free option, you can substitute with a 1:1 gluten-free flour blend, though the texture might be a bit different. The key with royal icing is to avoid liquid food coloring, which can thin it too much; gel dyes give you that bright, thick color you want.
Equipment Needed
To make these perfect decorated graduation sugar cookies with royal icing, you’ll want a few handy kitchen tools:
- Mixing Bowls: Medium and large bowls for dough and icing — glass or stainless steel work well.
- Electric Mixer: A stand or hand mixer makes cream butter and sugar easy and helps whip the icing to the right texture.
- Rolling Pin: Preferably one with adjustable rings or guides to roll dough evenly (about ¼ inch thick).
- Cookie Cutters: Graduation-themed shapes like caps, stars, and diplomas. If you don’t have themed cutters, simple squares or circles work, too.
- Baking Sheets: Non-stick or lined with parchment paper to prevent sticking and ensure even baking.
- Piping Bags and Tips: Disposable or reusable piping bags with fine round tips (#1 or #2) for outlining and flooding icing.
- Scribe Tool or Toothpick: For smoothing icing and fixing small mistakes.
- Cooling Rack: To let cookies cool completely before decorating.
If you’re on a budget, wooden rolling pins and plastic piping bags work just fine. I once used a zip-top bag with a tiny hole snipped at the corner when I ran out of piping bags—it’s a handy hack for emergencies. Also, keep your piping tips clean and dry to avoid clogging; a quick rinse with warm water during breaks helps keep icing flowing smoothly.
Preparation Method
- Mix Dry Ingredients: In a medium bowl, whisk together 2 ¾ cups (345g) all-purpose flour, 1 teaspoon baking powder, and ½ teaspoon salt. Set aside. This ensures your rising agent and salt are evenly distributed, which is key for consistent texture. (5 minutes)
- Cream Butter and Sugar: Using an electric mixer, beat 1 cup (227g) softened unsalted butter with 1 cup (200g) granulated sugar until light and fluffy, about 3-4 minutes. The mixture should look pale and have a soft, airy texture—this traps air for tender cookies. (4 minutes)
- Add Egg and Extracts: Beat in 1 large egg, 1 teaspoon vanilla extract, and optional ½ teaspoon almond extract until fully combined. The batter will look creamy and smooth. (2 minutes)
- Incorporate Dry Ingredients: Gradually add the flour mixture to the wet ingredients, mixing on low speed until just combined. Avoid overmixing to keep cookies tender. The dough will be soft but manageable. (3 minutes)
- Chill the Dough: Divide the dough into two disks, wrap in plastic wrap, and refrigerate for at least 1 hour (or overnight). Chilling prevents spreading and makes rolling easier. (1 hour or more)
- Preheat Oven: Set oven to 350°F (175°C). Line baking sheets with parchment paper or silicone mats. (5 minutes)
- Roll and Cut Dough: On a lightly floured surface, roll out one disk of dough to about ¼ inch (6 mm) thickness. Use your graduation-themed cookie cutters to cut shapes. Transfer cookies to baking sheets, spacing about 1 inch (2.5 cm) apart. Repeat with second disk. (15 minutes)
- Bake Cookies: Bake for 8-10 minutes, rotating sheets halfway through for even browning. Cookies should be just set around the edges with no color change on top. Overbaking leads to dry, crumbly cookies. (8-10 minutes)
- Cool Completely: Let cookies cool on baking sheets for 5 minutes, then transfer to a wire rack to cool fully before decorating. Warm cookies will melt royal icing. (20-30 minutes)
- Prepare Royal Icing: In a large bowl, beat together 4 cups (480g) sifted powdered sugar, 3 tablespoons pasteurized egg whites (or 6 tablespoons meringue powder mix), and 1 tablespoon fresh lemon juice. Add water a teaspoon at a time to reach piping consistency. The icing should hold a ribbon shape when drizzled from a spoon but still flow smoothly. Divide and color as desired with gel food coloring. (15 minutes)
- Decorate Cookies: Outline each cookie with thicker icing using a piping bag fitted with a small round tip. Let outline dry for 10 minutes. Flood inside the border with thinner icing using a squeeze bottle or piping bag. Use a toothpick or scribe tool to spread icing evenly and pop air bubbles. Add details like tassels, letters, or stars once the base layer is dry. Allow cookies to dry completely (several hours or overnight) before stacking or packaging. (Varies)
Pro tip: If your icing dries too fast while decorating, cover your bowls with damp towels to keep it moist. Also, when working with multiple colors, clean your scribe tool or toothpick between uses to avoid unwanted color mixing.
Cooking Tips & Techniques
Royal icing can intimidate even seasoned bakers, but a few tricks make it simpler:
- Consistency is King: For outlining, keep the icing thicker so it holds shape. For flooding, thin it down with water until it flows off your spoon in a steady ribbon but isn’t runny. I learned this by trial and error—too thin and the icing runs off the cookie; too thick and it doesn’t spread smoothly.
- Test Your Dough Roll: Rolling dough evenly to ¼ inch thickness prevents uneven baking. I use rolling pin guides and a ruler to eyeball it, saving me from cookies that are burnt on edges but raw in the center.
- Chill Dough Well: Don’t skip this step. Chilling stops spreading and helps cookies keep their shape during baking. I once ignored chilling and ended up with sad, misshapen cookies—lesson learned.
- Use Parchment or Silicone Mats: They prevent sticking and help cookies bake evenly. Plus, cleanup is so much easier.
- Don’t Rush Drying: Let royal icing dry fully between layers and after finishing. Patience here pays off with smooth, crack-free surfaces.
- Practice Piping: If you’re new to decorating, practice your outlines and flooding on parchment paper first. It helps build confidence before working on the actual cookies.
Also, multitasking helps. While cookies bake and cool, prepare your icing and colors so you’re not scrambling later. I often find this recipe pairs nicely with other treats like rainbow pot of gold cupcakes, which adds a colorful spread at any party.
Variations & Adaptations
Personalizing these graduation sugar cookies is easy and fun:
- Dietary Swaps: Substitute all-purpose flour with a gluten-free blend for gluten-free cookies. Use dairy-free butter and egg replacers (like flax eggs) for vegan versions, and swap royal icing with a powdered sugar glaze.
- Seasonal Themes: While graduation caps and diplomas are classics, try swapping colors and shapes for other celebrations. For example, switch to pastel blue and pink for baby showers or add floral details for springtime events.
- Flavor Twists: Add citrus zest to the dough—lemon or orange—for a fresh aroma. Or, mix in a pinch of cinnamon or nutmeg to give the cookies a cozy warmth.
- Alternative Decorating Methods: Instead of royal icing, try melted chocolate drizzle or edible paint for a rustic look.
- Personal Touch: I once added edible gold dust to the tassels for a subtle shimmer that impressed the graduates and guests alike.
For something savory after all that sweetness, you might appreciate the comforting notes of Irish lamb stew—a hearty dish that complements a sweet celebration spread beautifully.
Serving & Storage Suggestions
These cookies are best served at room temperature after the icing has completely dried. Arrange them on a festive platter or wrap individually in cellophane bags tied with a ribbon for gifting.
Complement these sweet treats with light beverages like iced tea or sparkling lemonade, which balance the sugary richness. For a brunch party, pairing with dishes such as a fresh spring vegetable frittata offers a perfect savory counterpoint.
To store, place cookies in an airtight container layered with parchment paper to prevent sticking. They keep well at room temperature for up to 5 days. For longer storage, freeze in a single layer for up to 3 months—just thaw at room temperature before serving.
When reheating, avoid microwaving (which can melt the icing). Instead, let them come to room temperature naturally. Flavors tend to mellow and deepen after a day or two, making them even more enjoyable.
Nutritional Information & Benefits
Per cookie (approximate): 150 calories, 5g fat, 25g carbohydrates, 1g protein.
These cookies aren’t exactly health food, but the simple ingredients mean no artificial additives or preservatives. Using real butter and fresh vanilla gives a natural richness that store-bought cookies lack.
For those with dietary restrictions, the recipe can be adjusted for gluten-free or vegan diets without sacrificing much flavor. Just be mindful that royal icing contains egg whites, so consider alternatives if allergies are a concern.
From a wellness perspective, sharing these cookies with loved ones adds emotional nourishment—a sweet way to celebrate achievements and make memories.
Conclusion
If you’re looking for a sweet way to celebrate a graduate’s big day, these perfect decorated graduation sugar cookies with royal icing offer the right balance of taste, tradition, and charm. They bring a little sparkle to the table and a lot of smiles to the party.
Don’t hesitate to customize the colors, shapes, or flavors to match your celebration style—you might even discover a new favorite twist. I love how these cookies give me a moment of calm focus during the hustle of party prep, plus a delicious reward at the end.
Give them a try, and if you do, share your decorating stories and photos—I’d love to hear how you made them your own. Here’s to sweet celebrations and memories that last.
FAQs
- How long do decorated sugar cookies last?
Stored in an airtight container, they keep fresh for up to 5 days at room temperature and up to 3 months frozen. - Can I make the dough ahead of time?
Yes! Dough can be refrigerated for up to 3 days or frozen for up to 3 months before rolling and cutting. - What if I don’t have meringue powder?
You can use pasteurized egg whites, but be careful with raw eggs; meringue powder is safer and easier to store. - How do I avoid cracking in royal icing?
Avoid over-thinning the icing, and let it dry slowly at room temperature away from drafts. - Can I use store-bought royal icing?
You can, but homemade icing gives better control over consistency and taste.
Pin This Recipe!
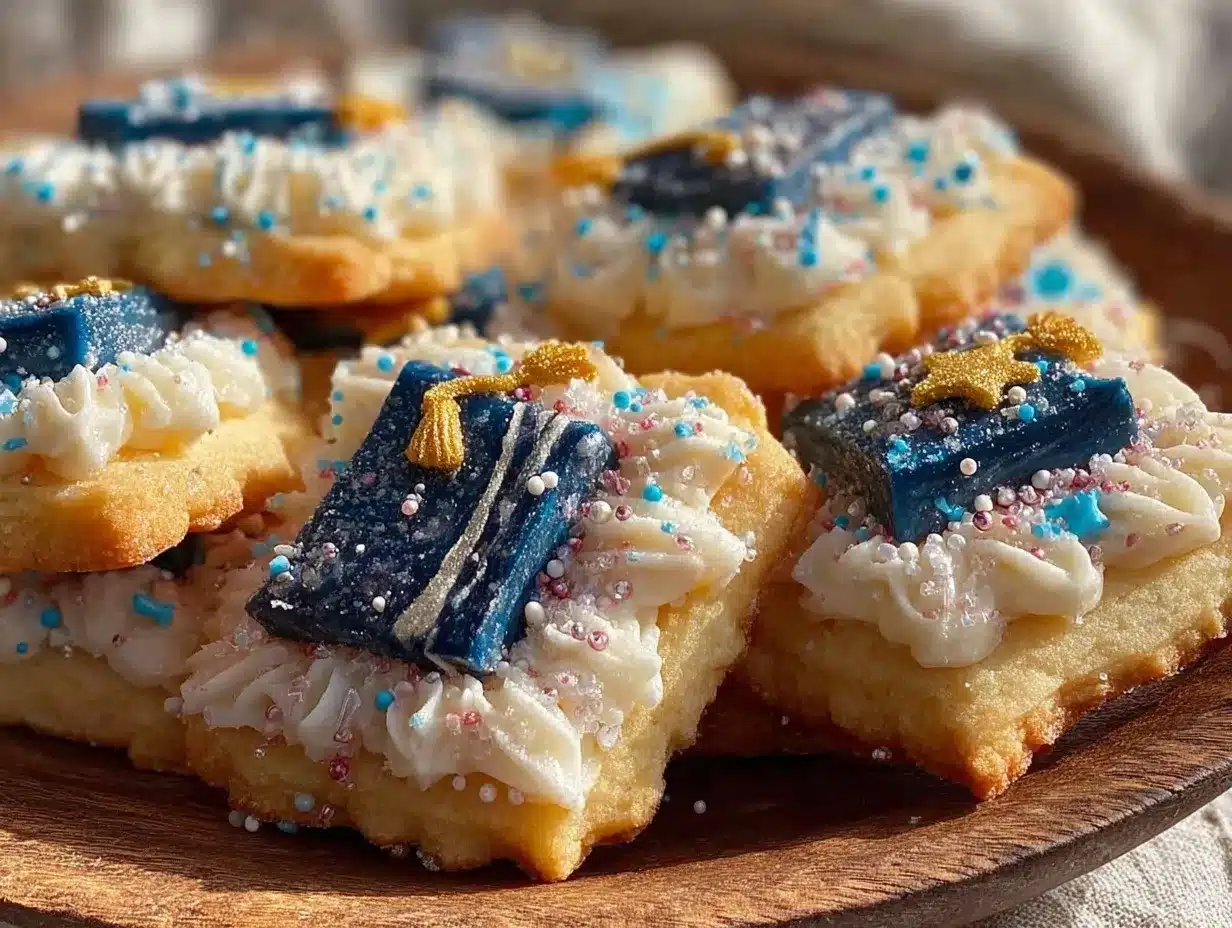
Perfect Decorated Graduation Sugar Cookies with Royal Icing
These decorated sugar cookies with royal icing are perfect for graduation celebrations, featuring a buttery base and a smooth, pipeable icing that dries hard for intricate designs.
- Prep Time: 25 minutes
- Cook Time: 10 minutes
- Total Time: 1 hour 35 minutes
- Yield: 24 cookies 1x
- Category: Dessert
- Cuisine: American
Ingredients
- 2 ¾ cups (345 grams) all-purpose flour
- 1 teaspoon baking powder
- ½ teaspoon salt
- 1 cup (227 grams) unsalted butter, softened
- 1 cup (200 grams) granulated sugar
- 1 large egg, room temperature
- 1 teaspoon pure vanilla extract
- ½ teaspoon almond extract (optional)
- 4 cups (480 grams) powdered sugar, sifted
- 3 tablespoons pasteurized egg whites or 6 tablespoons meringue powder mixed with water
- 1 tablespoon fresh lemon juice
- Water (as needed)
- Gel food coloring
Instructions
- Mix dry ingredients: In a medium bowl, whisk together flour, baking powder, and salt. Set aside.
- Cream butter and sugar: Using an electric mixer, beat softened butter with granulated sugar until light and fluffy, about 3-4 minutes.
- Add egg and extracts: Beat in egg, vanilla extract, and optional almond extract until fully combined.
- Incorporate dry ingredients: Gradually add flour mixture to wet ingredients, mixing on low speed until just combined.
- Chill the dough: Divide dough into two disks, wrap in plastic wrap, and refrigerate for at least 1 hour or overnight.
- Preheat oven to 350°F (175°C). Line baking sheets with parchment paper or silicone mats.
- Roll and cut dough: Roll out one disk to about ¼ inch thickness. Use graduation-themed cookie cutters to cut shapes. Transfer to baking sheets, spacing 1 inch apart. Repeat with second disk.
- Bake cookies: Bake for 8-10 minutes, rotating sheets halfway through. Cookies should be set around edges with no color change on top.
- Cool completely: Let cookies cool on baking sheets for 5 minutes, then transfer to wire rack to cool fully before decorating.
- Prepare royal icing: Beat powdered sugar, egg whites or meringue powder, and lemon juice. Add water a teaspoon at a time to reach piping consistency. Divide and color with gel food coloring.
- Decorate cookies: Outline each cookie with thicker icing using a piping bag with a small round tip. Let outline dry for 10 minutes. Flood inside border with thinner icing. Use a toothpick or scribe tool to spread icing evenly and pop air bubbles. Add details once base layer is dry. Allow cookies to dry completely (several hours or overnight) before stacking or packaging.
Notes
Keep royal icing covered with damp towels to prevent drying out while decorating. Clean scribe tool or toothpick between colors to avoid mixing. Chill dough well to prevent spreading. Use gel food coloring to avoid thinning icing. Let icing dry fully between layers and after decorating for best results.
Nutrition
- Serving Size: 1 cookie
- Calories: 150
- Fat: 5
- Carbohydrates: 25
- Protein: 1
Keywords: graduation sugar cookies, royal icing cookies, decorated sugar cookies, graduation party treats, easy sugar cookies, royal icing tutorial