“You seriously think strawberry-flavored cookies can’t be both soft and beautifully decorated?” my friend asked with a smirk as I pulled a tray of freshly baked treats from the oven. Honestly, I wasn’t convinced at first either. I mean, how often do you see strawberry cookies that don’t feel dry or overly sweet?
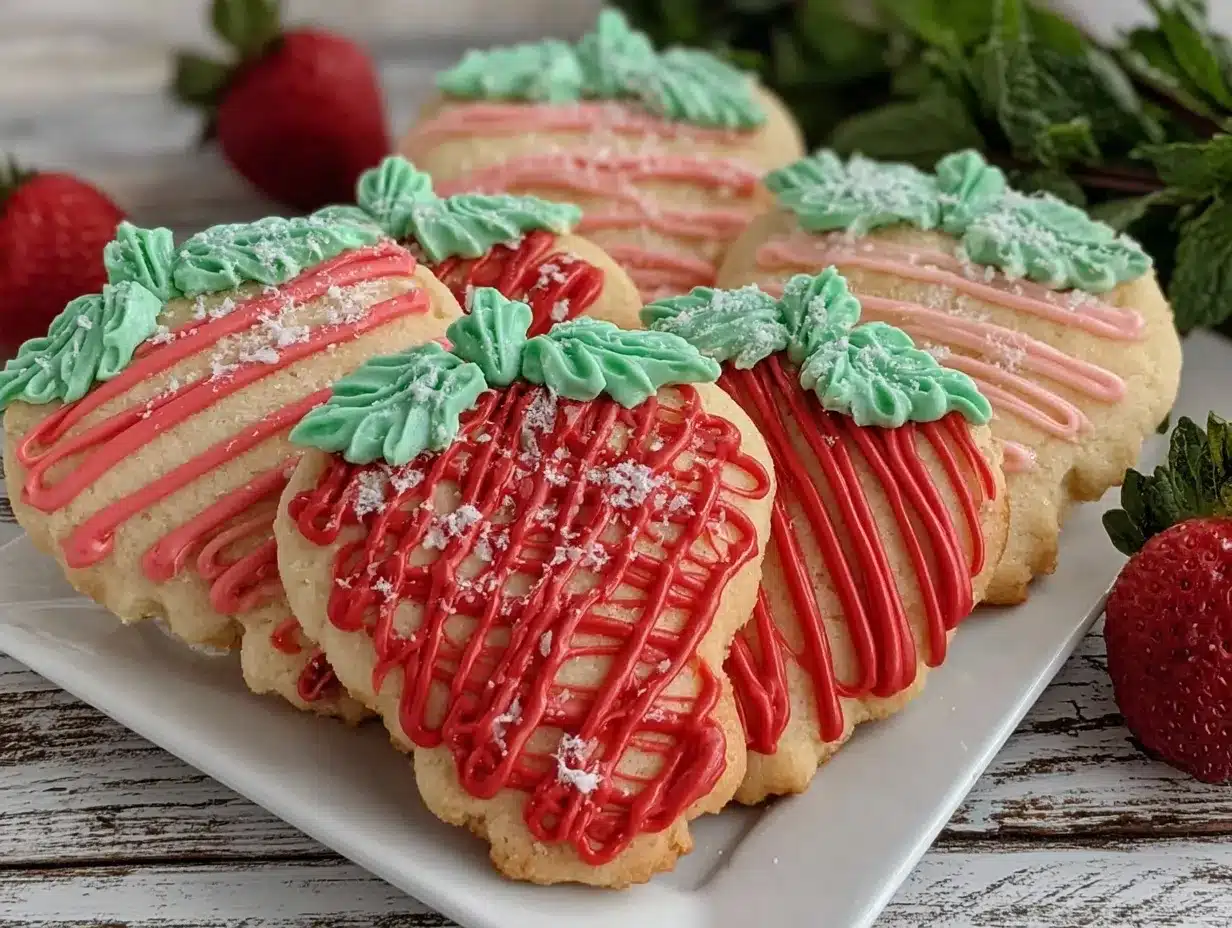
But that afternoon, armed with a bag of freeze-dried strawberries and a trusty royal icing recipe, I went into full experiment mode. The kitchen smelled like fresh summer fields, sweet but subtle, and the dough was soft enough to promise something good was coming. The real test came when I iced each cookie carefully, the royal icing drying into crisp, delicate patterns that made the treats look almost too pretty to eat.
What surprised me most was how the fruity flavor stood out without screaming for attention, balanced perfectly by the creamy sweetness of the icing. These strawberry cookies became a quiet little obsession of mine—baked multiple times in one week, gifted to neighbors, and even brought to a casual brunch that sparked compliments I still blush over. The best part? They’re surprisingly straightforward to make, even if you’re not a seasoned baker.
There’s something soothing about the process—the gentle folding of the freeze-dried strawberries into the dough, the steady hand needed for piping the icing, and the tiny moments of anticipation while the cookies cool. It’s that combination of comfort and artistry that made this recipe stick around in my repertoire.
So, if you’re curious about a strawberry cookie recipe that’s easy enough for a busy day but special enough for a gathering, this might just become your new favorite. It’s not flashy, but it’s honest and, I think, a little bit magical in its own simple way.
Why You’ll Love This Recipe
After baking these Perfect Strawberry Cookies Decorated with Royal Icing several times, I can say with confidence this recipe hits all the right notes. Here’s what makes it stand out:
- Quick & Easy: You can have these cookies baked and decorated in under 90 minutes. Perfect for last-minute treats or when you need a sweet fix fast.
- Simple Ingredients: No need for exotic or hard-to-find items. Most are pantry staples, plus freeze-dried strawberries that add vibrant flavor without extra moisture.
- Perfect for Special Occasions: These cookies shine at birthday parties, bridal showers, or just a cozy afternoon tea. They’re as delightful to look at as they are to eat.
- Crowd-Pleaser: Kids love the bright pink hue and sweet taste, while adults appreciate the subtle fruitiness and elegant icing designs.
- Unbelievably Delicious: The soft, buttery texture combined with bursts of strawberry and the smooth, sweet royal icing creates a balance that makes you close your eyes after the first bite.
What sets this recipe apart is the use of freeze-dried strawberries, which pack intense flavor without sogginess, and the royal icing that dries with a beautiful, professional finish. It’s not just another sugar cookie with a dab of pink—this is a thoughtfully crafted treat that feels both homemade and special.
For those who want to impress without stress, this recipe delivers. The royal icing might seem intimidating, but with a bit of practice and the tips I’ll share, it becomes a manageable, even enjoyable part of the process. Plus, unlike some decorated cookies, these hold up well for a few days, making them ideal for gifting or prepping ahead.
What Ingredients You Will Need
This recipe uses simple, wholesome ingredients to deliver bold flavor and satisfying texture without the fuss. Most are easy to find and likely already in your kitchen or local grocery store.
- All-purpose flour (2 ½ cups / 315 g) – The base for the cookie dough, providing structure.
- Baking powder (1 tsp) – Helps the cookies rise just enough to stay soft and tender.
- Salt (½ tsp) – Balances the sweetness and enhances flavor.
- Unsalted butter, softened (1 cup / 227 g) – Adds richness and moisture. I recommend using European-style butter like Plugrá for a creamier texture.
- Granulated sugar (¾ cup / 150 g) – Sweetens the dough without overpowering.
- Large eggs (2, room temperature) – Bind ingredients and contribute to the cookie’s tenderness.
- Vanilla extract (1 tsp) – Adds depth of flavor.
- Freeze-dried strawberries, crushed (1 cup / 30 g) – The star ingredient giving that authentic strawberry flavor without sogginess. You can find these in most health food stores or online.
For the Royal Icing:
- Powdered sugar (4 cups / 480 g) – The base of the icing, sifted for smoothness.
- Pasteurized egg whites (4 tbsp) – Creates the perfect consistency and allows the icing to harden beautifully.
- Lemon juice (1 tsp) – Adds a slight tang and helps stabilize the icing.
- Food coloring (optional) – Gel colors work best to keep the icing thick and vibrant. For a soft pink, a tiny drop goes a long way.
If you want to make this gluten-free, you can swap the all-purpose flour with a gluten-free blend like Bob’s Red Mill 1-to-1. For dairy-free, try coconut oil instead of butter, though the texture will be slightly different.
For a fresher twist, you might swap freeze-dried strawberries with finely chopped fresh strawberries, but be warned: fresh berries add moisture that can change the dough’s consistency and baking time.
Equipment Needed
- Mixing bowls: At least two – one for the dough, one for the icing.
- Electric mixer: A stand mixer with paddle attachment works wonders, but a hand mixer is perfectly fine.
- Measuring cups and spoons: Precise measurements matter here.
- Baking sheets: Non-stick or lined with parchment paper for easy cleanup.
- Cooling racks: Essential to let cookies cool completely before decorating.
- Piping bags and tips: A small round tip (#2 or #3) for outlining and flooding the royal icing. You can use disposable bags or reusable silicone ones.
- Sifter: For powdered sugar, to keep the icing smooth.
If you don’t have piping bags, plastic sandwich bags with a tiny corner snipped off work in a pinch. Also, using a toothpick or skewer helps spread and smooth the icing once piped.
Personally, I recommend investing in a good silicone baking mat for even baking and less sticking. It’s one of those small upgrades that make a big difference over time.
Preparation Method
- Preheat your oven to 350°F (175°C). Line two baking sheets with parchment paper or silicone mats. This keeps the cookies from sticking and makes cleanup easier. (10 minutes)
- Mix dry ingredients: In a medium bowl, sift or whisk together 2 ½ cups (315 g) all-purpose flour, 1 tsp baking powder, and ½ tsp salt. Set aside. This step ensures an even distribution and lighter cookie texture.
- Cream butter and sugar: In a large bowl, use an electric mixer to beat 1 cup (227 g) softened unsalted butter with ¾ cup (150 g) granulated sugar until light and fluffy. This usually takes about 3-5 minutes. The lightness here makes a difference in cookie softness.
- Add eggs and vanilla: Beat in 2 large eggs (room temperature) one at a time, then stir in 1 tsp vanilla extract. Mixing slowly helps prevent curdling and keeps the dough smooth.
- Incorporate dry ingredients: Gradually fold in the flour mixture, mixing just until combined. Overmixing develops gluten and leads to tough cookies, so keep it gentle.
- Fold in freeze-dried strawberries: Crush 1 cup (30 g) freeze-dried strawberries into small pieces and gently fold them into the dough. These little bits pack a punch of flavor without extra moisture.
- Chill the dough: Wrap the dough in plastic and refrigerate for at least 30 minutes. This step helps the dough firm up, making it easier to roll and preventing spreading during baking.
- Roll and cut: On a lightly floured surface, roll chilled dough to about ¼ inch (6 mm) thickness. Use your favorite cookie cutters (classic circles, hearts, or even strawberries!) to cut shapes. Place them 2 inches apart on baking sheets.
- Bake: Bake for 10-12 minutes, or until edges just start to turn golden. The centers should remain soft. Overbaking dries them out.
- Cool completely: Transfer cookies to wire racks and let cool fully before decorating. This prevents royal icing from melting or sliding off.
- Prepare royal icing: In a clean bowl, beat 4 cups (480 g) powdered sugar with 4 tbsp pasteurized egg whites and 1 tsp lemon juice. Adjust consistency by adding more powdered sugar (for thicker icing) or a few drops of water (for flooding). Tint with gel food coloring as desired.
- Decorate: Use a piping bag fitted with a small round tip to outline each cookie. Let the outline set for a few minutes, then flood the center with thinner icing. Use a toothpick to spread and smooth if needed. Let dry for several hours or overnight for a perfect finish.
Pro tip: If the royal icing crusts over too fast, cover it with a damp cloth to keep it workable. Also, warming the cookie sheet slightly before baking can help with even browning.
Cooking Tips & Techniques
Working with royal icing can be a little intimidating, but here are some tricks I picked up after plenty of trial and error:
- Start with clean, dry bowls and utensils for your royal icing. Even a tiny bit of grease or moisture can cause it to separate or not dry properly.
- Practice piping on parchment paper before decorating your cookies. It helps you get a feel for the pressure and flow.
- Don’t rush the drying process. Royal icing needs time to harden fully, especially if you’re layering colors or details. Overnight is best.
- Freeze-dried strawberries are key. I tried fresh strawberries once, and the dough got soggy. The freeze-dried version gives that intense flavor without messing with texture.
- Chill your dough well. If your kitchen is warm, the dough can get sticky and challenging to handle. A quick 15-minute chill midway through rolling helps.
- Use gel food coloring. Liquid colors thin the icing and change consistency, while gels keep the thick texture needed for piping.
- Beware of overmixing the dough. It can lead to tougher cookies. Mix until just combined.
Multitasking tip: While your cookies bake, whip up the royal icing so it’s ready when the cookies cool. It saves time and keeps the momentum going.
Variations & Adaptations
These strawberry cookies are a great base to customize to your taste or dietary needs. Here are a few ideas:
- Dietary: Swap all-purpose flour for almond flour for a low-carb twist. You’ll get a nuttier flavor but a slightly denser cookie.
- Seasonal: In summer, try swapping freeze-dried strawberries with freeze-dried raspberries or blueberries for a different berry vibe. Or mix in lemon zest for a bright, fresh note.
- Flavor: Add a teaspoon of almond extract along with vanilla for a subtle nutty undertone.
- Decoration: Instead of royal icing, try a simple glaze made from powdered sugar and fresh strawberry juice for a rustic look.
- Personal favorite: One time I tried mixing in tiny white chocolate chips into the dough, and it was a total hit—sweet pockets melting into the strawberry dough.
Serving & Storage Suggestions
These strawberry cookies taste best at room temperature, allowing the flavors and textures to shine.
- Serve with a cup of tea, coffee, or even a glass of cold milk for a comforting snack.
- They also pair nicely with light summer salads or fruit bowls, making them a great dessert for casual brunches—similar in vibe to the fresh spring vegetable frittata I love serving on weekends.
- Store cookies in an airtight container at room temperature for up to 3 days without icing getting sticky.
- If you want to keep them longer, freeze undecorated cookies in a single layer, then thaw and decorate when ready.
- Reheat briefly in a warm oven (250°F/120°C for 5 minutes) if you like them warm, but avoid microwaving as it can soften the icing.
- Flavors deepen after a day, so if you can resist, let them rest overnight before decorating.
Nutritional Information & Benefits
Each cookie (assuming 24 cookies per batch) contains approximately:
| Calories | 120 |
|---|---|
| Fat | 6 g |
| Carbohydrates | 16 g |
| Protein | 1.5 g |
| Sugar | 9 g |
Freeze-dried strawberries are rich in vitamin C and antioxidants, adding a slight nutritional boost to these treats. Using real butter provides healthy fats and a satisfying texture, while the royal icing, though sweet, is made with simple ingredients without artificial additives.
For those mindful of allergens, this recipe contains gluten, dairy, and eggs. However, substitutions like dairy-free butter or egg replacers can make it suitable for many diets, though texture and taste may vary slightly.
From a wellness perspective, this recipe balances indulgence with real ingredients and homemade care—something I appreciate when I want a treat that feels honest and satisfying without excess fuss.
Conclusion
In the end, these Perfect Strawberry Cookies Decorated with Royal Icing aren’t just pretty faces. They’re a little bit of everyday magic—a recipe that’s approachable yet special, simple yet impressive.
Whether you’re baking for a casual afternoon, a party, or just to brighten your day, they’re easy to make, delightful to share, and full of that gentle strawberry sweetness that stays with you.
Feel free to tweak the flavors, try new shapes, or experiment with colors—it’s your kitchen adventure. I love coming back to this recipe because it reminds me that with just a few ingredients and a bit of patience, something wonderful can come out of a quiet afternoon.
If you give these cookies a try, I’d love to hear how you decorated them or what variations you came up with. Sharing recipes and stories is what makes cooking so rewarding, after all.
Happy baking!
FAQs
Can I use fresh strawberries instead of freeze-dried?
Fresh strawberries add too much moisture, which can make the dough sticky and affect baking. Freeze-dried strawberries are best for flavor without altering texture.
How do I store decorated cookies to keep the icing from getting sticky?
Store in an airtight container at room temperature with layers separated by parchment paper. Avoid refrigeration, which can cause condensation and soften the icing.
Is royal icing safe to eat raw?
This recipe uses pasteurized egg whites, which are safer than raw eggs. If concerned, you can use meringue powder as an alternative.
Can I freeze the cookies after decorating?
It’s better to freeze undecorated cookies. Royal icing can crack or discolor after freezing.
What’s the best way to fix cracked royal icing?
Lightly mist the cracks with water and smooth gently with a damp brush. Let dry completely before handling.
Pin This Recipe!
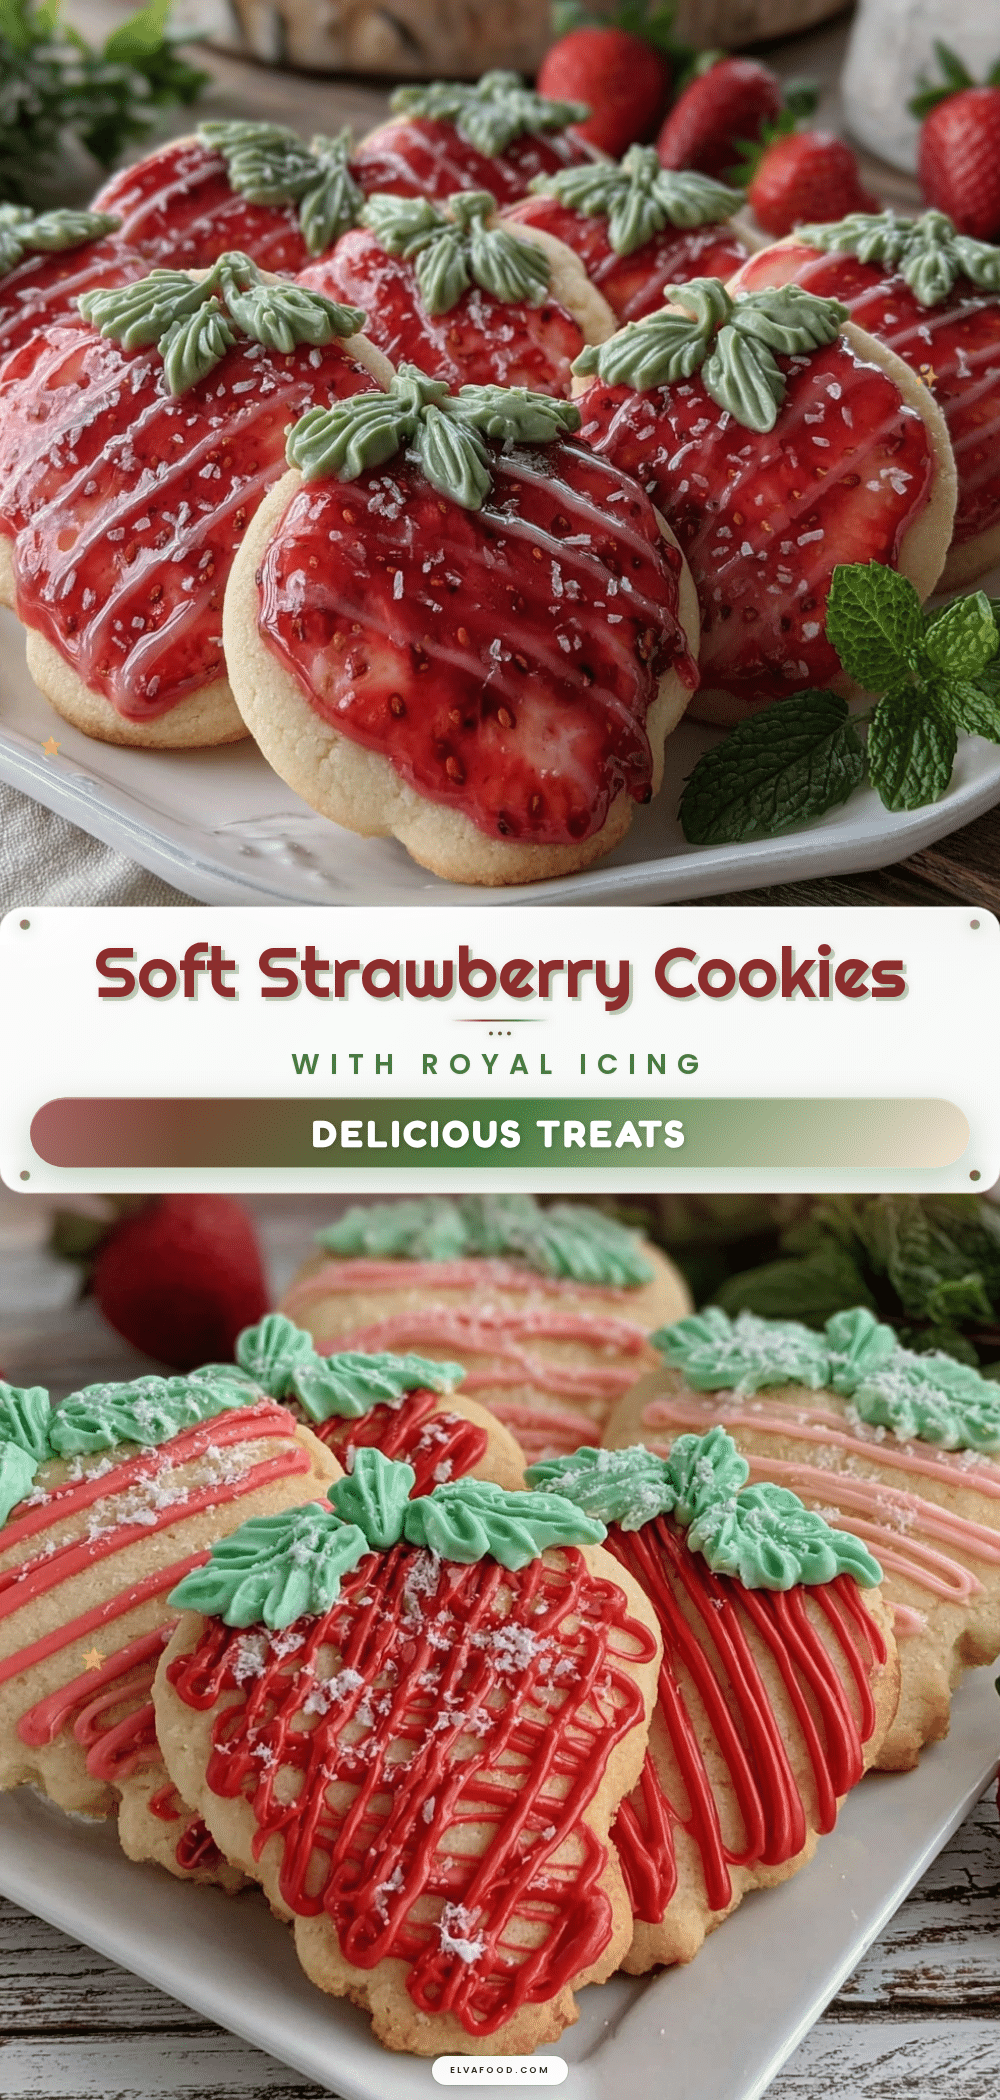
Perfect Strawberry Cookies Recipe Easy Homemade Decorated with Royal Icing

Soft and beautifully decorated strawberry-flavored cookies made with freeze-dried strawberries and royal icing. Easy to make and perfect for special occasions or everyday treats.
- Prep Time: 20 minutes
- Cook Time: 12 minutes
- Total Time: 90 minutes
- Yield: 24 cookies 1x
- Category: Dessert
- Cuisine: American
Ingredients
- 2 ½ cups (315 g) all-purpose flour
- 1 tsp baking powder
- ½ tsp salt
- 1 cup (227 g) unsalted butter, softened (European-style recommended)
- ¾ cup (150 g) granulated sugar
- 2 large eggs, room temperature
- 1 tsp vanilla extract
- 1 cup (30 g) freeze-dried strawberries, crushed
- 4 cups (480 g) powdered sugar (for royal icing)
- 4 tbsp pasteurized egg whites (for royal icing)
- 1 tsp lemon juice (for royal icing)
- Food coloring (optional, gel colors recommended)
Instructions
- Preheat your oven to 350°F (175°C). Line two baking sheets with parchment paper or silicone mats.
- In a medium bowl, sift or whisk together 2 ½ cups all-purpose flour, 1 tsp baking powder, and ½ tsp salt. Set aside.
- In a large bowl, use an electric mixer to beat 1 cup softened unsalted butter with ¾ cup granulated sugar until light and fluffy, about 3-5 minutes.
- Beat in 2 large eggs one at a time, then stir in 1 tsp vanilla extract.
- Gradually fold in the flour mixture, mixing just until combined.
- Gently fold in 1 cup crushed freeze-dried strawberries.
- Wrap the dough in plastic and refrigerate for at least 30 minutes.
- On a lightly floured surface, roll chilled dough to about ¼ inch thickness. Cut shapes with cookie cutters and place 2 inches apart on baking sheets.
- Bake for 10-12 minutes, or until edges just start to turn golden but centers remain soft.
- Transfer cookies to wire racks and cool completely before decorating.
- Prepare royal icing by beating 4 cups powdered sugar with 4 tbsp pasteurized egg whites and 1 tsp lemon juice. Adjust consistency as needed and tint with gel food coloring if desired.
- Use a piping bag with a small round tip to outline each cookie. Let outline set for a few minutes, then flood the center with thinner icing. Use a toothpick to spread and smooth if needed.
- Let decorated cookies dry for several hours or overnight for a perfect finish.
Notes
Use freeze-dried strawberries for intense flavor without sogginess. Chill dough well to prevent spreading. Practice piping on parchment paper before decorating. Use gel food coloring for best icing consistency. Store decorated cookies in an airtight container at room temperature for up to 3 days. Freeze undecorated cookies for longer storage. Let royal icing dry overnight for best results.
Nutrition
- Serving Size: 1 cookie
- Calories: 120
- Sugar: 9
- Fat: 6
- Carbohydrates: 16
- Protein: 1.5
Keywords: strawberry cookies, royal icing, decorated cookies, freeze-dried strawberries, soft cookies, easy cookie recipe, homemade cookies