It was a Tuesday morning. The clock had already done that thing where it jumps from 7:15 to 7:38 without asking permission. I was standing in front of the open fridge, holding a bag of shredded cheese, and I just froze. My kid was already in the car, backpack on, but the lunchbox on the counter was still empty. Not a single thing inside. I had five minutes. Five minutes to come up with something that wouldn’t get traded away, thrown out, or come back uneaten.
That’s when I saw the package of Hawaiian rolls on the top shelf. And the pack of deli ham. And the block of cheddar. I didn’t have time to think. I just started stacking. Ham, cheese, a quick brush of melted butter on top. I threw them in the oven while I grabbed an apple and a juice box. By the time I walked the lunchbox to the car, the sliders were cool enough to wrap. That afternoon, the lunchbox came back empty. Completely empty. That never happens.
That is the exact moment these easy mini ham and cheese sliders were born. Not from a fancy recipe book or a cooking show. From pure, honest, get-it-done desperation. And honestly? That’s the best kind of recipe to have in your back pocket.
Why You’ll Love This Recipe
Let me tell you why these little sandwiches have become a permanent fixture in my kitchen. I’ve tested this version more times than I can count, tweaking the butter ratio and the bake time until it was just right. Here is what makes them truly special:
- Ready in 20 Minutes : From start to finish, these sliders come together faster than you can pack a bag of chips. Perfect for those mornings when you need a win.
- Simple Ingredients : No fancy trips to a specialty store. You probably have everything you need right now. Butter, mustard, poppy seeds, ham, cheese, and those sweet rolls.
- Perfect for Lunchboxes : They hold up beautifully. No sogginess, no falling apart. Just a neat little sandwich that stays together until lunchtime.
- Crowd-Pleaser : I have yet to meet a kid who doesn’t gobble these up. And the adults? They sneak them from the pan when nobody is looking.
- Unbelievably Delicious : That buttery, slightly sweet top with the salty ham and melty cheese? It is comfort food in its purest form. The kind of thing that makes you close your eyes for a second after the first bite.
This isn’t just another sandwich recipe. It is the one that saves your sanity on busy mornings. The one that makes your kid feel like they got something special. And the one that takes about as much effort as pouring a bowl of cereal. What’s not to love?
What Ingredients You Will Need
This recipe uses simple, everyday ingredients to deliver big flavor without any fuss. Most of these are pantry staples, which is exactly what you want when you are in a pinch.
- 1 package (12 count) Hawaiian sweet rolls : These are the foundation. Their soft, slightly sweet texture is what makes these sliders so good. King’s Hawaiian is my go-to brand, but any brand will work. You want the ones that come in a connected sheet.
- 1/2 pound (225g) deli ham, thinly sliced : Go for a good quality honey ham or black forest ham. Ask for it sliced thin at the deli counter. The thin slices stack better and melt into the cheese more evenly.
- 6 slices Swiss cheese : Swiss is classic for a reason. It melts beautifully and has a mild, nutty flavor that pairs perfectly with ham. You can also use provolone or havarti if you prefer.
- 1/4 cup (60g) unsalted butter, melted : This is the magic layer. The butter soaks into the top of the rolls and creates that golden, slightly crispy crust. Use unsalted so you can control the salt level.
- 1 tablespoon Dijon mustard : Adds a little tang that cuts through the richness. You can use yellow mustard if that is what you have, but Dijon gives a more sophisticated flavor. Trust me on this one.
- 1 teaspoon Worcestershire sauce : This is the secret ingredient. Just a tiny bit adds a savory depth that makes everyone ask what you did differently.
- 1 tablespoon poppy seeds : Not just for looks. They add a subtle crunch and a nutty flavor that makes the tops of the rolls extra special.
- 1 teaspoon onion powder : Adds a gentle savory note without any chunks of onion. Perfect for picky eaters.
- 1/2 teaspoon garlic powder : Because garlic makes everything better. Just a hint here to round out the flavors.
For the mustard-butter mixture, I recommend using a good quality Dijon like Grey Poupon. It has the right balance of tang and creaminess. If you are out of Worcestershire sauce, a splash of soy sauce can work in a pinch, though the flavor will be slightly different.
Equipment Needed
You don’t need much to make these sliders, which is part of their beauty. Here is what you will need:
- 9×13-inch baking dish : This is the perfect size for a full package of 12 rolls. A glass or ceramic dish works best for even heating. I use a Pyrex dish that I have had for years.
- Sharp knife or serrated knife : To slice the rolls in half horizontally. A serrated bread knife works beautifully here because it cuts through the soft rolls without squishing them.
- Small bowl : For mixing the butter, mustard, and seasonings together.
- Pastry brush : To brush the butter mixture evenly over the top of the rolls. If you don’t have one, you can use the back of a spoon.
- Aluminum foil : To cover the sliders during the first part of baking. This traps steam and helps the cheese melt perfectly.
- Cooling rack : Optional, but nice to have. It lets air circulate under the dish so the bottoms don’t get soggy.
If you don’t have a pastry brush, honestly, just drizzle the butter mixture over the rolls and spread it around with a spoon. It works just fine. I have done it that way more times than I care to admit.
Preparation Method

Now for the fun part. Let me walk you through this step by step. I promise it is easier than it sounds.
- Preheat your oven to 350°F (175°C). Get that going first so it is ready when you are. While the oven heats, take the ham and cheese out of the fridge so they can come to room temperature slightly. This helps everything melt together better.
- Prepare the baking dish. Lightly spray your 9×13-inch dish with nonstick cooking spray. You don’t want those buttery bottoms sticking to the pan. Trust me, I learned this the hard way.
- Slice the rolls. Keeping the rolls connected in their sheet, use a serrated knife to slice them in half horizontally. You want to separate the top half from the bottom half in one big piece. It takes a steady hand, but it is totally doable. If you mess up, don’t worry. Just piece them back together in the dish.
- Place the bottom half in the dish. Gently transfer the bottom half of the rolls to your prepared baking dish. Press them down slightly to make sure they are sitting flat.
- Layer the ham. Take your thinly sliced ham and layer it evenly over the bottom half of the rolls. Don’t be shy with the ham. A generous layer makes for a satisfying sandwich. I usually do about 3 to 4 layers of folded ham.
- Add the cheese. Place the Swiss cheese slices over the ham. If the slices are large, you can tear them in half to fit better. Make sure the cheese covers the ham evenly so every bite gets that melty goodness.
- Top with the other half. Carefully place the top half of the rolls back over the cheese and ham. Press down gently to make everything snug.
- Make the butter mixture. In your small bowl, combine the melted butter, Dijon mustard, Worcestershire sauce, poppy seeds, onion powder, and garlic powder. Whisk it all together until it is well combined. It should smell amazing already.
- Brush the tops. Using your pastry brush, generously brush the butter mixture over the top of the rolls. Make sure every single roll gets some. The butter will soak in and create that golden, crispy top we are after. Don’t skip this step. It is what makes these sliders unforgettable.
- Cover and bake. Cover the dish with aluminum foil and bake for 15 minutes. The foil traps steam, which helps the cheese melt and the ham warm through without drying out the rolls.
- Uncover and finish. After 15 minutes, remove the foil and bake for another 5 to 7 minutes, or until the tops are golden brown and the cheese is bubbly around the edges. Keep an eye on them. You want them golden, not burnt.
- Let them rest. This is the hardest part. Let the sliders rest in the dish for about 5 minutes before slicing. This allows the cheese to set slightly so the sliders hold their shape when you cut them. If you cut them too soon, the cheese will ooze everywhere. Not that I have any experience with that.
- Slice and serve. Use a sharp knife to cut between the rolls. You should have 12 perfect little sliders. Serve them warm or at room temperature. Both are delicious.
Cooking Tips & Techniques
Over the years, I have made these sliders more times than I can count. Some batches were perfect. Some were, well, learning experiences. Here is what I have figured out:
Don’t overbake them. The number one mistake I made early on was leaving them in the oven too long. The tops get too dark, and the rolls can become dry. Pull them out the moment they turn golden. That extra minute is not worth it.
Use room temperature butter for the mixture. If your butter is too hot, it will cook the seasonings. If it is too cold, it won’t mix well. Let it melt and then cool for a minute before adding the mustard and Worcestershire. This keeps the flavors bright.
Let the sliders rest after baking. I know it is tempting to dig in right away, but those 5 minutes of rest are crucial. The cheese needs a moment to set. If you cut too soon, you will have a mess. And a delicious mess, sure, but a mess nonetheless.
Make them ahead of time. You can assemble these sliders up to 24 hours in advance. Just cover them tightly with plastic wrap and keep them in the fridge. When you are ready to bake, add about 5 extra minutes to the covered baking time since they are starting from cold. This is a lifesaver for busy mornings.
Use a sharp knife to slice. A dull knife will squish the rolls and make a mess. A sharp serrated knife glides right through. It makes a difference in how neat they look.
Variations & Adaptations
One of the best things about this recipe is how easily it adapts. Here are some of my favorite variations:
- Turkey and Provolone : Swap the ham for sliced turkey and the Swiss for provolone. Add a thin layer of cranberry sauce for a Thanksgiving-inspired version. It is fantastic for leftover turkey.
- Vegetarian Version : Use roasted red peppers, spinach, and a mix of mozzarella and provolone. You can also add thin slices of grilled zucchini or eggplant. It is just as satisfying without the meat.
- Spicy Kick : Add a layer of pepper jack cheese or spread a little sriracha mayo on the bottom half of the rolls before adding the ham. It gives the sliders a nice little heat that adults love.
- Breakfast Sliders : Use scrambled eggs, cooked sausage patties, and cheddar cheese. Brush the tops with the same butter mixture. These are incredible for a weekend brunch.
- Gluten-Free Option : Use gluten-free Hawaiian rolls or any gluten-free slider buns. The rest of the ingredients are naturally gluten-free, so you just need to swap the bread. Bake time may vary slightly, so keep an eye on them.
I have tried the turkey and cranberry version for Thanksgiving leftovers, and it was honestly better than the main meal. The sweet and savory combination is just perfect.
Serving & Storage Suggestions
These sliders are incredibly versatile when it comes to serving. Here is how I like to handle them:
Serving Temperature: These are best served warm, right out of the oven. But they are also fantastic at room temperature, which makes them perfect for lunchboxes. If you are serving them for a party, keep them in a warm oven (200°F) until ready to serve.
What to Serve With: A simple side of baby carrots, apple slices, or a small salad rounds out the meal nicely. For a party, serve them with a bowl of tomato soup or a side of potato chips. They also pair beautifully with a fresh spring vegetable frittata for a brunch spread.
Storage: Store any leftover sliders in an airtight container in the refrigerator for up to 3 days. They actually get better as the flavors meld together. I have eaten them cold straight from the fridge and they are still delicious.
Reheating: To reheat, place the sliders on a baking sheet and warm them in a 350°F oven for about 5 to 7 minutes. You can also microwave them for 20 to 30 seconds, but the tops won’t be as crispy. For best results, use the oven.
Freezing: These sliders freeze beautifully. Assemble them completely but do not bake. Wrap the entire dish tightly in plastic wrap, then in foil. Freeze for up to 3 months. When ready to bake, thaw overnight in the fridge, then bake as directed, adding about 10 minutes to the covered baking time. This is my favorite meal prep trick.
Nutritional Information & Benefits
While these sliders are definitely a treat, they do offer some nutritional benefits. Here is a rough estimate per slider (based on 12 servings):
| Nutrient | Amount Per Slider |
|---|---|
| Calories | 220 |
| Total Fat | 12g |
| Saturated Fat | 6g |
| Cholesterol | 45mg |
| Sodium | 580mg |
| Total Carbohydrates | 18g |
| Dietary Fiber | 1g |
| Sugars | 6g |
| Protein | 12g |
The ham provides a good amount of protein, which helps keep kids full throughout the school day. Swiss cheese offers calcium for strong bones and teeth. The Hawaiian rolls give quick energy from carbohydrates. If you are looking for a lower-sodium option, use low-sodium ham and reduce the added salt in the butter mixture.
For a lighter version, you can use whole wheat slider buns and reduced-fat cheese. It changes the texture slightly, but it is still delicious. I have made them this way for my own family when we are trying to eat a bit healthier.
Conclusion
These easy mini ham and cheese sliders have saved my sanity more times than I can count. They are the recipe I turn to when I have no time, no energy, and a hungry kid staring at me. They are simple, reliable, and always, always delicious.
I love that I can make them ahead, freeze them, and pull them out on a chaotic morning. I love that my kid actually eats them without complaint. And I love that they taste like I put in way more effort than I actually did.
If you try these sliders, I would love to hear how they turned out. Did your kids love them? Did you try a fun variation? Drop a comment below and let me know. And if you are looking for other easy lunchbox ideas, you might enjoy our easy lo mein noodles with chicken and veggies or these rainbow pot of gold cupcakes for a fun treat.
Happy cooking, friend. You have got this.
Frequently Asked Questions
Can I make these sliders ahead of time?
Absolutely. You can assemble them up to 24 hours in advance. Just cover them tightly and keep them in the fridge. When you are ready to bake, add about 5 extra minutes to the covered baking time since they are starting from cold.
Can I freeze these sliders?
Yes, they freeze beautifully. Assemble them completely but do not bake. Wrap the dish tightly in plastic wrap and then foil. Freeze for up to 3 months. Thaw overnight in the fridge before baking as directed.
What is the best cheese to use for ham and cheese sliders?
Swiss cheese is the classic choice because it melts smoothly and has a mild, nutty flavor. Provolone, havarti, and cheddar also work wonderfully. You can even mix two types of cheese for extra flavor.
Can I use a different type of roll?
Yes, you can use any soft slider bun. Hawaiian rolls are traditional because of their slight sweetness, but brioche buns, potato rolls, or even whole wheat slider buns work great. Just adjust the bake time if the rolls are larger or denser.
How do I keep the sliders from getting soggy in a lunchbox?
Let the sliders cool completely before packing them. You can also wrap each slider individually in parchment paper or foil to keep them from getting soggy. Storing them in an airtight container with a paper towel on the bottom helps absorb any extra moisture.
Pin This Recipe!
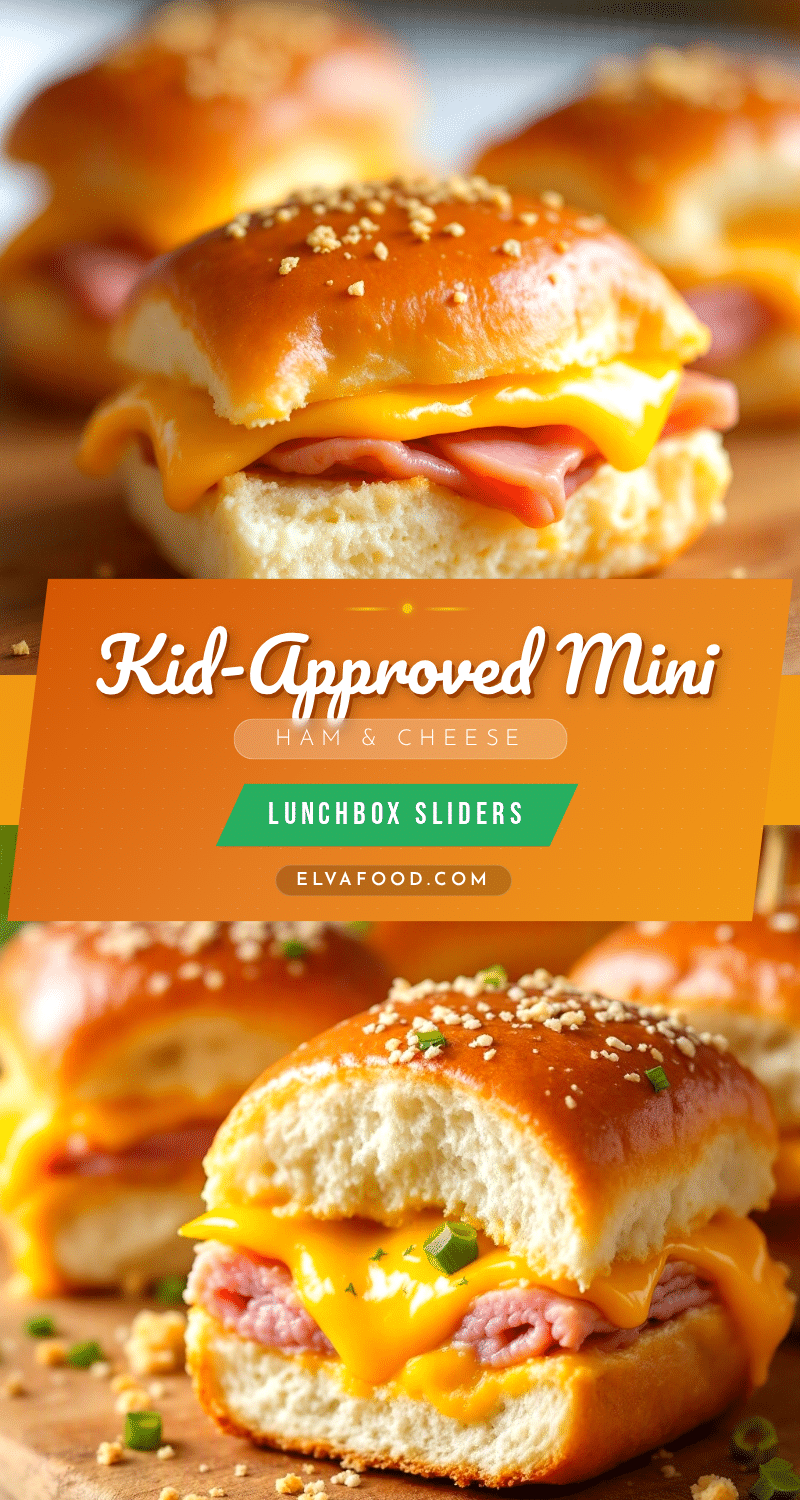
Easy Mini Ham and Cheese Sliders: Best Kids Lunchbox Idea

These easy mini ham and cheese sliders are ready in 20 minutes and perfect for lunchboxes. Made with simple ingredients like Hawaiian rolls, deli ham, Swiss cheese, and a buttery mustard topping, they are a crowd-pleaser that stays together until lunchtime.
- Prep Time: 10 minutes
- Cook Time: 20 minutes
- Total Time: 30 minutes
- Yield: 12 sliders 1x
- Category: Main Course
- Cuisine: American
Ingredients
- 1 package (12 count) Hawaiian sweet rolls
- 1/2 pound (225g) deli ham, thinly sliced
- 6 slices Swiss cheese
- 1/4 cup (60g) unsalted butter, melted
- 1 tablespoon Dijon mustard
- 1 teaspoon Worcestershire sauce
- 1 tablespoon poppy seeds
- 1 teaspoon onion powder
- 1/2 teaspoon garlic powder
Instructions
- Preheat your oven to 350°F (175°C).
- Lightly spray a 9×13-inch baking dish with nonstick cooking spray.
- Keeping the rolls connected in their sheet, use a serrated knife to slice them in half horizontally.
- Place the bottom half of the rolls in the prepared baking dish.
- Layer the thinly sliced ham evenly over the bottom half of the rolls.
- Place the Swiss cheese slices over the ham.
- Carefully place the top half of the rolls back over the cheese and ham.
- In a small bowl, combine the melted butter, Dijon mustard, Worcestershire sauce, poppy seeds, onion powder, and garlic powder. Whisk until well combined.
- Generously brush the butter mixture over the top of the rolls.
- Cover the dish with aluminum foil and bake for 15 minutes.
- Remove the foil and bake for another 5 to 7 minutes, or until the tops are golden brown and the cheese is bubbly.
- Let the sliders rest in the dish for about 5 minutes before slicing.
- Use a sharp knife to cut between the rolls into 12 sliders. Serve warm or at room temperature.
Notes
Don’t overbake them; pull them out the moment they turn golden. Use room temperature butter for the mixture. Let the sliders rest after baking for 5 minutes. You can assemble them up to 24 hours in advance. For freezing, assemble completely but do not bake; wrap tightly and freeze for up to 3 months.
Nutrition
- Serving Size: 1 slider
- Calories: 220
- Sugar: 6
- Sodium: 580
- Fat: 12
- Saturated Fat: 6
- Carbohydrates: 18
- Fiber: 1
- Protein: 12
Keywords: ham and cheese sliders, mini sliders, lunchbox ideas, easy lunch, kid-friendly, Hawaiian rolls, quick dinner


