My friend Jenna said “football-shaped cheese board” and I thought she had finally lost it. Not the charcuterie part—I mean, I get that. But the crispy Parmesan part? That sounded like a gimmick waiting to fall apart before kickoff. I told her flat out, “Parmesan crisps are delicate and weird, and shaping them into a football feels like Pinterest overreach.” She just smiled and said “just try it.” So I did. And honestly? I was wrong. Really wrong.
The thing is, I’ve made plenty of charcuterie boards before. I’ve got the whole routine down—meats fanned out, cheeses cubed, crackers arranged just so. But this crispy Parmesan football thing? It actually works. The cheese crisps up into these sturdy, salty little tiles that hold their shape perfectly. You arrange them into a football pattern on the board, and suddenly everyone’s grabbing for them first. Not the salami. Not the fancy crackers. The cheese.
It’s one of those recipes that looks complicated but isn’t. You just bake shredded Parmesan in little piles, shape them while they’re warm, and arrange them on a board. That’s it. No special equipment, no weird ingredients, no stress. And the best part? It disappears fast. Like, before halftime fast. I’ve made this for three game days now, and every time someone asks “how did you do that?” with their mouth half full.
Why You’ll Love This Recipe
Let me tell you why this crispy Parmesan football charcuterie board has become my go-to for game day. First off, it’s ridiculously easy. You’re looking at maybe 20 minutes of active work, and the rest is just arranging stuff on a board. That’s it.
- Quick & Easy: From start to finish, you’re looking at about 30 minutes. The Parmesan crisps bake in 6-8 minutes, and while they cool, you arrange everything else. Perfect for those last-minute game day cravings.
- Simple Ingredients: You need exactly one main ingredient for the football—shredded Parmesan cheese. Everything else on the board is whatever you like. No fancy grocery trips needed.
- Perfect for Game Day: This board is made for gatherings. It’s shareable, interactive, and honestly, it’s a conversation starter. People can’t resist grabbing a crispy Parmesan “tile” with their favorite dip.
- Crowd-Pleaser: I’ve served this to groups that included kids, picky eaters, and serious foodies. Everyone loves it. The crispy Parmesan has this addictive salty crunch that pairs with almost anything.
- Unbelievably Delicious: The texture is what gets you—crispy, crunchy, slightly chewy in the center if you leave them a little thicker. Paired with creamy dips or salty meats? It’s next-level comfort food.
What makes this recipe different from every other charcuterie board out there is the technique. Most boards rely on store-bought crackers or bread for the crunch factor. This one creates its own crunchy element from scratch, and it’s way more impressive. Plus, the football shape ties everything together thematically without being cheesy (pun intended). It’s the kind of recipe that makes you look like you tried really hard when you actually didn’t.
What Ingredients You Will Need
This recipe uses simple ingredients to create something that looks way more complicated than it is. Here’s what you’ll need for the crispy Parmesan football and the surrounding board.
For the Crispy Parmesan Football
- 2 cups finely shredded Parmesan cheese (the real stuff, not the green can—trust me on this)
- 1 teaspoon garlic powder (optional, but adds nice depth)
- 1/2 teaspoon black pepper (freshly ground if you have it)
For the Charcuterie Board
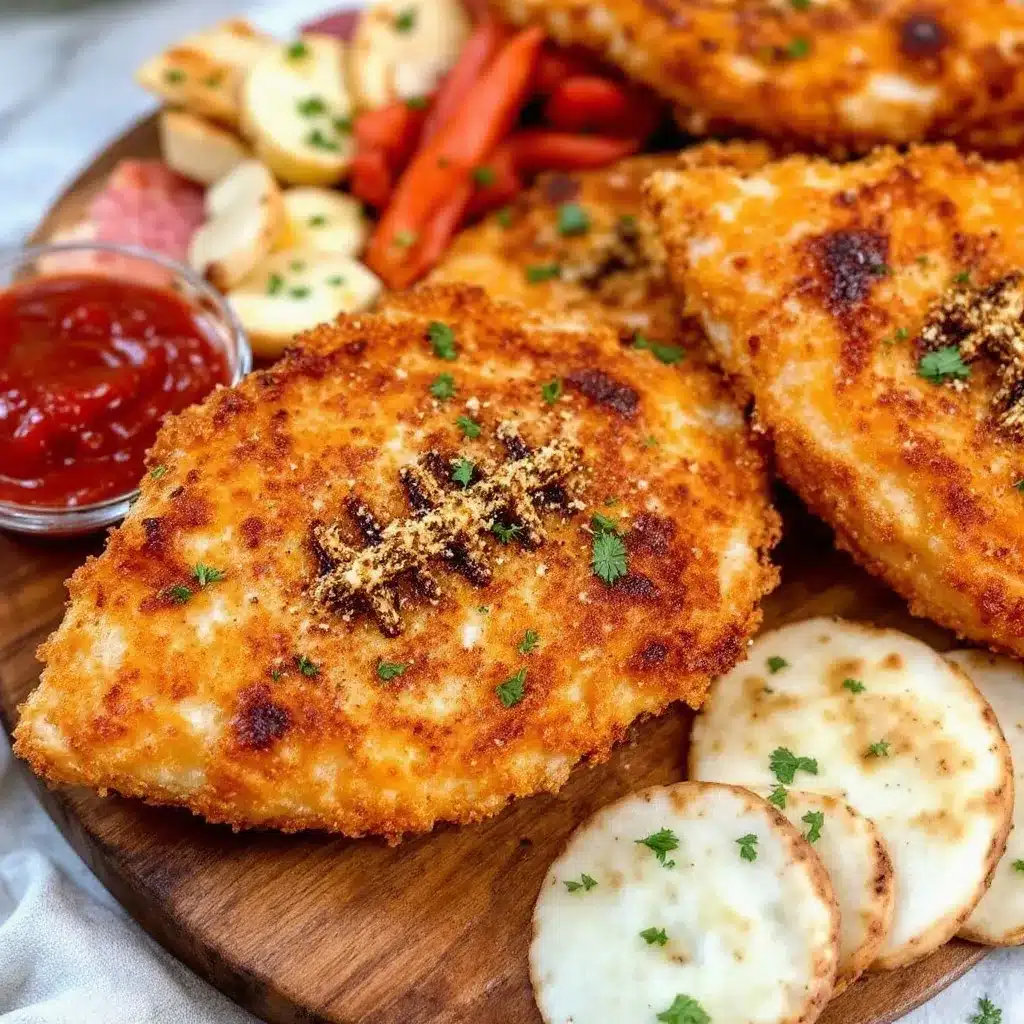
- 8 ounces salami (I like Genoa or soppressata, sliced thin)
- 6 ounces prosciutto (thinly sliced, torn into pieces)
- 4 ounces pepperoni (sliced, for that game day feel)
- 8 ounces fresh mozzarella balls (small ones, drained)
- 4 ounces sharp cheddar (cubed or sliced)
- 1 cup mixed olives (green and kalamata)
- 1 cup cherry tomatoes (halved)
- 1/2 cup roasted red peppers (sliced into strips)
- 1/2 cup marinated artichoke hearts (quartered)
- Fresh rosemary sprigs (for garnish, optional but pretty)
- Crackers or crostini (enough to fill gaps)
For the Parmesan crisps, I recommend using block Parmesan and grating it yourself. The pre-shredded stuff has anti-caking agents that prevent it from melting and crisping properly. I learned this the hard way after a sad, greasy first attempt. Also, feel free to swap in any meats or cheeses you prefer. This board is totally customizable—that’s the beauty of it.
Equipment Needed
You don’t need much for this recipe, which is part of why I love it. Here’s the basic gear:
- Baking sheet (standard half-sheet size works great)
- Parchment paper (non-negotiable—the cheese will stick without it)
- Small cookie cutter or knife (for shaping the crisps into football shapes—optional but helpful)
- Large wooden board or platter (any size works, just make sure it’s big enough for your crowd)
- Small bowls (for dips, olives, or other loose items)
- Spatula (for moving warm crisps)
If you don’t have a cookie cutter, you can freehand the football shapes with a small knife while the crisps are still warm. It’s a little messier but works fine. I’ve also used a pizza cutter in a pinch—just roll it through the warm cheese to create straight edges. For the board itself, any large cutting board or serving platter works. I’ve even used a clean baking sheet in a pinch (it’s game day, after all).
Preparation Method
Let’s walk through this step by step. I’ll include all the little details that make the difference between good and great.
- Preheat your oven to 400°F (200°C). Line a baking sheet with parchment paper. Make sure the paper fits flat—no curling edges, or the cheese will seep underneath.
- Mix the Parmesan with garlic powder and black pepper in a small bowl. This step is optional, but I find the garlic adds a subtle warmth that pairs beautifully with the salty cheese. If you’re feeling fancy, add a pinch of red pepper flakes.
- Spoon the Parmesan mixture onto the parchment paper in small piles. Use about 1 tablespoon per crisp. Space them about 2 inches apart—they’ll spread as they melt. For a football shape, aim for slightly oval piles, about 2 inches long and 1.5 inches wide. Don’t worry if they’re not perfect; you can trim them later.
- Bake for 6-8 minutes, watching closely after 5 minutes. The cheese should be golden brown and bubbly, with the edges turning a deeper brown. If they’re still pale, give them another minute. Every oven runs differently, so trust your eyes more than the timer.
- Remove from the oven and let cool for 1 minute on the baking sheet. They’ll be soft and pliable at this point—perfect for shaping. If you wait too long, they’ll harden and crack when you try to shape them.
- Shape the crisps into footballs while they’re still warm. Use a small football-shaped cookie cutter to press down and cut out the shape, or use a knife to trim the edges. Gently press the edges to create the classic football pointy ends. Work quickly—you have about 2-3 minutes before they harden.
- Transfer the shaped crisps to a wire rack to cool completely. They’ll crisp up as they cool, becoming sturdy and crunchy. This takes about 5 minutes. Don’t stack them or they’ll stick together.
- While the crisps cool, prepare your charcuterie board. Arrange the meats, cheeses, olives, tomatoes, and other ingredients on your board. Leave a clear space in the center for the football. I like to place small bowls for olives and artichokes to keep things organized.
- Arrange the Parmesan crisps in a football shape in the center of the board. Start with a base layer of crisps, then add a second layer slightly offset, like shingles on a roof. This creates dimension and makes it look like a real football. Use about 12-15 crisps for a standard football shape.
- Garnish with fresh rosemary sprigs at the ends of the football to look like the laces or just scatter them around for color. Add any final touches—sprinkle some flaky sea salt over everything, maybe a drizzle of honey over the cheese.
- Serve immediately or within an hour. The crisps stay crunchy for about 2-3 hours, but they’re best fresh. If you’re making this ahead, bake the crisps and store them in an airtight container, then assemble the board just before serving.
Cooking Tips & Techniques
I’ve made this recipe about a dozen times now, and I’ve learned a few things the hard way. Here’s what works.
Use fresh Parmesan. I cannot stress this enough. The pre-shredded stuff in the bag? It won’t work. It has cellulose and other anti-caking agents that prevent it from melting properly. You’ll end up with greasy, sad little piles instead of crispy, golden footballs. Spend the extra few minutes grating a block of real Parmesan. It’s worth it.
Watch the oven like a hawk. These crisps go from perfectly golden to burnt in about 30 seconds. I know because I’ve done it. Set a timer for 5 minutes, then check every 30 seconds after that. The edges should be deep golden brown, but the center should still be light golden. If the edges are getting dark too fast, pull them out early.
Work quickly when shaping. Once those crisps come out of the oven, you have about 3 minutes before they harden completely. Have your cookie cutter or knife ready before you start baking. I learned this after frantically trying to find my cookie cutter while the crisps turned into brittle, unshapeable discs.
Don’t skip the parchment paper. I tried using a silicone baking mat once, thinking it would be easier. The cheese stuck to it like glue. Parchment paper is non-negotiable here. Also, don’t reuse the same parchment for multiple batches—the residual grease will make the next batch stick.
Let them cool completely before stacking. If you stack warm crisps, they’ll stick together and break when you try to separate them. Let them cool on a wire rack for at least 5 minutes before moving them to the board. If you’re making them ahead, store them in an airtight container with parchment paper between layers.
Variations & Adaptations
This recipe is super flexible, so feel free to make it your own. Here are some variations I’ve tried.
Spicy Version: Add 1/2 teaspoon of red pepper flakes or cayenne pepper to the Parmesan mixture before baking. It gives the crisps a nice kick that pairs beautifully with a cool dip like ranch or blue cheese. I made this for a super bowl party and it was the first thing to disappear.
Herb-Infused Version: Mix in 1 teaspoon of dried rosemary or thyme with the Parmesan. The herbs toast in the oven and become incredibly fragrant. This version is especially good with a honey drizzle or paired with fresh fruit like figs or grapes.
Gluten-Free Friendly: This recipe is naturally gluten-free since it’s just cheese and seasonings. Just make sure your charcuterie board items are also gluten-free if needed. Most meats, cheeses, and vegetables are fine, but check the crackers.
Low-Carb/Keto Version: Load up on extra meats and cheeses, skip the crackers, and add more vegetables like cucumber slices, celery sticks, and bell pepper strips. The Parmesan crisps are already low-carb, so this board is keto-friendly as is.
Sweet & Savory Version: Drizzle the finished football with honey or balsamic glaze before serving. The sweetness contrasts beautifully with the salty Parmesan. I tried this once on a whim and now I do it every time—it’s that good.
Serving & Storage Suggestions
This board is best served at room temperature, so pull everything out of the fridge about 20 minutes before you’re ready to eat. The flavors come alive when they’re not ice cold.
Serving Temperature: Serve the Parmesan crisps at room temperature. They’ll be crunchiest this way. If you refrigerate them, they’ll lose some of their crispness. The meats and cheeses should also be at room temperature for best flavor.
Presentation: Arrange the board on a large wooden platter or cutting board. Place the football in the center, then fan out the meats around it. Group the cheeses together, and scatter the olives, tomatoes, and artichokes in small clusters. Add fresh herbs for color—rosemary, thyme, or even edible flowers look beautiful.
Complementary Dishes: This board pairs wonderfully with a light salad or a bowl of Italian wedding soup for a more substantial meal. For drinks, a crisp white wine like Pinot Grigio or a cold beer works perfectly. If you’re feeling fancy, try a creamy homemade horchata for a non-alcoholic option that’s surprisingly refreshing.
Storage: The Parmesan crisps can be stored in an airtight container at room temperature for up to 3 days. Place parchment paper between layers to prevent sticking. The assembled board should not be stored—it’s best eaten fresh. If you have leftovers, store the meats and cheeses separately in the fridge.
Reheating: If your crisps lose their crunch, pop them in a 350°F oven for 2-3 minutes. Let them cool on the baking sheet before serving again. Don’t microwave them—they’ll turn rubbery and sad.
Nutritional Information & Benefits
Here’s a rough breakdown for one serving (about 1/8 of the board, including the crisps and a variety of meats and cheeses):
- Calories: 380-450
- Protein: 25-30g
- Fat: 28-35g
- Carbohydrates: 8-12g
- Fiber: 2-3g
- Sugar: 2-4g
- Sodium: 900-1200mg
This board is naturally high in protein and healthy fats from the cheese and meats. Parmesan is a good source of calcium and phosphorus, which support bone health. The olives provide healthy monounsaturated fats and antioxidants. For a lighter option, load up on the vegetables and skip the heavier meats like salami.
Keep in mind that this is a treat—game day food meant to be enjoyed. It’s not exactly health food, but it’s made with real ingredients and no weird additives. If you’re watching sodium, go easy on the cured meats and olives. Otherwise, dig in and enjoy.
Conclusion
Look, I was wrong about this crispy Parmesan football charcuterie board. Dead wrong. I thought it was a gimmick, a Pinterest fail waiting to happen. But after making it for three game days in a row, I can honestly say it’s become my secret weapon. It’s easy, it’s impressive, and it disappears faster than anything else on the table.
The best part? You can customize it however you want. Swap in your favorite meats, cheeses, and dips. Make it spicy, make it sweet, make it whatever your crowd loves. The football shape ties everything together without being over the top. And honestly, watching people’s faces when they realize the “crackers” are actually crispy Parmesan? That never gets old.
So go ahead and try it. You don’t need to be a chef or a charcuterie expert. Just grab some good Parmesan, a baking sheet, and your favorite game day snacks. Arrange it all on a board, and watch it disappear. Then come back and tell me how it went—I’d love to hear about your version. And if you’re looking for another crowd-pleaser, try my crispy sesame chicken for a main dish that’s just as easy. Happy game day!
Frequently Asked Questions
Can I make the Parmesan crisps ahead of time?
Yes! Bake and shape the crisps up to 3 days in advance. Store them in an airtight container at room temperature with parchment paper between layers. Assemble the board just before serving for best results.
Can I use pre-shredded Parmesan?
I don’t recommend it. Pre-shredded cheese has anti-caking agents that prevent it from melting properly. You’ll end up with greasy, uneven crisps. Freshly grated Parmesan from a block works much better.
How do I keep the crisps from sticking to the parchment?
Make sure you use good quality parchment paper and let the crisps cool for at least 1 minute on the baking sheet before trying to move them. If they’re still sticking, they might need another 30 seconds of cooling time.
Can I make this board vegetarian?
Absolutely! Skip the meats and load up on extra cheeses, vegetables, and dips. Roasted red peppers, marinated mushrooms, fresh figs, and honeycomb are all great additions. The Parmesan crisps are already vegetarian-friendly.
What if I don’t have a football-shaped cookie cutter?
No problem! Use a small knife to trim the warm crisps into football shapes. Or just leave them as rustic ovals—they’ll still look great on the board. The shape is more about the overall arrangement than individual perfection.
Pin This Recipe!
Crispy Parmesan Football Charcuterie Board: Easy Game Day Recipe

A stunning and easy game day appetizer featuring crispy Parmesan crisps shaped into a football, surrounded by a customizable charcuterie board of meats, cheeses, and vegetables. Perfect for gatherings and sure to impress.
- Prep Time: 20 minutes
- Cook Time: 8 minutes
- Total Time: 30 minutes
- Yield: 8 servings 1x
- Category: Appetizer
- Cuisine: American
Ingredients
- 2 cups finely shredded Parmesan cheese
- 1 teaspoon garlic powder (optional)
- 1/2 teaspoon black pepper (freshly ground)
- 8 ounces salami (Genoa or soppressata, sliced thin)
- 6 ounces prosciutto (thinly sliced, torn into pieces)
- 4 ounces pepperoni (sliced)
- 8 ounces fresh mozzarella balls (small, drained)
- 4 ounces sharp cheddar (cubed or sliced)
- 1 cup mixed olives (green and kalamata)
- 1 cup cherry tomatoes (halved)
- 1/2 cup roasted red peppers (sliced into strips)
- 1/2 cup marinated artichoke hearts (quartered)
- Fresh rosemary sprigs (for garnish, optional)
- Crackers or crostini (enough to fill gaps)
Instructions
- Preheat your oven to 400°F (200°C). Line a baking sheet with parchment paper.
- Mix the Parmesan with garlic powder and black pepper in a small bowl.
- Spoon the Parmesan mixture onto the parchment paper in small piles, about 1 tablespoon per crisp. Space them about 2 inches apart. For a football shape, aim for slightly oval piles, about 2 inches long and 1.5 inches wide.
- Bake for 6-8 minutes, watching closely after 5 minutes. The cheese should be golden brown and bubbly, with the edges turning a deeper brown.
- Remove from the oven and let cool for 1 minute on the baking sheet. They’ll be soft and pliable at this point.
- Shape the crisps into footballs while they’re still warm. Use a small football-shaped cookie cutter to press down and cut out the shape, or use a knife to trim the edges. Gently press the edges to create the classic football pointy ends. Work quickly—you have about 2-3 minutes before they harden.
- Transfer the shaped crisps to a wire rack to cool completely. They’ll crisp up as they cool, becoming sturdy and crunchy. This takes about 5 minutes.
- While the crisps cool, prepare your charcuterie board. Arrange the meats, cheeses, olives, tomatoes, and other ingredients on your board. Leave a clear space in the center for the football.
- Arrange the Parmesan crisps in a football shape in the center of the board. Start with a base layer of crisps, then add a second layer slightly offset, like shingles on a roof. Use about 12-15 crisps for a standard football shape.
- Garnish with fresh rosemary sprigs at the ends of the football to look like the laces or just scatter them around for color. Add any final touches—sprinkle some flaky sea salt over everything, maybe a drizzle of honey over the cheese.
- Serve immediately or within an hour. The crisps stay crunchy for about 2-3 hours, but they’re best fresh.
Notes
Use freshly grated Parmesan from a block for best results. Pre-shredded cheese contains anti-caking agents that prevent proper melting. Watch the oven closely as crisps can burn quickly. Work quickly when shaping the crisps as they harden within 2-3 minutes. Store leftover crisps in an airtight container at room temperature for up to 3 days.
Nutrition
- Serving Size: 1/8 of board
- Calories: 380450
- Sugar: 24
- Sodium: 9001200
- Fat: 2835
- Saturated Fat: 1215
- Carbohydrates: 812
- Fiber: 23
- Protein: 2530
Keywords: Parmesan crisps, football charcuterie board, game day appetizer, easy charcuterie board, crispy Parmesan, football shaped cheese board


