“You’ve got to try this,” my friend said, smirking as she passed me a generous slice. It was late afternoon, and I was just settling down with a cup of coffee, feeling a bit drained after a long day. The moment I took a bite of that creamy, dreamy Lotus Biscoff cheesecake, everything else melted away. Honestly, I wasn’t quite sure about the no-bake part at first—cheesecake usually means oven, right? But this version, with its rich cookie butter swirl and buttery biscuit base, instantly rewrote my cheesecake rules.
That afternoon, I ended up making this cheesecake not once, but three times in a week (yes, it’s that addictive). The silky texture, the sweet caramel notes from the Lotus Biscoff spread, and the satisfying crunch of the cookie crust all came together in a way that felt like a little escape. It’s funny how a simple recipe can turn a chaotic day into a quiet, cozy moment. There’s something comforting about the familiar scent of cookie butter swirling through the creaminess—like a warm hug you didn’t know you needed.
What really hooked me was how easy it was to whip up without turning on the oven or waiting for complicated steps. It’s one of those recipes I trust to bring smiles, whether it’s a casual weekend treat or an impromptu dessert for friends. And I have to say, it’s holding its own alongside other favorites like my Baileys Irish Cream Cheesecake—both rich but totally different vibes.
So, this creamy no-bake Lotus Biscoff cheesecake with cookie butter swirl isn’t just a dessert. It’s a quiet little moment of indulgence that sticks with you, a sweet pause in the day that feels honestly worth savoring.
Why You’ll Love This Recipe
After countless tries and tweaks, this recipe has truly become my go-to when I want something sweet, creamy, and effortless. Here’s why it’s earned a permanent spot in my dessert lineup:
- Quick & Easy: Ready in under 30 minutes, no oven required—perfect for when you’re short on time but craving something indulgent.
- Simple Ingredients: Uses pantry staples and the magic of Lotus Biscoff cookie butter, so no last-minute grocery runs.
- Perfect for Any Occasion: Whether it’s a casual get-together, a birthday, or a cozy night in, this cheesecake fits right in.
- Crowd-Pleaser: Kids, adults, and even picky eaters tend to go back for seconds—there’s just something about the cookie butter swirl that hooks you.
- Unbelievably Delicious: The texture is silky smooth with a subtle crunch from the biscuit base, and the sweet caramel flavor of Biscoff spreads warmth through every bite.
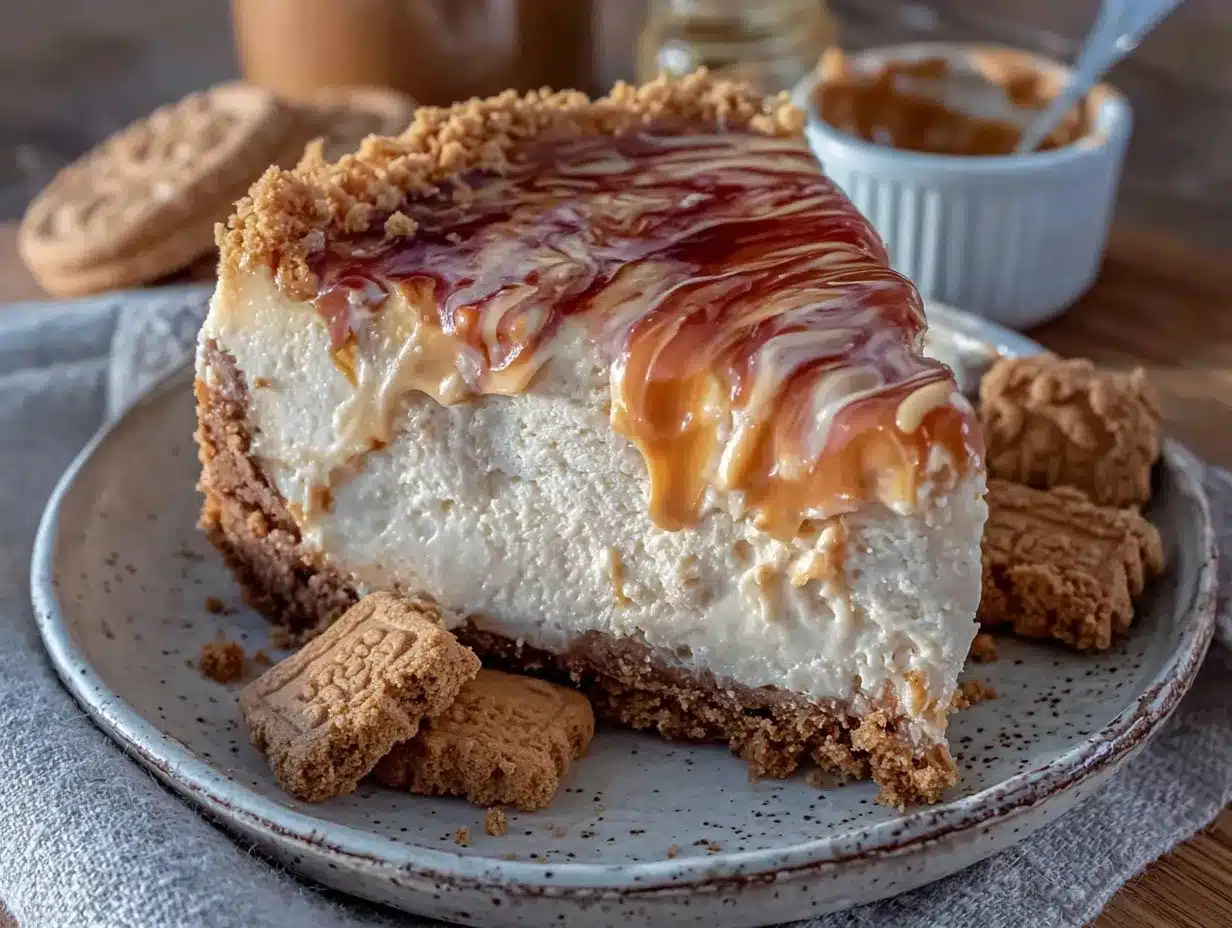
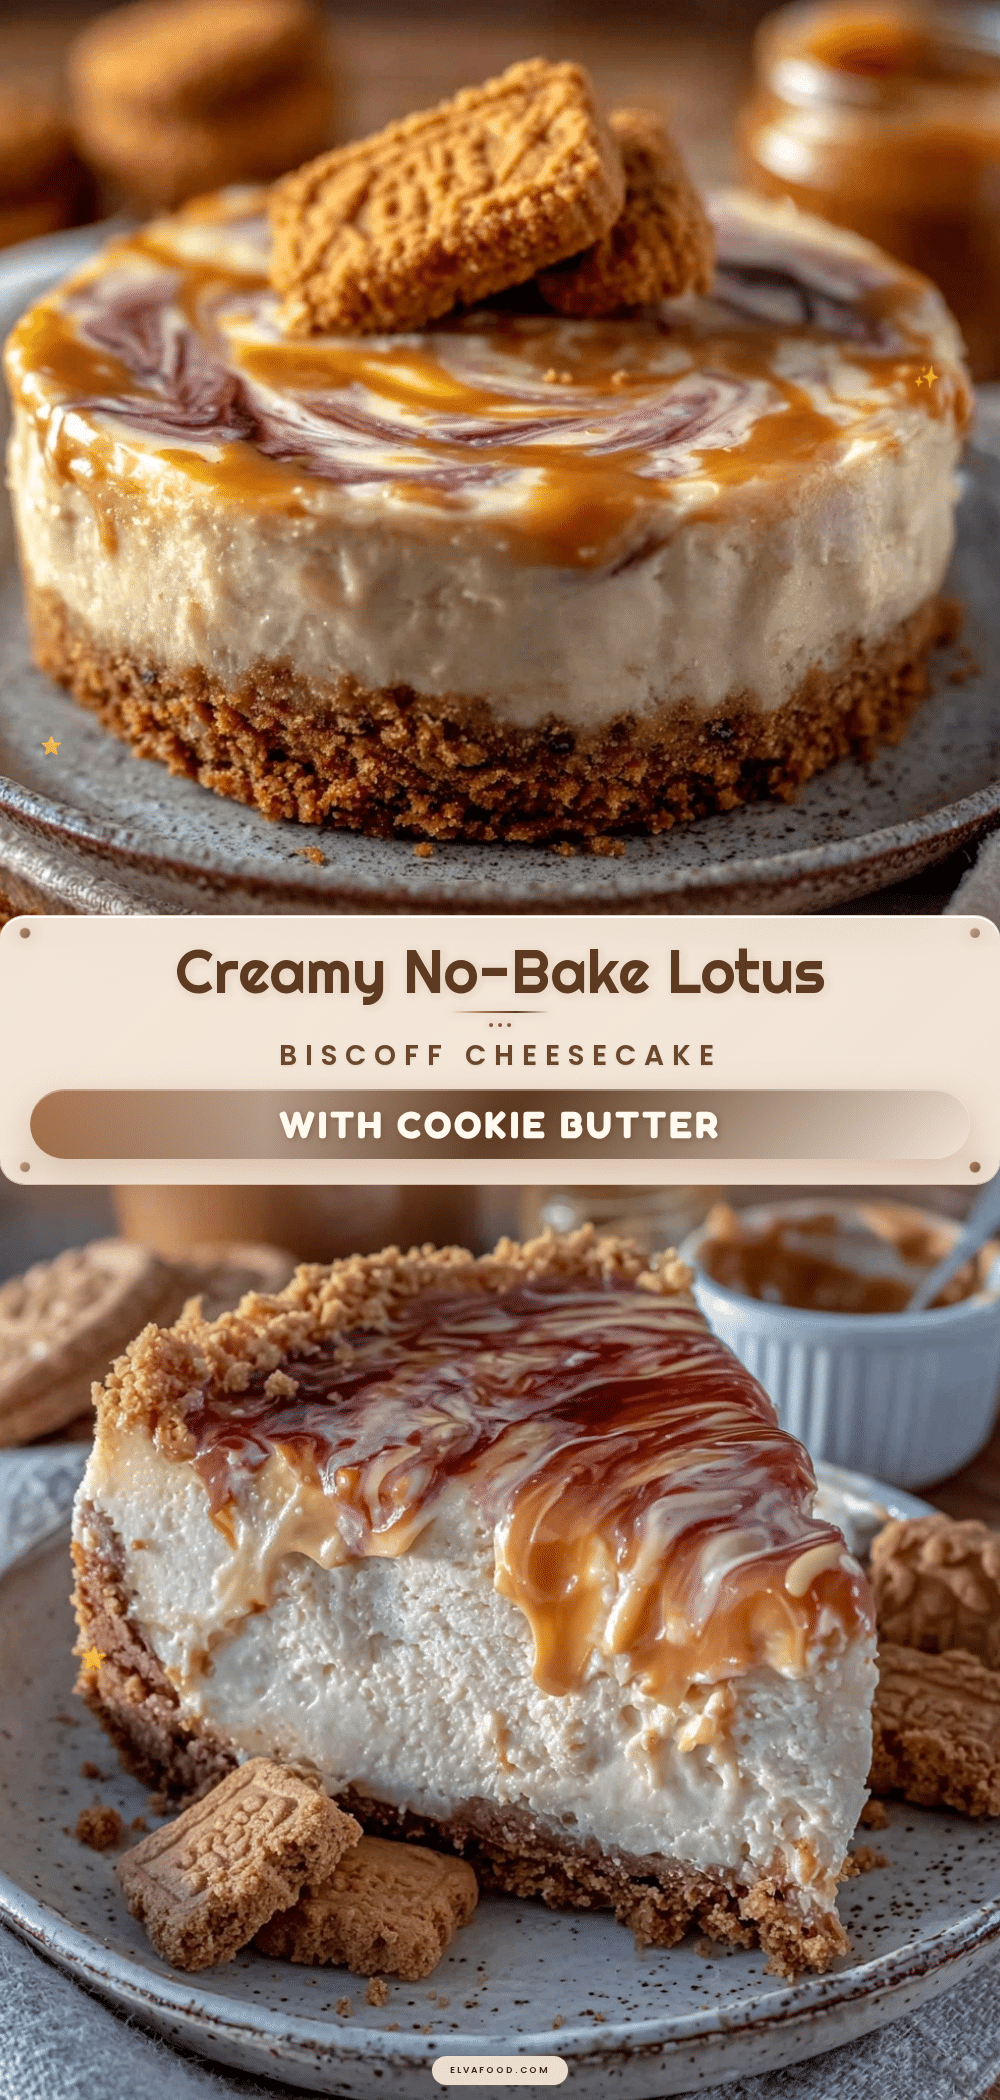
This isn’t your average no-bake cheesecake. What sets it apart? The cookie butter swirl isn’t just stirred in—it’s artfully layered, giving each slice a beautiful marbled effect and bursts of flavor. Plus, using crushed Lotus Biscoff cookies for the crust means every bite has that signature spice-and-caramel kick. It’s like comfort food with a little twist, satisfying that sweet tooth without feeling heavy or complicated.
Honestly, it’s the kind of dessert that makes you close your eyes after the first bite and think, “Yep, this is exactly what I needed.” If you’re after something that feels a bit fancy but is really fuss-free, this recipe has your name on it.
What Ingredients You Will Need
This creamy no-bake Lotus Biscoff cheesecake recipe uses straightforward ingredients that blend together to create a rich, luscious dessert with minimal effort. Most of these are pantry staples or easy to find at your local grocery store. Here’s what you’ll need:
- For the crust:
- Lotus Biscoff cookies (about 200g or 7 oz), crushed (you can pulse them in a food processor or crush in a zip bag with a rolling pin)
- Unsalted butter (100g or 7 tablespoons), melted (provides that perfect buttery binding)
- For the cheesecake filling:
- Cream cheese (500g or 17.5 oz), softened (I prefer Philadelphia for a smooth texture)
- Heavy cream (240ml or 1 cup), chilled (whipped to soft peaks for that airy creaminess)
- Powdered sugar (100g or ¾ cup), sifted (to avoid lumps)
- Vanilla extract (1 teaspoon), pure if possible (adds depth to the flavor)
- Lotus Biscoff cookie butter (150g or 5.3 oz), at room temperature (this is the star for the swirl—smooth and luscious)
- Optional toppings:
- Crushed Biscoff cookies or cookie crumbs for garnish
- Whipped cream dollops
- Springform pan (around 8-inch or 20 cm) – makes it easy to release the cheesecake without messing up the edges. If you don’t have one, a regular round cake pan lined with parchment works but be careful when unmolding.
- Mixing bowls – at least two; one for the crust, one for the filling.
- Electric mixer or stand mixer – highly recommended for whipping the cream and cream cheese smooth. A handheld mixer works fine, too, but it takes a bit more elbow grease.
- Spatula – for folding ingredients gently and scraping down the bowl.
- Food processor or rolling pin with a strong bag – to crush the Biscoff cookies into fine crumbs for the crust.
- Measuring cups and spoons – for accuracy, especially when working with powdered sugar and butter.
- Prepare the crust: Start by crushing your Lotus Biscoff cookies into fine crumbs. About 200g (7 oz) should yield roughly 1 ¾ cups of crushed cookies. I usually use a food processor, but if you don’t have one, placing the cookies in a sealed plastic bag and hammering them gently with a rolling pin works just as well. Mix the crumbs with 100g (7 tablespoons) of melted unsalted butter until the mixture holds together when pressed.
- Press into the pan: Transfer the cookie-butter mixture into your 8-inch (20 cm) springform pan. Use the back of a spoon or a flat-bottomed glass to press it evenly and firmly across the bottom. Pop the pan into the fridge to chill for at least 15 minutes while you prepare the filling. This step ensures a crisp, sturdy base that won’t crumble when sliced.
- Whip the cream: Pour 240ml (1 cup) of chilled heavy cream into a cold bowl. Whip using an electric mixer on medium speed until soft peaks form. This usually takes 3-4 minutes. Be careful not to overwhip; you want the cream airy but still smooth.
- Mix the cream cheese and sugar: In a separate bowl, beat 500g (17.5 oz) of softened cream cheese with 100g (¾ cup) powdered sugar and 1 teaspoon vanilla extract. Beat until the mixture is silky and lump-free—this may take 2-3 minutes. Scrape down the sides occasionally to incorporate everything evenly.
- Combine cream and cream cheese: Gently fold the whipped cream into the cream cheese mixture using a spatula. Use slow, folding motions to keep the mixture light and airy—this is key for that fluffy texture.
- Add the cookie butter swirl: Warm 150g (5.3 oz) of Lotus Biscoff cookie butter slightly in the microwave for 10-15 seconds to soften it just enough to drizzle. Pour half of the cheesecake filling into the chilled crust, then spoon half of the cookie butter over the top in dollops. Using a knife or skewer, swirl the cookie butter into the filling gently to create pretty marbled patterns. Repeat with the remaining filling and cookie butter. The swirl effect is what makes this cheesecake visually stunning and extra flavorful.
- Chill to set: Cover the cheesecake with cling film or a lid and refrigerate for at least 4 hours, but ideally overnight. This resting time helps everything firm up beautifully and allows the flavors to meld.
- Serve: Before slicing, run a warm knife around the edges to loosen. Slice carefully and garnish with extra crushed Biscoff cookies or whipped cream if you like. Enjoy chilled for the best texture and flavor.
- Softened cream cheese is a must. If it’s too cold, lumps form, and the texture suffers. Let it sit at room temperature for about 30 minutes before mixing.
- Chill your mixing bowl and beaters when whipping cream. This helps the cream reach the right consistency faster and prevents overwhipping.
- Folding technique matters. Use gentle, sweeping motions to combine whipped cream with cream cheese. Stirring vigorously will deflate the air and make the cheesecake dense.
- Cookie butter swirl finesse: Warm the cookie butter just enough to drizzle smoothly. Cold cookie butter is too stiff, and hot cookie butter can separate.
- Press the crust firmly. A well-packed base stops crumbling when you cut the cheesecake and adds that satisfying crunch.
- Patience is key. Give the cheesecake enough time in the fridge to chill and set properly — rushing this step will result in a softer, less sliceable dessert.
- Chocolate Biscoff Swirl: Mix some melted dark chocolate with the cookie butter before swirling for a richer, more decadent flavor.
- Berry Twist: Add a layer of fresh raspberries or strawberry compote on top before chilling. The tartness balances the sweetness beautifully.
- Vegan/Dairy-Free Option: Use vegan cream cheese, coconut cream whipped to peaks, and dairy-free cookie butter. The texture will be slightly different, but still tasty and creamy.
- Gluten-Free Crust: Substitute the Biscoff cookies with gluten-free ginger snaps or almond flour mixed with coconut sugar and butter.
- Peanut Butter Swirl: Swap half the cookie butter with natural peanut butter for a nutty twist that pairs surprisingly well with the creamy filling.
For a gluten-free version, you can swap the Biscoff cookies with gluten-free ginger snaps or speculoos-style cookies. If you want to make it dairy-free, try using a dairy-free cream cheese and coconut cream instead of heavy cream, and make sure your cookie butter is compatible.
When choosing your cream cheese, aim for full-fat for the creamiest result. I’ve found that low-fat versions tend to make the cheesecake less stable and a bit grainy. Also, a chilled bowl and beaters help when whipping the cream to get that perfect fluffy texture.
Equipment Needed
If you’re on a budget or prefer minimal gadgets, you can crush the cookies by hand and whip the cream with a whisk (though it requires more patience). I’ve found that a springform pan is worth investing in if you make cheesecakes often; it keeps things neat and stress-free.
Preparation Method
Tip: If your cookie butter is too thick to swirl easily, microwaving in short bursts keeps it pliable without melting completely. Also, don’t rush the chilling process; that wait really makes the difference.
Cooking Tips & Techniques
Working with a no-bake cheesecake can be surprisingly simple if you keep a few things in mind:
On my first try, I ended up with a crumbly crust that practically fell apart when cutting. Lesson learned: firmly pressing the base and letting it chill thoroughly solves that. Also, if you forget to soften cream cheese or warm cookie butter, don’t sweat it—just give yourself a few extra minutes and try again. Cooking is about learning as you go!
Variations & Adaptations
This creamy no-bake Lotus Biscoff cheesecake is a wonderful base to play with. Here are a few ideas I’ve tried or considered:
One favorite I experimented with was adding a pinch of cinnamon to the crust crumbs. It added a warm spice that complemented the Biscoff flavor subtly. Feel free to make it your own—you can even try layering this cheesecake with the vibrant fruit toppings from my Mini Lemon Blueberry Cheesecakes.
Serving & Storage Suggestions
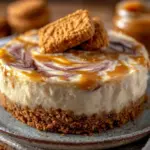
This cheesecake is best served chilled straight from the fridge. The texture is soft but firm enough to slice neatly, and the cookie butter swirl really shines when cold. For a pretty presentation, garnish with extra crushed Lotus Biscoff cookies or a dollop of whipped cream right before serving.
Pair it with a hot cup of coffee or a light dessert wine to balance the sweetness. It also makes a delightful finish to a cozy dinner, like the hearty Irish Lamb Stew I sometimes make on chilly evenings.
To store, cover the cheesecake tightly with plastic wrap or place it in an airtight container. It keeps well in the fridge for up to 4 days. If you want to freeze it, slice first and wrap each piece individually to avoid freezer burn. When ready to eat, thaw overnight in the fridge for best texture.
One thing I love is how the flavors get a little bolder after a day or two, making leftovers even more indulgent. Just a heads-up: the crust may soften slightly over time, but that doesn’t take away from the overall experience.
Nutritional Information & Benefits
This no-bake Lotus Biscoff cheesecake is rich and indulgent, so it’s definitely a treat rather than an everyday snack. Here’s a rough estimate per slice (assuming 12 slices):
| Nutrient | Amount per slice |
|---|---|
| Calories | 320-350 kcal |
| Fat | 22g (mostly from cream cheese and butter) |
| Carbohydrates | 28g (includes sugars from cookie butter and crust) |
| Protein | 5g |
Key ingredients like cream cheese provide calcium and some protein, while Lotus Biscoff cookies add delightful spices like cinnamon and nutmeg. Though this dessert contains gluten and dairy, substitutions are easy to make for allergies or dietary preferences.
For those mindful of sugar intake, you can experiment with powdered sugar substitutes or reduce the cookie butter amount slightly. I find this recipe strikes a nice balance between indulgence and simplicity, making it a satisfying treat when you want to pause and enjoy a little sweetness.
Conclusion
This creamy no-bake Lotus Biscoff cheesecake with cookie butter swirl is a recipe that feels like a small celebration every time you make it. It’s quick enough for a last-minute dessert but impressive enough to share with guests or just savor on your own. The combo of smooth cheesecake, crunchy cookie crust, and swirled cookie butter is a comfort food win that’s hard to beat.
What I love most is how easy it is to customize and how forgiving the method is—perfect for both beginners and seasoned bakers alike. Honestly, it’s become one of those recipes I turn to when I want to treat myself without fuss.
If you give this cheesecake a try, I’d love to hear how you swirl your cookie butter or what variations you’ve dreamed up. Don’t hesitate to share your own twists or questions in the comments below. Here’s to sweet moments made simple and delicious!
Frequently Asked Questions
Can I make this cheesecake ahead of time?
Yes! In fact, it tastes even better the next day after chilling overnight. Just keep it covered tightly in the fridge.
Do I have to use Lotus Biscoff cookie butter?
While Lotus Biscoff cookie butter is the classic choice here, you can substitute with any similar spiced cookie butter or even peanut butter for a different twist.
How do I prevent the crust from getting soggy?
Press the crust firmly and chill it thoroughly before adding the filling. This helps it stay crisp longer.
Is this recipe gluten-free?
The traditional recipe uses Biscoff cookies, which contain gluten. For a gluten-free version, swap with gluten-free ginger snaps or similar cookies.
Can I freeze leftover cheesecake?
Definitely! Slice first, wrap pieces individually, and freeze. Thaw in the fridge overnight before serving.
Pin This Recipe!
Creamy No-Bake Lotus Biscoff Cheesecake Recipe with Easy Cookie Butter Swirl
A rich and luscious no-bake cheesecake featuring a buttery Lotus Biscoff cookie crust and a silky cream cheese filling with a beautiful cookie butter swirl. Perfect for quick indulgence without the oven.
- Prep Time: 20 minutes
- Cook Time: 0 minutes
- Total Time: 4 hours 20 minutes
- Yield: 12 servings 1x
- Category: Dessert
- Cuisine: American
Ingredients
- 200g (7 oz) Lotus Biscoff cookies, crushed
- 100g (7 tablespoons) unsalted butter, melted
- 500g (17.5 oz) cream cheese, softened
- 240ml (1 cup) heavy cream, chilled
- 100g (3/4 cup) powdered sugar, sifted
- 1 teaspoon vanilla extract
- 150g (5.3 oz) Lotus Biscoff cookie butter, at room temperature
- Optional toppings: crushed Biscoff cookies or cookie crumbs, whipped cream dollops
Instructions
- Crush Lotus Biscoff cookies into fine crumbs (about 1 3/4 cups). Mix with melted unsalted butter until mixture holds together when pressed.
- Press the cookie-butter mixture evenly and firmly into the bottom of an 8-inch (20 cm) springform pan. Chill in the fridge for at least 15 minutes.
- Whip chilled heavy cream in a cold bowl using an electric mixer on medium speed until soft peaks form (3-4 minutes).
- Beat softened cream cheese with powdered sugar and vanilla extract until silky and lump-free (2-3 minutes).
- Gently fold whipped cream into the cream cheese mixture using slow, folding motions to keep it light and airy.
- Warm Lotus Biscoff cookie butter slightly in the microwave for 10-15 seconds to soften. Pour half of the cheesecake filling into the chilled crust, spoon half of the cookie butter over the top in dollops, and swirl gently with a knife or skewer. Repeat with remaining filling and cookie butter.
- Cover the cheesecake and refrigerate for at least 4 hours, preferably overnight, to set.
- Before slicing, run a warm knife around the edges to loosen. Slice carefully and garnish with extra crushed Biscoff cookies or whipped cream if desired. Serve chilled.
Notes
Use full-fat cream cheese for best texture. Chill mixing bowl and beaters before whipping cream. Warm cookie butter slightly to swirl easily but avoid overheating. Press crust firmly and chill thoroughly to prevent crumbling. Allow cheesecake to chill overnight for best set and flavor.
Nutrition
- Serving Size: 1 slice (1/12th of c
- Calories: 335
- Sugar: 20
- Sodium: 210
- Fat: 22
- Saturated Fat: 13
- Carbohydrates: 28
- Fiber: 1
- Protein: 5
Keywords: no-bake cheesecake, Lotus Biscoff, cookie butter swirl, easy cheesecake, creamy dessert, no oven dessert, cookie crust