“You know that moment when all you want is chocolate—right now, no fuss, no waiting?” That was me on a Wednesday evening, exhausted from a long day and staring blankly into the abyss of my pantry. Honestly, I didn’t expect much when I tossed a few ingredients into a mug, half doubting this quick chocolate lava mug cake with molten center would actually work. But, oh, how wrong I was.
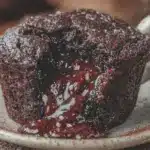
The first bite was this warm, gooey surprise—a molten river of chocolatey goodness flowing from the center, just like the fancy desserts you see in restaurants but without the wait or the mess. It was like a tiny celebration in a cup, and I found myself making it two, three times that week, each time tweaking it just a little to get it *perfect* for my craving.
What stuck with me is how this recipe feels like the answer to those random chocolate emergencies. It’s quick, comforting, and somehow both simple and indulgent all at once. If you’ve ever been skeptical about mug cakes or doubted if such a quick fix could satisfy a chocolate craving, this one might quietly win you over too—just like it did me.
Why You’ll Love This Recipe
Making a dessert in under five minutes that actually tastes like it took hours? Yes, please. This quick chocolate lava mug cake recipe has become my go-to when I need something sweet and molten but without the drama.
- Quick & Easy: Ready in about 5 minutes from start to finish—perfect for those last-minute dessert urges or solo late-night snacks.
- Simple Ingredients: Uses pantry staples like cocoa powder, flour, and sugar—no fancy trips required.
- Perfect for Any Occasion: Whether you’re winding down after work or need a sweet pick-me-up during a cozy night in, it fits the bill.
- Crowd-Pleaser: I’ve made this for friends who can’t believe it’s microwaved—everyone loves that molten center surprise.
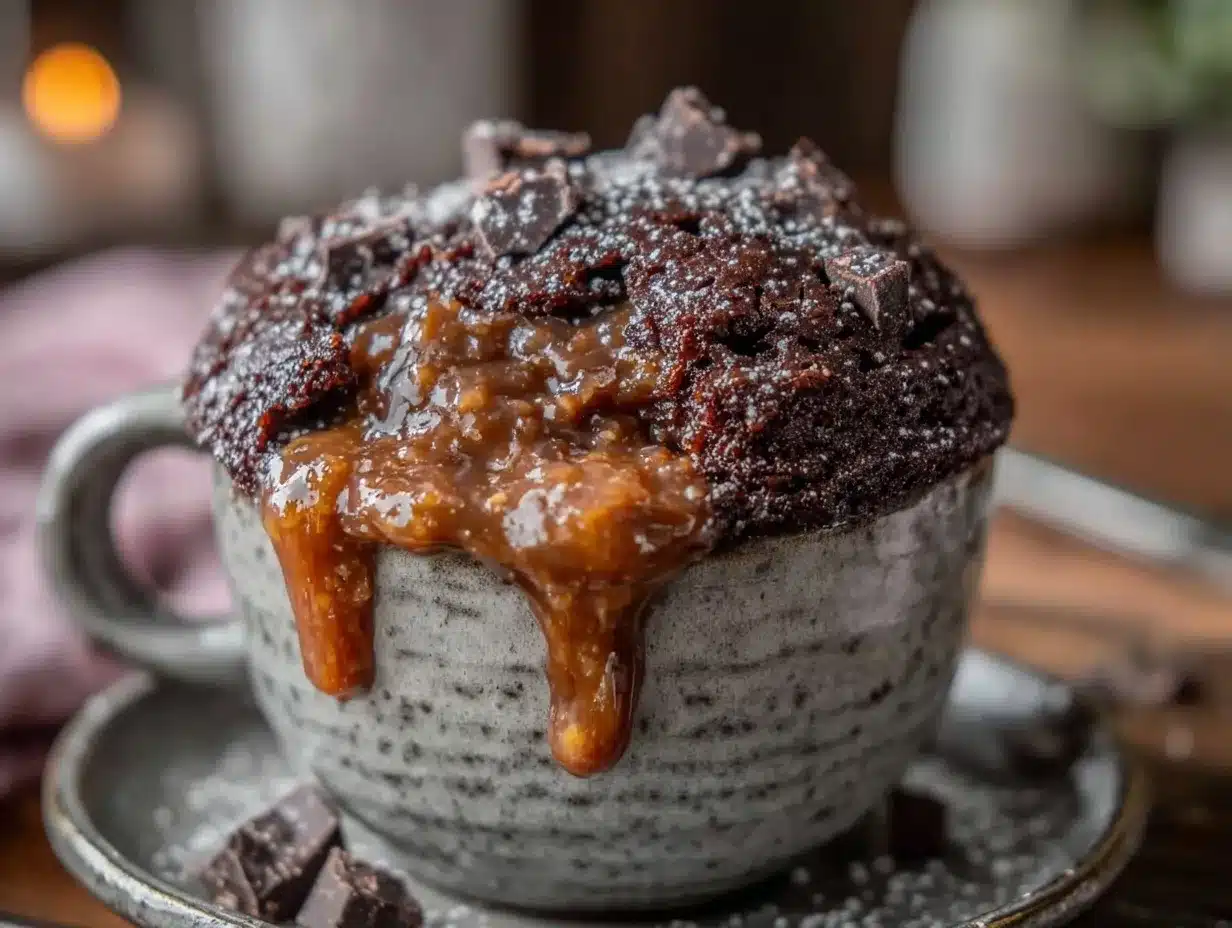
- Unbelievably Delicious: The texture is just right—not dry, not rubbery—with a luscious molten core that melts on your tongue.
This isn’t your run-of-the-mill microwave cake. The trick? A carefully balanced batter and just the right microwaving time that yields a molten center without turning the edges into rubber. I like to think of it as chocolate comfort food that respects your time and your taste buds.
And honestly, it’s the kind of dessert that makes you close your eyes after the first spoonful, savoring that gooey middle. It’s a little moment of indulgence that’s both quick and satisfying—because who says you can’t have great chocolate on a whim?
What Ingredients You Will Need
This recipe uses simple, wholesome ingredients to deliver bold flavor and a satisfying molten texture without any fuss. Most of these are pantry staples, and substitutions are easy if needed.
- All-purpose flour (4 tablespoons) – the base for structure; can swap with gluten-free flour blend for gluten-free option.
- Cocoa powder (2 tablespoons) – unsweetened, for that rich chocolate flavor. I prefer Dutch-processed for a smoother taste.
- Sugar (3 tablespoons) – regular granulated sugar works well; brown sugar can be used for a deeper caramel note.
- Baking powder (1/4 teaspoon) – gives just enough rise to keep the cake fluffy.
- Salt (a pinch) – balances the sweetness and enhances chocolate notes.
- Milk (3 tablespoons) – whole or 2%; almond or oat milk works for dairy-free.
- Vegetable oil (2 tablespoons) – adds moisture and richness; melted butter can be used if preferred.
- Vanilla extract (1/4 teaspoon) – adds warmth and depth.
- Chocolate piece or chocolate chips (1-2 tablespoons) – the secret to that molten center; try a good-quality semi-sweet chocolate like Ghirardelli for best melt and flavor.
Feel free to swap the chocolate piece for a spoonful of Nutella or peanut butter if you want a different molten surprise. I’ve also tried adding a pinch of espresso powder to amp up the chocolate flavor without making it taste like coffee.
Equipment Needed
- Microwave-safe mug (roughly 12 oz capacity) – essential to hold the batter and withstand heat; I find ceramic mugs work best for even cooking.
- Measuring spoons and cups – for accuracy, especially with cocoa and baking powder.
- Small mixing bowl or the mug itself – you can mix directly in the mug to save dishes.
- Fork or small whisk – for mixing the batter smoothly.
- Microwave – of course! If you don’t have one, a toaster oven can work but will need longer cooking time and careful watching.
If you don’t have measuring spoons, a tablespoon from your flatware set can do in a pinch, but accuracy really helps with the balance in this recipe. I once tried using a plastic mug, and it didn’t heat evenly—so ceramic is my top recommendation.
Preparation Method
- Gather your ingredients. Measure everything out to keep the process smooth (about 2 minutes).
- Mix dry ingredients. In your microwave-safe mug or a small bowl, combine 4 tablespoons all-purpose flour, 2 tablespoons cocoa powder, 3 tablespoons sugar, 1/4 teaspoon baking powder, and a pinch of salt. Stir well with a fork to avoid lumps.
- Add wet ingredients. Pour in 3 tablespoons milk, 2 tablespoons vegetable oil, and 1/4 teaspoon vanilla extract. Stir until the batter is smooth and glossy, making sure to scrape the sides and bottom so no dry flour remains.
- Insert the molten center. Press 1-2 tablespoons of chocolate chips or a piece of chocolate gently into the center of the batter. Don’t stir it in; just nestle it so it will melt during cooking.
- Microwave cooking. Place the mug in the microwave and cook on high for 60-70 seconds (times vary by microwave wattage). The edges should look set but the center slightly soft. Avoid overcooking or the molten center will disappear.
- Check and adjust. If the cake looks too wet, add 10 seconds and check again. The cake will continue to cook slightly once out of the microwave.
- Let it rest. Allow the mug cake to sit for 1-2 minutes. This helps the molten center thicken slightly but remain gooey.
- Enjoy! Grab a spoon and dig into the warm, chocolatey lava center. It’s best served right away for that melt-in-your-mouth magic.
Pro tip: If you want to get fancy, top with a scoop of ice cream or a dusting of powdered sugar. I often eat it plain, straight from the mug, because the molten center steals the show.
Cooking Tips & Techniques
One thing I learned the hard way is that microwave times can be tricky. Too long and you get a dense, rubbery cake; too short and it’s just gooey batter. Start with 60 seconds and adjust by 5-10 seconds depending on your microwave’s power.
Mixing is another key. You want the batter smooth but not overmixed—just enough to combine. Overworking flour can make the cake tough.
Using a good-quality cocoa powder makes a noticeable difference in flavor. I tried lower-quality brands once, and the cake turned out bland, so don’t skimp there.
For that molten center, resist the urge to stir the chocolate into the batter. Leaving it nestled creates that lovely liquid core you’re aiming for.
Lastly, don’t skip the resting time after microwaving. It lets the heat distribute evenly and the molten center set just right without losing that gooey texture.
Variations & Adaptations
- Peanut Butter Lava: Swap the chocolate piece for a spoonful of peanut butter or peanut butter chips. It’s a nutty twist that pairs amazingly with chocolate batter.
- Berry Surprise: Drop a few frozen raspberries or blueberries into the center instead of chocolate. The berries soften and burst, adding a fruity molten core.
- Gluten-Free Version: Use a 1:1 gluten-free baking flour blend instead of all-purpose flour. The texture will be slightly different but still delicious.
- Vegan Adaptation: Replace milk with almond or oat milk and use coconut oil instead of vegetable oil. Make sure your chocolate is dairy-free.
- Spiced Chocolate: Add a pinch of cinnamon or cayenne pepper to the dry ingredients for a subtle warm kick.
Personally, I once tried a version with a piece of caramel candy in the center, and it was a gooey, buttery surprise that made me rethink dessert altogether.
Serving & Storage Suggestions
This chocolate lava mug cake is best enjoyed warm, straight from the mug. The molten center is at its peak gooeyness right after cooking, so don’t wait too long.
For a little extra oomph, a scoop of vanilla ice cream or a dollop of whipped cream complements the rich chocolate perfectly. I’ve also paired it with a hot cup of coffee or even a mint tea for balance.
If you happen to have leftovers (rare in my experience), cover the mug with plastic wrap and refrigerate for up to 2 days. Reheat in the microwave for 20-30 seconds, but the molten center won’t be quite the same.
Flavors tend to mellow if you let it sit too long, so treat this as an immediate gratification dessert—one that rewards you right away.
Nutritional Information & Benefits
Each serving of this quick chocolate lava mug cake contains approximately 350-400 calories, depending on specific ingredient brands and substitutions.
Key ingredients like cocoa powder are rich in antioxidants and can help boost mood through natural compounds. Using vegetable oil instead of butter reduces saturated fat, making it a slightly lighter treat.
This recipe can be adapted for gluten-free or vegan diets, making it versatile for many dietary needs. It does contain common allergens like gluten, dairy (unless substituted), and soy if using some chocolates.
From a wellness perspective, it’s a mindful indulgence—small portion, big satisfaction, and a manageable sugar hit without going overboard.
Conclusion
This quick chocolate lava mug cake with molten center is a tiny miracle for chocolate lovers who crave something warm, gooey, and fast. It’s a recipe you can pull together in minutes, with ingredients you probably have on hand, that never fails to impress.
Feel free to tweak it to your taste—add spices, swap fillings, or try different milks. What matters most is that it brings you a moment of sweet comfort when you need it most.
Honestly, I keep coming back to this recipe because it’s the perfect balance of ease and indulgence. If you give it a try, I’d love to hear how you made it your own—drop a comment or share your favorite twist!
Here’s to simple, satisfying desserts that fit right into your busy life.
Frequently Asked Questions
Can I make the chocolate lava mug cake without a microwave?
Yes, you can use a toaster oven or conventional oven by placing the batter in an oven-safe ramekin and baking at 350°F (175°C) for about 10 minutes. Keep an eye on it to avoid overbaking.
What if my molten center isn’t gooey after microwaving?
Try reducing the cooking time by 5-10 seconds. Microwave power varies, so shorter cooking prevents the center from solidifying.
Can I prepare the batter ahead of time?
It’s best to prepare and cook immediately for the freshest texture and molten center. The batter can be made a few hours ahead but may lose some rise and gooeyness.
Is it possible to make this recipe dairy-free?
Absolutely! Use plant-based milk like almond or oat milk and substitute vegetable oil with coconut oil. Choose dairy-free chocolate for the molten center.
How can I make the lava center more pronounced?
Use a larger piece of high-quality chocolate or add a spoonful of chocolate spread like Nutella. Just be sure not to stir it into the batter so it stays molten.
For a savory dinner to balance out your sweet cravings, you might enjoy the hearty Irish lamb stew recipe with Guinness or a comforting bowl of Italian wedding soup with tender meatballs—both perfect for cozy evenings.
Pin This Recipe!
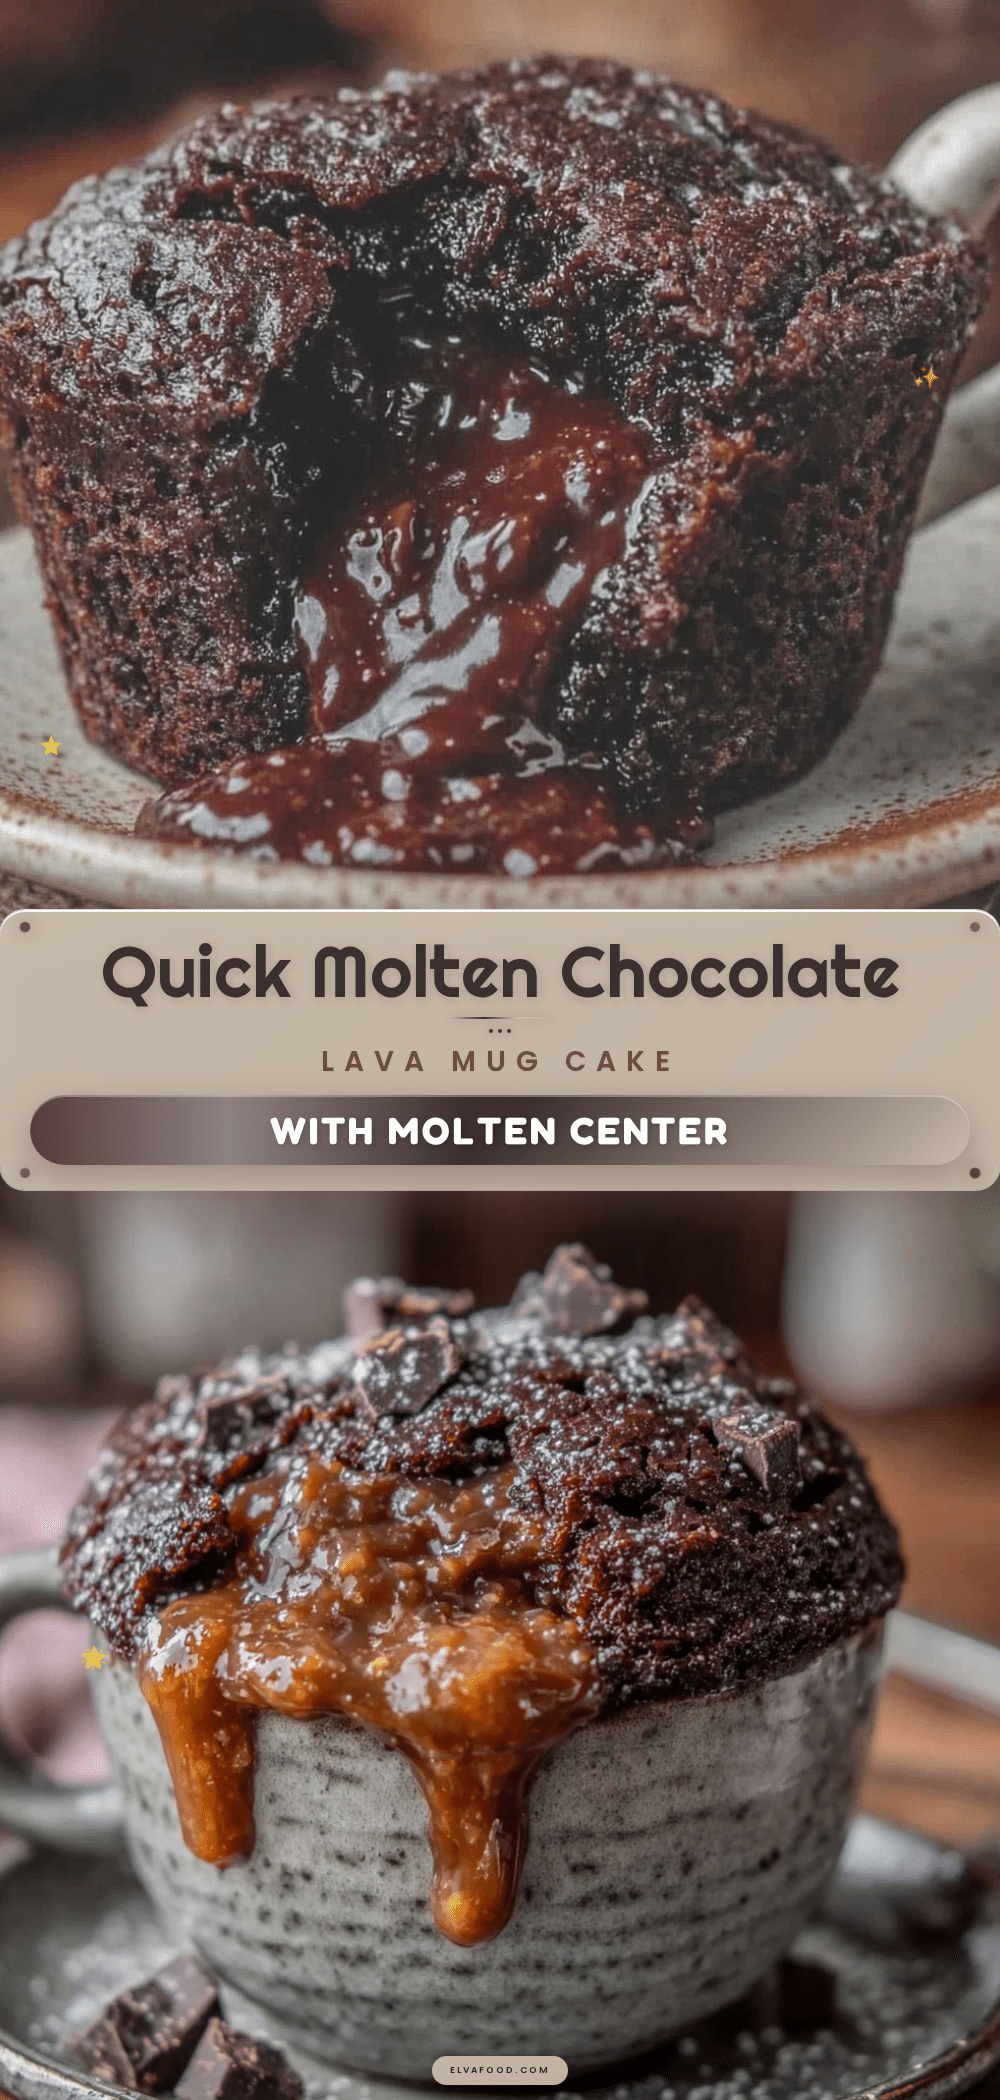
Quick Chocolate Lava Mug Cake
A quick and easy microwave mug cake with a warm, gooey molten chocolate center, perfect for satisfying chocolate cravings in under five minutes.
- Prep Time: 2 minutes
- Cook Time: 1-2 minutes
- Total Time: 5 minutes
- Yield: 1 serving 1x
- Category: Dessert
- Cuisine: American
Ingredients
- 4 tablespoons all-purpose flour
- 2 tablespoons unsweetened cocoa powder (preferably Dutch-processed)
- 3 tablespoons granulated sugar
- 1/4 teaspoon baking powder
- Pinch of salt
- 3 tablespoons milk (whole or 2%; almond or oat milk for dairy-free)
- 2 tablespoons vegetable oil (or melted butter)
- 1/4 teaspoon vanilla extract
- 1–2 tablespoons chocolate piece or chocolate chips (semi-sweet recommended)
Instructions
- Gather your ingredients and measure everything out (about 2 minutes).
- In a microwave-safe mug or small bowl, combine flour, cocoa powder, sugar, baking powder, and salt. Stir well with a fork to avoid lumps.
- Add milk, vegetable oil, and vanilla extract. Stir until the batter is smooth and glossy, scraping the sides and bottom.
- Press chocolate chips or a piece of chocolate gently into the center of the batter without stirring.
- Microwave on high for 60-70 seconds until edges are set but center is slightly soft. Adjust time by 5-10 seconds if needed.
- Let the mug cake rest for 1-2 minutes to allow the molten center to thicken but remain gooey.
- Enjoy warm, straight from the mug.
Notes
Use ceramic mugs for even cooking. Avoid overcooking to keep the molten center gooey. Resting after microwaving helps set the center. For dairy-free, use plant-based milk and coconut oil. Variations include peanut butter or berries as molten centers.
Nutrition
- Serving Size: One 12 oz mug cake
- Calories: 350400
- Sugar: 30
- Sodium: 150
- Fat: 18
- Saturated Fat: 3
- Carbohydrates: 50
- Fiber: 3
- Protein: 5
Keywords: chocolate lava cake, mug cake, quick dessert, microwave cake, molten center, easy chocolate dessert