“Did you use all the espresso again?” my roommate asked with a raised eyebrow as I shuffled back from the kitchen, clutching the last of the morning’s coffee stash. Honestly, I was just trying to make a quick dessert after a long day, but somehow that espresso soak in this decadent tiramisu cheesecake recipe turned into a full-on obsession. I couldn’t stop tweaking it throughout the week—tasting, adjusting, soaking those ladyfingers just right. The smell of espresso and cocoa filled the apartment, pulling me into this late-night ritual where time slowed down and worries faded.
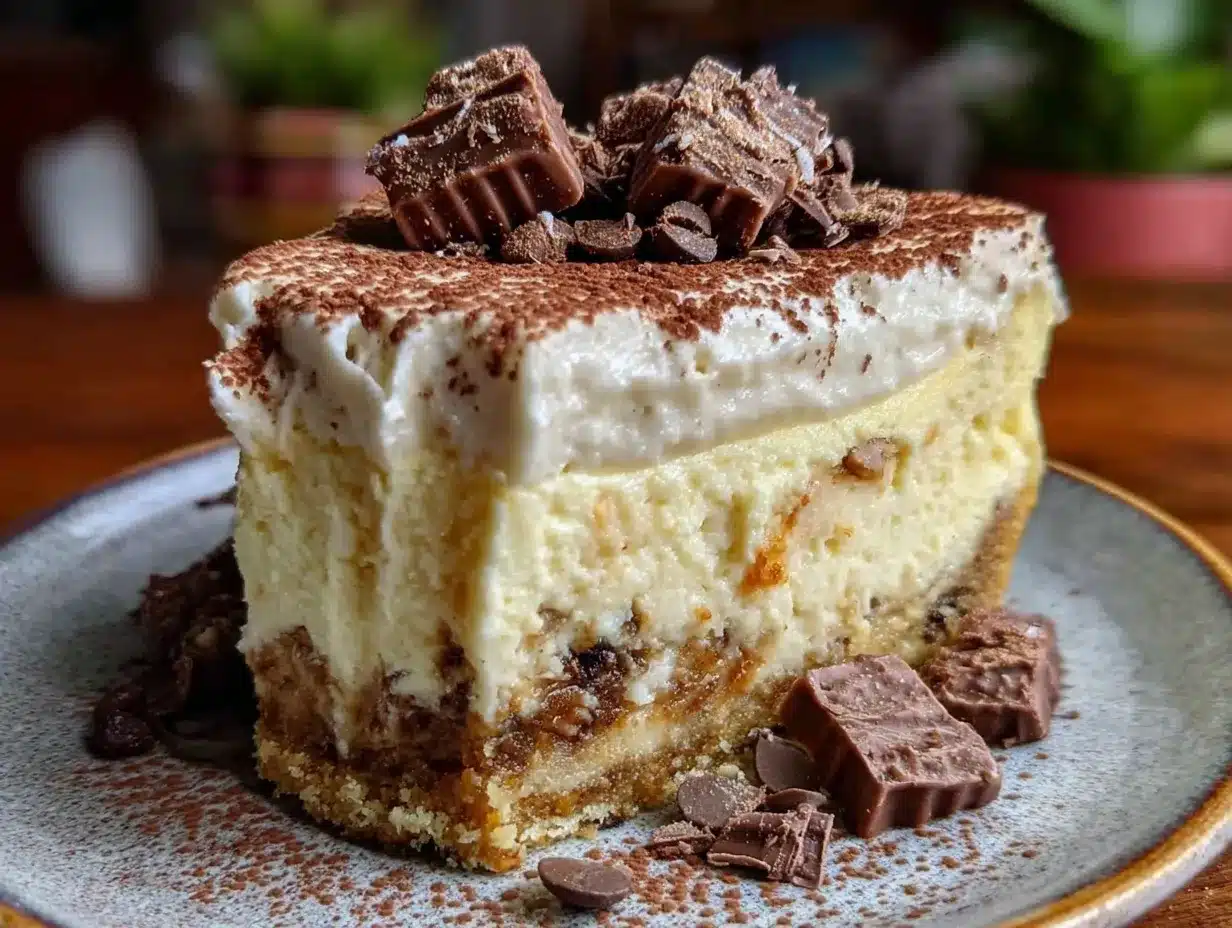
This cheesecake came from an accidental win, actually. I was originally aiming for a simple tiramisu but got lazy with layering and instead poured the espresso-soaked ladyfingers beneath a creamy, velvety cheesecake layer. The result? Something richer and more indulgent than I expected, with a perfect balance between coffee bitterness and sweet creaminess. It’s one of those desserts that feels like a warm hug after a hectic day, the kind you want to share but secretly hope no one else touches before you get your slice.
That quiet realization—that sometimes the best recipes come from improvising on a tired evening—makes this Decadent Tiramisu Cheesecake with Espresso Soak a keeper in my book. It’s a dessert that’s as comforting as it is impressive, and if you’ve ever wanted to wow guests without fussing endlessly, this is the one to have in your repertoire.
Why You’ll Love This Recipe
This tiramisu cheesecake recipe isn’t just another dessert hack; it’s a carefully tested creation that brings together the best of two worlds—classic tiramisu and rich, creamy cheesecake. After multiple trials, I found that the espresso soak is key to getting that authentic coffee flavor without overpowering the delicate texture.
- Quick & Easy: Ready in about 1 hour plus chilling time, it’s perfect for last-minute dinner parties or weekend treats.
- Simple Ingredients: You likely have everything on hand—from cream cheese to espresso powder—making it fuss-free.
- Perfect for Special Occasions: Whether it’s a birthday, holiday feast, or casual get-together, this dessert impresses without stress.
- Crowd-Pleaser: Kids, adults, coffee lovers, and cheesecake fans all give it rave reviews; it’s truly a universal favorite.
- Unbelievably Delicious: The espresso-soaked ladyfingers add a subtle bitterness that contrasts beautifully with the creamy, smooth cheesecake layer.
What sets this tiramisu cheesecake apart? The espresso soak is easy but powerful, soaking the ladyfingers just enough to avoid sogginess while capturing the full coffee essence. Plus, blending mascarpone with cream cheese gives it a luxurious texture that’s not too dense or too light—it’s that perfect middle ground.
Honestly, this recipe hits that sweet spot where comfort meets sophistication. It’s the kind of dessert that invites you to slow down and savor every bite—perfect after a comforting meal, like the rich Irish lamb stew with Guinness or the cozy Dublin coddle sausage and potato stew. Trust me, it’s worth making room for.
What Ingredients You Will Need
This recipe uses simple, wholesome ingredients to deliver bold flavor and a satisfying texture without any fuss. Most are pantry staples or easy to find, and you can tweak a few elements depending on your preferences or dietary needs.
- For the Espresso Soak:
– 1 cup (240 ml) brewed espresso or strong coffee, cooled
– 2 tablespoons coffee liqueur (optional, adds depth) - For the Crust:
– 24 ladyfingers (savoiardi), store-bought or homemade
– 3 tablespoons unsalted butter, melted (for brushing) - For the Cheesecake Filling:
– 16 oz (450 g) cream cheese, softened (I recommend Philadelphia for smoothness)
– 8 oz (225 g) mascarpone cheese, room temperature (adds creaminess)
– 3/4 cup (150 g) granulated sugar
– 3 large eggs, room temperature
– 1 teaspoon pure vanilla extract
– 1 tablespoon all-purpose flour (helps with structure) - For the Topping:
– Unsweetened cocoa powder, for dusting
– Dark chocolate shavings or curls (optional, for garnish)
Substitution tips: Use gluten-free ladyfingers or almond flour crust for a gluten-free version. Swap mascarpone with full-fat Greek yogurt if you want a lighter twist, but keep the cream cheese for body. For dairy-free, try vegan cream cheese and coconut cream, though texture will differ slightly.
Equipment Needed
- 9-inch (23 cm) springform pan – essential for easy removal of the cheesecake
- Mixing bowls – medium and large sizes for batter and espresso soak
- Electric mixer or stand mixer – makes blending cream cheese and mascarpone smooth and lump-free
- Whisk and spatula – for incorporating ingredients and folding
- Fine mesh sieve – handy for dusting cocoa powder evenly
- Measuring cups and spoons – for accuracy in baking
If you don’t have a springform pan, a regular cake pan lined with parchment paper can work, but be extra careful when unmolding. I’ve used a hand mixer when the stand mixer was in use, and it does the job, though it takes more elbow grease. Keeping your cream cheese softened and at room temperature is a game changer for smooth batter, so plan ahead!
Preparation Method
- Prepare the Espresso Soak: Brew 1 cup (240 ml) of strong espresso or coffee and let it cool to room temperature. Stir in 2 tablespoons of coffee liqueur if using. Set aside. (Approx. 10 minutes)
- Prep the Crust: Preheat your oven to 350°F (175°C). Quickly dip each ladyfinger into the espresso soak—just a second or two per side to avoid sogginess. Lay them in a single layer at the bottom of the greased 9-inch springform pan. Brush them lightly with melted butter for added richness. Bake for 8-10 minutes until slightly firm. Remove and cool. (Approx. 15 minutes)
- Make the Cheesecake Filling: In a large bowl, beat 16 oz (450 g) cream cheese and 8 oz (225 g) mascarpone cheese with 3/4 cup (150 g) sugar until smooth and creamy—no lumps! Add 3 large eggs one at a time, mixing well after each. Stir in 1 teaspoon vanilla extract and 1 tablespoon all-purpose flour. The batter should be thick but pourable. (Approx. 10 minutes)
- Assemble and Bake: Pour the cheesecake batter evenly over the espresso-soaked ladyfinger crust. Smooth the top with a spatula. Place the pan on a baking sheet and bake at 325°F (160°C) for 50-60 minutes, or until the edges are set but the center still jiggles slightly when shaken. (Approx. 1 hour)
- Cool and Chill: Turn off the oven and crack the door open. Let the cheesecake cool in the oven for 1 hour to prevent cracking. Then refrigerate for at least 6 hours, preferably overnight, to let flavors meld and texture firm up.
- Finishing Touches: Before serving, dust the top generously with unsweetened cocoa powder through a fine sieve. Optionally, sprinkle dark chocolate shavings for an elegant touch.
Tip: If the cheesecake cracks slightly, don’t sweat it—dusting cocoa and adding chocolate shavings helps disguise imperfections. The espresso soak timing matters; too long, and the ladyfingers become mushy; too short, and the coffee flavor is weak. Trust your instincts—just a quick dip is perfect.
Cooking Tips & Techniques
One of the trickiest parts is getting the cheesecake texture just right. Mixing cream cheese and mascarpone until completely smooth avoids lumps that can ruin the silky mouthfeel. Keep your ingredients at room temperature to make this easier.
Baking low and slow is key here—325°F (160°C) helps the cheesecake cook evenly without drying out. Resist the urge to open the oven door often; gentle heat means fewer cracks. Cooling it gradually in the oven before chilling prevents sudden temperature shifts that cause cracking.
For the espresso soak, I learned the hard way that soaking ladyfingers too long turns them into a soggy mess. A quick dip for 1–2 seconds per side is enough. If you prefer, you can brush the ladyfingers with espresso instead of dipping for more control.
Don’t rush chilling. The best texture and flavor develop overnight. If you’re short on time, a minimum of 6 hours is okay, but the cheesecake tastes more harmonious with longer chilling.
If you want a glossy finish, a thin layer of warmed apricot jam (strained) brushed on top after dusting cocoa can add a nice sheen and subtle sweetness—though it’s not traditional.
Variations & Adaptations
- Alcohol-Free Version: Omit the coffee liqueur and use extra espresso or strong coffee for soaking. You can add a splash of vanilla extract to the soak for added aroma.
- Gluten-Free Adaptation: Replace ladyfingers with gluten-free sponge or almond flour cookies. Adjust soaking time since gluten-free options can be more delicate.
- Decadent Chocolate Tiramisu Cheesecake: Add 1/3 cup (35 g) cocoa powder to the cheesecake batter and sprinkle mini chocolate chips between layers for a chocolate twist.
- Seasonal Twist: Swap espresso soak with a spiced chai tea soak for a warm, aromatic variation during cooler months.
- Personal Variation: I once swapped the ladyfingers for thin layers of homemade almond cake soaked in espresso, which added a subtle nuttiness that paired beautifully with the creamy filling.
Serving & Storage Suggestions
This tiramisu cheesecake is best served chilled but can benefit from sitting at room temperature for 10-15 minutes before slicing to soften slightly for the perfect bite. For presentation, dust with extra cocoa and add a few chocolate curls or even a fresh mint leaf for contrast.
It pairs wonderfully with a cup of freshly brewed espresso or a light dessert wine like Moscato. Consider serving alongside fresh berries or a dollop of whipped cream to balance the richness.
Store leftovers covered tightly in the refrigerator for up to 4 days. The flavors deepen over time, and the texture becomes even more luscious. You can freeze individual slices wrapped well for up to 2 months—just thaw overnight in the fridge before serving.
Reheating isn’t recommended as it affects texture, but a quick warm spoonful of mascarpone on the side can mimic that cozy warmth if needed.
Nutritional Information & Benefits
Per serving (based on 12 slices): approximately 350 calories, 25g fat, 25g carbohydrates, and 6g protein. The recipe is rich due to cream cheese and mascarpone but provides calcium and protein.
Espresso adds negligible calories but contributes antioxidants and a natural energy boost. Using real mascarpone and cream cheese ensures a creamy texture without artificial fillers.
For those watching carbs, this dessert is moderate, but swapping ladyfingers for almond flour crust can reduce carbs significantly. Be mindful of caffeine content due to espresso soak, especially for children or sensitive individuals.
From a wellness perspective, this dessert balances indulgence with quality ingredients, making it a satisfying treat that feels special without unnecessary additives or preservatives.
Conclusion
This Decadent Tiramisu Cheesecake with Espresso Soak is the kind of dessert that feels luxurious yet approachable—perfect for anyone who loves coffee-flavored sweets but wants something with more depth and creaminess. It’s a recipe you can customize and make your own, whether you’re craving a classic tiramisu vibe or something a little different.
I love this cheesecake because it’s a reminder that some of the best dishes come from happy accidents and a willingness to experiment. It’s also a great way to impress friends or family without spending hours in the kitchen. If you’ve enjoyed rich desserts like the Baileys Irish cream cheesecake, you’ll find this recipe a worthy addition to your collection.
Feel free to leave your thoughts, ask questions, or share your own spin on this recipe—I’m excited to hear how you make it your own. Now, go ahead and treat yourself to a slice of creamy, coffee-soaked bliss.
FAQs
Can I make this tiramisu cheesecake ahead of time?
Yes! In fact, chilling it overnight is best for flavor and texture. You can prepare it up to 2 days in advance and keep it refrigerated until serving.
What can I use instead of ladyfingers?
You can substitute with sponge cake, pound cake, or gluten-free cookies. Just soak them briefly in the espresso soak to avoid sogginess.
How do I prevent cracks in my cheesecake?
Use room temperature ingredients, bake at a low temperature, and avoid opening the oven door during baking. Cooling the cheesecake gradually in the oven before refrigerating helps too.
Can I make this recipe without alcohol?
Absolutely! Simply omit the coffee liqueur from the espresso soak and add extra strong coffee or a splash of vanilla extract for flavor.
Is it possible to freeze leftover tiramisu cheesecake?
Yes, wrap individual slices tightly and freeze for up to 2 months. Thaw overnight in the fridge before enjoying for best texture.
Pin This Recipe!
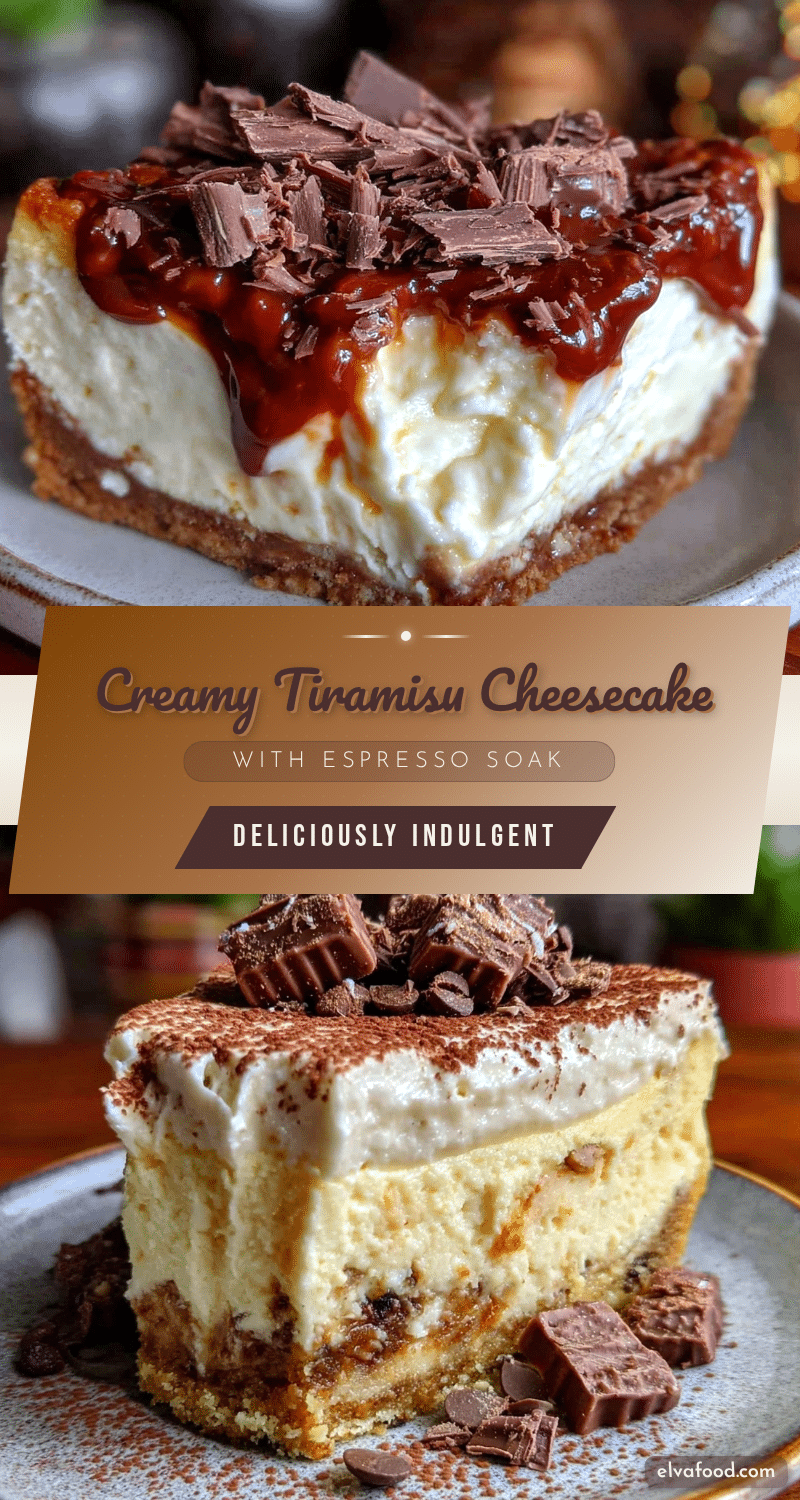
Decadent Tiramisu Cheesecake Recipe with Easy Espresso Soak
A rich and creamy tiramisu cheesecake combining espresso-soaked ladyfingers with a velvety mascarpone and cream cheese filling. Perfect for coffee lovers seeking a comforting yet sophisticated dessert.
- Prep Time: 25 minutes
- Cook Time: 1 hour
- Total Time: 7 hours 25 minutes
- Yield: 12 servings 1x
- Category: Dessert
- Cuisine: Italian
Ingredients
- 1 cup (240 ml) brewed espresso or strong coffee, cooled
- 2 tablespoons coffee liqueur (optional)
- 24 ladyfingers (savoiardi), store-bought or homemade
- 3 tablespoons unsalted butter, melted
- 16 oz (450 g) cream cheese, softened
- 8 oz (225 g) mascarpone cheese, room temperature
- 3/4 cup (150 g) granulated sugar
- 3 large eggs, room temperature
- 1 teaspoon pure vanilla extract
- 1 tablespoon all-purpose flour
- Unsweetened cocoa powder, for dusting
- Dark chocolate shavings or curls (optional)
Instructions
- Prepare the Espresso Soak: Brew 1 cup (240 ml) of strong espresso or coffee and let it cool to room temperature. Stir in 2 tablespoons of coffee liqueur if using. Set aside.
- Prep the Crust: Preheat oven to 350°F (175°C). Quickly dip each ladyfinger into the espresso soak for 1-2 seconds per side to avoid sogginess. Lay them in a single layer at the bottom of a greased 9-inch springform pan. Brush lightly with melted butter. Bake for 8-10 minutes until slightly firm. Remove and cool.
- Make the Cheesecake Filling: In a large bowl, beat cream cheese and mascarpone with sugar until smooth and creamy. Add eggs one at a time, mixing well after each. Stir in vanilla extract and flour until batter is thick but pourable.
- Assemble and Bake: Pour cheesecake batter evenly over espresso-soaked ladyfinger crust. Smooth the top. Place pan on a baking sheet and bake at 325°F (160°C) for 50-60 minutes, until edges are set but center jiggles slightly.
- Cool and Chill: Turn off oven and crack door open. Let cheesecake cool in oven for 1 hour. Refrigerate at least 6 hours or overnight to firm up and meld flavors.
- Finishing Touches: Before serving, dust top generously with unsweetened cocoa powder through a fine sieve. Optionally, sprinkle dark chocolate shavings for garnish.
Notes
Use room temperature ingredients for smooth batter. Dip ladyfingers quickly to avoid sogginess. Bake at low temperature (325°F) to prevent cracking. Cool cheesecake gradually in oven before chilling. For a glossy finish, brush warmed apricot jam after dusting cocoa. Variations include alcohol-free, gluten-free, and chocolate twists.
Nutrition
- Serving Size: 1 slice (1/12th of c
- Calories: 350
- Fat: 25
- Carbohydrates: 25
- Protein: 6
Keywords: tiramisu cheesecake, espresso soak, coffee dessert, creamy cheesecake, easy tiramisu, mascarpone cheesecake, ladyfinger dessert