I burned the first batch of pumpkin snickerdoodles so badly my smoke alarm has never quite recovered. It was 2018, I was trying to impress my sister-in-law who claims she doesn’t like pumpkin desserts, and I got distracted by my toddler painting the dog with yogurt. The cookies came out flat, bitter, and honestly, they looked like sad orange pancakes. But here’s the thing—I scraped one off the sheet anyway, and underneath that burnt exterior, the center was soft, spicy, and exactly what I’d been chasing. That moment taught me something important about moisture content and oven temperature that no recipe blog had ever mentioned.
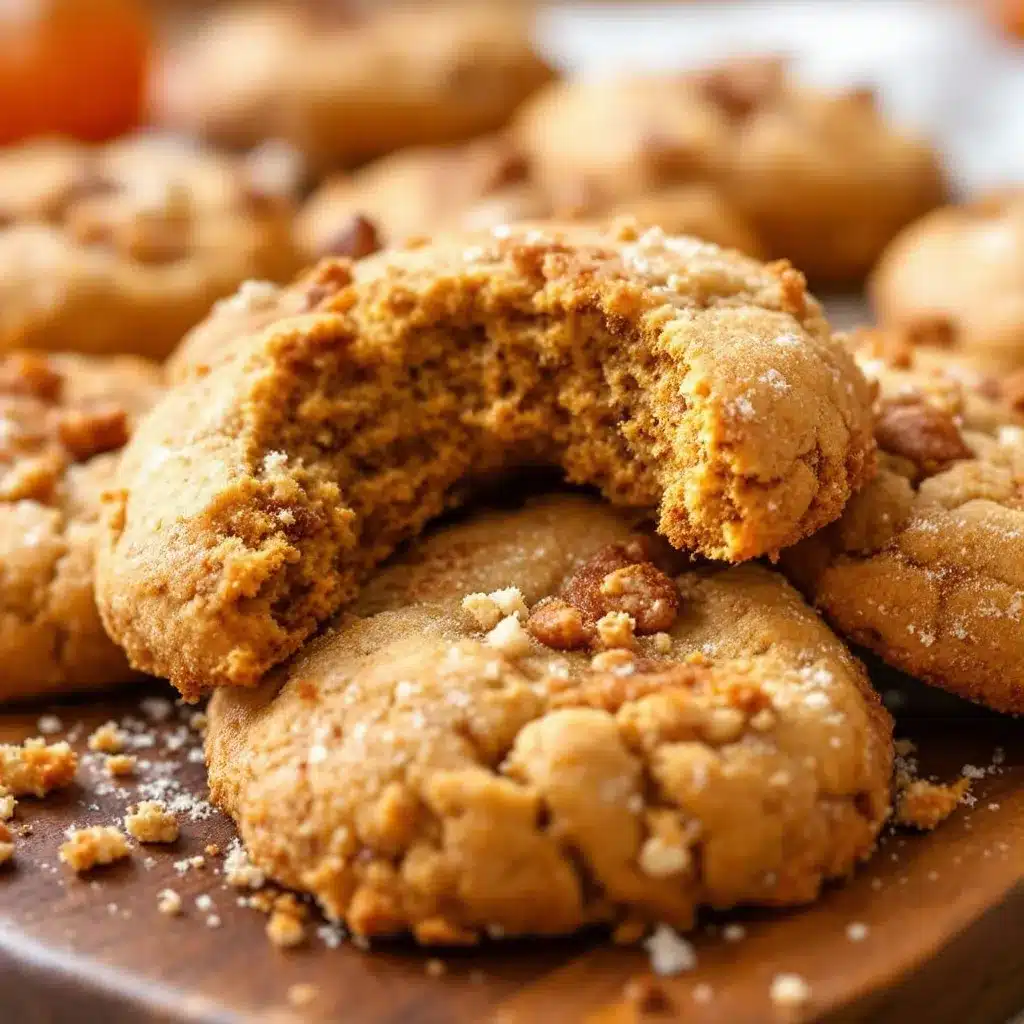
I spent the next three weekends making batch after batch, tweaking ratios, testing different flour blends, and annoying my neighbors with endless cookie deliveries. Some were too cakey. Some spread into puddles. One batch tasted more like pumpkin pie filling than a cookie you could actually hold. But eventually, I cracked it. These chewy pumpkin snickerdoodle cookies have that perfect tension—crispy cinnamon-sugar edges giving way to a soft, almost fudgy center that tastes like autumn in cookie form. The pumpkin doesn’t overwhelm; it just adds this gentle warmth and keeps everything impossibly tender.
What I love most is how these cookies make people who swear they’re “not pumpkin people” reach for a second one. That first batch failure turned into something I’m genuinely proud of. And now I’m sharing every trick I learned along the way.
Why You’ll Love This Recipe
These aren’t your average pumpkin cookies. Most pumpkin cookie recipes turn out cakey and dry because the pumpkin adds so much moisture that bakers compensate with too much flour. I tested this recipe seven times to get that perfect chewy texture you usually only get from classic snickerdoodles.
- Perfectly Chewy Texture : The secret is reducing the pumpkin puree slightly and using a specific fat ratio that keeps these cookies soft for days. No cakey nonsense here.
- Simple Pantry Ingredients : You probably have everything except maybe the pumpkin puree. No weird specialty flours or hard-to-find extracts.
- Great for Fall Baking : These disappear at Thanksgiving, Halloween parties, and cozy weekend baking sessions. I’ve made them for three different Friendsgiving gatherings and they’re always the first plate to empty.
- Crowd-Pleaser Status : My neighbor who “doesn’t do pumpkin” ate four. My picky nephew asked for the recipe. Even my husband, who usually prefers chocolate desserts, said these might be his new favorite cookie.
- Freezer-Friendly : The dough freezes beautifully, so you can bake fresh cookies whenever the craving hits without making a whole batch.
These cookies are different because they actually taste like snickerdoodles first and pumpkin second. The cream of tartar gives that signature tangy snickerdoodle flavor, while the pumpkin adds moisture and warmth without stealing the show. It’s the kind of cookie that makes you close your eyes after the first bite—not because it’s fancy, but because it just tastes right.
What Ingredients You Will Need
This recipe uses simple, wholesome ingredients that work together to create that perfect chewy texture and warm spiced flavor. Most of these are probably already in your pantry, which makes these cookies dangerously easy to whip up on a whim.
- Unsalted butter, softened (1 cup / 2 sticks) – I prefer using unsalted so I can control the salt level. Let it sit out for about an hour until it’s soft but not melting. Land O’Lakes is my go-to for consistent butterfat content.
- Granulated sugar (1 cup / 200g) – Regular white sugar gives these cookies their structure and helps create those crispy edges.
- Light brown sugar, packed (½ cup / 100g) – This adds moisture and a hint of molasses flavor that pairs beautifully with the pumpkin and spices.
- Pumpkin puree (½ cup / 120g) – Not pumpkin pie filling! Make sure you grab 100% pure pumpkin puree. Libby’s is the most reliable brand for consistent moisture content. I actually blot mine with a paper towel to remove excess water before mixing.
- Large egg (1, room temperature) – Room temperature egg incorporates more evenly into the butter mixture.
- Vanilla extract (1½ teaspoons) – Pure vanilla makes a difference here. Imitation works in a pinch, but pure adds a deeper flavor.
- All-purpose flour (2¾ cups / 345g) – Spoon and level your flour. Scooping directly from the bag packs in too much flour and makes dry cookies.
- Cream of tartar (2 teaspoons) – This is non-negotiable for authentic snickerdoodle flavor. It gives that signature tanginess.
- Baking soda (1 teaspoon) – Helps the cookies spread just enough.
- Ground cinnamon (2 teaspoons) – Divided between the dough and the coating.
- Ground nutmeg (½ teaspoon) – Freshly grated if you have it, but pre-ground works fine.
- Ground ginger (½ teaspoon) – Adds warmth without heat.
- Ground cloves (¼ teaspoon) – Just a pinch for depth.
- Salt (½ teaspoon) – Balances the sweetness and enhances all the spices.
- For the cinnamon-sugar coating : Granulated sugar (¼ cup / 50g) and ground cinnamon (2 tablespoons)
For the best texture, use a kitchen scale if you have one. Measuring flour by weight is more accurate and makes a noticeable difference in cookie texture. If you’re using a gluten-free flour blend, look for one that includes xanthan gum—I’ve had good results with Bob’s Red Mill 1-to-1 Baking Flour.
Equipment Needed
You don’t need fancy equipment for these cookies, which is part of their charm. Here’s what you’ll need:
- Large mixing bowls (at least 2) – One for wet ingredients, one for dry.
- Electric hand mixer or stand mixer – A hand mixer works perfectly. I actually prefer it because there’s less cleanup.
- Measuring cups and spoons – Accurate measurements matter, especially for the flour and cream of tartar.
- Kitchen scale (optional but recommended) – Takes the guesswork out of flour measurement.
- Rubber spatula – For scraping down the bowl and folding ingredients.
- Baking sheets (2-3) – Light-colored aluminum sheets give the most even browning. Dark sheets can over-brown the bottoms.
- Parchment paper or silicone baking mats – Parchment paper is cheaper and works great. Silicone mats are reusable and give consistent results.
- Cooling rack – Essential for preventing soggy bottoms.
- Small bowl – For the cinnamon-sugar coating.
- Cookie scoop (1½ tablespoon size) – Makes uniform cookies that bake evenly. A #40 scoop is perfect.
My best tip for equipment: invest in good parchment paper. The cheap stuff curls up and doesn’t lay flat. I use Reynolds Kitchens brand and it never lets me down. Also, if you’re using silicone mats, reduce your baking time by about a minute since they insulate the bottom of the cookies slightly.
Preparation Method
- Preheat your oven to 350°F (175°C) and line two baking sheets with parchment paper. Make sure your oven rack is in the middle position. I always let my oven preheat for at least 15 minutes to ensure even temperature.
- Prepare the pumpkin puree – Measure out ½ cup of pumpkin puree and spread it on a paper towel-lined plate. Place another paper towel on top and press gently to absorb excess moisture. Let it sit while you prepare the other ingredients. This step is crucial for chewy cookies—too much moisture makes them cakey.
- Cream the butter and sugars – In a large mixing bowl, beat the softened butter, granulated sugar, and brown sugar together on medium speed for 3-4 minutes until light and fluffy. You want it to look pale and aerated. Scrape down the sides of the bowl halfway through.
- Add the wet ingredients – Beat in the blotted pumpkin puree, room temperature egg, and vanilla extract on medium speed until fully combined, about 1 minute. The mixture might look slightly curdled at this point—that’s normal and won’t affect the final cookies.
- Whisk the dry ingredients – In a separate bowl, whisk together the all-purpose flour, cream of tartar, baking soda, 1 teaspoon cinnamon, nutmeg, ginger, cloves, and salt. Whisking ensures the leavening agents and spices are evenly distributed. I count 20 whisks to be thorough.
- Combine wet and dry ingredients – Gradually add the dry ingredients to the wet mixture, mixing on low speed just until no streaks of flour remain. Stop mixing as soon as the dough comes together. Overmixing develops gluten and makes tough cookies. The dough will be soft and slightly sticky—that’s what you want.
- Chill the dough – Cover the bowl with plastic wrap and refrigerate for at least 30 minutes, or up to 3 days. Chilling is not optional here. It prevents the cookies from spreading too much and allows the flavors to meld. I’ve tested this without chilling and the cookies turn into flat discs every time.
- Prepare the cinnamon-sugar coating – In a small bowl, mix together ¼ cup granulated sugar and 2 tablespoons cinnamon. Stir until evenly combined.
- Shape and coat the cookies – Using a 1½ tablespoon cookie scoop, portion the chilled dough into balls. Roll each ball between your palms until smooth, then roll generously in the cinnamon-sugar mixture. Place on the prepared baking sheets about 2 inches apart. I fit 12 cookies per sheet.
- Bake – Bake one sheet at a time for 10-12 minutes. The cookies should look puffed, slightly cracked on top, and the edges should be set but the centers will still look soft and slightly underdone. This is exactly what you want. For chewier cookies, pull them at 10 minutes. For slightly crispier edges, go to 12.
- Cool properly – Let the cookies cool on the baking sheet for exactly 5 minutes. This allows them to set without overbaking. Then transfer to a wire cooling rack to cool completely. The centers will continue to set as they cool.
- Repeat – If you only have one or two baking sheets, let them cool completely between batches. Placing dough on a hot sheet causes premature spreading.
One sensory cue to watch for: when the cookies are done, your kitchen should smell like a pumpkin spice candle exploded—warm cinnamon, nutty butter, and sweet pumpkin. The edges will be lightly golden while the centers remain pale and soft.
Cooking Tips & Techniques
After burning, flattening, and otherwise destroying many batches of these cookies, I’ve learned a few things the hard way. Let me save you the trouble.
Don’t skip blotting the pumpkin. I know it seems fussy, but pumpkin puree is basically pumpkin water. If you add it straight from the can, your cookies will spread into thin, cakey disks. That extra 30 seconds of blotting is the difference between chewy and sad.
Measure your flour correctly. Spoon it into your measuring cup and level it off with a knife. Scooping directly from the bag can add up to 25% more flour, which gives you dry, crumbly cookies. I learned this after a particularly disappointing batch that tasted more like shortbread than snickerdoodles.
Cream of tartar is not optional. It’s what gives snickerdoodles their signature tang and also helps stabilize the cookie structure. If you don’t have it, these will just be pumpkin sugar cookies—still good, but not the same. Don’t substitute baking powder either; I tried that once and the texture was all wrong.
Chill the dough thoroughly. I know you want cookies now, but warm pumpkin cookie dough is basically pancake batter. It spreads everywhere. Thirty minutes is the minimum, but overnight is better. The dough actually improves with age as the spices meld together.
Rotate your baking sheet halfway through. Most ovens have hot spots. Turning the sheet at the 5-minute mark ensures even baking. I ruined an entire batch because I forgot this simple step and the front row came out dark while the back row was still pale.
Underbake slightly. Pull the cookies when the centers still look soft and slightly puffed. They’ll continue baking from residual heat on the hot sheet. If you wait until they look fully done, they’ll be overbaked and dry.
Variations & Adaptations
One of the best things about this recipe is how easily it adapts to different tastes and dietary needs. Here are some variations I’ve tested and loved:
Gluten-Free Version : Substitute the all-purpose flour with a 1-to-1 gluten-free baking blend that contains xanthan gum. Bob’s Red Mill works perfectly. Add an extra tablespoon of flour since gluten-free blends tend to absorb less moisture. The texture will be slightly more tender but still chewy.
Dairy-Free Option : Use vegan butter sticks (not margarine in a tub, which has too much water). I’ve had great results with Miyoko’s European Style Cultured Vegan Butter. The cookies won’t spread quite as much, so flatten them slightly before baking.
Spice It Up : Add ¼ teaspoon cardamom or allspice for a more complex flavor profile. I made a batch with cardamom for a holiday party and they disappeared faster than the original version.
Pumpkin Chocolate Chip Snickerdoodles : Fold in ½ cup of white chocolate chips or dark chocolate chunks after mixing the dough. The chocolate adds a nice contrast to the warm spices. My husband prefers this version, and honestly, I do too sometimes.
Vegan Adaptation : Replace the egg with a flax egg (1 tablespoon ground flaxseed mixed with 3 tablespoons water, let sit for 5 minutes). Use vegan butter and ensure your sugar is vegan-friendly. The texture will be slightly less tender but still delicious.
Extra Cinnamon Coating : Double the cinnamon-sugar mixture and give each cookie a second roll after they’ve cooled for 5 minutes. This creates a thicker, crunchier coating that’s absolutely addictive.
If you enjoy adapting classic cookie recipes, you might also love our rainbow pot of gold cupcakes for a fun, colorful twist on traditional baking.
Serving & Storage Suggestions
These chewy pumpkin snickerdoodle cookies are best served slightly warm, when the centers are still soft and the cinnamon-sugar coating is fragrant. Let them cool for about 10 minutes after baking if you can wait that long—the texture really sets during this time.
For the ultimate cookie experience, serve them with a cold glass of milk, a warm cup of chai tea, or a creamy homemade horchata for a cinnamon-forward pairing that complements the spices beautifully.
Storage Instructions:
- Room Temperature : Store in an airtight container at room temperature for up to 5 days. Place a slice of bread in the container to keep them soft—the cookies will absorb the moisture. Replace the bread every other day.
- Refrigerator : These cookies actually stay fresh longer in the fridge, up to 7 days. Let them come to room temperature before serving for the best texture.
- Freezer (baked cookies) : Freeze in a single layer on a baking sheet, then transfer to a freezer-safe bag for up to 3 months. Thaw at room temperature for about 30 minutes.
- Freezer (raw dough) : Scoop the dough into balls, roll in cinnamon-sugar, and freeze on a baking sheet. Once frozen, transfer to a freezer bag. Bake from frozen, adding 2-3 minutes to the baking time.
Reheating: Pop a cookie in the microwave for 8-10 seconds to get that fresh-from-the-oven softness. For a crispier exterior, reheat in a 300°F oven for 3-4 minutes.
The flavors actually deepen after a day or two. I honestly prefer these cookies on day two, when the pumpkin and spices have had time to meld together. If you’re making them for a gathering, bake them a day ahead for maximum flavor.
For a cozy fall dessert spread, serve these alongside our Baileys Irish cream cheesecake for a decadent dessert table that’ll impress any crowd.
Nutritional Information & Benefits
Here’s the approximate nutritional breakdown per cookie (based on 36 cookies):
| Nutrient | Amount per Cookie |
|---|---|
| Calories | 145 |
| Total Fat | 6g |
| Saturated Fat | 3.5g |
| Cholesterol | 18mg |
| Sodium | 95mg |
| Total Carbohydrates | 21g |
| Dietary Fiber | 1g |
| Sugars | 12g |
| Protein | 2g |
| Vitamin A | 15% DV |
| Iron | 4% DV |
Pumpkin is packed with vitamin A, which supports eye health and immune function. The cinnamon in these cookies may help regulate blood sugar levels, while the cream of tartar provides a small amount of potassium. These cookies are not health food, but they’re certainly not the worst thing you could snack on either.
Dietary Considerations:
- Contains: Wheat (gluten), dairy, eggs
- Can be made gluten-free, dairy-free, or vegan with the substitutions listed above
- These cookies are vegetarian-friendly
I believe in balance—life’s too short to skip dessert, but it’s also too short to eat cookies that don’t bring you joy. These hit that sweet spot between indulgence and something you can feel reasonably good about sharing with your family.
Frequently Asked Questions
Why did my pumpkin snickerdoodle cookies turn out cakey instead of chewy?
The most common reason is too much moisture from the pumpkin puree. Make sure you blot the pumpkin with paper towels to remove excess water before adding it to the dough. Also, check that you’re measuring your flour correctly—scooping directly from the bag can add too much flour, which makes cookies dry and cakey.
Can I make these cookies without cream of tartar?
Technically yes, but they won’t be true snickerdoodles. Cream of tartar gives these cookies their signature tangy flavor and helps create that chewy texture. If you don’t have it, you can substitute 2 teaspoons of lemon juice or white vinegar mixed with the wet ingredients, but the flavor will be different. Honestly, just buy cream of tartar—it’s cheap and lasts forever in your pantry.
How do I keep my pumpkin snickerdoodles from spreading too much?
Chill the dough for at least 30 minutes before baking. Warm pumpkin cookie dough is very soft and will spread into flat discs if you skip this step. Also, make sure your butter isn’t too soft—it should be room temperature, not melted or greasy. If your kitchen is warm, pop the shaped cookie balls in the fridge for 10 minutes before baking.
Can I use pumpkin pie spice instead of individual spices?
Absolutely! Substitute 2 teaspoons of pumpkin pie spice for the cinnamon, nutmeg, ginger, and cloves in the dough. You’ll still need the extra cinnamon for the coating. Pumpkin pie spice blends vary by brand, so taste your dough and adjust if needed. I’ve used both and honestly can’t tell the difference in the final cookie.
How long do these cookies stay fresh?
Stored in an airtight container at room temperature, these cookies stay fresh for up to 5 days. They actually taste better on day two when the flavors have melded. For longer storage, freeze the baked cookies for up to 3 months or the raw dough for up to 3 months. If your cookies start to dry out, add a slice of bread to the container to restore moisture.
Conclusion
These chewy pumpkin snickerdoodle cookies are everything I want in a fall dessert—warm spices, soft centers, crispy edges, and that nostalgic snickerdoodle tang that takes me back to my grandmother’s kitchen. They’re forgiving enough for beginner bakers but special enough to impress at any holiday gathering.
I’ve made these cookies for countless occasions, and they never fail to spark conversation. People always ask what makes them so soft, or why they taste different from other pumpkin cookies. That’s when I share the secret—blotting the pumpkin, chilling the dough, and using real cream of tartar. It’s those little details that turn a good cookie into a great one.
Whether you’re baking for a Thanksgiving potluck, a Halloween party, or just because the weather turned cool and you’re craving something cozy, these cookies deliver. They’re the kind of recipe that becomes a tradition—the one your family requests year after year.
I’d love to hear how these turn out for you! Drop a comment below and let me know if you tried any variations, or tag me in your photos if you share them online. Happy baking, friends—may your cookies be chewy, your cinnamon-sugar coating generous, and your kitchen smell like autumn.
If you’re looking for more fall-inspired treats, don’t miss our mini lemon blueberry cheesecakes for a bright, fruity contrast to all those warm spices. And for savory options to balance out all this sugar, our easy lo mein noodles make a perfect weeknight dinner alongside a batch of freshly baked cookies for dessert.
Pin This Recipe!
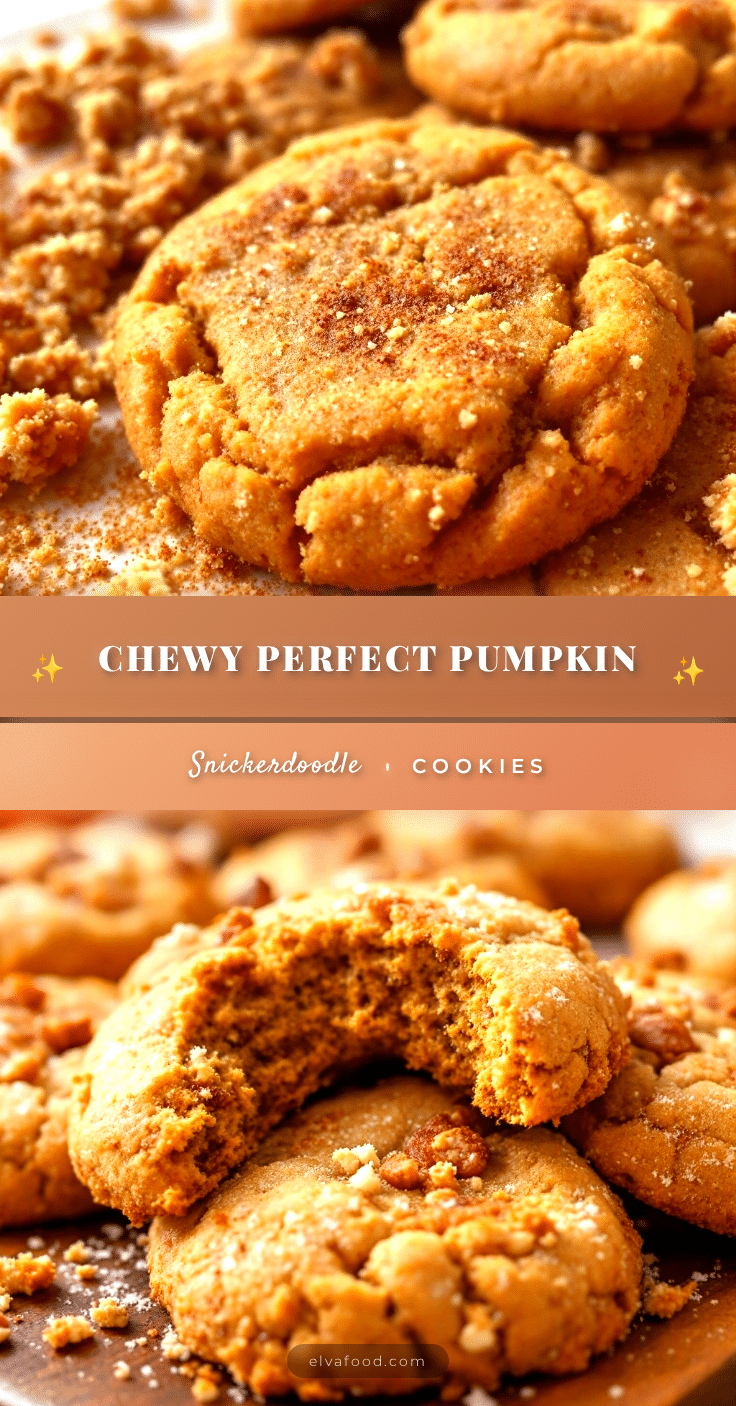
Best Chewy Pumpkin Snickerdoodle Cookies Recipe
These chewy pumpkin snickerdoodle cookies have crispy cinnamon-sugar edges and a soft, almost fudgy center. The pumpkin adds gentle warmth and keeps them tender, making even self-proclaimed ‘non-pumpkin people’ reach for seconds.
- Prep Time: 15 minutes
- Cook Time: 10-12 minutes per batch
- Total Time: 1 hour (including chilling)
- Yield: 36 cookies 1x
- Category: Dessert
- Cuisine: American
Ingredients
- 1 cup (2 sticks) unsalted butter, softened
- 1 cup (200g) granulated sugar
- ½ cup (100g) light brown sugar, packed
- ½ cup (120g) pumpkin puree (blotted)
- 1 large egg, room temperature
- 1½ teaspoons vanilla extract
- 2¾ cups (345g) all-purpose flour
- 2 teaspoons cream of tartar
- 1 teaspoon baking soda
- 2 teaspoons ground cinnamon (divided)
- ½ teaspoon ground nutmeg
- ½ teaspoon ground ginger
- ¼ teaspoon ground cloves
- ½ teaspoon salt
- For the cinnamon-sugar coating: ¼ cup (50g) granulated sugar and 2 tablespoons ground cinnamon
Instructions
- Preheat oven to 350°F (175°C) and line two baking sheets with parchment paper. Ensure oven rack is in the middle position.
- Measure ½ cup pumpkin puree and spread on a paper towel-lined plate. Place another paper towel on top and press gently to absorb excess moisture. Let sit while preparing other ingredients.
- In a large mixing bowl, beat softened butter, granulated sugar, and brown sugar together on medium speed for 3-4 minutes until light and fluffy. Scrape down sides halfway through.
- Beat in blotted pumpkin puree, room temperature egg, and vanilla extract on medium speed until fully combined, about 1 minute.
- In a separate bowl, whisk together flour, cream of tartar, baking soda, 1 teaspoon cinnamon, nutmeg, ginger, cloves, and salt until evenly distributed.
- Gradually add dry ingredients to wet mixture, mixing on low speed just until no streaks of flour remain. Dough will be soft and slightly sticky.
- Cover bowl with plastic wrap and refrigerate for at least 30 minutes, or up to 3 days.
- In a small bowl, mix together ¼ cup granulated sugar and 2 tablespoons cinnamon for the coating.
- Using a 1½ tablespoon cookie scoop, portion chilled dough into balls. Roll each ball smooth, then roll generously in cinnamon-sugar mixture. Place on prepared baking sheets about 2 inches apart.
- Bake one sheet at a time for 10-12 minutes. Cookies should look puffed, slightly cracked on top, with edges set but centers still soft.
- Let cookies cool on baking sheet for exactly 5 minutes, then transfer to a wire cooling rack to cool completely.
- Repeat with remaining dough, letting baking sheets cool completely between batches.
Notes
Don’t skip blotting the pumpkin—it prevents cakey cookies. Cream of tartar is non-negotiable for authentic snickerdoodle flavor. Chill dough thoroughly to prevent spreading. Underbake slightly for chewy texture. For gluten-free, use a 1-to-1 gluten-free flour blend with xanthan gum. For dairy-free, use vegan butter sticks. For vegan, use a flax egg and vegan butter.
Nutrition
- Serving Size: 1 cookie
- Calories: 145
- Sugar: 12
- Sodium: 95
- Fat: 6
- Saturated Fat: 3.5
- Carbohydrates: 21
- Fiber: 1
- Protein: 2
Keywords: pumpkin snickerdoodle, chewy pumpkin cookies, fall baking, snickerdoodle recipe, pumpkin dessert, easy cookie recipe


