That first crack of a graham cracker sleeve — you know the sound, that sharp snap followed by the crumble — still takes me straight to my grandmother’s kitchen in early October. She’d have the radio playing low, some old jazz station, and the counter would already be dusted with flour even though nothing in her kitchen ever called for it. I was maybe nine, sitting on a stool that wobbled, watching her crush those crackers with a rolling pin like she was settling an old score. She never measured anything, not really. A pour of melted butter here, a pinch of cinnamon there, and somehow it always tasted exactly right. That buttery, sandy crust became the foundation for everything good in my book, and years later, it’s still the first thing I think of when pumpkin season rolls around. These Best Mini Pumpkin Cheesecake Bars are my grown-up nod to those afternoons — a little more precise, sure, but carrying the same quiet comfort. The filling is rich and spiced just right, the crust stays crisp, and each little square feels like a small, earned moment of peace. Honestly, I think she’d approve.
Why You’ll Love This Recipe
These aren’t just another pumpkin dessert you’ll forget by Thanksgiving. These mini cheesecake bars hit that sweet spot between impressive and completely doable on a Tuesday night.
- Perfectly Portioned: No slicing struggles, no uneven pieces. Each bar is its own little treat, which makes them ideal for parties, bake sales, or just keeping yourself from eating an entire full-sized cheesecake (speaking from experience here).
- Buttery Graham Crust That Stays Crunchy: The crust is the unsung hero here. It’s pressed firmly, pre-baked just enough, and stays crisp even after a day in the fridge. No soggy bottoms — I promise.
- Rich, Creamy Pumpkin Filling: We’re using real pumpkin puree, a blend of warm spices, and cream cheese that’s been properly softened. The result is a filling that’s luscious without being heavy, with that classic pumpkin pie flavor but a much smoother texture.
- No Water Bath Needed: Full-sized cheesecakes can be fussy with those water baths and cracked tops. These mini bars bake up evenly and beautifully without any of that hassle. It’s a stress-free way to get that cheesecake fix.
- Make-Ahead Friendly: In fact, they taste even better the next day. The flavors meld together, the texture sets perfectly, and you get to cross dessert off your list a full day before the party. That’s a win in my book.
What really sets these bars apart is the balance. The crust isn’t too sweet, the filling isn’t too dense, and the pumpkin flavor is front and center without being overpowering. I’ve tested this recipe about five times now — adjusting the spice ratio, tweaking the bake time, even trying different cream cheese brands — and this version is the one that made my husband say, “Okay, these are actually better than the full cheesecake.” And he’s not easy to impress.
What Ingredients You Will Need
This recipe keeps things simple with ingredients you can find at any grocery store. No special orders, no obscure spices — just honest, good-quality staples that come together beautifully.
For the Buttery Graham Crust
- Graham cracker crumbs (1 ½ cups / about 12 full sheets) — You can buy pre-crushed crumbs, but I honestly prefer crushing my own. The texture is more uneven, which gives the crust a little character. Pulse them in a food processor or seal them in a bag and go to town with a rolling pin. It’s oddly satisfying.
- Unsalted butter (6 tablespoons, melted) — I use unsalted so I can control the salt level. Make sure it’s fully melted but not boiling hot, or it’ll make the crumbs clumpy.
- Granulated sugar (2 tablespoons) — Just enough to sweeten the crust without making it candy-like.
- Cinnamon (¼ teaspoon) — A whisper of warmth that hints at what’s coming in the filling.
- Salt (a pinch) — Don’t skip this. Salt in the crust balances the sweetness of the filling and keeps everything from tasting flat.
For the Pumpkin Cheesecake Filling
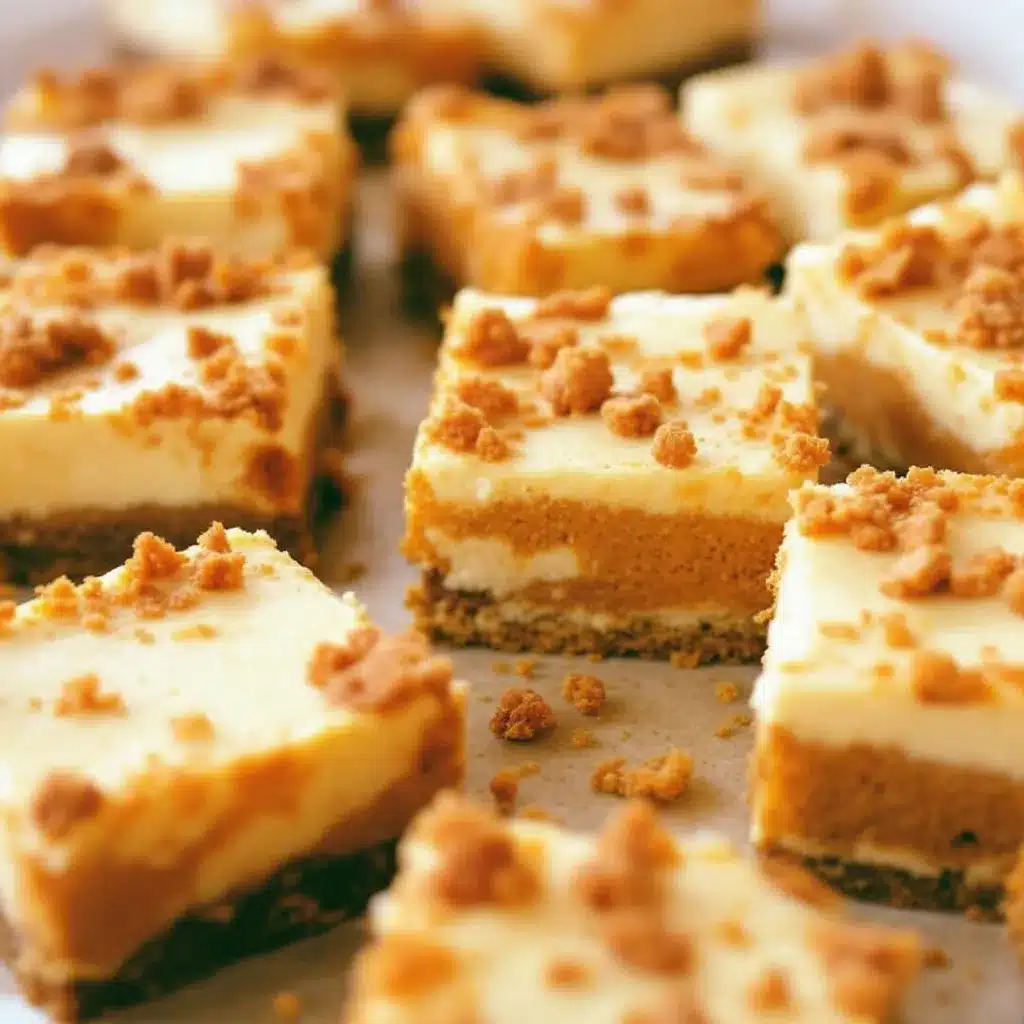
- Cream cheese (16 ounces, full-fat, softened to room temperature) — This is non-negotiable. Low-fat cream cheese has a higher water content and will make your filling runny. Let it sit on the counter for at least an hour before you start. I’ve made the mistake of rushing this step, and the lumps are a dead giveaway.
- Granulated sugar (¾ cup) — Sweet enough to balance the tang of the cream cheese and the earthiness of the pumpkin.
- Pumpkin puree (1 cup, not pumpkin pie filling) — Make sure you grab the 100% pure pumpkin, not the pre-sweetened stuff. Libby’s is my go-to, but any brand works as long as it’s pure pumpkin.
- Sour cream (¼ cup, room temperature) — This adds a subtle tang and helps keep the filling silky smooth. Greek yogurt works as a substitute if that’s what you have on hand.
- Large eggs (2, room temperature) — Cold eggs will seize the cream cheese mixture and leave you with a lumpy batter. Crack them into a bowl and let them sit for 15 minutes if you forgot to take them out ahead of time.
- Vanilla extract (1 teaspoon) — Pure vanilla extract makes a difference here. The artificial stuff has a chemical aftertaste that doesn’t play well with pumpkin.
- Pumpkin pie spice (1 ½ teaspoons) — You can use store-bought or make your own with cinnamon, nutmeg, ginger, and a tiny pinch of cloves. I actually prefer making my own because I like a little extra ginger.
- Cinnamon (½ teaspoon) — Because there’s no such thing as too much cinnamon in a pumpkin dessert.
- Salt (¼ teaspoon) — Again, salt is your friend. It sharpens all the flavors and keeps the sweetness in check.
Equipment Needed
You don’t need a fancy kitchen to pull these off, but a few key tools will make the process smoother.
- 8×8-inch baking pan — This is the perfect size for 16 mini bars. A 9×9 works too, but your bars will be slightly thinner and may need a minute or two less in the oven.
- Parchment paper — Line the pan with two overlapping strips so you can lift the entire block of cheesecake out cleanly. Trust me on this one.
- Food processor or zip-top bag and rolling pin — For crushing the graham crackers. The food processor is faster, but the bag method is more therapeutic.
- Electric hand mixer or stand mixer — You need something with a bit of power to get the cream cheese smooth. A whisk and a strong arm could work, but you’ll be there a while.
- Large mixing bowls — One for the crust, one for the filling.
- Rubber spatula — For scraping down the sides of the bowl and spreading the filling evenly.
- Measuring cups and spoons — Precision matters in baking, especially with the spices.
If you don’t have a food processor, no worries. I’ve crushed plenty of graham crackers with a rolling pin and a bit of elbow grease. The texture ends up a little more rustic, which I actually prefer. Just make sure there aren’t any large chunks left, or the crust won’t hold together.
Preparation Method
Let’s get baking. Take your time with each step, and you’ll be rewarded with perfectly creamy, beautifully spiced mini pumpkin cheesecake bars.
Step 1: Prep Your Pan and Preheat
Preheat your oven to 325°F (160°C). Line your 8×8-inch baking pan with parchment paper, leaving a few inches of overhang on two opposite sides. This creates little handles that let you lift the whole thing out later. Lightly spray the parchment with non-stick cooking spray just to be safe.
Step 2: Make the Buttery Graham Crust
In a food processor, pulse the graham crackers until they turn into fine crumbs. You should have about 1 ½ cups. Transfer them to a medium bowl and stir in the 2 tablespoons of sugar, ¼ teaspoon of cinnamon, and a pinch of salt. Pour the 6 tablespoons of melted butter over the mixture and stir with a fork until every crumb is moistened. It should look like wet sand and clump together when you squeeze a bit in your fist.
Press the mixture firmly into the bottom of your prepared pan. I use the bottom of a flat measuring cup to really pack it down — an even, compact crust is key to keeping it from crumbling when you cut the bars. Bake the crust for 10 minutes at 325°F (160°C), then set it aside to cool slightly while you make the filling.
Step 3: Make the Pumpkin Cheesecake Filling
In a large mixing bowl, beat the softened cream cheese with an electric hand mixer on medium speed until it’s completely smooth and fluffy — about 2 minutes. Scrape down the sides and bottom of the bowl with a rubber spatula. Add the ¾ cup of sugar and beat for another minute until fully incorporated and creamy.
Add the 1 cup of pumpkin puree, ¼ cup of sour cream, 1 teaspoon of vanilla extract, 1 ½ teaspoons of pumpkin pie spice, ½ teaspoon of cinnamon, and ¼ teaspoon of salt. Beat on low speed until everything is combined, then scrape the bowl again. Don’t overmix at this stage — you don’t want to incorporate too much air.
Add the 2 room-temperature eggs, one at a time, beating on low speed just until each yolk disappears into the mixture. Overbeating the eggs can cause the cheesecake to puff up and crack during baking. Stop as soon as the batter looks smooth and uniform.
Step 4: Assemble and Bake
Pour the pumpkin cheesecake filling over the pre-baked crust. Use your spatula to spread it evenly, making sure it reaches all the corners. Give the pan a gentle tap on the counter to release any air bubbles.
Bake at 325°F (160°C) for 35 to 40 minutes. The edges should look set and slightly puffed, but the center should still have a slight jiggle when you gently shake the pan — like Jell-O, not like soup. If the center looks completely firm, it’s overbaked. Don’t worry if a small crack appears; these bars are forgiving.
Step 5: Cool and Chill
Place the pan on a wire rack and let the cheesecake cool completely at room temperature — about 1 hour. Then cover the pan with plastic wrap and refrigerate for at least 4 hours, but overnight is really best. This is the hardest part, I know, but that chill time is what gives the bars their clean, beautiful slices.
Step 6: Slice and Serve
Once fully chilled, use the parchment overhang to lift the entire block of cheesecake out of the pan. Place it on a cutting board and use a sharp, clean knife to slice it into 16 even bars. Wipe the knife clean between cuts for the neatest edges. Serve cold or let them sit at room temperature for 10 minutes for a slightly softer texture.
Cooking Tips & Techniques
I’ve learned a few things the hard way so you don’t have to. Here are the tips that make a real difference.
Room temperature ingredients matter more than you think. I know it’s tempting to use cold cream cheese straight from the fridge, but it will leave you with a lumpy batter no matter how long you beat it. The same goes for the eggs and sour cream. Cold ingredients don’t emulsify properly, which can also lead to a grainy texture. Set everything out an hour before you start, and you’ll thank me later.
Don’t overmix the eggs. This is probably the most common mistake I see. Once you add the eggs, mix on low speed and stop as soon as they’re incorporated. Overmixing beats too much air into the batter, which causes the cheesecake to puff up in the oven and then collapse, leaving cracks across the surface. We want creamy, not cavernous.
Press the crust firmly. I cannot stress this enough. A loosely packed crust will crumble the moment you try to cut a bar. Use the bottom of a measuring cup or a flat glass to really compact those crumbs. The pre-bake also helps set the crust, so don’t skip it.
Check for doneness with the jiggle test. A toothpick test doesn’t work for cheesecake — you’ll just create a crack. Instead, gently shake the pan. The edges should be set, but the center should wobble slightly. It will continue to set as it cools. If the center looks liquid or sloshes, give it another 5 minutes and check again.
Use a hot knife for clean cuts. Run your knife under hot water, dry it off, and slice. The heat helps the knife glide through the cheesecake without dragging. Wipe the blade clean between each cut. It takes an extra minute, but the result is worth it — especially if you’re serving these for a gathering.
Variations & Adaptations
This recipe is a great base for experimentation. Here are a few twists I’ve tried and loved.
Gluten-Free Version: Swap the graham crackers for gluten-free graham crackers or use crushed gluten-free shortbread cookies. The texture is slightly different — a bit more delicate — but the flavor is still fantastic. Just make sure to press the crust firmly since gluten-free crumbs can be more crumbly.
Vegan Adaptation: Use a vegan cream cheese brand (I like Kite Hill or Violife), a flax egg (1 tablespoon ground flaxseed mixed with 3 tablespoons water, let sit for 5 minutes), and a dairy-free butter like Miyoko’s. The texture won’t be exactly the same — slightly less firm — but it’s still creamy and delicious. I tested this for a friend’s birthday, and no one at the party even noticed.
Bourbon-Pecan Twist: Add 1 tablespoon of bourbon to the filling along with the vanilla. Then top the bars with a sprinkle of toasted pecans before serving. The bourbon adds a warm, oaky depth that pairs beautifully with the pumpkin spice. This version is especially good for fall dinner parties or Thanksgiving.
Chocolate Drizzle: Melt ¼ cup of dark chocolate chips with a teaspoon of coconut oil and drizzle it over the chilled bars. The bitterness of the dark chocolate cuts through the sweetness of the cheesecake perfectly. It’s a small addition that feels extra special.
Spice It Up: If you like a bolder pumpkin flavor, add an extra ½ teaspoon of ginger and a pinch of cardamom to the spice mix. Cardamom has this lovely floral, citrusy note that makes the pumpkin taste more complex. I tried this on a whim one afternoon, and now it’s my preferred version.
Serving & Storage Suggestions
These bars are versatile enough for everything from a casual snack to a holiday dessert table.
Serving Temperature: I prefer them cold straight from the fridge — the texture is firmer and almost fudge-like. But if you like a softer, creamier bite, let them sit at room temperature for about 10 to 15 minutes before serving. Both ways are delicious; it just depends on your mood.
Presentation Ideas: Arrange the bars on a platter and top each one with a small dollop of whipped cream and a light dusting of cinnamon. For a more decadent look, drizzle with caramel sauce and sprinkle with toasted pepitas (pumpkin seeds). The green pepitas against the orange cheesecake is very pretty for fall.
What to Serve Alongside: These bars pair beautifully with a hot cup of coffee or a spiced chai latte. For a full dessert spread, serve them alongside a batch of rainbow pot of gold cupcakes for a fun contrast in flavors and colors. They also work wonderfully after a hearty meal like Irish lamb stew with Guinness — the richness of the stew is balanced by the light, creamy cheesecake.
Storage: Store the bars in an airtight container in the refrigerator for up to 5 days. Place a sheet of parchment paper between layers if you need to stack them. The crust will soften slightly over time, but the flavor actually improves after a day or two as the spices meld together.
Freezing Instructions: These freeze beautifully. Place the fully chilled and sliced bars on a baking sheet and freeze until solid — about 2 hours. Then transfer them to a freezer-safe container or zip-top bag with parchment between layers. They’ll keep for up to 3 months. Thaw in the refrigerator overnight before serving.
Nutritional Information & Benefits
While these are definitely a treat, they do offer a few redeeming qualities worth noting.
| Nutrient | Per Bar (1 of 16) |
|---|---|
| Calories | 215 |
| Total Fat | 14g |
| Saturated Fat | 8g |
| Cholesterol | 55mg |
| Sodium | 175mg |
| Total Carbohydrates | 20g |
| Dietary Fiber | 1g |
| Sugars | 14g |
| Protein | 4g |
| Vitamin A | 45% DV |
| Calcium | 4% DV |
Pumpkin is packed with vitamin A, which supports eye health and immune function. The cream cheese provides a bit of calcium and protein, though it’s also the main source of saturated fat here. If you’re watching your sugar intake, you can reduce the sugar to ½ cup without sacrificing too much texture — the pumpkin adds natural sweetness. These bars are vegetarian and can be made gluten-free or vegan with the substitutions mentioned earlier. They do contain dairy and gluten in their standard form, so keep that in mind for guests with allergies.
I don’t pretend these are health food, but I do feel better about serving a dessert that has a vegetable as its main ingredient. It’s a small comfort, but it counts for something.
Conclusion
These Best Mini Pumpkin Cheesecake Bars with Buttery Graham Crust are exactly what a fall dessert should be — warm-spiced, creamy, and deeply satisfying without being fussy. The crust stays crisp, the filling is luscious, and each little bar feels like a small celebration. Whether you’re making them for a holiday gathering, a weekend treat, or just because the weather turned cool and you’re craving something cozy, this recipe delivers every time.
I love how forgiving this recipe is. It doesn’t demand perfection — just a little patience and a willingness to enjoy the process. And honestly, that’s the kind of baking I want to share. So go ahead, make a batch. Press that crust down with confidence, let the filling set overnight, and slice yourself a piece of something good. If you try them, I’d love to hear how they turn out. Leave a comment below, tag me in your photos, or tell me about your own pumpkin dessert memories. Happy baking, friends.
Frequently Asked Questions
Can I use a 9×9-inch pan instead of 8×8?
Yes, you can. The bars will be slightly thinner, so reduce the baking time by about 5 minutes and start checking for doneness earlier. You’ll also get slightly more bars — about 20 instead of 16.
Why did my cheesecake filling crack?
Cracks usually happen from overbaking or overmixing. Make sure you take the cheesecake out while the center still has a slight jiggle. Also, avoid overbeating the eggs — mix on low speed just until they disappear into the batter. A water bath isn’t necessary for these bars, but if you’re nervous, you can place a small pan of hot water on the oven rack below the cheesecake to add moisture.
Can I use pumpkin pie filling instead of pure pumpkin puree?
I wouldn’t recommend it. Pumpkin pie filling is already sweetened and spiced, which will throw off the sugar and spice balance in this recipe. Stick with 100% pure pumpkin puree for the best results. If you accidentally bought pie filling, reduce the sugar to ¼ cup and skip the pumpkin pie spice, but honestly, the texture might still be off.
How do I know when the crust is baked enough?
The crust is done when it’s lightly golden around the edges and smells toasty — about 10 minutes at 325°F (160°C). It shouldn’t be dark brown. If you press it gently, it should feel firm but not hard. Let it cool for 5 to 10 minutes before adding the filling so the crust doesn’t start cooking the cheesecake batter prematurely.
Can I make these mini pumpkin cheesecake bars ahead of time for a party?
Absolutely. In fact, I recommend it. Make them a day ahead, let them chill overnight in the pan, and slice them just before serving. The flavors deepen, the texture sets perfectly, and you’ll have one less thing to worry about on party day. They also freeze well if you want to make them even further in advance — just thaw in the fridge overnight before serving.
Pin This Recipe!
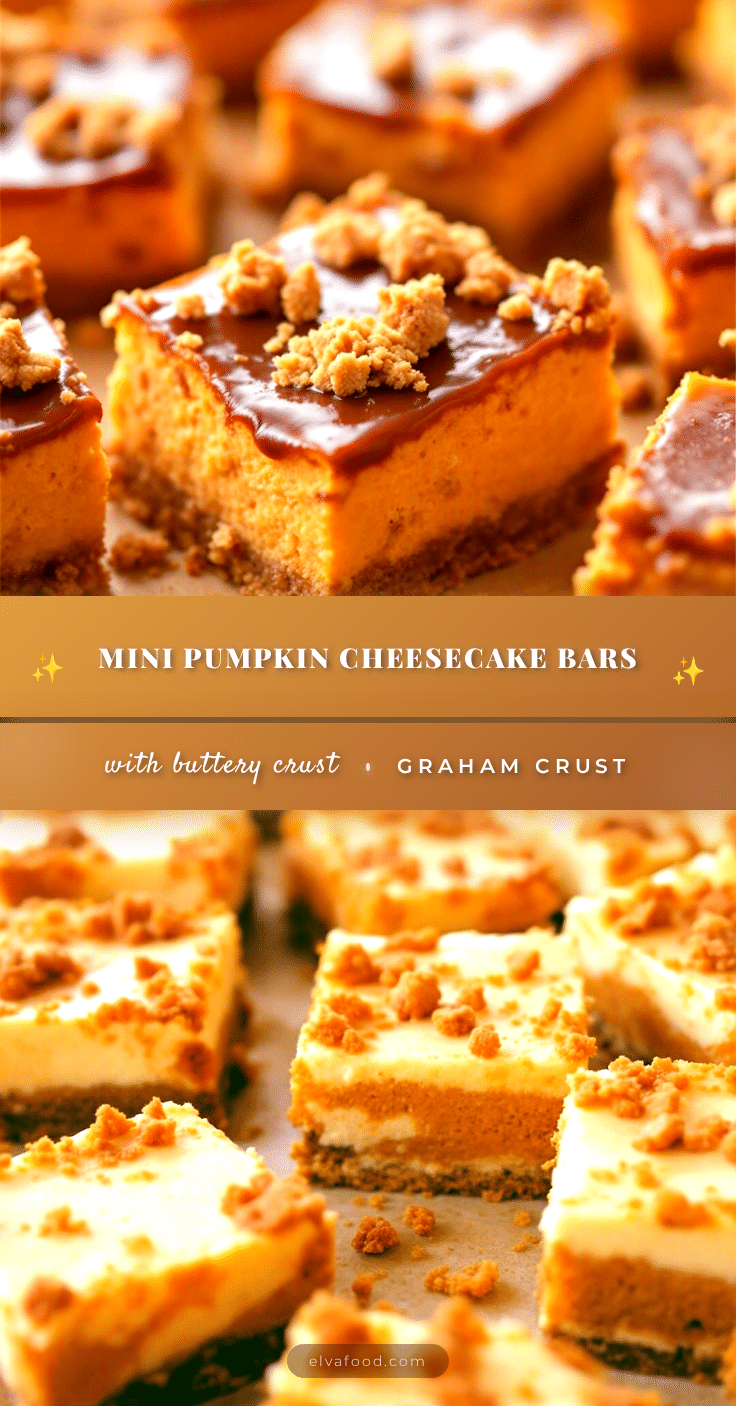
Best Mini Pumpkin Cheesecake Bars with Easy Buttery Crust
These mini pumpkin cheesecake bars feature a buttery graham cracker crust and a rich, creamy pumpkin filling. Perfectly portioned and easy to make without a water bath, they’re a stress-free fall dessert that tastes even better the next day.
- Prep Time: 20 minutes
- Cook Time: 40 minutes
- Total Time: 5 hours (includes chilling time)
- Yield: 16 bars 1x
- Category: Dessert
- Cuisine: American
Ingredients
- 1 ½ cups graham cracker crumbs (about 12 full sheets)
- 6 tablespoons unsalted butter, melted
- 2 tablespoons granulated sugar
- ¼ teaspoon ground cinnamon
- 1 pinch salt
- 16 ounces cream cheese, full-fat, softened to room temperature
- ¾ cup granulated sugar
- 1 cup pumpkin puree (not pumpkin pie filling)
- ¼ cup sour cream, room temperature
- 2 large eggs, room temperature
- 1 teaspoon vanilla extract
- 1 ½ teaspoons pumpkin pie spice
- ½ teaspoon ground cinnamon
- ¼ teaspoon salt
Instructions
- Preheat oven to 325°F (160°C). Line an 8×8-inch baking pan with parchment paper, leaving overhang on two opposite sides. Lightly spray with non-stick cooking spray.
- Make the crust: In a food processor, pulse graham crackers into fine crumbs. Transfer to a bowl and stir in 2 tablespoons sugar, ¼ teaspoon cinnamon, and a pinch of salt. Pour in 6 tablespoons melted butter and stir until all crumbs are moistened. Press firmly into the bottom of the prepared pan using a flat measuring cup. Bake for 10 minutes, then set aside to cool slightly.
- Make the filling: In a large bowl, beat softened cream cheese with an electric mixer on medium speed until smooth and fluffy, about 2 minutes. Scrape down the bowl. Add ¾ cup sugar and beat for 1 minute until creamy.
- Add pumpkin puree, sour cream, vanilla extract, pumpkin pie spice, cinnamon, and salt. Beat on low speed until combined. Scrape the bowl again.
- Add eggs one at a time, beating on low speed just until each yolk disappears. Do not overmix.
- Pour filling over the pre-baked crust and spread evenly. Tap the pan gently on the counter to release air bubbles.
- Bake at 325°F (160°C) for 35 to 40 minutes. The edges should be set, but the center should still jiggle slightly when shaken.
- Cool completely on a wire rack, about 1 hour. Then cover with plastic wrap and refrigerate for at least 4 hours, preferably overnight.
- Once chilled, use parchment overhang to lift the cheesecake out of the pan. Slice into 16 even bars using a sharp knife. Wipe the knife clean between cuts for neat edges.
Notes
Room temperature ingredients are crucial for a smooth filling. Do not overmix the eggs to prevent cracking. Press the crust firmly to avoid crumbling. Use the jiggle test for doneness. For clean cuts, use a hot knife. Bars can be stored in the refrigerator for up to 5 days or frozen for up to 3 months.
Nutrition
- Serving Size: 1 bar
- Calories: 215
- Sugar: 14
- Sodium: 175
- Fat: 14
- Saturated Fat: 8
- Carbohydrates: 20
- Fiber: 1
- Protein: 4
Keywords: pumpkin cheesecake bars, mini cheesecake, fall dessert, pumpkin dessert, graham cracker crust, Thanksgiving dessert, easy cheesecake bars


