My partner took just one bite of these creamy no-bake pumpkin pie cheesecake jars and immediately asked if I could make them again for the next three weekends straight. Honestly, I wasn’t even sure how it turned out so smooth and rich until I saw the way their eyes lit up with that first taste. The pumpkin spice aroma mingling with the tang of cream cheese filled the kitchen, and for a moment, the world outside didn’t exist. It wasn’t just dessert; it was a quiet moment of simple joy, perfectly portioned in these little jars that I’d prepped earlier in the day. This recipe didn’t just come from me—it was born from watching someone else savor something unexpected, easy, and utterly satisfying.
The texture is silky but with a subtle firmness, the kind that makes you pause and say, “Wait, this didn’t need to bake?” And the best part? No oven required at all, making it a total game-changer for busy days or when you’re craving a cozy fall treat without the fuss. I realized this recipe stuck with me because it’s the kind of dessert that feels homemade but looks fancy, and you can whip it up in advance to impress guests—or just treat yourself without last-minute stress. It’s that quiet promise of comfort in a jar that keeps me coming back, especially when the weather cools and pumpkin season calls my name.
Why You’ll Love This Recipe
Let me tell you, this no-bake pumpkin pie cheesecake jars recipe isn’t your standard pumpkin pie or cheesecake mashup. After testing about a dozen versions (true story), I landed on this one because it hits all the right notes without demanding hours or a ton of complicated steps. Here’s what makes it a keeper in my book:
- Quick & Easy: Ready in under 30 minutes, making it perfect for busy evenings or last-minute dessert plans.
- Simple Ingredients: You won’t need anything fancy or hard to find—just pantry staples and a can of pumpkin.
- Perfect for Parties: These jars are ideal for holiday gatherings or potlucks since you can make them ahead and grab-and-go.
- Crowd-Pleaser: Kids, adults, and everyone in between always ask for seconds. The creamy texture with pumpkin spice is just irresistible.
- Unbelievably Delicious: The combination of cream cheese, pumpkin, and warming spices is like comfort food in miniature form.
What sets this recipe apart is the no-bake method that doesn’t sacrifice flavor or texture. Instead of a dense pumpkin cheesecake that can feel heavy, these jars are light, airy, and incredibly smooth thanks to the whipped cream folded into the filling. Plus, the buttery graham cracker crust at the bottom gives a satisfying crunch that contrasts beautifully with the creamy layers. I also love that you can customize the spice blend to your liking or swap out the crust for a gluten-free option easily.
What Ingredients You Will Need
This recipe relies on simple, wholesome ingredients that come together to create bold fall flavors with a satisfying texture. Most are pantry staples you likely have on hand, and I’ve included tips on substitutions so it’s super flexible.
- For the crust:
- Graham cracker crumbs (about 1 ½ cups or 150g) – I prefer Honey Maid for the classic flavor.
- Unsalted butter, melted (6 tablespoons or 85g) – adds richness and helps bind the crumbs.
- Brown sugar (2 tablespoons) – optional, but it adds a nice depth and caramel note.
- For the filling:
- Cream cheese, softened (8 ounces or 225g) – use full-fat for best creaminess.
- Pumpkin puree (1 cup or 245g) – canned is fine, but fresh roasted pumpkin works too.
- Powdered sugar (¾ cup or 90g) – to sweeten without graininess.
- Heavy cream (1 cup or 240ml) – whipped to soft peaks for that fluffy texture.
- Vanilla extract (1 teaspoon) – for a warm, aromatic undertone.
- Ground cinnamon (1 teaspoon), ground ginger (½ teaspoon), ground nutmeg (¼ teaspoon), ground cloves (⅛ teaspoon) – the classic pumpkin pie spice blend.
- Salt (a pinch) – balances the sweetness and spices.
- For garnish (optional):
- Whipped cream
- Chopped pecans or toasted walnuts
- A sprinkle of cinnamon or pumpkin pie spice
If you’re aiming for a gluten-free version, substitute the graham crackers with gluten-free cookies or crushed nuts. And if you prefer a lighter dairy-free option, coconut cream whipped can replace the heavy cream, and vegan cream cheese brands work surprisingly well here. This recipe’s flexibility is part of why I keep coming back to it, especially when juggling dietary preferences at gatherings.
Equipment Needed
Thankfully, the equipment list for this recipe is minimal and budget-friendly, making it accessible whether you’re a kitchen newbie or seasoned cook. Here’s what you’ll need:
- Mixing bowls: One large bowl for the crust and another for the filling. Glass or stainless steel works best.
- Electric mixer or stand mixer: To whip the cream and cream cheese smooth—hand mixers can work but expect a bit more elbow grease.
- Measuring cups and spoons: Precision helps here, especially with the spices and sugar.
- Spoons or spatulas: For folding and mixing without deflating the whipped cream.
- Small jars or dessert glasses: I use 8-ounce (240ml) mason jars for individual servings, but small ramekins or cups work just as well.
If you don’t have an electric mixer, whipping cream by hand is doable but takes patience—about 5-7 minutes of brisk whisking. I remember the first time I tried it without a mixer and almost gave up, but the results were worth the arm workout! Also, when choosing your jars, make sure they seal well if you plan to store the cheesecake jars for a day or two before serving.
Preparation Method
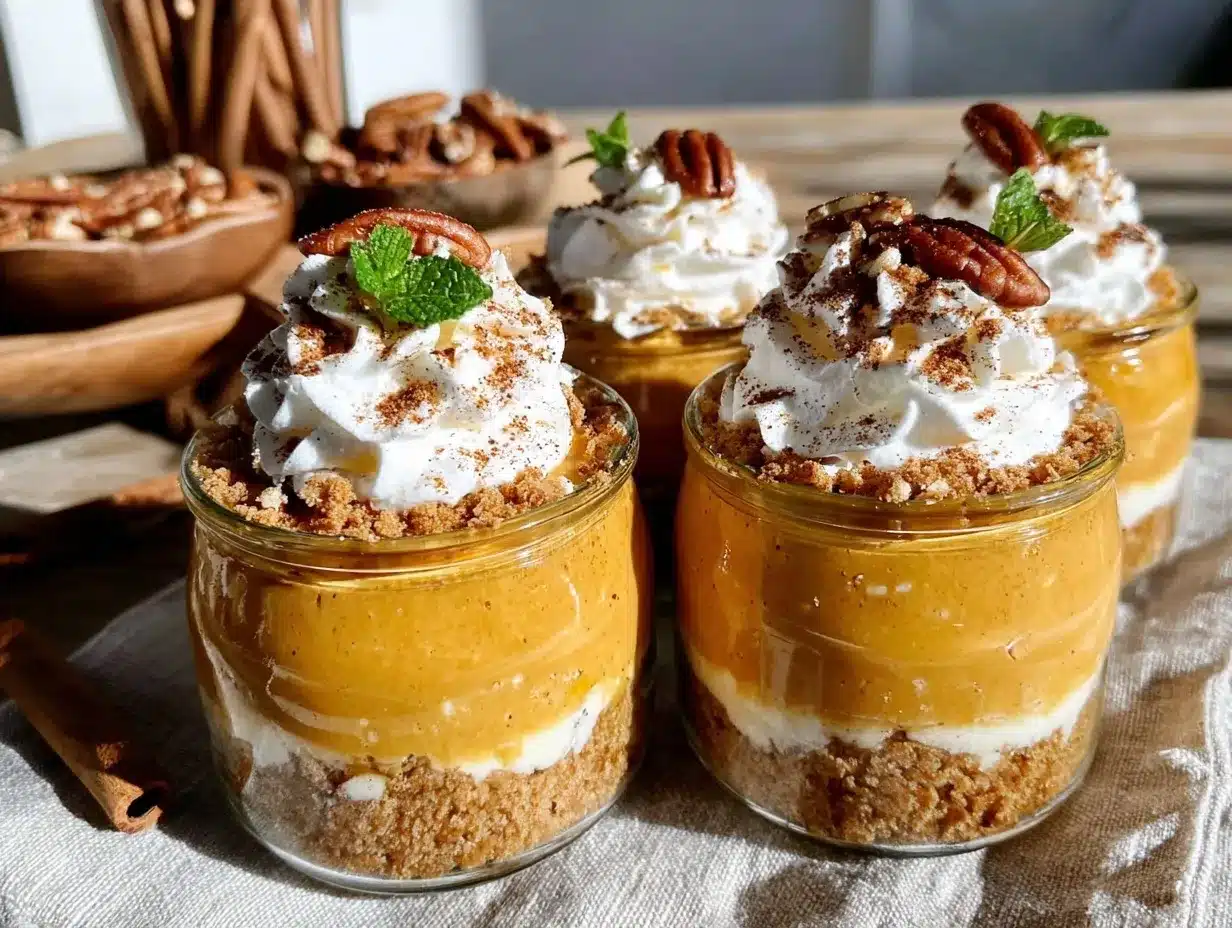
- Prepare the crust: In a medium bowl, combine 1 ½ cups (150g) graham cracker crumbs with 2 tablespoons brown sugar and 6 tablespoons (85g) melted unsalted butter. Stir until the mixture resembles wet sand. This usually takes about 2 minutes. The texture should hold together when pressed (tip: test by pinching a small amount in your fingers).
- Distribute the crust: Spoon about 2 tablespoons of the crust mixture into each jar (for 6 jars). Press down firmly with the back of a spoon or your fingers to create an even base. Chill the jars in the fridge for 10 minutes to let the crust set while you prepare the filling.
- Whip the cream: In a large bowl, use an electric mixer to whip 1 cup (240ml) heavy cream until soft peaks form. This usually takes about 3-4 minutes on medium-high speed. Watch closely—it can go from perfect to butter quickly!
- Mix cream cheese and pumpkin: In another bowl, beat 8 ounces (225g) softened cream cheese with ¾ cup (90g) powdered sugar until smooth and fluffy, about 2-3 minutes. Add 1 cup (245g) pumpkin puree, 1 teaspoon vanilla extract, 1 teaspoon cinnamon, ½ teaspoon ginger, ¼ teaspoon nutmeg, ⅛ teaspoon cloves, and a pinch of salt. Mix until everything is well combined and creamy.
- Fold in whipped cream: Gently fold the whipped cream into the pumpkin mixture in three additions. Use a spatula and fold carefully to keep the mixture light and airy. The filling should be smooth and slightly fluffy.
- Assemble the jars: Spoon the filling evenly over the chilled crust layer in each jar. Smooth the tops with the back of a spoon or spatula. Cover each jar with a lid or plastic wrap.
- Chill: Refrigerate the jars for at least 4 hours or overnight. This helps the filling set and flavors meld. I usually make them the night before so they’re ready when guests arrive or after a long day.
- Serve: Before serving, garnish with a dollop of whipped cream, a sprinkle of cinnamon, and chopped pecans if you like. Serve chilled straight from the fridge.
One trick I learned is to let the cream cheese soften at room temperature for about 30 minutes before starting. This avoids lumps and makes mixing easier. Also, if your pumpkin puree is very wet, draining it slightly in a fine mesh sieve can prevent the filling from becoming too runny.
Cooking Tips & Techniques
Making a no-bake cheesecake can be deceptively simple but mastering a few techniques can take your jars from good to wow. Here’s what I’ve learned over multiple batches:
- Softening cream cheese: This is key for a lump-free filling. If you forget, microwave it for 10 seconds, then stir well before mixing.
- Whipping cream: Chill your bowl and beaters in the freezer for 10-15 minutes before whipping. Cold equipment helps to whip cream faster and achieve better volume.
- Folding vs. stirring: Always fold the whipped cream gently into the pumpkin mixture. Stirring too aggressively deflates the air bubbles and results in a denser texture.
- Pressing the crust: Don’t skimp on compacting the crust layer. A firm base keeps the jars intact and adds a nice crunch.
- Flavor balance: Taste your pumpkin mixture before folding in the whipped cream. Adjust spices or sweetness slightly since chilling dulls flavors a bit.
One time, I overbeat the cream and ended up with butter instead of fluffy peaks—lesson learned! Also, multitasking by prepping the crust while the cream cheese softens can save a bunch of time. If you want to get fancy, sprinkle a little sea salt on top of the crust before chilling for a salty-sweet contrast I adore.
Variations & Adaptations
This recipe is pretty flexible, so you can twist it to suit different diets, seasons, or tastes:
- Gluten-free: Swap graham crackers for crushed gluten-free cookies or almond flour mixed with a bit of butter.
- Vegan: Use dairy-free cream cheese and coconut cream whipped instead of heavy cream. Maple syrup can replace powdered sugar.
- Spice it up: Add a dash of cayenne or black pepper for a subtle kick, or swap pumpkin pie spice for chai or gingerbread spices to mix things up.
- Seasonal twists: In summer, try swapping pumpkin for mango puree or fresh berries for a bright, fruity cheesecake jar.
- Crust alternatives: Use crushed gingersnaps or chocolate cookies for a richer crust flavor.
Personally, I once made a batch with a pecan praline crust and a drizzle of caramel sauce on top—totally indulgent and a hit at a fall party. The jars held up well, and it was a fun way to mix textures and flavors. If you’re interested in other make-ahead desserts, my Baileys Irish Cream Cheesecake recipe is just as creamy and fuss-free.
Serving & Storage Suggestions
These pumpkin pie cheesecake jars are best served chilled, straight from the fridge. The cool temperature enhances the creamy texture and brings out the pumpkin spice aroma. For presentation, topping with a fresh dollop of whipped cream and a light dusting of cinnamon or nutmeg adds a lovely finishing touch.
They pair wonderfully with warm drinks like coffee or spiced chai tea, making them perfect for fall brunches or holiday dinners. When hosting, I often place a few jars alongside savory dishes like Irish lamb stew or a hearty Dublin coddle to offer a sweet contrast.
For storage, cover the jars tightly with lids or plastic wrap and refrigerate for up to 3 days. They actually taste better after a day as the flavors meld beautifully. If you want to keep them longer, you can freeze the jars for up to 1 month; thaw in the fridge overnight before serving. Avoid reheating as the texture will change.
Nutritional Information & Benefits
Each jar (about 1 serving) contains approximately 320 calories, with 24g fat, 20g carbohydrates, and 5g protein. The recipe offers a good source of calcium from the cream cheese and heavy cream, while pumpkin puree provides fiber, vitamin A, and antioxidants. The spices not only add flavor but also come with anti-inflammatory benefits.
This dessert fits well into a balanced diet when enjoyed in moderation. For those watching carbs, using a sugar substitute or reducing the crust can lower the carbohydrate count. The option to make it gluten-free or dairy-free widens its appeal for various dietary needs.
Conclusion
There’s something quietly satisfying about these creamy no-bake pumpkin pie cheesecake jars that keeps me reaching for them season after season. They’re easy to make, don’t require an oven, and taste like you invested hours in the kitchen. Most importantly, they bring a little moment of joy—like the small reaction from my partner that started it all.
Feel free to tweak the spices or crust to fit your taste, and don’t be shy about making a batch ahead to enjoy whenever the craving hits. I love how this recipe balances comfort with convenience, making it great for everything from casual family nights to impressing guests at fall gatherings.
If you try it, I’d love to hear how you customize your jars or what your favorite twists are—drop a comment below or share your photos. Cooking and sharing these little jars of pumpkin goodness has become one of my favorite seasonal rituals, and I hope it finds a place in your kitchen too.
Frequently Asked Questions
Can I make these cheesecake jars ahead of time?
Absolutely! They actually taste better after chilling for at least 4 hours or overnight. Store them covered in the fridge for up to 3 days.
Can I use fresh pumpkin instead of canned puree?
Yes, but make sure to roast and puree the fresh pumpkin well, then drain any excess moisture to avoid a watery filling.
Is this recipe gluten-free?
It can be by swapping the graham cracker crust for gluten-free cookies or nut-based crusts.
What if I don’t have an electric mixer?
You can whip the cream by hand with a whisk, though it will take longer and require some elbow grease.
Can I freeze the pumpkin cheesecake jars?
Yes, freeze them tightly covered for up to one month. Thaw in the fridge overnight before serving. Avoid reheating.
Pin This Recipe!
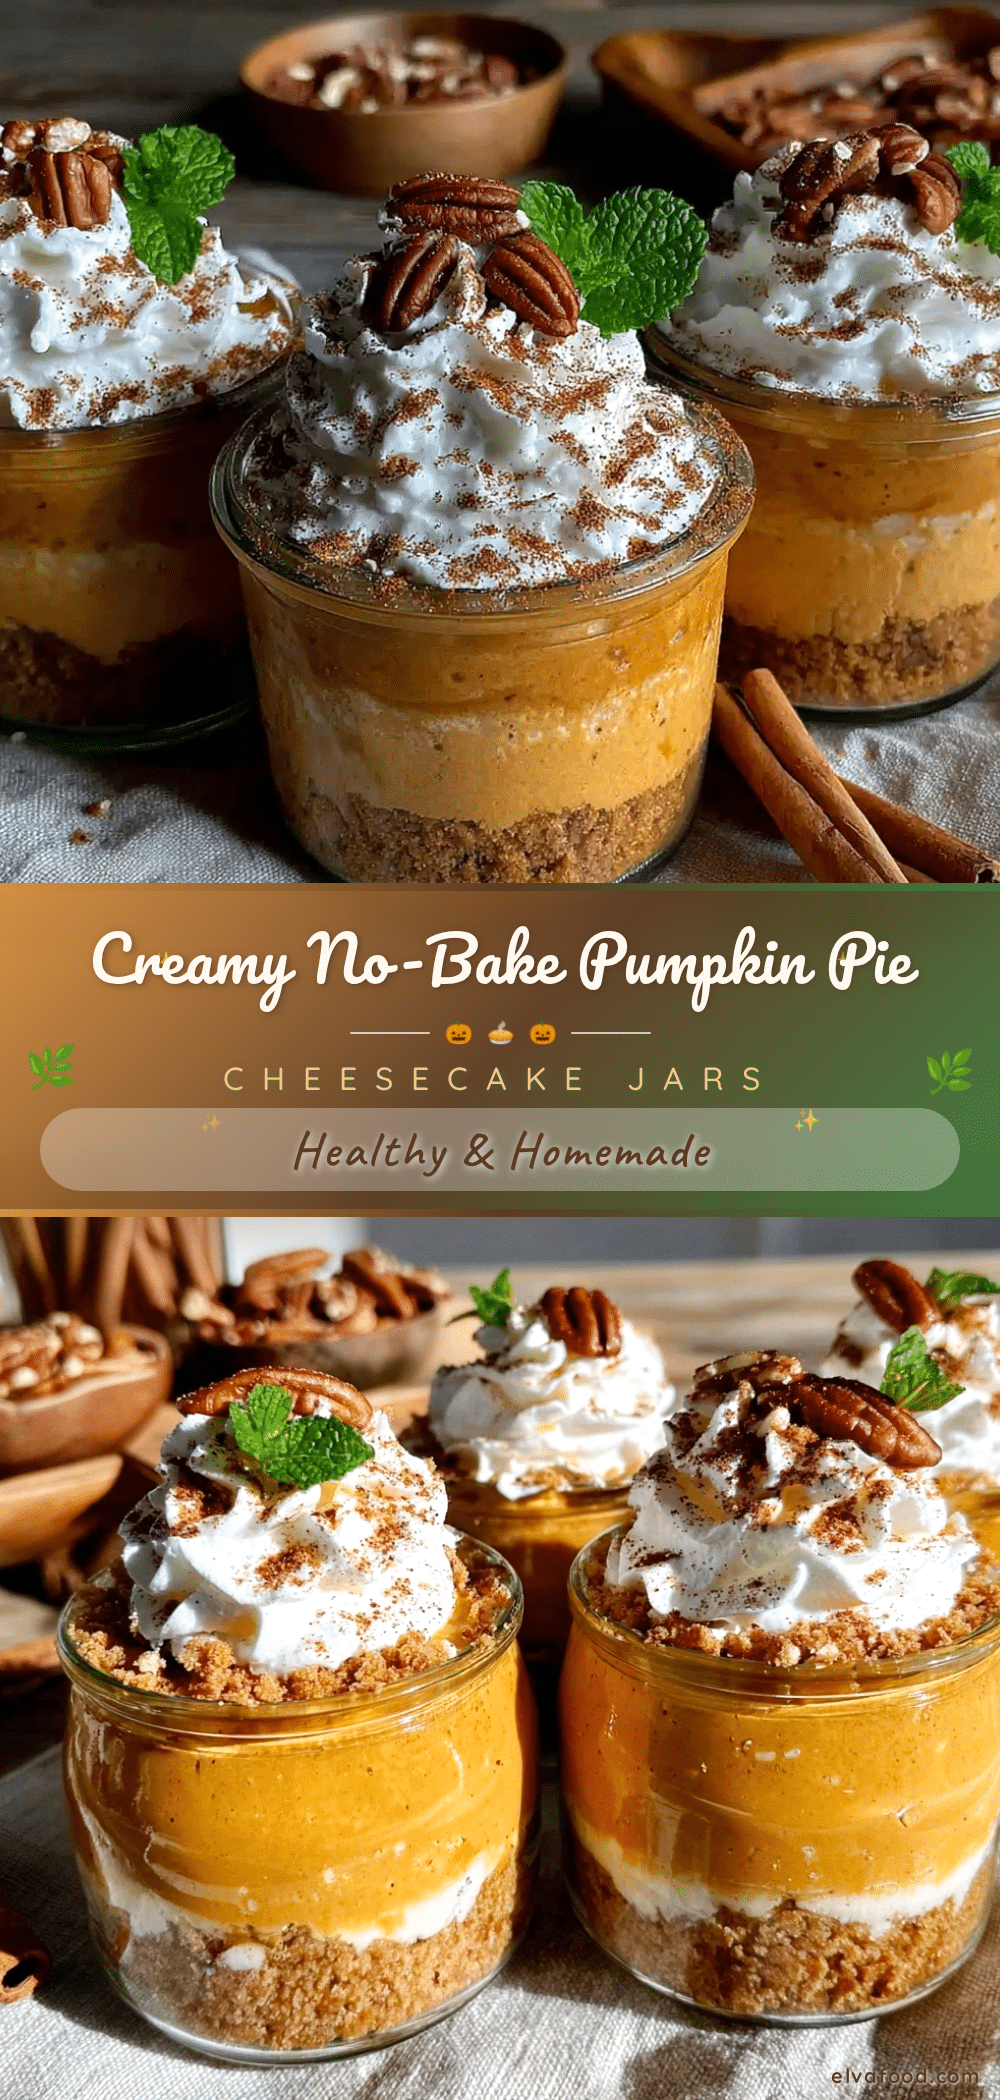
Creamy No-Bake Pumpkin Pie Cheesecake Jars
A smooth, rich, and easy no-bake pumpkin pie cheesecake in individual jars, perfect for make-ahead desserts and cozy fall treats.
- Prep Time: 15 minutes
- Cook Time: 0 minutes
- Total Time: 4 hours 15 minutes
- Yield: 6 servings 1x
- Category: Dessert
- Cuisine: American
Ingredients
- 1 ½ cups (150g) graham cracker crumbs
- 6 tablespoons (85g) unsalted butter, melted
- 2 tablespoons brown sugar (optional)
- 8 ounces (225g) cream cheese, softened
- 1 cup (245g) pumpkin puree
- ¾ cup (90g) powdered sugar
- 1 cup (240ml) heavy cream, whipped to soft peaks
- 1 teaspoon vanilla extract
- 1 teaspoon ground cinnamon
- ½ teaspoon ground ginger
- ¼ teaspoon ground nutmeg
- ⅛ teaspoon ground cloves
- Pinch of salt
- Optional garnish: whipped cream, chopped pecans or toasted walnuts, sprinkle of cinnamon or pumpkin pie spice
Instructions
- In a medium bowl, combine graham cracker crumbs, brown sugar, and melted butter. Stir until mixture resembles wet sand and holds together when pressed.
- Spoon about 2 tablespoons of crust mixture into each jar (for 6 jars). Press down firmly to create an even base. Chill jars in fridge for 10 minutes.
- In a large bowl, whip heavy cream with an electric mixer until soft peaks form, about 3-4 minutes.
- In another bowl, beat softened cream cheese with powdered sugar until smooth and fluffy, about 2-3 minutes. Add pumpkin puree, vanilla extract, cinnamon, ginger, nutmeg, cloves, and salt. Mix until well combined.
- Gently fold whipped cream into pumpkin mixture in three additions, keeping mixture light and airy.
- Spoon filling evenly over chilled crust in each jar. Smooth tops. Cover jars with lids or plastic wrap.
- Refrigerate jars for at least 4 hours or overnight to set and meld flavors.
- Before serving, garnish with whipped cream, a sprinkle of cinnamon, and chopped nuts if desired. Serve chilled.
Notes
Soften cream cheese at room temperature for 30 minutes before mixing to avoid lumps. Chill bowl and beaters before whipping cream for better volume. Fold whipped cream gently to keep mixture airy. Press crust firmly for a crunchy base. Adjust spices and sweetness before folding in whipped cream as chilling dulls flavors. Store covered in fridge up to 3 days or freeze up to 1 month. Thaw overnight in fridge before serving. Avoid reheating.
Nutrition
- Serving Size: 1 jar (about 8 ounce
- Calories: 320
- Fat: 24
- Carbohydrates: 20
- Protein: 5
Keywords: pumpkin pie, cheesecake jars, no-bake dessert, pumpkin spice, fall dessert, make-ahead dessert, easy pumpkin cheesecake


