That unmistakable crackle of a perfectly baked tortilla cup — the kind that shatters just right under your fingers — instantly whisks me back to a sunlit kitchen table where summer afternoons stretched on endlessly. It’s funny how the crispness of those little cups, filled overflowing with savory layers, can summon up memories of laughter, casual chatter, and the kind of easygoing joy that only great food shared with friends can bring. I stumbled onto these crispy loaded taco dip cups after a random craving for something handheld but bursting with flavor. You know the feeling — wanting all the best parts of taco night, but without the mess or fuss.
These little cups aren’t just a snack; they’re a microcosm of all the good things about Mexican-inspired flavors, packed tight into bite-sized delights. The crunchy tortilla scoops cradle a zesty, creamy dip loaded with seasoned ground beef, melty cheese, fresh veggies, and that punch of cool sour cream and salsa that somehow ties it all together. I remember making them late into an evening when friends dropped by unannounced — the ease of pulling these together and watching them disappear faster than I could say “more please” was genuinely satisfying.
Honestly, the magic isn’t just in the ingredients; it’s in the texture contrast — crisp shell, creamy filling, and that hint of spice that sneaks up just so. These crispy loaded taco dip cups have stuck with me because they bring the festive feel without the stress. Whether it’s a casual get-together or a game day binge, these cups feel like a mini celebration in every bite. There’s something quietly satisfying about how they hold themselves together, no drips, no mess — just pure, crunchy, flavorful fun.
So, if you’re looking for a snack that’s bursting with personality and flavor, but also super easy to whip up, this recipe will feel like a little secret weapon in your culinary arsenal. Let’s just say, once you try them, you’ll see why they quickly became my go-to for any party or casual hangout. And I can’t wait to share what goes into making these irresistible crispy loaded taco dip cups with crunchy tortilla scoops.
Why You’ll Love This Crispy Loaded Taco Dip Cups Recipe
Making these crispy loaded taco dip cups has been a total game-changer in my snack rotation — and here’s why you’ll want to make them too:
- Quick & Easy: Ready in under 30 minutes, these cups are perfect for busy nights or last-minute guests.
- Simple Ingredients: No need for exotic items; everything is likely already in your pantry or fridge.
- Perfect for Parties: They’re bite-sized, mess-free, and great for casual gatherings, potlucks, or game days.
- Crowd-Pleaser: Kids, adults — everyone loves them! The combination of crunchy, creamy, and savory hits all the right notes.
- Unbelievably Delicious: The layered flavors and textures come together to create a snack that feels indulgent but balanced.
What sets this recipe apart isn’t just the filling — it’s the way the tortilla cups get golden and crisp in the oven, holding all that loaded goodness without getting soggy. I’ve tested a few versions, but baking the scoops in muffin tins is pure genius for creating sturdy little cups that invite you to dig in without worrying about spills. Plus, I add a pinch of smoked paprika and cumin to the beef mixture that really brings a smoky warmth, making these cups more than your average taco dip — they’re cozy, comforting, and just a bit addictive.
Whether you’re planning a casual night with friends or a festive afternoon snack, these crispy loaded taco dip cups bring a certain joyful ease to the table. Honestly, they’re the kind of recipe that makes you close your eyes and savor each bite, knowing you nailed something special without breaking a sweat. And if you’re a fan of easy crowd-pleasing dishes like crispy arancini risotto balls, you’ll find the same satisfying crunch and comforting filling in these taco cups.
What Ingredients You Will Need
This recipe uses straightforward, wholesome ingredients that come together to create bold flavor and satisfying texture without a lot of fuss. Most of these are pantry staples, with fresh toppings bringing brightness and freshness. Feel free to swap or adjust based on what you have on hand!
- For the Crispy Tortilla Cups:
- Small corn tortillas (6-inch diameter works best) — I recommend using fresh or good-quality store-bought ones for best crispness
- Cooking spray or a light brush of vegetable oil (helps achieve that golden crunch)
- Pinch of salt (optional, for seasoning the cups)
- For the Loaded Taco Dip Filling:
- Ground beef (85% lean), 1 pound (450 g) — you can swap ground turkey or chicken if preferred
- Yellow onion, finely diced (1 medium) — adds sweetness and depth
- Garlic cloves, minced (2 cloves) — for that signature savory punch
- Chili powder, 1 tablespoon — gives warmth without overpowering
- Ground cumin, 1 teaspoon — smoky undertone
- Smoked paprika, 1/2 teaspoon — optional but highly recommended for depth
- Salt and pepper, to taste
- Refried beans, 1 cup (240 ml) — creamy base that helps bind the filling
- Shredded sharp cheddar cheese, 1 cup (100 g) — the melty, gooey factor
- Fresh cilantro, chopped (2 tablespoons) — fresh herbal note
- For the Toppings:
- Diced tomatoes (1 medium, seeded) — bright and fresh
- Sliced black olives (1/4 cup or 40 g) — briny contrast
- Chopped green onions (2 tablespoons) — for a mild crunch and color
- Sour cream or Greek yogurt (1/2 cup or 120 ml) — cool creaminess
- Fresh jalapeño slices (optional, to taste) — if you like a little heat
- Fresh lime wedges (for serving) — a squeeze adds brightness
Pro tip: For an easy shortcut, I sometimes use pre-seasoned taco meat from the store, but cooking it yourself with fresh spices gives a much better flavor balance. Also, if you want to keep things vegetarian, swapping the beef for sautéed mushrooms or plant-based crumbles works surprisingly well.
Equipment Needed
- Muffin tin or cupcake pan — essential for shaping the crispy tortilla cups perfectly. If you don’t have one, a mini tart pan or even an oven-safe ramekin can work.
- Nonstick skillet or frying pan — for cooking the ground beef and onions.
- Mixing bowls — to combine ingredients and toss toppings.
- Sharp knife and cutting board — for chopping veggies and herbs.
- Spoon or small ladle — to fill the tortilla cups evenly.
- Cooking spray or brush — helps get the tortillas perfectly crisp.
From experience, using a nonstick muffin tin makes cleanup a breeze, but if you’re using metal pans, a light oiling is key to prevent sticking. I’ve also tried silicone muffin molds when hosting outdoor parties — they’re flexible and portable, but the crispness takes just a tiny bit longer to develop. Whatever you use, just keep an eye on the tortilla cups while baking to avoid over-browning.
Preparation Method
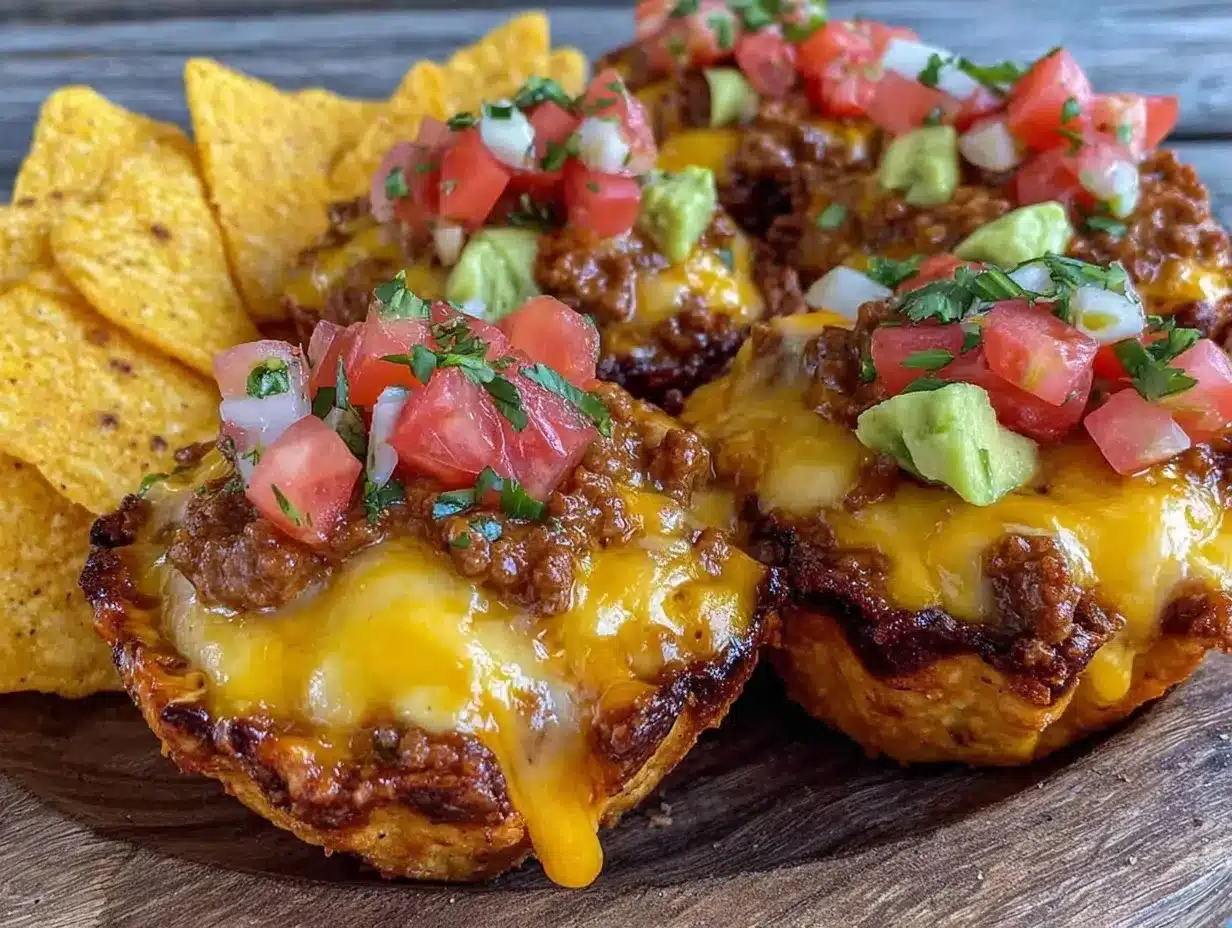
- Preheat your oven to 375°F (190°C). This temperature crisps the tortillas nicely without burning them.
- Prepare the tortilla cups: Lightly brush or spray both sides of each small corn tortilla with vegetable oil. You want a thin, even coating to get that perfect crunch.
- Shape the cups: Press each tortilla gently but firmly into the cups of your muffin tin, forming little bowls. If the tortillas crack, just patch with a small piece of another tortilla — it won’t affect the final result.
- Bake the tortillas: Place the muffin tin in the oven and bake for about 10-12 minutes, or until the edges are golden brown and crisp. Keep a close eye near the end since they can go from perfect to burnt quickly.
- Cook the beef filling: While tortillas bake, heat a skillet over medium-high heat. Add the ground beef and diced onion. Cook, breaking up the meat with a wooden spoon, until fully browned and onions are soft, about 8 minutes.
- Add garlic and spices: Stir in the minced garlic, chili powder, cumin, smoked paprika, salt, and pepper. Cook for another 1-2 minutes until fragrant.
- Mix in refried beans: Remove from heat and stir in the refried beans until fully combined. This adds creamy texture and helps the filling hold together.
- Assemble the dip cups: Spoon a generous amount of the beef-bean mixture into each crispy tortilla cup. Top with shredded cheddar cheese and bake again for 5 minutes, or until the cheese melts.
- Add fresh toppings: Remove from oven, then sprinkle diced tomatoes, sliced olives, chopped green onions, and fresh cilantro over each cup. Add a dollop of sour cream or Greek yogurt on top.
- Serve with lime wedges and jalapeño slices (optional): A quick squeeze of lime juice just before eating balances the richness beautifully.
Note: If you want to prep ahead, you can bake the tortilla cups and cook the beef filling a few hours before serving. Just assemble and bake with cheese right before guests arrive to keep everything fresh and crispy.
Cooking Tips & Techniques
Getting the perfect balance of crispy cups and flavorful filling took a few tries, so here’s what I’ve learned along the way:
- Don’t skip oiling the tortillas: Even a light spray makes a huge difference in crunch. Dry tortillas just won’t crisp properly.
- Use a muffin tin for shape: Pressing tortillas into muffin cups creates sturdy little bowls that hold the dip without leaking or sogginess.
- Watch your oven time: Tortillas can go from golden to burnt in seconds, so stay close during baking.
- Cook beef thoroughly but don’t overdo it: Overcooked meat can get dry; keep it juicy but well browned for the best flavor.
- Layer flavors: Adding refried beans smooths out the filling and helps it stick, while spices like smoked paprika add subtle complexity.
- Fresh toppings matter: The contrast of cool sour cream, fresh tomatoes, and crisp green onions brings the whole dish alive.
- Multitask prep: While the tortilla cups bake, cook your filling and prep toppings to save time and keep everything hot and fresh.
One rookie mistake I made early on was trying to fill the cups before baking the cheese on top — the cheese didn’t melt evenly and the filling got soggy. Baking after filling keeps the cheese perfectly gooey and the tortilla crisp. Trust me, it’s worth the little extra step!
Variations & Adaptations
This recipe is super flexible, so you can easily adapt it to suit different tastes or dietary needs:
- Vegetarian Version: Swap ground beef for sautéed mushrooms, black beans, or a seasoned plant-based crumble. The refried beans still add great creaminess and protein.
- Spice It Up: Add diced jalapeños or a dash of cayenne powder to the beef mixture for more heat.
- Cheese Options: Try pepper jack for a spicy kick or a Mexican blend for more melty goodness.
- Gluten-Free: Corn tortillas are naturally gluten-free, but double-check your refried beans and seasoning blends for hidden gluten.
- Seasonal Twist: In warmer months, swap diced tomatoes for fresh pico de gallo or add diced avocado for creaminess.
One time, I experimented with a layer of guacamole under the beef filling for extra richness — it was a hit at our casual brunch! Also, if you want a lighter option, swap sour cream for Greek yogurt and use lean turkey instead of beef.
Serving & Storage Suggestions
These crispy loaded taco dip cups are best served warm to enjoy the melty cheese and crisp cups. They make excellent finger food for parties or easy appetizers before dinner. I like to plate them with lime wedges and a sprinkle of fresh cilantro for a pop of color and brightness.
Pair them with a fresh salad or something simple like fresh spring vegetable frittata for a well-rounded meal. For drinks, a cold margarita or homemade horchata adds a festive flair — speaking of which, the creamy homemade horchata recipe on this site pairs wonderfully.
If you have leftovers (rare, but it happens!), store the assembled cups in an airtight container in the refrigerator for up to 2 days. Reheat in a preheated oven at 350°F (175°C) for about 10 minutes to bring back the crispness. Avoid microwaving if you want to keep that satisfying crunch.
Fun fact: the flavors tend to meld nicely if you let the cups sit for 30 minutes after assembling, so sometimes I make them a bit ahead and let guests enjoy a slightly deeper flavor experience.
Nutritional Information & Benefits
Each crispy loaded taco dip cup contains approximately:
| Nutrient | Amount per Serving (1 cup) |
|---|---|
| Calories | 180-220 kcal |
| Protein | 12-15 g |
| Fat | 10-12 g |
| Carbohydrates | 12-15 g |
| Fiber | 3-4 g |
This snack offers a balanced mix of protein and fiber, thanks to the ground beef and beans. The corn tortillas provide complex carbs and are naturally gluten-free. Plus, the fresh vegetables add vitamins and antioxidants. If you swap sour cream for Greek yogurt, you get a nice boost of probiotics and calcium.
From a wellness perspective, this recipe feels like a treat that doesn’t derail your day. It’s satisfying enough to keep hunger at bay and can fit into a balanced diet when enjoyed in moderation.
Conclusion
Crispy loaded taco dip cups with crunchy tortilla scoops have become one of those recipes I reach for when I want something flavorful, fun, and fuss-free. They offer all the best parts of taco night without requiring you to stand over a messy table or deal with folded tortillas falling apart. The layers of seasoned beef, creamy beans, gooey cheese, and fresh toppings come together in a way that feels special but is totally doable on a weeknight or for entertaining.
Feel free to adjust the fillings and toppings to suit your mood or what’s in your fridge — that’s part of what makes this recipe so great. For me, these cups are pure comfort food with a satisfying crunch, and I love how they bring people together, one bite at a time.
If you try this recipe, I’d love to hear what variations you come up with or how they went down at your next gathering. Happy cooking and snacking!
FAQs About Crispy Loaded Taco Dip Cups
Can I make the tortilla cups ahead of time?
Yes! You can bake the tortilla cups up to a day in advance and store them in an airtight container. Just fill and bake with cheese right before serving for best crispness.
What if I don’t have a muffin tin?
You can use mini tart pans, oven-safe ramekins, or even shape the tortillas over inverted oven-safe bowls. The key is to hold the shape while baking.
Can I freeze these taco dip cups?
It’s best to freeze the beef filling separately. Assemble and bake the cups fresh for best texture. Tortilla cups tend to get soggy when frozen.
Is there a vegetarian alternative?
Absolutely! Swap the ground beef for black beans, lentils, or plant-based meat crumbles. The refried beans add creaminess and protein to keep them hearty.
How spicy are these cups?
They’re mildly spiced by default. You can adjust the chili powder or add jalapeño slices to increase the heat according to your preference.
Pin This Recipe!
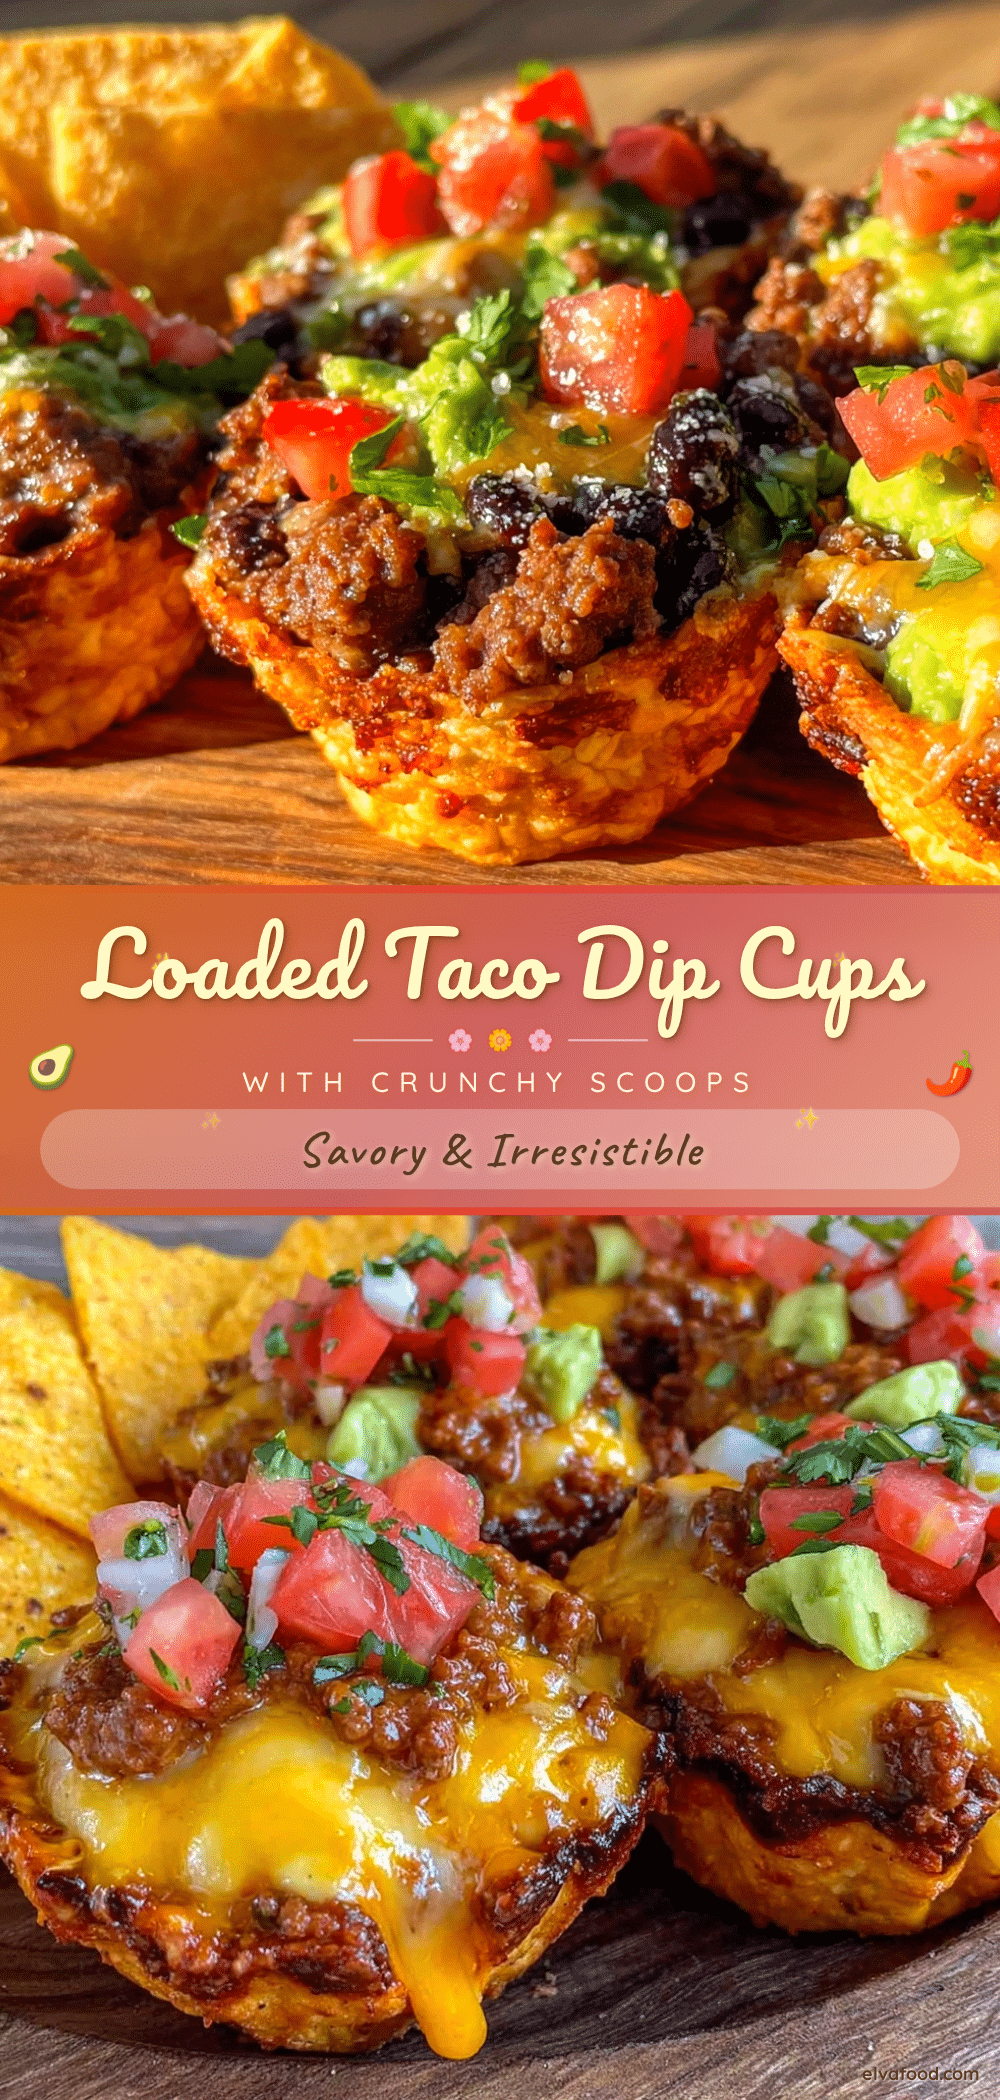
Crispy Loaded Taco Dip Cups

These crispy loaded taco dip cups are a perfect party snack featuring crunchy tortilla scoops filled with seasoned ground beef, melty cheese, fresh veggies, and creamy toppings. They are easy to make, mess-free, and bursting with Mexican-inspired flavors.
- Prep Time: 15 minutes
- Cook Time: 20 minutes
- Total Time: 35 minutes
- Yield: 12 servings 1x
- Category: Appetizer
- Cuisine: Mexican
Ingredients
- Small corn tortillas (6-inch diameter)
- Cooking spray or vegetable oil
- Pinch of salt (optional)
- 1 pound (450 g) ground beef (85% lean)
- 1 medium yellow onion, finely diced
- 2 garlic cloves, minced
- 1 tablespoon chili powder
- 1 teaspoon ground cumin
- 1/2 teaspoon smoked paprika (optional)
- Salt and pepper, to taste
- 1 cup (240 ml) refried beans
- 1 cup (100 g) shredded sharp cheddar cheese
- 2 tablespoons fresh cilantro, chopped
- 1 medium diced tomato, seeded
- 1/4 cup (40 g) sliced black olives
- 2 tablespoons chopped green onions
- 1/2 cup (120 ml) sour cream or Greek yogurt
- Fresh jalapeño slices (optional)
- Fresh lime wedges (for serving)
Instructions
- Preheat your oven to 375°F (190°C).
- Lightly brush or spray both sides of each small corn tortilla with vegetable oil.
- Press each tortilla gently but firmly into the cups of your muffin tin, forming little bowls. Patch any cracks with small pieces of tortilla if needed.
- Bake the tortillas in the oven for 10-12 minutes, or until edges are golden brown and crisp. Watch closely to avoid burning.
- While tortillas bake, heat a skillet over medium-high heat. Add ground beef and diced onion. Cook, breaking up the meat, until browned and onions are soft, about 8 minutes.
- Stir in minced garlic, chili powder, cumin, smoked paprika, salt, and pepper. Cook for another 1-2 minutes until fragrant.
- Remove from heat and stir in refried beans until fully combined.
- Spoon a generous amount of the beef-bean mixture into each crispy tortilla cup. Top with shredded cheddar cheese.
- Bake again for 5 minutes, or until the cheese melts.
- Remove from oven and sprinkle diced tomatoes, sliced olives, chopped green onions, and fresh cilantro over each cup.
- Add a dollop of sour cream or Greek yogurt on top.
- Serve with lime wedges and optional jalapeño slices. Squeeze lime juice over before eating.
Notes
Lightly oiling the tortillas is essential for crispness. Use a muffin tin to shape the cups for sturdy bowls. Watch baking time closely to avoid burning. Bake with cheese after filling to keep cups crisp and cheese melty. Can prep tortilla cups and beef filling ahead; assemble and bake cheese just before serving. For vegetarian version, substitute beef with mushrooms, black beans, or plant-based crumbles.
Nutrition
- Serving Size: 1 crispy loaded taco
- Calories: 180220
- Fat: 1012
- Carbohydrates: 1215
- Fiber: 34
- Protein: 1215
Keywords: taco dip, crispy tortilla cups, party snack, Mexican appetizer, loaded taco dip, easy snack, ground beef dip


