The plate was empty before I even had a chance to grab one. Third round in, and the requests started flying — “Can you share that brownie recipe?” Honestly, I didn’t expect the little cauldron brownie bites to disappear so fast, especially with that wild green slime frosting dripping over the edges. It all began as a fun experiment for a Halloween get-together. I wanted something that looked like it belonged in a witch’s lair but tasted like the kind of rich, fudgy brownie that makes you close your eyes and smile. I was half-surprised when the gooey frosting turned out just right — thick, shiny, and uncomfortably green, but irresistibly sweet.
One of those nights where the kitchen smelled like dark chocolate and something suspiciously tangy, and everyone kept sneaking bites when they thought no one was watching. Kids and adults alike were drawn to the eerie glow of that slime frosting, and honestly, it was the kind of recipe that makes you think, “Maybe I should’ve made a double batch.” The crunchy brownie edges combined with that silky, almost sticky frosting created a texture combo that I had to marvel at myself.
It’s funny how recipes like this sneak up on you — started as a fun idea, but now it’s a staple I find hard to skip when I want to impress friends without fuss. The way the frosting clings to the brownie bites like some sort of delicious, edible potion always gets a few comments. If you’re looking for a dessert that’s both playful and packed with flavor, this one’s quietly proud to hold that spot. There’s a little magic in the mix — not just the green color, but the way it all comes together so effortlessly.
In the end, it’s the kind of treat that sticks with you, not because it’s fancy, but because it tastes like something made with a bit of mischief and a lot of heart. That’s why I keep coming back to these Flavorful Cauldron Brownie Bites with Gooey Green Slime Frosting. They’re simple, surprising, and just a little bit weird—in the best way possible.
Why You’ll Love This Recipe
Trust me, after testing this recipe more times than I’d care to admit, it’s clear why these brownie bites have earned their place in my baking rotation. The balance of rich, chocolatey brownie and that unforgettable green slime frosting isn’t something you find every day. It’s a little quirky, a lot tasty, and surprisingly easy to pull together.
- Quick & Easy: You can whip these up in under 45 minutes, making them perfect for last-minute parties or unexpected guests.
- Simple Ingredients: No obscure pantry items here — just basics like cocoa, butter, sugar, and a few fun add-ins for the frosting.
- Perfect for Halloween & Parties: The spooky green frosting makes these ideal for themed events, but honestly, they’re great anytime you want to impress without stress.
- Crowd-Pleaser: Both kids and adults can’t get enough — the texture and flavor combo keeps everyone coming back for more.
- Unbelievably Delicious: That rich, fudgy brownie is balanced with a creamy, gooey frosting that sticks just right — not too sweet, not too tart.
What sets this recipe apart is the way the frosting is made — it’s thick and glossy with just the right “slimy” consistency, thanks to a little tweak I picked up after several failed attempts. Unlike normal frosting, this one clings and oozes like you’d expect from something called “slime.” Plus, the brownies themselves are dense but not heavy, with a crackly top that gives way to a moist center. It’s not your standard brownie bite, and that’s exactly why I’m still surprised it’s such a hit.
Honestly, it’s the kind of recipe that makes you feel a little proud without having to say much. You know it’s a winner when people text you the next day asking for the recipe — and that’s exactly how this one stuck around.
What Ingredients You Will Need
This recipe uses simple, wholesome ingredients to bring together bold chocolate flavor and that funky, gooey green frosting without any fuss. Most of these are pantry staples, and substitutions are easy if you’re looking to tweak things.
- For the Brownie Bites:
- Unsalted butter, 1/2 cup (115g), melted (adds richness and moisture)
- Granulated sugar, 1 cup (200g)
- Large eggs, 2, room temperature (for structure and moisture)
- Pure vanilla extract, 1 teaspoon
- All-purpose flour, 3/4 cup (95g), sifted
- Cocoa powder, 1/2 cup (50g), unsweetened (I prefer Valrhona or Ghirardelli for deep flavor)
- Salt, 1/4 teaspoon (balances sweetness)
- For the Gooey Green Slime Frosting:
- Powdered sugar, 1 1/2 cups (180g), sifted (for smoothness)
- Unsalted butter, 1/4 cup (57g), softened
- Milk, 2-3 tablespoons (30-45ml), whole milk recommended
- Vanilla extract, 1/2 teaspoon
- Green food coloring, 10-15 drops (gel coloring works best for vibrancy and less liquid)
- Optional: A few drops of lemon juice (adds subtle tang to balance sweetness)
If you want to make these gluten-free, swapping all-purpose flour with almond flour or a gluten-free blend works well, though the texture will be a bit different. For a dairy-free frosting, coconut oil can replace butter, and almond or oat milk works instead of cow’s milk. The key is keeping the frosting thick enough to hold that gooey slime look without running off.
Equipment Needed
- Mixing bowls – at least two, one for wet ingredients and one for dry.
- Measuring cups and spoons – for accuracy, especially with flour and cocoa powder.
- Electric mixer or hand whisk – the frosting is easier with a mixer, but a sturdy whisk can get the job done too.
- 8×8-inch (20×20 cm) baking pan – for baking the brownie slab before cutting into bites.
- Parchment paper – to line the pan for easy removal and clean-up.
- Spatula – for folding ingredients and spreading batter evenly.
- Cooling rack – to allow brownie bites to cool completely before frosting.
- Optional: piping bag or small offset spatula – if you want to get fancy with the slime frosting application.
I’ve tried making these using silicone baking pans, but I find the parchment-lined metal pan gives the best edges and texture. When it comes to frosting, a handheld electric mixer helps the buttercream get that glossy finish faster. If you’re on a budget, a basic whisk and a plastic container for mixing work just fine, though it takes some muscle.
Preparation Method
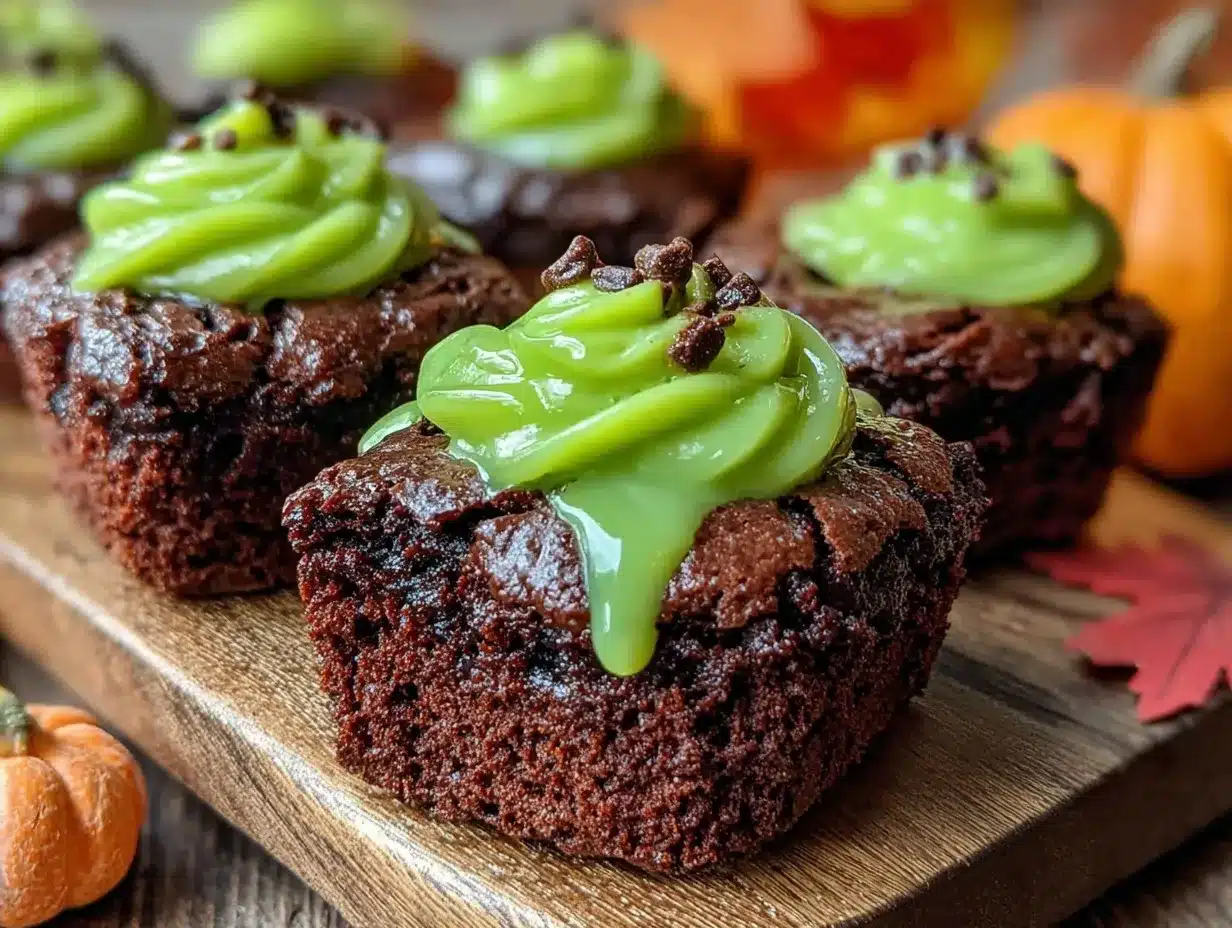
- Preheat your oven to 350°F (175°C). Line an 8×8-inch (20×20 cm) baking pan with parchment paper, leaving some overhang on the sides for easy removal.
- Mix the melted butter and sugar in a large bowl until just combined. The sugar should look slightly dissolved but don’t overbeat — you want a dense brownie.
- Add the eggs one at a time, mixing well after each addition. Stir in the vanilla extract. This should take about 2-3 minutes by hand or 1 minute with a mixer.
- In a separate bowl, whisk together the sifted flour, cocoa powder, and salt.
- Fold the dry ingredients gently into the wet mixture, being careful not to overmix. The batter should be thick and glossy with no dry streaks. This step usually takes about 1-2 minutes. Overmixing can lead to tough brownies, so keep it gentle.
- Pour the batter into the prepared pan, spreading it evenly with a spatula. Tap the pan lightly on the counter to remove air bubbles.
- Bake for 20-25 minutes or until a toothpick inserted in the center comes out with a few moist crumbs. The edges should look set but the center slightly soft — that’s the fudgiest spot.
- Let the brownies cool completely in the pan on a wire rack before lifting them out using the parchment overhang. This usually takes about 40 minutes, but don’t rush it — frosting warm brownies will melt your slime!
- While the brownies cool, prepare the frosting: Beat the softened butter with an electric mixer on medium speed until creamy, about 1-2 minutes.
- Add powdered sugar gradually, mixing on low speed to avoid a sugar cloud. Pour in 2 tablespoons of milk and vanilla extract, then beat on medium-high until smooth and fluffy. If the frosting is too thick, add the remaining tablespoon of milk; if too thin, add a bit more powdered sugar.
- Add green food coloring drop by drop, mixing well until you reach that perfect slime green. A few drops of lemon juice can add a subtle tang that cuts through the sweetness.
- Cut the cooled brownies into bite-sized squares, about 1.5 inches (4 cm) each. Use a sharp knife for clean edges.
- Frost each brownie bite generously with the gooey green slime frosting. You can spread it with a small offset spatula or pipe it for a fun effect. Let the frosting set for 10-15 minutes before serving so it clings just right.
If your frosting gets too runny, pop it in the fridge for 10 minutes then whip again. If brownies seem dry, try adding a small dollop of frosting on top — it’s a game-changer. Trust me, the contrast between the fudgy brownie and slippery frosting is what makes these bites unforgettable.
Cooking Tips & Techniques
One trick I learned the hard way is to not overbake these brownies. You want that fudgy center, not a cakey result. Keep an eye tight after 18 minutes, and test with a toothpick early — it’s better to err on the side of slightly underbaked.
The frosting is where this recipe shines or sinks. Using gel food coloring is key to keeping it vibrant without watering down your frosting. Also, beat the butter first until creamy — this helps the powdered sugar incorporate better and avoid grainy frosting.
Another tip: cooling the brownies completely before frosting is essential. I once tried frosting warm brownies and ended up with a sticky mess that looked more like a failed potion than slime. Patience pays off here.
When piping the frosting, don’t be shy with the amount. The gooey, dripping effect is what sells the “cauldron slime” look. If you want to get fancy, adding a tiny sprinkle of edible glitter or black sanding sugar can make the bites look even more magical.
Multitasking works well here — while the brownies bake, whip up the frosting so everything’s ready to go once they’re cooled. And if you want a smoother frosting, sifting powdered sugar before mixing avoids lumps and helps with that glossy finish.
Variations & Adaptations
- Flavor Variations: Swap cocoa powder for dark chocolate melted into the batter for an ultra-rich taste. You can also stir in chopped nuts or mini chocolate chips for extra texture.
- Frosting Twists: Add a hint of peppermint extract to the frosting for a minty slime effect, or use white chocolate buttercream tinted green for a creamier finish.
- Dietary Adjustments: Use almond flour or gluten-free flour blend to make the brownie bites gluten-free. For vegan versions, substitute flax eggs and vegan butter — though the frosting consistency might need slight tweaking.
- Cooking Method: These brownies also work well baked in a muffin tin for individual bites, just reduce baking time by 5-7 minutes.
- Personal Try: I once made a pumpkin-spiced version with warm spices in the brownie base and swapped the green frosting out for orange — still got rave reviews, especially in fall.
Serving & Storage Suggestions
Serve these cauldron brownie bites at room temperature for the best texture and gooey frosting experience. They look amazing arranged on a dark platter or a themed Halloween tray, paired with simple vanilla ice cream or a cup of black coffee.
For a fun twist, you can serve alongside some Rainbow Pot of Gold Cupcakes to keep the festive vibe going strong. Or, if you’re after savory comfort foods before dessert, something like Irish Lamb Stew is a hearty match.
Store leftover brownie bites in an airtight container in the fridge for up to 4 days. The frosting will firm up a bit but stays tasty. To refresh, let them sit at room temperature for 15 minutes before eating or microwave briefly (about 10 seconds) to soften the frosting without melting it completely.
They also freeze well—just pop them in a single layer on a tray until solid, then transfer to a freezer bag. Thaw in the fridge overnight, then bring to room temperature before serving to keep that lovely slime texture intact.
Nutritional Information & Benefits
Each brownie bite (about 1.5-inch square) clocks in roughly at 150 calories, with 8 grams of fat, 20 grams of carbohydrates, and 2 grams of protein. The cocoa powder offers antioxidants, and using unsalted butter gives you control over sodium levels.
While these treats are definitely indulgent, you can lighten the load by using less sugar in the frosting or swapping butter for lighter alternatives. Gluten-free or vegan versions are easy to make with substitutions, making these bites accessible to many dietary preferences.
For those mindful of allergens, the recipe contains dairy, eggs, and gluten by default, but swapping ingredients can help make it safe. I find that balancing the rich chocolate with the tangy frosting makes for a dessert that feels satisfying without being overly heavy.
Conclusion
These Flavorful Cauldron Brownie Bites with Gooey Green Slime Frosting have quietly taken a special place in my recipe box. They’re not just a fun, spooky dessert — they’re a reliable crowd-pleaser that’s easy to make and impossible to resist. The balance of fudgy brownie and oozy frosting offers a little surprise in every bite, perfect for anyone looking to add a bit of playful magic to their baking.
Feel free to tweak the frosting color or add your own twist to the base recipe — that’s part of the fun. I love how this recipe brings people together, whether it’s at a party or a casual night in, and I’m always a little amazed by how quickly they disappear.
If you try these, I’d love to hear how your slime frosting turned out or what variations you experimented with. Baking should be as much about the stories we make as the flavors we share. Here’s to your own little cauldron of brownie magic.
Frequently Asked Questions
What makes the frosting “slime” and how do I get the right consistency?
The slime effect comes from using just the right balance of powdered sugar, butter, and milk, plus gel food coloring for vibrancy. The frosting should be thick but spreadable—too much milk and it runs, too little and it won’t ooze properly.
Can I make these ahead of time?
Absolutely. You can bake the brownies a day ahead and store them wrapped. Frost just before serving for best texture, or frost and refrigerate but bring to room temp before eating.
What’s the best way to cut these brownie bites cleanly?
Use a sharp knife and wipe it clean between cuts to avoid crumbling. Letting brownies cool completely makes cutting easier and neater.
Can I use natural food coloring instead of artificial?
You can try spirulina or matcha powders for green tint, but the color won’t be as vibrant or “slimy.” Gel food coloring is best for that classic bright green slime look.
How can I make these brownies fudgier?
Use a bit less flour (reduce by 1-2 tablespoons) and avoid overbaking. Also, melting the butter instead of creaming it helps keep the texture dense and moist.
Pin This Recipe!
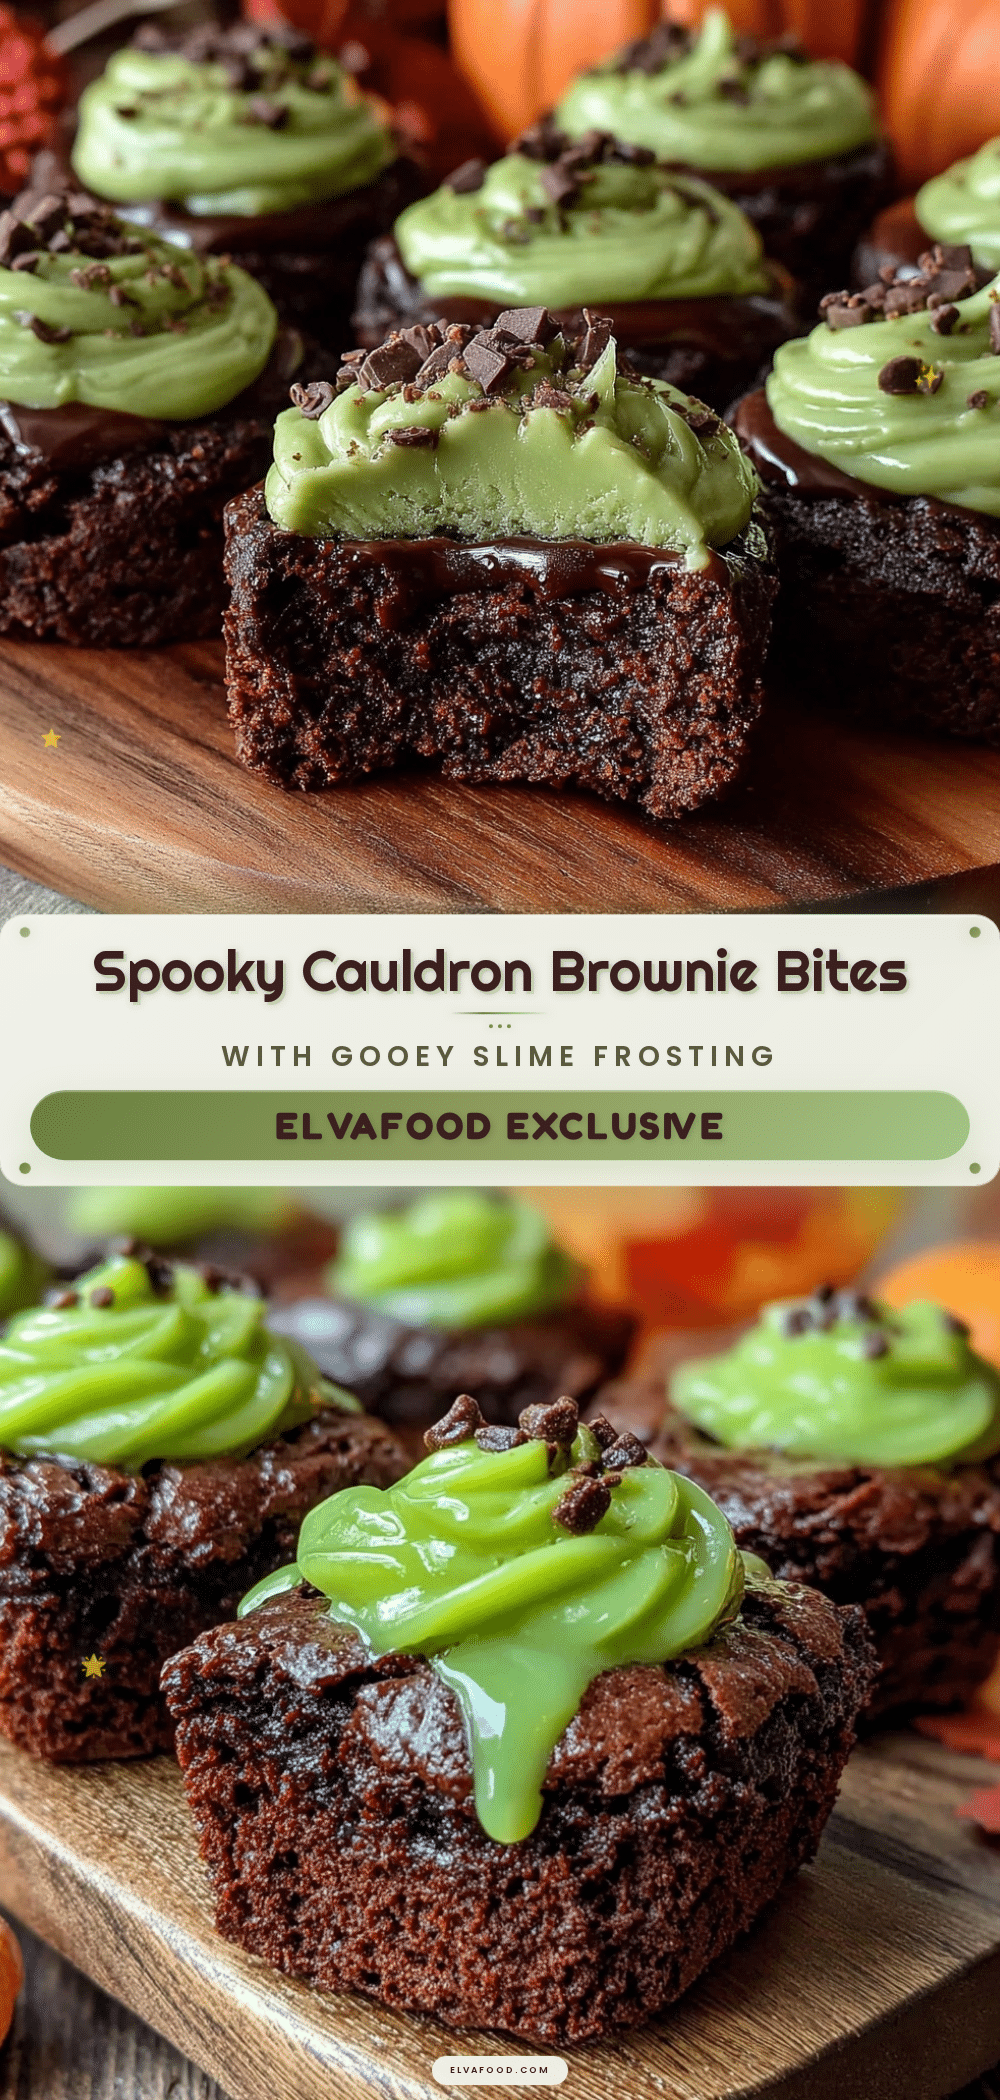
Flavorful Cauldron Brownie Bites with Gooey Green Slime Frosting
These brownie bites feature a rich, fudgy chocolate base topped with a thick, glossy green slime frosting, perfect for Halloween or any fun occasion. They are quick to make, crowd-pleasing, and irresistibly tasty.
- Prep Time: 15 minutes
- Cook Time: 25 minutes
- Total Time: 45 minutes
- Yield: 16 servings 1x
- Category: Dessert
- Cuisine: American
Ingredients
- 1/2 cup (115g) unsalted butter, melted
- 1 cup (200g) granulated sugar
- 2 large eggs, room temperature
- 1 teaspoon pure vanilla extract
- 3/4 cup (95g) all-purpose flour, sifted
- 1/2 cup (50g) unsweetened cocoa powder
- 1/4 teaspoon salt
- 1 1/2 cups (180g) powdered sugar, sifted
- 1/4 cup (57g) unsalted butter, softened
- 2–3 tablespoons (30-45ml) whole milk
- 1/2 teaspoon vanilla extract
- 10–15 drops green gel food coloring
- Optional: a few drops lemon juice
Instructions
- Preheat oven to 350°F (175°C). Line an 8×8-inch (20×20 cm) baking pan with parchment paper, leaving overhang for easy removal.
- Mix melted butter and granulated sugar in a large bowl until just combined.
- Add eggs one at a time, mixing well after each addition. Stir in vanilla extract.
- In a separate bowl, whisk together sifted flour, cocoa powder, and salt.
- Fold dry ingredients gently into wet mixture until thick and glossy with no dry streaks.
- Pour batter into prepared pan and spread evenly. Tap pan lightly to remove air bubbles.
- Bake for 20-25 minutes or until a toothpick inserted comes out with a few moist crumbs.
- Cool brownies completely in pan on wire rack, about 40 minutes.
- Prepare frosting: Beat softened butter with electric mixer until creamy, about 1-2 minutes.
- Gradually add powdered sugar on low speed. Add 2 tablespoons milk and vanilla extract, beat until smooth and fluffy. Adjust consistency with remaining milk or powdered sugar as needed.
- Add green food coloring drop by drop, mixing until desired slime green color is reached. Add lemon juice if using.
- Cut cooled brownies into 1.5-inch (4 cm) bite-sized squares using a sharp knife.
- Frost each brownie bite generously with green slime frosting. Let set for 10-15 minutes before serving.
Notes
Do not overbake brownies to keep them fudgy. Use gel food coloring for vibrant slime effect. Cool brownies completely before frosting to avoid melting. If frosting is too runny, chill and whip again. For gluten-free, substitute flour with almond or gluten-free blend. For dairy-free, use coconut oil and plant-based milk.
Nutrition
- Serving Size: 1 brownie bite (abou
- Calories: 150
- Fat: 8
- Carbohydrates: 20
- Protein: 2
Keywords: brownie bites, Halloween dessert, green slime frosting, fudgy brownies, easy brownies, party treats, spooky dessert


