The way the syrup catches the light through the glass — that deep, honeyed amber with little flecks of cinnamon suspended like tiny rust-colored stars — and I already know these jars are going to be my favorite thing in the pantry all winter. It’s not even about the pears themselves, though they’re perfect, tender but not mushy, each slice holding its shape like it knows exactly what it’s supposed to do. It’s the whole jar. The weight of it. The way you can see through to the other side and know exactly what you’re getting before you twist off the lid.
I got into canning a few years back because I got tired of watching good fruit go bad on the counter. You know how it is — you buy a bag of pears with every intention of making a pie, and then life happens, and suddenly you’re staring at a bowl of brown spots. This homemade canned cinnamon pears recipe came out of one of those moments, honestly. I had a bushel of Bosc pears from the farmer’s market that were about two days from being compost, and I couldn’t stand the thought of it. So I grabbed my water bath canner, some cinnamon sticks I’d been hoarding, and just figured it out as I went.
The first batch was a little too soft. The second had too much sugar. But by the third, I had it — that perfect balance where the cinnamon doesn’t overpower the pear, just sits next to it like a good friend. And now, every time I open a jar in February, I remember that afternoon in my tiny kitchen, the steam fogging up the windows, the smell of cinnamon and fruit hanging in the air for days. That’s the thing about canning. You’re not just preserving fruit. You’re preserving the moment you made it.
Why You’ll Love This Recipe
Look, I’ve made a lot of canned things over the years. Some turned out great. Some ended up in the trash with a sad shrug. But this homemade canned cinnamon pears recipe? This one stuck. Here’s why I keep coming back to it, and why I think you will too.
- Simple Ingredients: You don’t need a specialty grocery store for this. Pears, sugar, cinnamon sticks, lemon juice, water. That’s it. No weird additives, no preservatives, no things you can’t pronounce.
- Beginner-Friendly: If you’ve never canned anything before, this is a great place to start. The process is straightforward, and pears are forgiving. They don’t turn into mush the second you look at them wrong.
- Perfect for Gifting: I’m not gonna lie — a jar of these tied with a little ribbon makes a better gift than half the stuff you’d buy at the store. People actually use it. They eat it. They remember it.
- Year-Round Summer: There’s something deeply satisfying about opening a jar of pears in January when the world is gray and cold. It tastes like September. Like sunshine in a jar.
- Completely Customizable: Want it spicier? Add a clove. Want it less sweet? Cut the sugar. Want it boozy? Toss in a splash of vanilla extract or bourbon. This recipe is a starting point, not a rule book.
What makes this version different from the standard canning recipes you’ll find online is the attention to the syrup. Most recipes just tell you to boil sugar and water and call it done. I spent a whole afternoon testing different ratios until I got a syrup that was thick enough to feel luxurious but light enough to let the pear flavor shine. And the cinnamon? I don’t use ground cinnamon because it makes the syrup cloudy. Whole sticks only. It’s a small thing, but it makes the jars look beautiful and the flavor stays clean.
This is the kind of recipe that makes you feel like you actually accomplished something. Not in a stressful way — in a satisfying, look-what-I-did-with-my-hands way. And honestly? We all need more of that.
What Ingredients You Will Need
This recipe uses simple, wholesome ingredients to deliver that warm, spiced sweetness without any fuss. Most of these are pantry staples, which makes this an easy project to tackle on a whim.
- Fresh Pears (about 5-6 pounds, depending on size) — You want pears that are ripe but still firm. Bosc or Bartlett work beautifully. Bosc holds its shape better during processing, while Bartlett gives a softer, more tender result. I personally prefer Bosc for canning because they don’t turn into baby food. Look for pears without bruises or soft spots. If they’re a little underripe, that’s actually perfect — they’ll soften in the syrup.
- Granulated Sugar (3 cups) — This creates the syrup that preserves and sweetens the pears. You can reduce it to 2 cups if you prefer a lighter syrup, but don’t go lower than that for food safety reasons when water bath canning. The sugar helps with preservation and texture.
- Cinnamon Sticks (6-8 sticks, one per jar) — Please use whole sticks, not ground cinnamon. Ground cinnamon turns the syrup murky and settles at the bottom of the jar. It doesn’t look pretty and the flavor isn’t as clean. I like Saigon cinnamon for its bold, sweet heat, but any good-quality cinnamon stick works.
- Fresh Lemon Juice (1/4 cup) — This is crucial. The acid in lemon juice helps preserve the color of the pears and prevents them from turning brown during processing. It also balances the sweetness of the syrup. Don’t skip it, and don’t use bottled lemon juice if you can help it — fresh tastes noticeably better.
- Water (6 cups) — For the syrup. Use filtered water if your tap water has a strong taste. You’ll be eating these pears months from now, so start with good water.
- Optional: Vanilla Extract (1 teaspoon per jar) — This is my little secret. A tiny splash of vanilla in each jar before you pour the syrup makes the pears taste like dessert. It’s not traditional, but it’s delicious.
- Optional: Whole Cloves (2-3 per jar) — If you want a more spiced, holiday-style pear, add a couple of cloves to each jar. Just warn people before they eat them — nobody wants to bite into a whole clove.
Equipment Needed
You don’t need a fancy kitchen to make this work. Here’s what you’ll actually use:
- Water Bath Canner (or a large, deep stockpot with a rack) — This is the big pot you’ll use to process the jars. If you don’t have a canner, a stockpot that’s deep enough to cover the jars with at least an inch of water works fine. Just put a folded kitchen towel at the bottom to keep the jars from rattling.
- Canning Jars (6-8 pint-sized jars with new lids and bands) — Pint jars are perfect for this recipe. Make sure the rims are clean and the lids are brand new. Old lids don’t seal reliably, and that’s how you lose a whole batch.
- Jar Lifter — This is non-negotiable. Trying to grab hot jars out of boiling water with tongs is a recipe for disaster. Trust me on this one. I have the scars.
- Wide-Mouth Funnel — Makes filling the jars so much less messy. Worth every penny.
- Large Pot (for making the syrup)
- Sharp Knife and Cutting Board — For peeling and slicing the pears.
- Clean Dish Towels — For drying the jars and wiping the rims before sealing.
- Magnetic Lid Lifter (optional but nice) — Helps you pick the lids out of hot water without burning your fingers.
Preparation Method
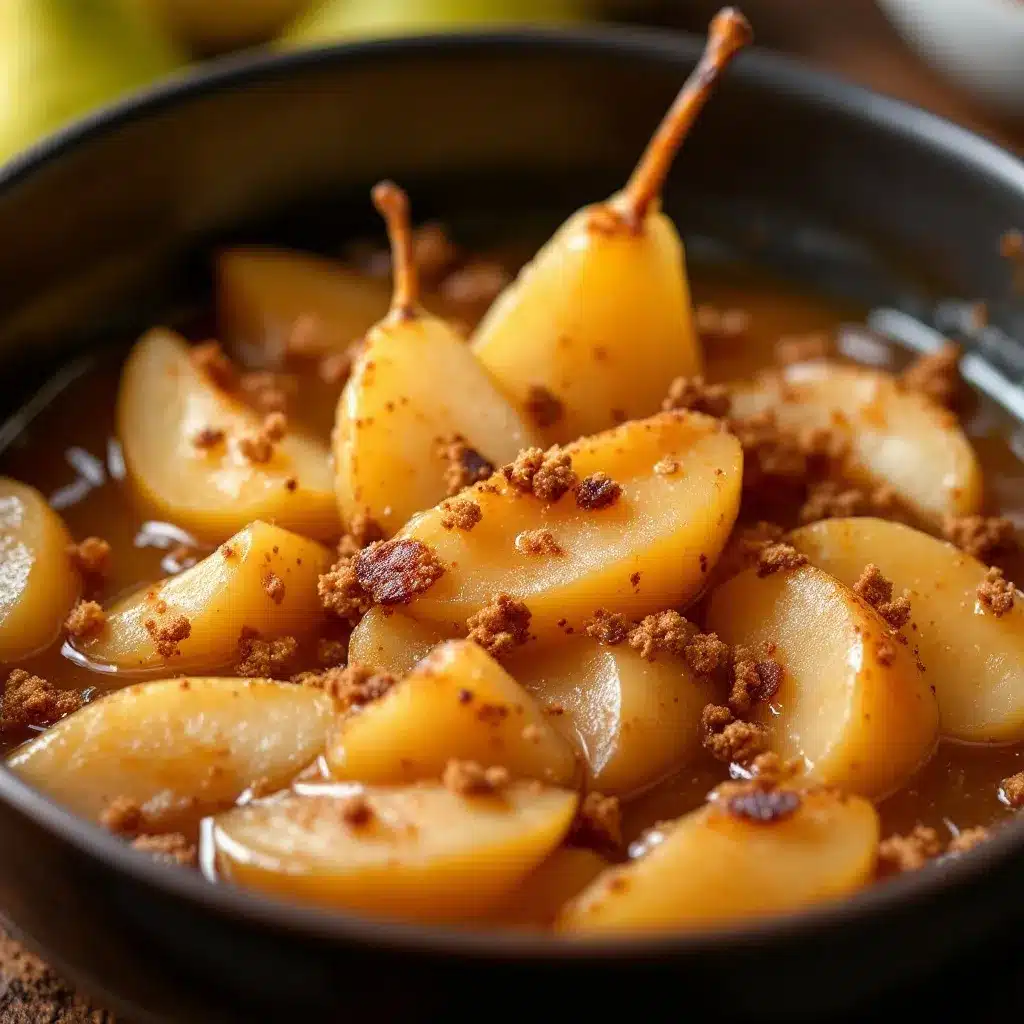
Alright, let’s get into it. This whole process takes about two hours from start to finish, but most of that is waiting for water to boil. The actual hands-on work is maybe 45 minutes.
- Prepare your jars and lids. Wash your jars, lids, and bands in hot, soapy water. Rinse well. Place the jars in your water bath canner, cover them with water, and bring to a simmer. Keep them hot until you’re ready to fill them. Put the lids in a small saucepan of hot water (not boiling) and keep them there until needed. Hot jars + hot syrup = happy seals.
- Make the syrup. In a large pot, combine 6 cups of water, 3 cups of sugar, and 1/4 cup of fresh lemon juice. Stir to dissolve the sugar. Bring to a boil over medium-high heat, then reduce to a simmer. Keep it warm while you prepare the pears.
- Prepare the pears. Peel the pears with a vegetable peeler or a sharp knife. Cut them in half lengthwise and use a melon baller or small spoon to scoop out the core and seeds. If you want uniform slices, cut each half into 3-4 wedges. As you work, drop the pear pieces into a bowl of water mixed with a little lemon juice to prevent browning. Don’t leave them sitting too long, though — you want them fresh.
- Blanch the pears. This step is optional but recommended. Drop the pear pieces into a pot of boiling water for 2-3 minutes. This softens them slightly and helps them hold their shape better during processing. Drain and set aside.
- Fill the jars. Remove a hot jar from the canner using your jar lifter. Place it on a clean towel. Using your wide-mouth funnel, pack the pear pieces into the jar, leaving about 1/2 inch of headspace at the top. Don’t cram them in — they need room for the syrup to circulate. Add one cinnamon stick to each jar. If you’re using vanilla or cloves, add those now.
- Add the syrup. Ladle the hot syrup over the pears, still leaving that 1/2 inch of headspace. Use a chopstick or a plastic knife to gently stir the jar and release any air bubbles. Wipe the rim of the jar with a clean, damp towel. Any sugar residue on the rim can prevent the lid from sealing.
- Seal the jars. Place a lid on the jar (center it over the rim) and screw on the band until it’s fingertip-tight — meaning you tighten it with your fingertips, not your whole hand. Don’t overtighten. Air needs to escape during processing.
- Process the jars. Using your jar lifter, carefully lower the filled jars into the water bath canner. Make sure the jars are covered by at least 1-2 inches of water. Put the lid on the canner and bring the water to a full rolling boil. Start your timer once the water is boiling. Process pint jars for 20 minutes. If you’re at an altitude above 1,000 feet, add 5 minutes for every 1,000 feet.
- Cool and check seals. After processing, turn off the heat and remove the canner lid. Let the jars sit in the hot water for 5 minutes. Then, using your jar lifter, remove them and place them on a towel-covered counter. Leave them undisturbed for 12-24 hours. You should hear the satisfying “pop” of the lids sealing as they cool. After 24 hours, press down on the center of each lid. If it doesn’t flex, it’s sealed. If it pops up and down, refrigerate that jar and use it within a few weeks.
- Label and store. Write the date and contents on the lids with a permanent marker. Store the sealed jars in a cool, dark place — your pantry, a basement shelf, or a cabinet away from the stove. They’ll keep for up to a year, but honestly, they never last that long in my house.
Cooking Tips & Techniques
I’ve made this recipe at least a dozen times, and I’ve made every mistake in the book so you don’t have to. Here’s what I’ve learned.
Don’t overprocess the pears. I know it’s tempting to leave them in the water bath longer “just to be safe,” but overprocessing turns your beautiful pear slices into mush. 20 minutes is perfect for pint jars. Set a timer and stick to it.
Use the right pears. I learned this the hard way when I used super-ripe Anjou pears and ended up with pear soup. You want pears that are ripe but still firm — they should yield slightly to pressure but not feel squishy. Underripe is actually better than overripe for canning.
Keep your jars hot. This is one of those rules that seems fussy until you break it and a jar cracks in your hands. Hot syrup in a cold jar = thermal shock = broken glass and wasted fruit. Keep those jars in simmering water until you’re ready to fill them.
Don’t skip the lemon juice. I know it seems like a small amount, but it does two important things: it keeps the pears from turning brown, and it raises the acidity of the syrup to a safe level for water bath canning. Pears are low-acid fruit, so the lemon juice is essential for food safety.
Let them rest. The pears will taste good right after processing, but they get better after a few weeks. The flavors meld, the cinnamon infuses deeper into the fruit, and the syrup thickens slightly. I try to wait at least two weeks before opening a jar. It’s hard, but it’s worth it.
Work in batches. If you’re doing a big haul of pears, don’t try to fill all the jars at once. Work in batches of 4-6 jars so the syrup stays hot and the pears don’t sit around too long. Your back will thank you, and the results will be more consistent.
Variations & Adaptations
One of the best things about this recipe is how easy it is to make it your own. Here are some variations I’ve tried and loved.
Spiced Winter Pears: Add 2-3 whole cloves and a star anise to each jar along with the cinnamon stick. The result is a deeply spiced pear that tastes like Christmas in a jar. I made a batch like this last December and gave them as gifts. They were gone before New Year’s.
Vanilla Bean Pears: Instead of vanilla extract, split a vanilla bean lengthwise and add half a bean to each jar. The tiny black specks floating in the golden syrup are gorgeous, and the flavor is more complex and floral than extract. This version is fancy enough to serve at a dinner party.
Honey-Sweetened Pears: Replace the white sugar with 2 cups of honey. The flavor is different — more floral, less neutral — and the syrup will be darker. If you use honey, reduce the processing time by 5 minutes because honey-based syrups can get too thick. I’ve done this with orange blossom honey and it was incredible.
Bourbon-Pear Sundaes: This isn’t a canning variation, but it’s my favorite way to eat the finished product. Warm up a few slices of canned cinnamon pears with a splash of bourbon, spoon them over vanilla ice cream, and drizzle a little of the syrup on top. It’s dangerously good.
Low-Sugar Version: If you’re watching your sugar intake, you can use a light syrup made with 1 cup of sugar and 6 cups of water. The pears will be less sweet, but they’ll still taste like cinnamon and pear. Just know that the texture might be slightly softer because sugar helps firm the fruit during processing.
If you’re looking for other cozy, comforting recipes to fill your kitchen with good smells, you might enjoy this hearty Irish lamb stew with Guinness — it’s the perfect cold-weather companion to a jar of these pears. Or, if you’re in the mood for something sweet and festive, these rainbow pot of gold cupcakes are a fun way to use up some of that extra cinnamon sugar.
Serving & Storage Suggestions
These pears are incredibly versatile. Here’s how I like to use them.
Serve them cold or at room temperature. Straight from the jar, they’re a perfect snack or a light dessert. I love eating them with a fork right out of the jar while standing in front of the open fridge — don’t judge, you know you do it too.
Warm them up. Spoon some pears and syrup into a small saucepan and warm them gently over low heat. Serve them over pancakes, waffles, or French toast for a breakfast that feels special. They’re also amazing spooned over plain yogurt or oatmeal.
Pair with cheese. This is my favorite trick for dinner parties. Arrange warm cinnamon pears on a platter with slices of sharp cheddar, aged gouda, or blue cheese. Drizzle a little of the syrup over everything and add some toasted walnuts. It’s an appetizer that looks fancy but takes five minutes to throw together.
Storage: Sealed jars will keep in a cool, dark place for up to 12 months. Once opened, store the jar in the refrigerator and use the pears within 2-3 weeks. The syrup will keep longer, but the texture of the pears starts to decline after a couple of weeks in the fridge.
Reheating: If you’re warming the pears for a recipe, do it gently. High heat can break them apart. A low simmer for 3-5 minutes is all they need.
Flavor development: As I mentioned earlier, the pears taste best after they’ve rested for at least two weeks. The cinnamon really sinks into the fruit, and the syrup thickens into something almost luscious. If you can resist the urge to open a jar right away, you’ll be rewarded.
Nutritional Information & Benefits
Let’s be real — these are canned pears in a sugar syrup, so they’re not exactly health food. But they’re not junk food either. Here’s the breakdown.
Estimated per serving (1/2 cup of pears with syrup):
- Calories: 120-150
- Carbohydrates: 32g
- Sugar: 28g (mostly from added sugar and natural pear sugar)
- Fiber: 2g
- Vitamin C: 4% of daily value
Health benefits: Pears are a good source of dietary fiber, which supports digestion and helps you feel full. They also contain vitamin C and copper, which are important for immune function and red blood cell production. The cinnamon in this recipe has anti-inflammatory properties and can help regulate blood sugar levels — though, fair warning, the sugar in the syrup kind of cancels that out.
Dietary considerations: This recipe is naturally vegan, dairy-free, gluten-free, and nut-free. If you use the low-sugar version, it’s also suitable for people watching their sugar intake. The only potential allergen is the pears themselves, which are not a common allergen.
My take: I don’t pretend these are a health food. They’s a treat — a delicious, satisfying, homemade treat that’s way better for you than anything you’d buy at the store. No high-fructose corn syrup, no artificial flavors, no preservatives. Just fruit, sugar, water, and spice. That’s a win in my book.
Conclusion
There’s something deeply satisfying about opening a jar of something you made with your own hands — especially when it’s the middle of winter and the world outside is cold and bare. These homemade canned cinnamon pears are that kind of recipe. They’re simple enough for a beginner, forgiving enough for a busy afternoon, and delicious enough to make you feel like you really accomplished something.
I hope you give this recipe a try. Don’t stress about getting it perfect — the first batch is always a learning experience. Adjust the sugar to your taste, experiment with spices, and make it your own. That’s the beauty of home canning. It’s not about following rules. It’s about preserving what’s good and sharing it with the people you love.
If you make these, I’d love to hear about it. Drop a comment below and tell me how they turned out, what variations you tried, or how you ended up serving them. And if you’re looking for more cozy, from-scratch recipes, you might enjoy this slow cooker carnitas recipe — it’s another one of those recipes that makes your whole house smell amazing while you barely lift a finger.
Happy canning, friends. Your pantry is about to get a whole lot cozier.
Frequently Asked Questions
Can I use ground cinnamon instead of cinnamon sticks?
You can, but I don’t recommend it. Ground cinnamon makes the syrup cloudy and leaves a gritty sediment at the bottom of the jar. The flavor is also less clean and more dusty. Cinnamon sticks give you a beautiful, clear syrup and a more refined taste. If ground cinnamon is all you have, use about 1/2 teaspoon per jar and accept that the appearance won’t be as pretty.
Do I have to peel the pears?
Yes, for this recipe. Pear skins are tough and don’t soften during processing. They’ll also turn brown and unappetizing in the jar. Peeling is a bit of work, but it’s worth it for the final texture and appearance. If you really want to skip peeling, use very thin-skinned Asian pears — but even then, I’d peel them.
How do I know if my jars sealed properly?
After the jars have cooled for 12-24 hours, press down on the center of each lid. If it’s firm and doesn’t flex or pop, it’s sealed. You can also remove the band and gently lift the jar by the lid — if the lid holds, it’s sealed. If you hear a popping sound when you press the center, the seal failed. Refrigerate that jar and use it within a few weeks.
Can I double this recipe?
Absolutely. This recipe scales up beautifully. Just make sure you have enough jars, enough pot space, and enough counter space. If you’re doing a big batch, work in smaller groups of jars — don’t try to fill 20 jars at once. The syrup will cool down, and you’ll end up with inconsistent results. Batch it out in groups of 4-6 jars for best results.
What can I do with the leftover syrup after the pears are gone?
Don’t you dare pour it down the drain! That cinnamon-infused syrup is liquid gold. Use it to sweeten tea or coffee, drizzle it over pancakes or oatmeal, stir it into yogurt, or use it as a base for cocktails. I’ve even used it to brush over cake layers for extra moisture and flavor. It keeps in the fridge for months.
Pin This Recipe!
Homemade Canned Cinnamon Pears
A simple, beginner-friendly recipe for preserving ripe pears in a warm cinnamon syrup. Perfect for gifting, enjoying year-round, or adding a touch of homemade sweetness to winter days.
- Prep Time: 45 minutes
- Cook Time: 20 minutes
- Total Time: 2 hours (including cooling)
- Yield: 6-8 pint jars 1x
- Category: Preserves
- Cuisine: American
Ingredients
- 5–6 pounds fresh pears (Bosc or Bartlett, ripe but firm)
- 3 cups granulated sugar
- 6–8 cinnamon sticks (one per jar)
- 1/4 cup fresh lemon juice
- 6 cups water (filtered if possible)
- 1 teaspoon vanilla extract per jar (optional)
- 2–3 whole cloves per jar (optional)
Instructions
- Prepare your jars and lids. Wash jars, lids, and bands in hot, soapy water. Rinse well. Place jars in water bath canner, cover with water, and bring to a simmer. Keep hot until ready to fill. Place lids in a small saucepan of hot water (not boiling) and keep warm.
- Make the syrup. In a large pot, combine 6 cups water, 3 cups sugar, and 1/4 cup fresh lemon juice. Stir to dissolve sugar. Bring to a boil over medium-high heat, then reduce to a simmer. Keep warm while preparing pears.
- Prepare the pears. Peel pears with a vegetable peeler or sharp knife. Cut in half lengthwise and scoop out core and seeds with a melon baller or small spoon. Cut each half into 3-4 wedges. Drop pear pieces into a bowl of water mixed with a little lemon juice to prevent browning.
- Blanch the pears (optional but recommended). Drop pear pieces into a pot of boiling water for 2-3 minutes. Drain and set aside.
- Fill the jars. Remove a hot jar from canner using jar lifter. Place on a clean towel. Using a wide-mouth funnel, pack pear pieces into jar, leaving 1/2 inch headspace. Add one cinnamon stick to each jar. Add vanilla or cloves if using.
- Add the syrup. Ladle hot syrup over pears, still leaving 1/2 inch headspace. Use a chopstick or plastic knife to gently stir and release air bubbles. Wipe jar rim with a clean, damp towel.
- Seal the jars. Place a lid on the jar (center over rim) and screw on band until fingertip-tight. Do not overtighten.
- Process the jars. Using jar lifter, carefully lower filled jars into water bath canner. Ensure jars are covered by at least 1-2 inches of water. Put lid on canner and bring water to a full rolling boil. Start timer once boiling. Process pint jars for 20 minutes. For altitudes above 1,000 feet, add 5 minutes per 1,000 feet.
- Cool and check seals. After processing, turn off heat and remove canner lid. Let jars sit in hot water for 5 minutes. Remove jars and place on a towel-covered counter. Leave undisturbed for 12-24 hours. After 24 hours, press down on center of each lid. If it doesn’t flex, it’s sealed. If it pops up and down, refrigerate and use within a few weeks.
- Label and store. Write date and contents on lids with a permanent marker. Store sealed jars in a cool, dark place for up to 1 year.
Notes
Use whole cinnamon sticks, not ground, to keep syrup clear. Pears should be ripe but firm; underripe is better than overripe. Keep jars hot to prevent thermal shock. Do not skip lemon juice—it prevents browning and ensures safe acidity. Let pears rest at least 2 weeks before opening for best flavor. If a jar doesn’t seal, refrigerate and use within a few weeks.
Nutrition
- Serving Size: 1/2 cup of pears wit
- Calories: 120150
- Sugar: 28
- Carbohydrates: 32
- Fiber: 2
Keywords: canned pears, cinnamon pears, homemade canned fruit, water bath canning, pear preserves, easy canning recipe, beginner canning, spiced pears, winter preserves, homemade gifts


