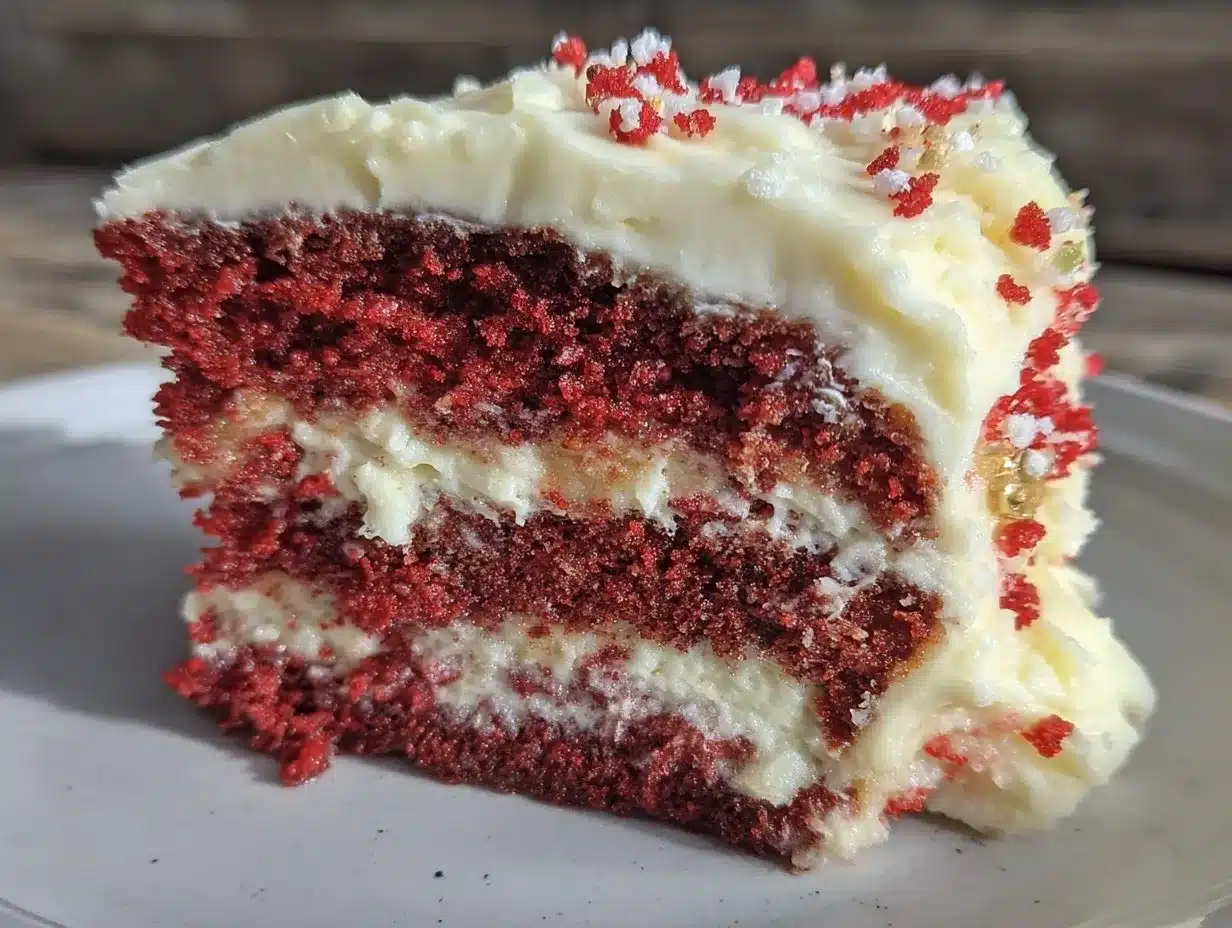
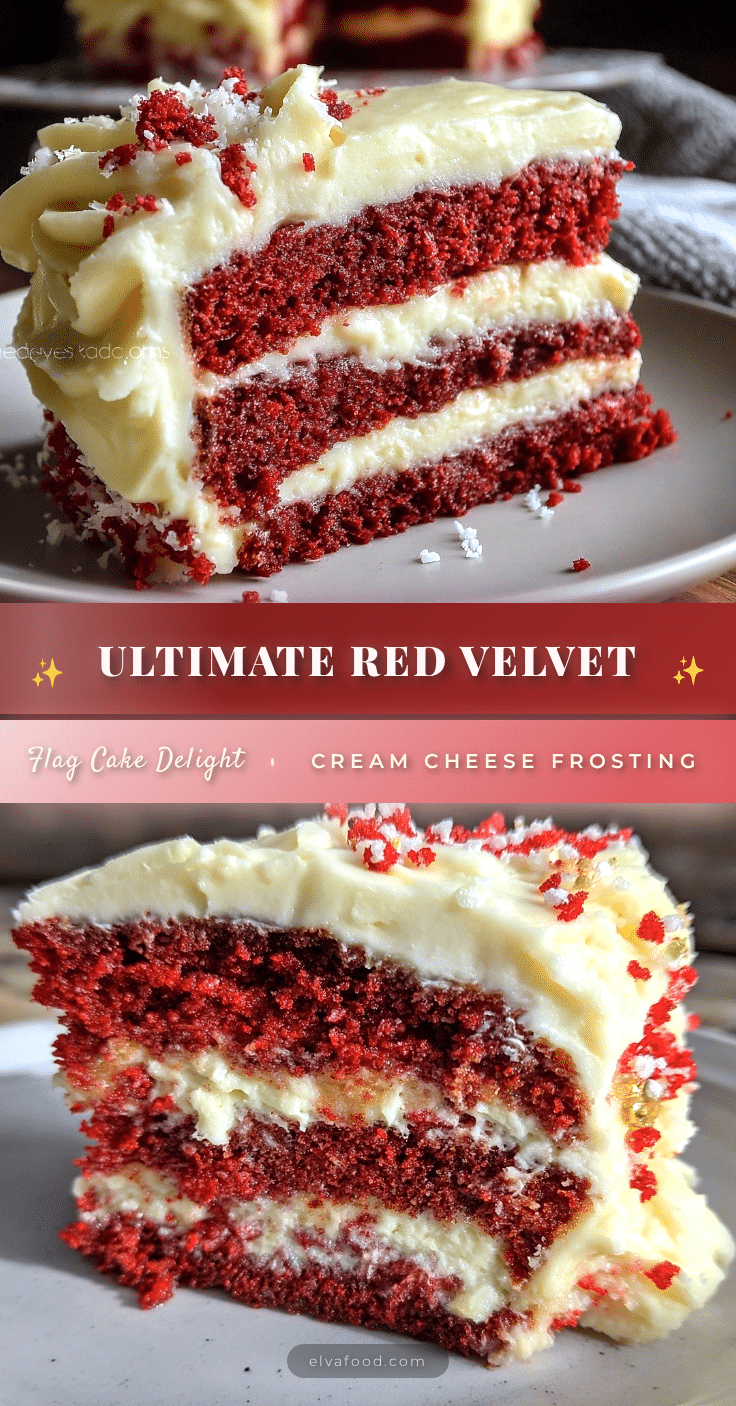
Three-time in a single week and still marveling at the way those crimson layers hold their shape—this Perfect Red Velvet Flag Cake with Cream Cheese Frosting has me utterly hooked. Honestly, it started as a random experiment to celebrate a long weekend, but by the third bake, I found myself tweaking the cream cheese frosting to just the right tangy-sweet balance that clings perfectly to each tier. The way the vibrant red meets the pristine white frosting in that flag pattern? It’s hypnotic, almost like the cake itself is waving a little edible banner for the holidays or any special occasion.
What kept pulling me back wasn’t just the pretty factor (though that helps), but the texture. The crumb is so fine and tender, yet sturdy enough to hold the flag’s shape without crumbling into a sad mess. And the frosting? It’s the kind that sticks around on your fingers and makes you lick them clean—no frosting left behind here. I even caught myself staring at the cake late at night, wondering how such a simple combination of cocoa, buttermilk, and cream cheese can feel so celebratory and comforting at once.
Somewhere between my third and fourth attempt, it hit me: this isn’t just a cake, it’s a ritual. The kind you make when you want to impress quietly, without the kitchen chaos turning into a full production. The recipe stuck with me because it’s honest, approachable, and just a little bit showy (in the best way). It’s that quiet confidence in a dessert that says, “Yeah, I made this,” without shouting it.
So, if you’ve got a craving for something that’s equal parts festive and homey, with a frosting that’s creamy but never overpowering, this Red Velvet Flag Cake might just become your next obsession too.
Why You’ll Love This Perfect Red Velvet Flag Cake Recipe
After countless trials, here’s why this Perfect Red Velvet Flag Cake with Cream Cheese Frosting has become a staple in my kitchen:
- Quick & Easy: The cake layers come together in under 45 minutes, with frosting prep taking just 15 more, making it perfect for last-minute celebrations or spontaneous baking urges.
- Simple Ingredients: No obscure components here—just pantry basics like cocoa powder, buttermilk, and cream cheese. You probably have most of these on hand right now.
- Perfect for Patriotic and Festive Occasions: Whether it’s Independence Day, Memorial Day, or a casual family gathering, the flag motif adds a playful, eye-catching touch.
- Crowd-Pleaser: Kids love the bright color and adults can’t resist the smooth, slightly tangy cream cheese frosting that’s not too sweet.
- Unbelievably Delicious: The balance of cocoa’s mild bitterness and the luscious sweet-tart frosting makes every bite melt-in-your-mouth heavenly.
This recipe stands apart because of its clever layering technique and the frosting’s perfect consistency—thick enough to pipe crisp white stars and stripes but soft enough to spread easily. Unlike other versions I’ve tried, this one doesn’t bleed red into the frosting, keeping the flag design crisp and festive. Plus, the cake’s moist crumb is consistent every time, no matter how many times (and fingers) get involved in the kitchen.
Honestly, it’s the kind of recipe that you can pull off with confidence, even if you’re not a pro baker. The frosting tutorial guides you through getting that smooth, luscious finish, and the layering instructions make it look like you spent all day perfecting it. This cake doesn’t just taste like a celebration—it looks like one too.
What Ingredients You Will Need for Your Perfect Red Velvet Flag Cake
This recipe calls for straightforward ingredients that create bold flavors and that signature velvety texture. Most are pantry staples, making it super accessible, and substitutions are easy if you need them.
- For the Cake:
- All-purpose flour, 2 ½ cups (315g) – I prefer King Arthur for consistent texture
- Unsweetened cocoa powder, 2 tablespoons (use Dutch-processed for richer flavor)
- Baking soda, 1 ½ teaspoons
- Salt, ½ teaspoon
- Sugar, 1 ½ cups (300g)
- Vegetable oil, 1 cup (240ml) – adds moisture without overpowering flavor
- Large eggs, 2, room temperature
- Buttermilk, 1 cup (240ml) – key to that tender crumb (can swap with milk + 1 tbsp vinegar)
- Vanilla extract, 1 teaspoon
- Red food coloring, 2 tablespoons (gel works best for vibrant color without thinning batter)
- White vinegar, 1 teaspoon (reacts with baking soda for lift)
- For the Cream Cheese Frosting:
- Cream cheese, 16 oz (450g), softened – use full-fat for best taste and texture
- Unsalted butter, ½ cup (115g), softened
- Powdered sugar, 4 cups (480g), sifted
- Vanilla extract, 1 teaspoon
- Pinch of salt (balances sweetness)
For variations, you can swap all-purpose flour with gluten-free flour blends or substitute the butter and cream cheese with dairy-free versions for a vegan option. If you want a lighter frosting, Greek yogurt can replace some cream cheese, but it changes the texture a bit.
Equipment Needed to Nail This Cake
- Two 9-inch round cake pans – I’ve used both metal and silicone; metal gives a crisper edge, silicone is easier for removal
- Mixing bowls – at least two, one for dry and one for wet ingredients
- Electric mixer or stand mixer – hand mixing is possible but expect more arm workout
- Measuring cups and spoons – precision matters here for the perfect crumb
- Rubber spatula – indispensable for folding and scraping batter
- Offset spatula – for smooth frosting application
- Piping bag and star tip (optional) – if you want to pipe the star pattern in the flag design precisely
- Cooling racks – helps cakes cool evenly and prevents sogginess
For budget-friendly options, you can use parchment paper to line pans instead of non-stick spray. If you lack a piping bag, a zip-top bag with a corner snipped works in a pinch. Keeping your cream cheese and butter softened but not melted is crucial—too warm and your frosting can get runny.
Step-by-Step Preparation Method for the Perfect Red Velvet Flag Cake
- Preheat your oven: Set it to 350°F (175°C). Grease and flour two 9-inch round pans or line them with parchment. This prep takes about 10 minutes.
- Mix dry ingredients: In a medium bowl, sift together 2 ½ cups (315g) flour, 2 tbsp cocoa powder, 1 ½ tsp baking soda, and ½ tsp salt. Whisk to combine evenly.
- Combine sugar and wet ingredients: In a large bowl, whisk 1 ½ cups (300g) sugar with 1 cup (240ml) oil until blended. Add 2 eggs one at a time, mixing well after each. Stir in 1 tsp vanilla and 2 tbsp red food coloring until batter is a uniform bright red.
- Incorporate buttermilk and vinegar: Alternate adding the dry ingredients and 1 cup (240ml) buttermilk to the wet mixture, starting and ending with the dry. Stir in 1 tsp white vinegar last. Mix just until combined — overmixing will toughen the cake.
- Divide batter evenly: Pour batter into prepared pans, smoothing tops with a spatula. The batter should fill pans about two-thirds full.
- Bake: Place pans in the oven and bake for 25-30 minutes. Check doneness by inserting a toothpick in the center — it should come out clean or with a few moist crumbs, never wet batter.
- Cool the cakes: Let layers cool in pans for 10 minutes before turning out onto wire racks. Cool completely before frosting to avoid melting.
- Make the cream cheese frosting: Beat 16 oz (450g) softened cream cheese and ½ cup (115g) softened butter together until smooth and creamy (about 3 minutes). Gradually add 4 cups (480g) powdered sugar, mixing on low to avoid a sugar cloud, then add 1 tsp vanilla and a pinch of salt. Beat until fluffy, about 2 minutes.
- Assemble your flag cake: Slice each cake layer horizontally to get four thin layers. Spread frosting evenly between each layer. On the top, carefully pipe or spread frosting to create white stripes and a star field using the cream cheese frosting. Chill cake for 30 minutes to set frosting.
Pro tip: If your frosting feels too soft for piping stars, refrigerate it for 15 minutes and stir before decorating. If the cake crumbles during slicing, chill it first for firmer slices.
Cooking Tips & Techniques for a Flawless Red Velvet Cake
Getting this flag cake just right took some trial and error, and here’s what I learned along the way:
- Don’t skip sifting: Cocoa powder and flour tend to clump, so sifting ensures a smooth batter without lumps.
- Use gel food coloring: Liquid dyes can thin your batter and dull the red. Gel colors pack more pigment and won’t affect texture.
- Softened, not melted butter and cream cheese: It’s tempting to microwave, but overheating will cause your frosting to separate.
- Room temperature eggs and buttermilk: They blend better for a uniform batter and help with rise and crumb.
- Chill cake layers before slicing: This prevents crumbs and keeps your flag design crisp.
- Use a serrated knife: It’s easier to cut even layers without squishing the cake.
- Multitasking tip: While cakes bake, prepare the frosting for efficiency and less waiting.
I once tried to frost a warm cake, and the frosting melted into a sad puddle — lesson learned the hard way! Also, piping stars takes a steady hand but don’t stress; imperfect stars still look charming and homemade.
Variations & Adaptations for Your Red Velvet Flag Cake
- Dietary swaps: Replace all-purpose flour with a gluten-free blend for celiac-friendly baking. Use dairy-free cream cheese and butter alternatives to make this vegan-friendly.
- Seasonal twists: Add fresh raspberries between layers in summer for a tart contrast. In winter, a hint of cinnamon or nutmeg in the batter adds warmth.
- Flavor tweaks: Swap vanilla extract for almond extract in the frosting for a unique, nutty aroma. Or swirl in a bit of melted white chocolate for extra richness.
- Different designs: Instead of a flag, try layering with different colored frostings for a rainbow effect, similar to the festive Rainbow Pot of Gold Cupcakes.
- Cooking methods: This recipe works well in cupcake form for easier portioning or even sheet cakes for larger parties.
I tried adding a layer of creamy cacio e pepe pasta before realizing some flavors are just better left separate—but hey, creativity counts!
Serving & Storage Suggestions for Your Red Velvet Flag Cake
Serve this cake slightly chilled or at room temperature to get the best texture and flavor. The cream cheese frosting softens when warmed, so avoid leaving it out too long on hot days.
Pair it with a glass of cold milk or a cup of freshly brewed coffee to complement the rich cocoa notes. For festive occasions, a sparkling rosé or a fruity punch pairs beautifully.
Store leftovers in an airtight container in the refrigerator for up to 4 days. The flavors actually deepen overnight, making day-two cake a delightful treat. You can freeze the cake layers (unfrosted) tightly wrapped for up to 2 months; thaw completely before frosting.
When reheating, let slices come to room temperature or warm gently in the microwave for 10-15 seconds (but watch closely to avoid melting the frosting).
Nutritional Information & Benefits
Per slice (based on 12 servings): approximately 350 calories, 18g fat, 42g carbs, 3g protein.
This cake has moderate sugar and fat due to the cream cheese frosting but benefits from its simple ingredients without artificial preservatives. Cocoa powder adds antioxidants, and buttermilk contributes calcium and probiotics for digestion.
While this is definitely a treat, you can lighten it up by reducing sugar in the frosting or using a low-fat cream cheese version. Note: contains gluten, dairy, and eggs, so not suitable for all allergies.
Conclusion: Why This Perfect Red Velvet Flag Cake Recipe Will Win You Over
Honestly, this Perfect Red Velvet Flag Cake with Cream Cheese Frosting isn’t just a dessert—it’s a statement. It’s the kind of cake that feels fancy without the fuss, comforting without being dull. I love that it invites you to get a little creative with the frosting design, yet holds the layers together with a texture that’s reliably tender and moist.
Feel free to adapt the flavors or the look to match your celebration style. Maybe you’ll add a little extra cocoa or swap the classic flag for a different pattern—whatever your twist, this recipe is a solid foundation. It’s become my go-to when I want a cake that feels special but doesn’t demand a professional baker’s patience.
Go ahead, try it out, and share how your flag came to life in your kitchen—I’m always curious to see what variations people come up with!
Frequently Asked Questions About the Perfect Red Velvet Flag Cake
How do I prevent the red color from fading during baking?
Use gel food coloring instead of liquid to keep the color vibrant. Also, avoid overbaking as that can dull the color.
Can I make the cake layers ahead of time?
Yes! Bake and cool the layers, then wrap tightly in plastic wrap and refrigerate for up to 2 days or freeze for longer storage.
What if I don’t have buttermilk?
Mix 1 cup milk with 1 tablespoon white vinegar or lemon juice, let sit 5 minutes before using. This mimics buttermilk’s acidity.
How do I get clean layers without crumbs mixing into the frosting?
Chill the cake layers before slicing. Use a serrated knife with gentle sawing motions to reduce crumbling.
Can I make this cake into cupcakes instead?
Absolutely! Fill cupcake liners about ⅔ full and bake for 18-22 minutes at 350°F (175°C). Adjust frosting application accordingly.
Pin This Recipe!
Perfect Red Velvet Flag Cake Recipe with Easy Cream Cheese Frosting Tutorial
A festive and tender red velvet cake with a smooth, tangy cream cheese frosting, perfect for patriotic occasions or any special celebration. The cake layers hold their shape beautifully, and the frosting is creamy without being overpowering.
- Prep Time: 15 minutes
- Cook Time: 30 minutes
- Total Time: 45 minutes
- Yield: 12 servings 1x
- Category: Dessert
- Cuisine: American
Ingredients
- 2 ½ cups (315g) all-purpose flour
- 2 tablespoons unsweetened cocoa powder (Dutch-processed preferred)
- 1 ½ teaspoons baking soda
- ½ teaspoon salt
- 1 ½ cups (300g) sugar
- 1 cup (240ml) vegetable oil
- 2 large eggs, room temperature
- 1 cup (240ml) buttermilk (or milk + 1 tbsp vinegar)
- 1 teaspoon vanilla extract
- 2 tablespoons red food coloring (gel preferred)
- 1 teaspoon white vinegar
- 16 oz (450g) cream cheese, softened
- ½ cup (115g) unsalted butter, softened
- 4 cups (480g) powdered sugar, sifted
- 1 teaspoon vanilla extract
- Pinch of salt
Instructions
- Preheat oven to 350°F (175°C). Grease and flour two 9-inch round pans or line with parchment paper.
- In a medium bowl, sift together flour, cocoa powder, baking soda, and salt. Whisk to combine.
- In a large bowl, whisk sugar and vegetable oil until blended. Add eggs one at a time, mixing well after each.
- Stir in vanilla extract and red food coloring until batter is uniformly bright red.
- Alternate adding dry ingredients and buttermilk to the wet mixture, starting and ending with dry ingredients. Stir in white vinegar last. Mix just until combined.
- Divide batter evenly between prepared pans, smoothing tops with a spatula.
- Bake for 25-30 minutes. Check doneness with a toothpick; it should come out clean or with a few moist crumbs.
- Cool cakes in pans for 10 minutes, then turn out onto wire racks to cool completely.
- Make frosting by beating cream cheese and butter until smooth and creamy (about 3 minutes). Gradually add powdered sugar on low speed, then add vanilla and salt. Beat until fluffy (about 2 minutes).
- Slice each cake layer horizontally to create four thin layers.
- Spread frosting evenly between layers. On top, pipe or spread frosting to create white stripes and star field for the flag design.
- Chill cake for 30 minutes to set frosting before serving.
Notes
Use gel food coloring to keep the red vibrant. Chill cake layers before slicing to prevent crumbling. Softened (not melted) cream cheese and butter are key for smooth frosting. If frosting is too soft for piping, refrigerate for 15 minutes and stir before decorating. Use a serrated knife for clean layer cuts. Cake layers can be baked ahead and stored refrigerated or frozen.
Nutrition
- Serving Size: 1 slice (1/12th of c
- Calories: 350
- Fat: 18
- Carbohydrates: 42
- Protein: 3
Keywords: red velvet cake, cream cheese frosting, flag cake, patriotic cake, easy red velvet, festive cake, holiday dessert