The kitchen smelled like yeast and warm dough, soft light spilling over the countertop, while I was halfway through scrolling through texts from friends debating pizza toppings. I had promised a simple pizza night but honestly dreaded the usual dough-making hustle. That’s when I stumbled upon this easy no-knead overnight NY-style pizza dough recipe—a total game changer. No fancy equipment, no kneading marathons, just a mix, a wait, and magic the next day.
At first, I was skeptical. Could a dough that didn’t require kneading actually deliver that perfect crispy crust and chewy interior I crave? I mean, I’d tried quick doughs before, and they either fell flat or turned into dense bricks. But this one was different. By letting the dough rest slowly overnight in the fridge, it developed this amazing flavor and texture that felt like a little culinary secret.
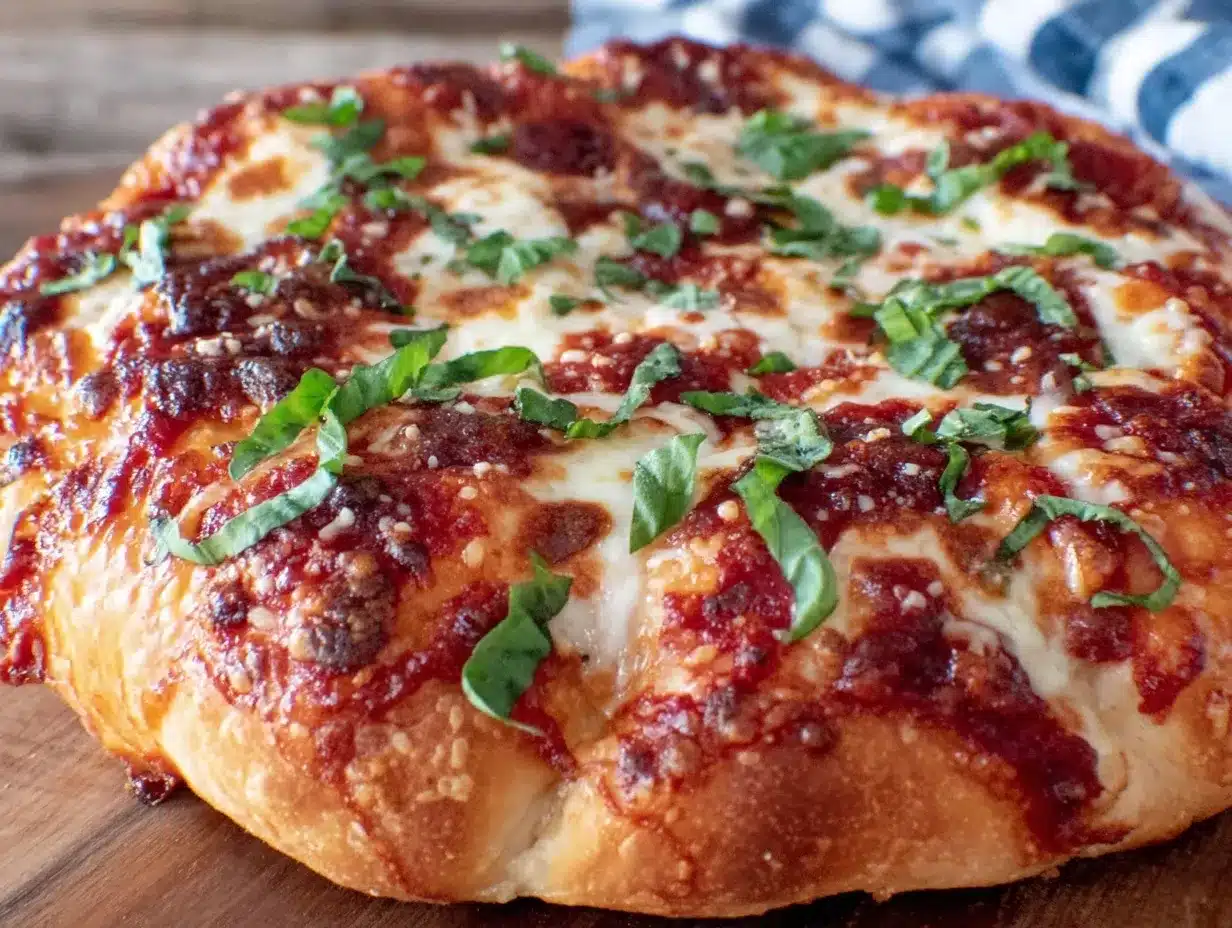
That first bite was a quiet revelation. The crust had that iconic New York crunch and fold, with just the right chewiness inside. It’s the kind of bread that makes you pause and smile, wondering why you ever bothered with complicated dough recipes. Since then, it’s been my go-to, especially on those evenings when I want homemade pizza without the fuss. The dough’s simple enough to prepare before bed and ready to roll out the next evening, perfect for busy folks who want pizza that feels special but fits their schedule.
Honestly, this recipe stuck with me because it turns making pizza into a relaxing ritual, rather than a chore. It’s comforting and reliable, and it reminds me a little of those slow-cooked stews like the Irish lamb stew I tried last winter—slow but rewarding. If you’ve been intimidated by dough or just want that NY-style crust at home, this is the one worth trusting.
Why You’ll Love This Recipe
After testing countless dough recipes, this easy no-knead overnight NY-style pizza dough has proven itself time and again. It’s not just about convenience; it’s about quality and flavor that keep me coming back.
- Quick & Easy: No kneading means less effort, and the dough comes together in about 10 minutes. Perfect for busy weeknights or spontaneous pizza cravings.
- Simple Ingredients: You probably have all these staples in your pantry already—flour, yeast, salt, water, and a touch of olive oil. No fancy imports or rare finds.
- Perfect for Entertaining: Whether it’s a casual family dinner or a pizza party with friends, this dough delivers that classic NY crispness everyone loves.
- Crowd-Pleaser: Kids, adults, pizza purists — everyone raves about the texture and flavor. The crust is thin, crispy on the edges, and chewy in the middle.
- Unbelievably Delicious: The slow fermentation overnight develops a depth of flavor that quick-rise doughs just can’t match. It’s like having a pizzeria in your kitchen.
What sets this recipe apart is the no-knead method combined with a cold overnight rise. The slow fermentation lets the yeast work its magic gently, creating those perfect air bubbles and that slightly tangy note typical of NY-style dough. I also like how the dough stretches easily without tearing, which means less frustration when shaping the pizza.
Honestly, it’s the kind of dough that makes you close your eyes after the first bite and think, “Yep, this is exactly what pizza should taste like.” It’s comfort food without the stress, and it lets you focus on your favorite toppings and sauces, like a rich tomato base or a creamy white sauce from recipes like the creamy cacio e pepe pasta I adore.
What Ingredients You Will Need
This recipe uses simple, wholesome ingredients to deliver that bold flavor and satisfying texture without any fuss or fancy extras. Everything here is pantry-friendly and easy to source, making it perfect for last-minute pizza cravings or planned meals.
- All-Purpose Flour (500g / 4 cups) – The base of the dough. I prefer King Arthur flour for consistent texture, but any unbleached all-purpose works well.
- Active Dry Yeast (7g / 2 1/4 teaspoons) – The leavening agent. Instant yeast can be a substitute if you skip the proofing step.
- Warm Water (350ml / 1 1/2 cups) – Around 105°F (40°C) to activate the yeast without killing it.
- Salt (10g / 2 teaspoons) – Enhances flavor and strengthens gluten.
- Olive Oil (2 tablespoons) – Adds richness and helps with dough elasticity.
- Optional Sugar (1 teaspoon) – I sometimes add this to kickstart yeast activity, but it’s not necessary.
For substitutions, you can swap all-purpose flour with bread flour if you want an even chewier texture. For gluten-free options, a blend designed for bread works best but expect a different crust feel. If you’re avoiding olive oil, a neutral vegetable oil can be used, though I recommend olive oil for that authentic flavor.
When choosing yeast, fresher packets yield better rise, and proofing in warm water helps you confirm it’s active. Salt is crucial but avoid direct contact with yeast before mixing, as it can inhibit fermentation.
Equipment Needed
You don’t need a fancy stand mixer or bread machine for this dough, which is part of what makes it so accessible.
- Large Mixing Bowl: For combining and resting the dough. Glass or stainless steel works best to avoid any unwanted flavors.
- Measuring Cups and Spoons: Precision matters in baking, so use reliable tools.
- Kitchen Scale (Optional but Recommended): For accuracy, especially with flour and water. I swear by mine for consistent results.
- Plastic Wrap or Damp Towel: To cover the dough during the overnight rise and keep it from drying out.
- Baking Sheet or Pizza Stone: A pizza stone helps get that crispy bottom crust, but a well-oiled baking sheet works in a pinch.
- Pizza Peel or Large Spatula: Helpful for transferring the pizza in and out of the oven, but you can manage with a flat baking sheet turned upside down as a makeshift peel.
For budget-friendly options, a basic mixing bowl and measuring spoons suffice. If you don’t have a pizza stone, preheating an inverted baking sheet can mimic the effect.
Preparation Method
-
Activate the Yeast: In a small bowl, combine the warm water (350ml / 1 1/2 cups) and active dry yeast (7g / 2 1/4 teaspoons). Stir gently and let it sit for 5-10 minutes until frothy. This step confirms that your yeast is alive and ready.
Tip: The water should feel warm but not hot — like a cozy bath. Too hot and you’ll kill the yeast; too cold and it won’t activate. -
Mix the Dough: In a large bowl, combine the flour (500g / 4 cups) and salt (10g / 2 teaspoons). Make a well in the center and pour in the yeast mixture along with olive oil (2 tablespoons). Use a wooden spoon or your hands to stir until all the flour is hydrated and a shaggy dough forms.
Note: The dough will be sticky and loose — that’s exactly what you want. Resist the urge to add more flour here. -
Cover and Refrigerate: Cover the bowl tightly with plastic wrap or a damp towel. Place it in the fridge for 12 to 24 hours. This slow, cold fermentation improves flavor and texture.
Tip: The longer you let it rise (up to 24 hours), the more complex the flavor gets. - Prepare to Bake: Remove the dough from the fridge about 1 hour before baking. This lets it come to room temperature and makes it easier to stretch.
- Shape the Dough: Lightly flour your work surface and hands. Turn the dough out and gently stretch it into a 12-inch (30 cm) circle. If it resists, let it rest for a few minutes, then try again.
-
Add Toppings and Bake: Transfer the dough to a preheated pizza stone or baking sheet. Add your favorite sauce, cheese, and toppings. Bake in a preheated oven at 500°F (260°C) for 10-12 minutes, or until the crust is golden and crispy.
Pro Tip: Use a pizza peel dusted with cornmeal to slide the pizza into the oven smoothly. - Enjoy! Let the pizza cool for a couple of minutes before slicing. The crust will be crispy on the outside, tender inside, and absolutely delicious.
Cooking Tips & Techniques
Getting that perfect NY-style pizza crust at home isn’t rocket science, but a few tricks help nail it every time.
- Don’t Skip the Cold Rise: The overnight fermentation is key for flavor and texture. I’ve rushed this step and ended up with bland, dense dough.
- Use High Heat: Home ovens max out around 500°F (260°C). Preheat for at least 45 minutes with a pizza stone inside to mimic pizzeria conditions.
- Handle the Dough Gently: This dough is wet and sticky — that’s good! Use flour sparingly when stretching to avoid drying it out.
- Timing is Everything: Let the dough sit out for about an hour before shaping. Cold dough snaps back and is harder to stretch.
- Watch the Crust: A golden edge with some charred spots is classic NY style. If your pizza isn’t browning, increase oven temperature or bake a bit longer.
- Don’t Overload Toppings: Too much sauce or cheese can weigh down the crust and make it soggy.
One time, I left the dough out too long at room temp and it overproofed, smelling sour and collapsing on the peel. Lesson learned: keep it chilled until ready and warm up just before baking.
Variations & Adaptations
This easy no-knead overnight NY-style pizza dough is a fantastic base that you can tweak to suit your tastes or dietary needs.
- Whole Wheat Version: Swap half the all-purpose flour for whole wheat for a nuttier flavor and more fiber. The dough might need a splash more water.
- Gluten-Free Adaptation: Use a gluten-free flour blend designed for baking, such as one with xanthan gum included. Expect a different texture but still tasty.
- Herb-Infused Dough: Add 1-2 teaspoons of dried oregano or rosemary to the flour for a subtle aromatic twist.
- Quick Rise Option: If you’re short on time, let the dough rise at room temperature for 2-3 hours instead of overnight, but the flavor won’t be as developed.
- Alternative Oils: Try avocado or walnut oil instead of olive oil for a different flavor profile.
Personally, I once experimented by folding in some cooked garlic and fresh basil into the dough before the cold rise—turned out incredible for a fragrant, slightly savory crust. It pairs well with simple toppings like fresh mozzarella and tomato slices.
Serving & Storage Suggestions
This pizza dough shines best fresh from the oven, while the crust is crisp and warm. Serve immediately with your favorite toppings to enjoy the contrast of crunchy edges and tender middle.
- Serving Temperature: Hot out of the oven is ideal, but leftovers reheat well in a hot skillet or oven at 375°F (190°C) for a few minutes to restore crispness.
- Pairings: A fresh green salad or a simple antipasto platter complements this pizza nicely. For drinks, a crisp beer or dry white wine works great.
- Storing Dough: Unused dough can be wrapped tightly and stored in the fridge for up to 48 hours or frozen for up to 3 months. Thaw overnight in the fridge before using.
- Leftover Pizza: Store in an airtight container or wrapped in foil in the fridge for up to 3 days. Avoid microwaving as it makes the crust soggy.
Nutritional Information & Benefits
This recipe offers a balance of carbohydrates, a small amount of protein, and minimal fat, making it a satisfying base for a meal. The slow fermentation process helps break down gluten and increases nutrient availability, which can aid digestion.
- Calories per serving (1/8 of pizza): approximately 200–250 kcal depending on toppings
- Contains gluten from wheat flour; not suitable for celiac disease without substitutions
- Olive oil adds heart-healthy monounsaturated fats
- Low in sugar and additives, making it a cleaner homemade alternative to store-bought dough
From a wellness angle, making dough at home means control over ingredients and freshness, which is always a plus compared to processed alternatives.
Conclusion
This easy no-knead overnight NY-style pizza dough has become a quiet staple in my kitchen for a reason: it’s simple, forgiving, and delivers that perfect balance of crispy and chewy that makes homemade pizza truly special. Whether you’re feeding a crowd or indulging solo, it’s a recipe that invites creativity without the stress.
Feel free to adjust the rise time, flour type, or toppings to fit your tastes. It’s a dough designed to adapt and make pizza nights feel effortless and satisfying. Honestly, I love how this recipe takes the intimidation out of pizza-making and lets you focus on the fun part — choosing your favorite flavors and sharing the results.
If you’re curious about other comforting, easy meals to pair with your homemade pizza nights, you might enjoy the cozy vibes of Dublin coddle or the rich flavors of homemade horchata for dessert. Feel free to share your pizza experiments or questions below — I’m always eager to hear how your kitchen adventures turn out!
Here’s to many delicious nights with this trusty dough in your repertoire.
FAQs
- Can I make this dough without yeast? Unfortunately, yeast is essential for the rise and texture of this NY-style dough. Substitutes like baking powder won’t create the same chewy crust.
- How long can I store the dough in the fridge? The dough keeps well up to 48 hours refrigerated. After that, the yeast may over-ferment and affect flavor and texture.
- Can I freeze the dough? Yes! Wrap tightly in plastic wrap and place in a freezer bag. Thaw overnight in the fridge before using.
- What if my dough is too sticky to handle? Lightly flour your hands and work surface, but avoid adding too much flour, which can make the crust tough. Letting the dough rest for a few minutes can help it relax and become easier to stretch.
- Can I bake this dough on a regular baking sheet? Yes, a baking sheet works fine if you don’t have a pizza stone, though the crust may not get as crispy on the bottom.
Pin This Recipe!

Easy No-Knead Overnight NY-Style Pizza Dough Recipe for Perfect Crispy Crust

This easy no-knead overnight NY-style pizza dough delivers a perfect crispy crust and chewy interior with minimal effort. The slow cold fermentation develops amazing flavor and texture, making homemade pizza simple and delicious.
- Prep Time: 10 minutes
- Cook Time: 10-12 minutes
- Total Time: 12-24 hours 22 minutes
- Yield: 1 large pizza (8 servings) 1x
- Category: Main Course
- Cuisine: American, New York Style
Ingredients
- 4 cups (500g) all-purpose flour
- 2 1/4 teaspoons (7g) active dry yeast
- 1 1/2 cups (350ml) warm water (around 105°F / 40°C)
- 2 teaspoons (10g) salt
- 2 tablespoons olive oil
- 1 teaspoon sugar (optional)
Instructions
- Activate the yeast by combining warm water and active dry yeast in a small bowl. Stir gently and let sit for 5-10 minutes until frothy.
- In a large bowl, combine flour and salt. Make a well in the center and pour in the yeast mixture and olive oil. Stir until a shaggy dough forms.
- Cover the bowl tightly with plastic wrap or a damp towel and refrigerate for 12 to 24 hours for slow fermentation.
- Remove the dough from the fridge about 1 hour before baking to come to room temperature.
- Lightly flour your work surface and hands. Turn the dough out and gently stretch it into a 12-inch (30 cm) circle.
- Transfer the dough to a preheated pizza stone or baking sheet. Add your favorite sauce, cheese, and toppings.
- Bake in a preheated oven at 500°F (260°C) for 10-12 minutes until the crust is golden and crispy.
- Let the pizza cool for a couple of minutes before slicing and serving.
Notes
Do not skip the cold rise; it is key for flavor and texture. Use high heat and preheat the oven with a pizza stone for best results. Handle the dough gently and use flour sparingly when stretching. Let dough rest if it resists stretching. Avoid overloading toppings to keep crust crispy. Dough can be stored in fridge up to 48 hours or frozen up to 3 months.
Nutrition
- Serving Size: 1/8 of pizza
- Calories: 200250
- Sugar: 1
- Sodium: 400
- Fat: 4
- Saturated Fat: 0.5
- Carbohydrates: 40
- Fiber: 2
- Protein: 6
Keywords: no-knead pizza dough, NY-style pizza, overnight pizza dough, easy pizza dough, crispy pizza crust, homemade pizza