The first time I made focaccia, I was convinced I’d messed it up. The dough looked more like a sticky, bubbling puddle than something destined for the oven. It sat there, looking sorry for itself, and I was sure I’d just wasted a cup of my precious sourdough discard. About an hour later, I pulled a pan of golden, craggy bread from the oven that was so good, my husband asked if I’d bought it from the bakery down the street. That was the moment I stopped worrying about doing things “right” and started paying attention to what the dough was actually telling me. This Easy No-Knead Sourdough Discard Focaccia Bread is born from that exact kind of kitchen accident—the kind that teaches you more than any recipe ever could.
I’ve always been a little intimidated by bread. The kneading, the proving, the precise folding schedules—it felt like a science experiment I wasn’t qualified to run. But this focaccia? It’s almost aggressively forgiving. You don’t need a stand mixer, you don’t need a sourdough starter that’s been fed on a strict schedule, and you definitely don’t need to spend hours wrestling with dough. You just need a little patience, a good amount of olive oil, and some leftover sourdough discard that’s been sitting in your fridge.
Let’s be honest—most sourdough discard recipes are cookies or crackers. They’re good, but they’re not dinner. This focaccia is a meal-maker. It’s the kind of bread you tear into while it’s still warm, the kind that soaks up soup or salad dressing, the kind that makes a simple plate of tomatoes and mozzarella feel like a spread. And the best part? It actually gets better on day two. That’s not something you hear about homemade bread very often.
Why You’ll Love This Recipe
- No Kneading Required: Seriously, not a single minute of kneading. You just mix, wait, and fold a few times. It’s the laziest bread you’ll ever make, and it’s the best.
- Uses Up Sourdough Discard: If you keep a sourdough starter, you know the struggle. This recipe is the perfect way to use that discard without having to feed it first. It’s a zero-waste win.
- Incredible Texture: The long, cold fermentation gives this focaccia a texture you just can’t get with commercial yeast alone. The crumb is open and airy, but the crust stays perfectly crisp and golden.
- So Forgiving: Forgot about it for an extra hour? It’s fine. The dough is incredibly resilient. It’s the perfect starter bread for anyone who’s nervous about baking with yeast.
- Totally Customizable: Throw on some rosemary and flaky salt, or go wild with cherry tomatoes and olives. This dough is a blank canvas for whatever you have on hand.
This isn’t just another focaccia recipe. It’s the one that finally made me feel like a real bread baker. The long, cold proof does all the heavy lifting, developing flavor and structure while you sleep or go about your day. It’s the kind of recipe that feels like a secret weapon—simple enough for a Tuesday night, impressive enough for a dinner party. Honestly, it’s the bread I make when I need to feel like I’ve got my act together, even when I absolutely do not.
What Ingredients You Will Need
This recipe uses simple, pantry-friendly ingredients to build a focaccia that’s anything but basic. The magic happens through time and technique, not a long list of specialty items.
- Bread Flour (500g / about 4 cups): I prefer bread flour here for its higher protein content, which gives the focaccia its signature chewy, airy crumb. All-purpose flour will work in a pinch, but the texture won’t be quite as open. I usually stick with King Arthur or Bob’s Red Mill for consistency.
- Warm Water (400ml / about 1 ¾ cups): The water should be lukewarm—around 90-100°F (32-38°C). Too hot and it’ll kill the yeast activity; too cold and the fermentation will take forever. Think warm bath water, not hot tea.
- Sourdough Discard (150g / about ¾ cup): This is the star of the show. You can use discard straight from the fridge—it doesn’t need to be active or bubbly. The discard adds a subtle tang and helps with the fermentation process. If you don’t have discard, you can substitute with an equal amount of active starter.
- Active Dry Yeast (1 teaspoon): Yes, we’re using commercial yeast alongside the discard. This ensures a reliable rise and a consistent crumb, even if your discard is a little sluggish. Instant yeast works too—just add it directly to the flour.
- Olive Oil (about ½ cup / 120ml, plus more for the pan): Don’t skimp here. A generous amount of good-quality olive oil is what gives focaccia its crisp, golden crust and rich flavor. I use a mild extra-virgin for the dough and a more robust one for drizzling on top.
- Salt (2 teaspoons): Fine sea salt is best. It dissolves more evenly into the dough than coarse kosher salt.
- Honey or Maple Syrup (1 tablespoon): Just a touch of sweetness helps the yeast get going and balances the tang of the sourdough. It also aids in browning the crust.
- Toppings (Optional): Flaky sea salt, fresh or dried rosemary, cherry tomatoes, olives, sliced garlic, or caramelized onions. This is where you make it your own.
Equipment Needed
You don’t need a lot of fancy gear for this one. A stand mixer would actually be overkill—we’re doing this by hand.
- Large Mixing Bowl: A standard 4-quart bowl is perfect. You’ll need room for the dough to grow.
- Rubber Spatula or Dough Scraper: For folding the sticky dough. A plastic bench scraper is ideal, but a sturdy spatula works too.
- 9×13-inch Baking Pan: A metal pan is best for heat conduction and getting a crisp bottom crust. Glass or ceramic will work, but you might need to bake it a few minutes longer.
- Plastic Wrap or a Shower Cap: To cover the dough while it proofs. A reusable shower cap is actually my favorite hack for this—it fits perfectly over the bowl.
- Kitchen Scale: I highly recommend weighing your flour and water for consistent results. It’s more accurate than measuring cups.
Preparation Method
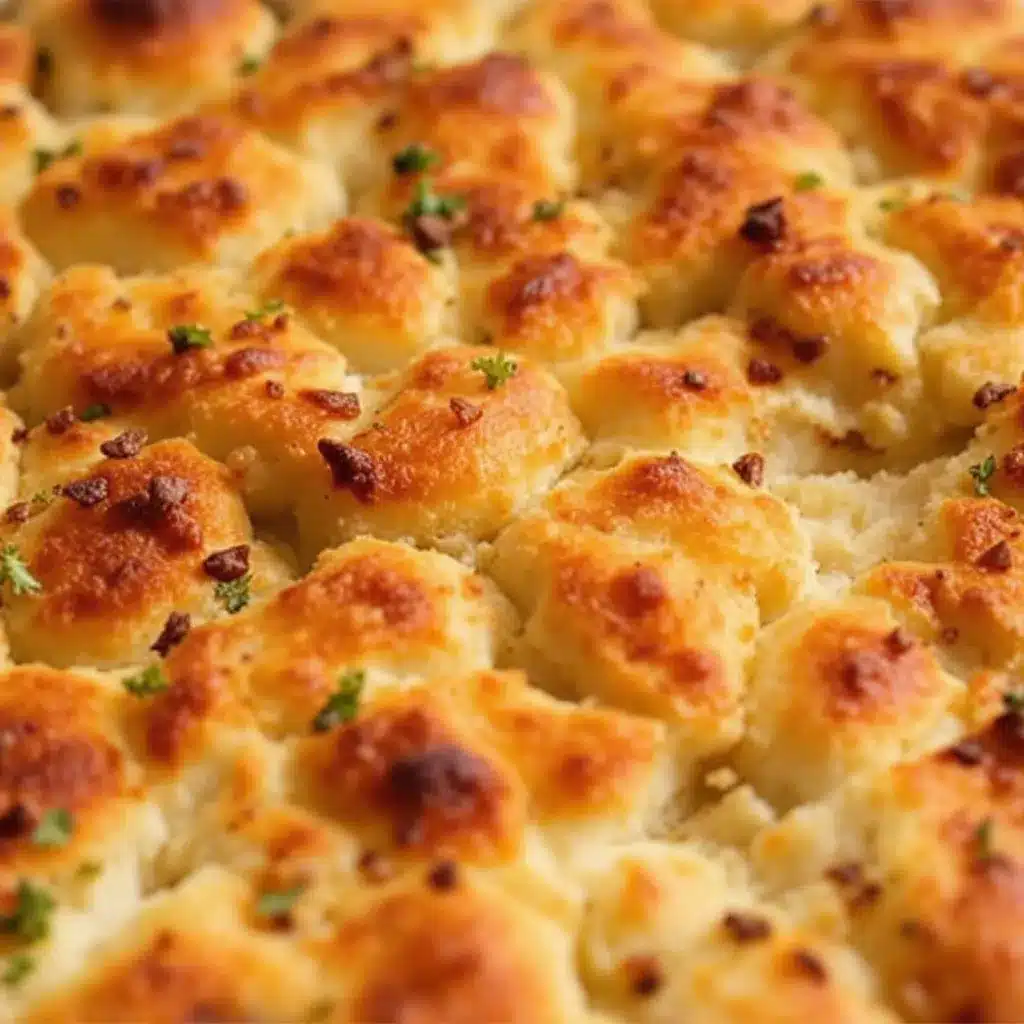
This recipe is all about the timeline. The active work is maybe 15 minutes total. The rest is just waiting. Here’s how it breaks down.
- Mix the Dough (5 minutes): In your large bowl, combine the warm water, sourdough discard, honey, and active dry yeast. Give it a quick stir and let it sit for about 5 minutes until the yeast starts to look a little foamy. Add the bread flour and salt. Mix with your spatula or dough scraper until a shaggy, sticky dough forms. It will look wet and lumpy—that’s exactly what we want. Don’t be tempted to add more flour.
- The First Rest (30 minutes): Cover the bowl with plastic wrap or a damp towel and let it rest at room temperature for 30 minutes. This is called the autolyse. It gives the flour time to absorb the water and start developing gluten naturally.
- The Folds (3 sets, 30 minutes apart): This is the only “work” you’ll do. With a wet hand or your dough scraper, grab a corner of the dough, stretch it up, and fold it over the center. Rotate the bowl a quarter turn and repeat. Do this 4-6 times, completing one full rotation. Cover the bowl and let it rest for 30 minutes. Repeat this folding process two more times (for a total of 3 sets of folds). After the third set, the dough will be noticeably smoother, stronger, and more elastic.
- Cold Fermentation (8-24 hours): After the last fold, cover the bowl tightly and place it in the refrigerator. This is where the magic happens. The cold slows down the fermentation, allowing the sourdough flavor to develop and the gluten to relax. You can leave it for as little as 8 hours or as long as 24. The longer it goes, the more complex the flavor.
- Panning and Final Proof (2-3 hours): When you’re ready to bake, generously coat your 9×13-inch pan with olive oil—don’t be shy. Turn the cold dough out into the pan. It will be stiff and cold. Gently coax it into the corners of the pan. If it resists, let it rest for 15 minutes and try again. Cover the pan with plastic wrap and let it proof at room temperature until the dough is puffy, bubbly, and has doubled in size. This usually takes 2-3 hours, depending on the temperature of your kitchen.
- Dimple and Top (5 minutes): Preheat your oven to 425°F (220°C). Drizzle the top of the dough generously with olive oil. Then, using your fingertips, press deep dimples all over the surface of the dough—right down to the bottom of the pan. This isn’t just for looks; it creates those iconic focaccia pockets. Add your toppings now. Sprinkle with flaky sea salt.
- Bake (25-30 minutes): Bake on the center rack until the focaccia is deep golden brown on top and sounds hollow when you tap the bottom. If the top is browning too quickly, tent it loosely with foil for the last 10 minutes.
- Cool (The Hardest Part, 20 minutes): Let the focaccia cool in the pan for about 5 minutes, then transfer it to a wire rack. Don’t skip this step! Cutting into it while it’s too hot will make the interior gummy. I know it’s tempting, but give it at least 20 minutes.
Cooking Tips & Techniques
I’ve made this focaccia more times than I can count, and I’ve learned a few things the hard way. Here’s what I wish I’d known from the start.
Don’t be afraid of a wet dough. The first time I made this, I was convinced the dough was too sticky and added more flour. Big mistake. A wetter dough is what gives you that open, airy crumb. Trust the process. A wet hand and a dough scraper are your best friends here.
The cold fermentation is non-negotiable. I’ve tried rushing this step and baking the same day. The flavor was flat, and the texture was dense. The overnight rest in the fridge is what transforms this from a decent bread into a truly great one. It’s also what makes the schedule so flexible—you can mix the dough one day and bake it the next.
Watch your oven temperature. Every oven runs a little differently. If your focaccia is browning too fast on top but isn’t cooked through, lower the temperature to 400°F (200°C) and bake for a few extra minutes. I once had a batch that was burnt on top and raw in the middle because I didn’t check it. Don’t be like me.
Use good olive oil. This is not the time for the cheap stuff you use for sautéing. The olive oil is a primary flavor here, especially on the crust. A fruity, peppery extra-virgin makes a noticeable difference.
Variations & Adaptations
This dough is incredibly versatile. Here are a few of my favorite ways to change it up.
- Classic Rosemary & Sea Salt: The most traditional topping. Fresh rosemary is best, but dried works in a pinch. Press it into the dimples along with some flaky sea salt before baking.
- Tomato & Olive: Halved cherry tomatoes and pitted Kalamata olives pressed into the dough before baking. The tomatoes burst in the oven, creating little pockets of sweet, jammy goodness. This is my go-to for summer.
- Everything Bagel: Before baking, brush the top with an egg wash and sprinkle generously with everything bagel seasoning. It’s incredible for breakfast or as a side for a bowl of soup.
- Caramelized Onion & Gruyère: Top the dimpled dough with caramelized onions and a generous sprinkle of shredded Gruyère cheese for the last 10 minutes of baking. It’s rich, savory, and absolutely decadent.
- Gluten-Free Adaptation: I’ve had success using a high-quality gluten-free bread flour blend. The dough will be more like a batter, and you’ll need to skip the folding steps. Just mix, pour into the oiled pan, and let it proof. The texture is different—more cakey—but still delicious.
Serving & Storage Suggestions
This focaccia is best served warm, but it’s still fantastic at room temperature. It’s the kind of bread that’s welcome anywhere.
Serving: Cut it into squares or slices and serve it alongside a big bowl of Italian Wedding Soup for a truly comforting meal. It’s also perfect for dipping into a creamy bowl of Cacio e Pepe or for making the most incredible sandwiches. I love splitting a piece in half and using it for a quick panini with prosciutto and mozzarella.
Storage: Store leftover focaccia in an airtight container or wrapped in foil at room temperature for up to 3 days. Do not refrigerate it—the fridge will dry it out and make it stale. The texture actually improves on day two as the moisture redistributes.
Reheating: The best way to revive leftover focaccia is to pop it in a 350°F (175°C) oven for 5-7 minutes. It will crisp right back up. You can also toast it in a skillet with a little olive oil. Avoid the microwave—it will turn it into a sad, rubbery sponge.
Freezing: This focaccia freezes beautifully. Wrap the fully cooled bread tightly in plastic wrap, then in foil, and freeze for up to 3 months. Thaw at room temperature and reheat in the oven.
Nutritional Information & Benefits
While I wouldn’t call focaccia a health food, it does have some redeeming qualities, especially when made with sourdough. The fermentation process breaks down some of the gluten and phytic acid, making the nutrients more bioavailable and easier to digest. Many people with mild gluten sensitivities find they can tolerate sourdough bread better than bread made with commercial yeast alone.
Here are the approximate nutritional values per serving (1/8 of the recipe):
- Calories: 280
- Fat: 12g
- Carbohydrates: 36g
- Fiber: 2g
- Protein: 7g
- Sodium: 480mg
This recipe uses a generous amount of olive oil, which is rich in heart-healthy monounsaturated fats and antioxidants. The sourdough fermentation also produces beneficial bacteria that can support gut health. It’s a treat, but it’s a treat that’s actually good for you in moderation.
Conclusion
This Easy No-Knead Sourdough Discard Focaccia Bread is the recipe that made me fall in love with bread baking. It’s forgiving, it’s flexible, and it delivers results that feel wildly disproportionate to the effort required. It’s the kind of bread that makes you look like a hero at a potluck or a dinner party, even if you spent most of the time just letting it do its thing in the fridge.
I love that this recipe turns something that usually gets thrown away—sourdough discard—into something genuinely beautiful and delicious. It feels resourceful and a little bit clever, like you’re getting away with something. And honestly, the smell of it baking is worth the wait alone. It fills the whole house with that warm, yeasty, olive-oil scent that just says “home.”
I’d love to hear how yours turns out. Did you go classic with rosemary, or did you try something wild? Drop a comment below and let me know. And if you’re looking for another easy, crowd-pleasing bread to try, check out my recipe for Crispy Arancini Risotto Balls—it uses leftover risotto in a similar, genius way. Happy baking, friends!
Frequently Asked Questions
Can I use all-purpose flour instead of bread flour?
Yes, you can. The focaccia will still be delicious, but it won’t have quite as open and airy a crumb. Bread flour’s higher protein content creates more gluten structure, which is what gives the bread its characteristic chew and those beautiful air pockets.
My dough didn’t rise much in the fridge. What went wrong?
Don’t panic—cold fermentation is slow. The dough will rise more in the fridge than you think, but it might not double in size. That’s normal. The final proof at room temperature in the pan is where the real rise happens. If it’s still sluggish, make sure your yeast is fresh and your water wasn’t too hot.
Can I skip the cold fermentation?
You can, but I wouldn’t recommend it. The cold fermentation is what develops the complex, tangy sourdough flavor and improves the texture. If you’re in a hurry, you can proof the dough at room temperature for 4-6 hours instead, but the result will be less flavorful and the crumb will be denser.
How do I know when the focaccia is fully baked?
The top should be a deep golden brown, and the bottom should sound hollow when you tap it. If you have an instant-read thermometer, the internal temperature at the center should be around 200-210°F (93-99°C). Don’t underbake it, or the center will be gummy.
Can I double this recipe?
Absolutely. You can easily double the ingredients and bake it in a half-sheet pan (18×13 inches). You may need to increase the baking time by 5-10 minutes. Just keep an eye on the color and the internal temperature.
Pin This Recipe!
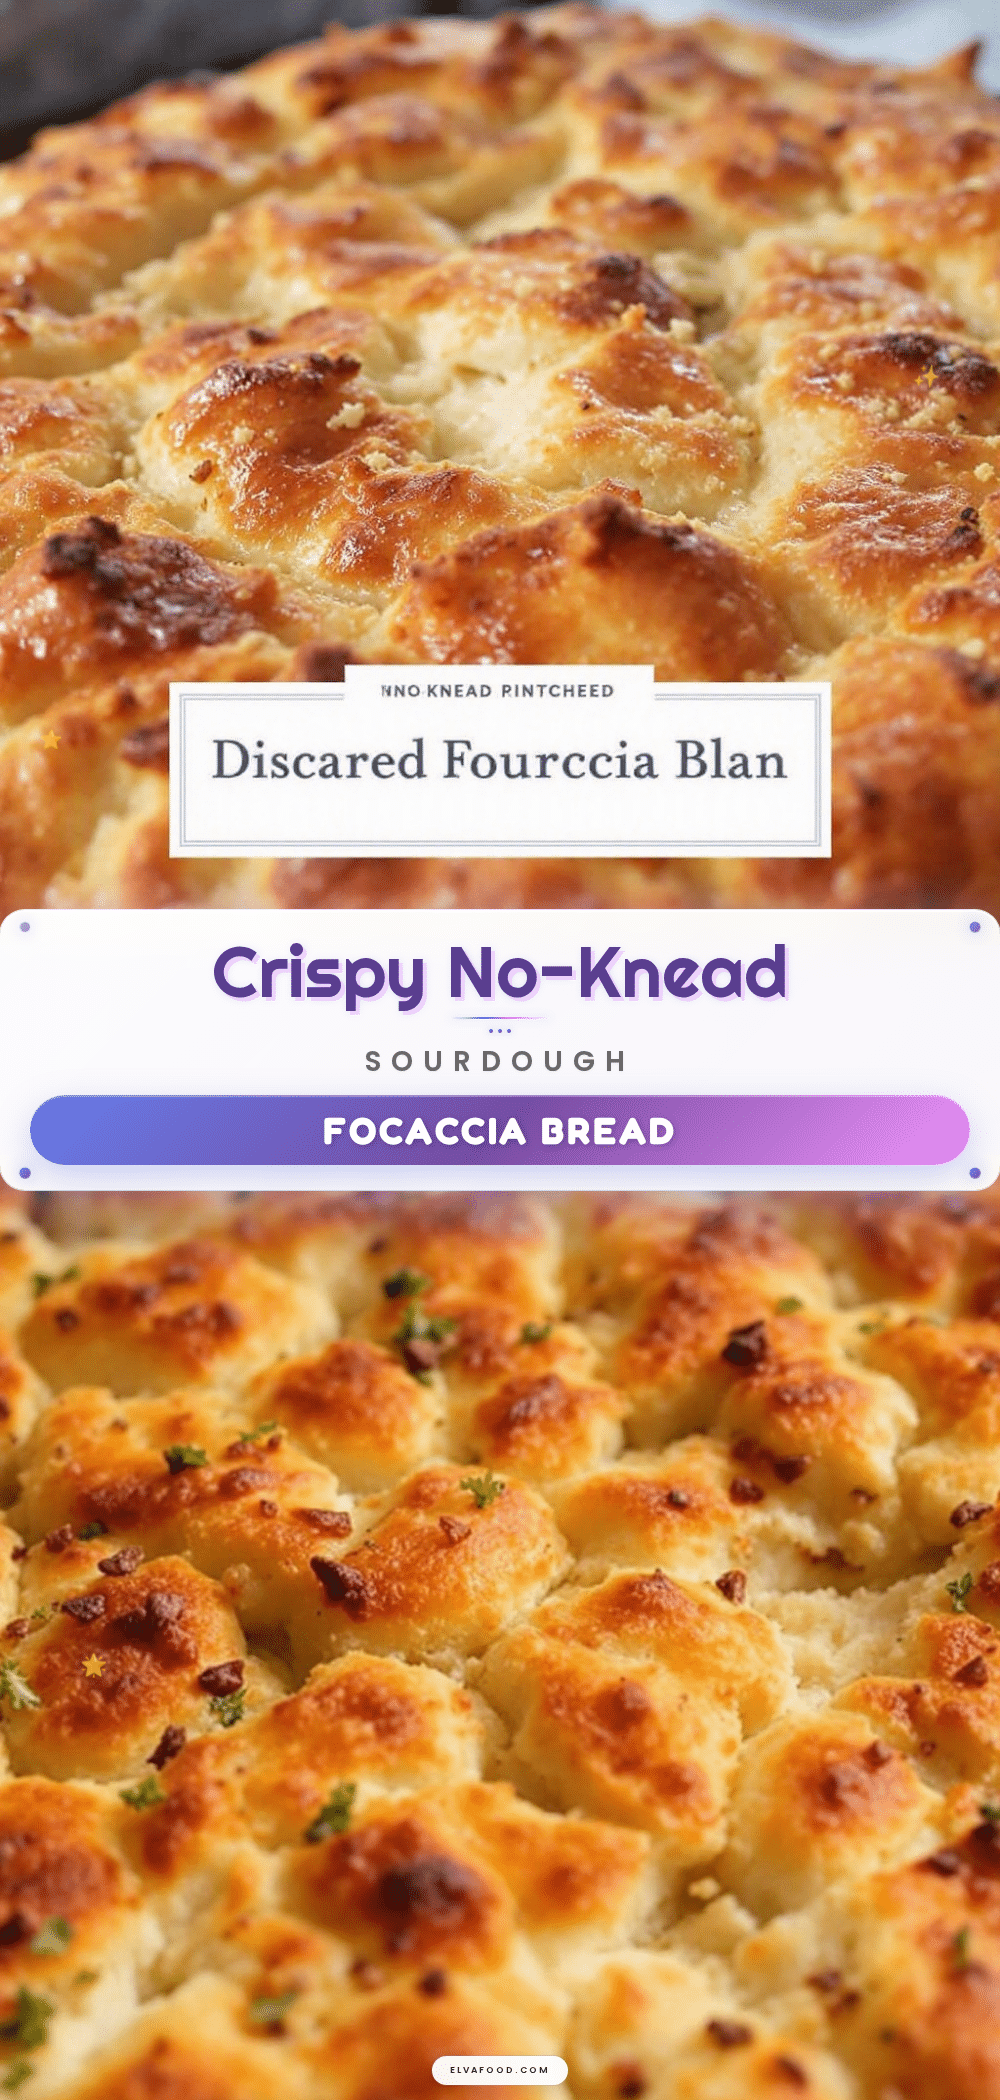
Easy No-Knead Sourdough Discard Focaccia Bread (Best Recipe)
This Easy No-Knead Sourdough Discard Focaccia Bread is a forgiving, flexible recipe that turns sourdough discard into a golden, airy bread with a crisp crust. It requires no kneading, uses a long cold fermentation for complex flavor, and is perfect for beginners and experienced bakers alike.
- Prep Time: 15 minutes
- Cook Time: 30 minutes
- Total Time: 8 hours 45 minutes (includes 8-24 hours cold fermentation)
- Yield: 8 servings 1x
- Category: Bread
- Cuisine: Italian
Ingredients
- 500g (about 4 cups) bread flour
- 400ml (about 1 ¾ cups) warm water (90-100°F / 32-38°C)
- 150g (about ¾ cup) sourdough discard (straight from fridge)
- 1 teaspoon active dry yeast
- ½ cup (120ml) olive oil, plus more for the pan
- 2 teaspoons fine sea salt
- 1 tablespoon honey or maple syrup
- Flaky sea salt, fresh or dried rosemary, cherry tomatoes, olives, sliced garlic, or caramelized onions (optional toppings)
Instructions
- Mix the Dough: In a large bowl, combine warm water, sourdough discard, honey, and active dry yeast. Let sit for 5 minutes until foamy. Add bread flour and salt. Mix with a spatula or dough scraper until a shaggy, sticky dough forms. Do not add more flour.
- First Rest: Cover the bowl and let rest at room temperature for 30 minutes (autolyse).
- The Folds: With a wet hand or dough scraper, stretch and fold the dough over itself 4-6 times, rotating the bowl a quarter turn each time. Cover and rest for 30 minutes. Repeat this folding process two more times (total of 3 sets of folds).
- Cold Fermentation: After the last fold, cover the bowl tightly and refrigerate for 8-24 hours.
- Panning and Final Proof: Generously coat a 9×13-inch baking pan with olive oil. Turn the cold dough into the pan and gently coax it into the corners. Cover and let proof at room temperature for 2-3 hours until puffy and doubled in size.
- Dimple and Top: Preheat oven to 425°F (220°C). Drizzle dough with olive oil and press deep dimples all over with your fingertips. Add toppings and sprinkle with flaky sea salt.
- Bake: Bake on the center rack for 25-30 minutes until deep golden brown and hollow-sounding when tapped. Tent with foil if browning too quickly.
- Cool: Let cool in the pan for 5 minutes, then transfer to a wire rack. Cool for at least 20 minutes before cutting.
Notes
Don’t be afraid of a wet dough; it creates an airy crumb. Cold fermentation is non-negotiable for best flavor and texture. Use good quality olive oil for the best flavor. The dough is very forgiving and can be customized with various toppings. Store at room temperature for up to 3 days; do not refrigerate. Reheat in a 350°F oven for 5-7 minutes. Freezes well for up to 3 months.
Nutrition
- Serving Size: 1/8 of recipe
- Calories: 280
- Sugar: 2
- Sodium: 480
- Fat: 12
- Saturated Fat: 2
- Carbohydrates: 36
- Fiber: 2
- Protein: 7
Keywords: sourdough discard focaccia, no-knead focaccia, easy focaccia recipe, sourdough bread, discard recipe, Italian bread, homemade focaccia


